Mini Pumpkin Fall Arrangement
Vibrant Tulip Arrangement
Bunny Wreath
Mother's Day Flowers
Christmas Elf Sock Arrangement
Fabulous Fall Arrangement
Molly and Justin's Wedding Flowers
Dazzling Dahlia Arrangement
Growing Gorgeous Amaryllis
Thoughtful Host/Hostess Gift
New Pop of Color
Great Gatsby Decorations
Spring for New Blooms
Evergreen Arrangements
Fall for Fall Splendor
Tulip-Topped Table Runner
Pussy Willows-a-Buzzin'
Red Twig Surprise Arrangement
Boost Your Mood
Deck with Boughs
Last Minute Holiday Decorations
Market Bunches
Best Flowers and Berries for Fall
Picking Flowers for Your Spouse
Workplace Stress Releasers
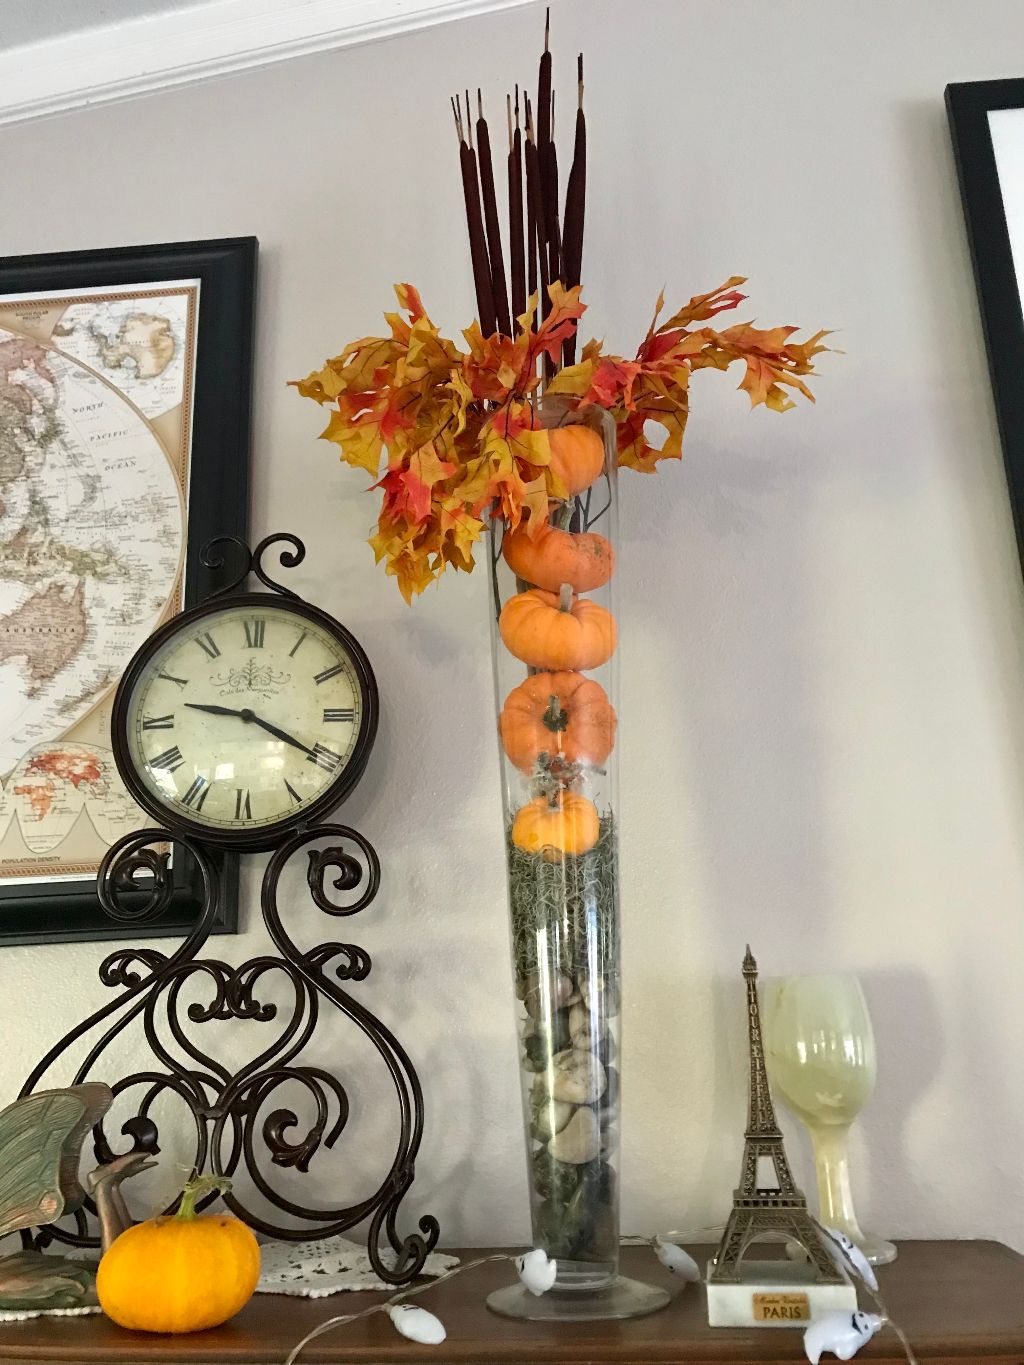 It"s so much fun to work with mini pumpkins, either from my garden or ones that I find at various markets. This year I had a bountiful harvest, using Jill-Be-Little seeds from Johnny Seed Co.
Here are the instructions for you to make your own:
One tall vase at least 3 inches in diameter (mine tapers up from one inch to five inches)
Decorative rocks
Spanish moss, about a handful
Mini pumpkins (as many that will fit)
10-12 skinny cattails
3 branches of preserved fall leaves
Alter the Spanish moss and rocks in the bottom of the vase. Add the pumpkins, turning them to show some whimsy. Stick the cattails in behind the top pumpkin. Add the fall leaves so that they are horizontal at the top of the vase.
Et, viola!
A really fun and easy way to brighten up a mantel or anywhere in your fall décor.
Vibrant Tulip Arrangement
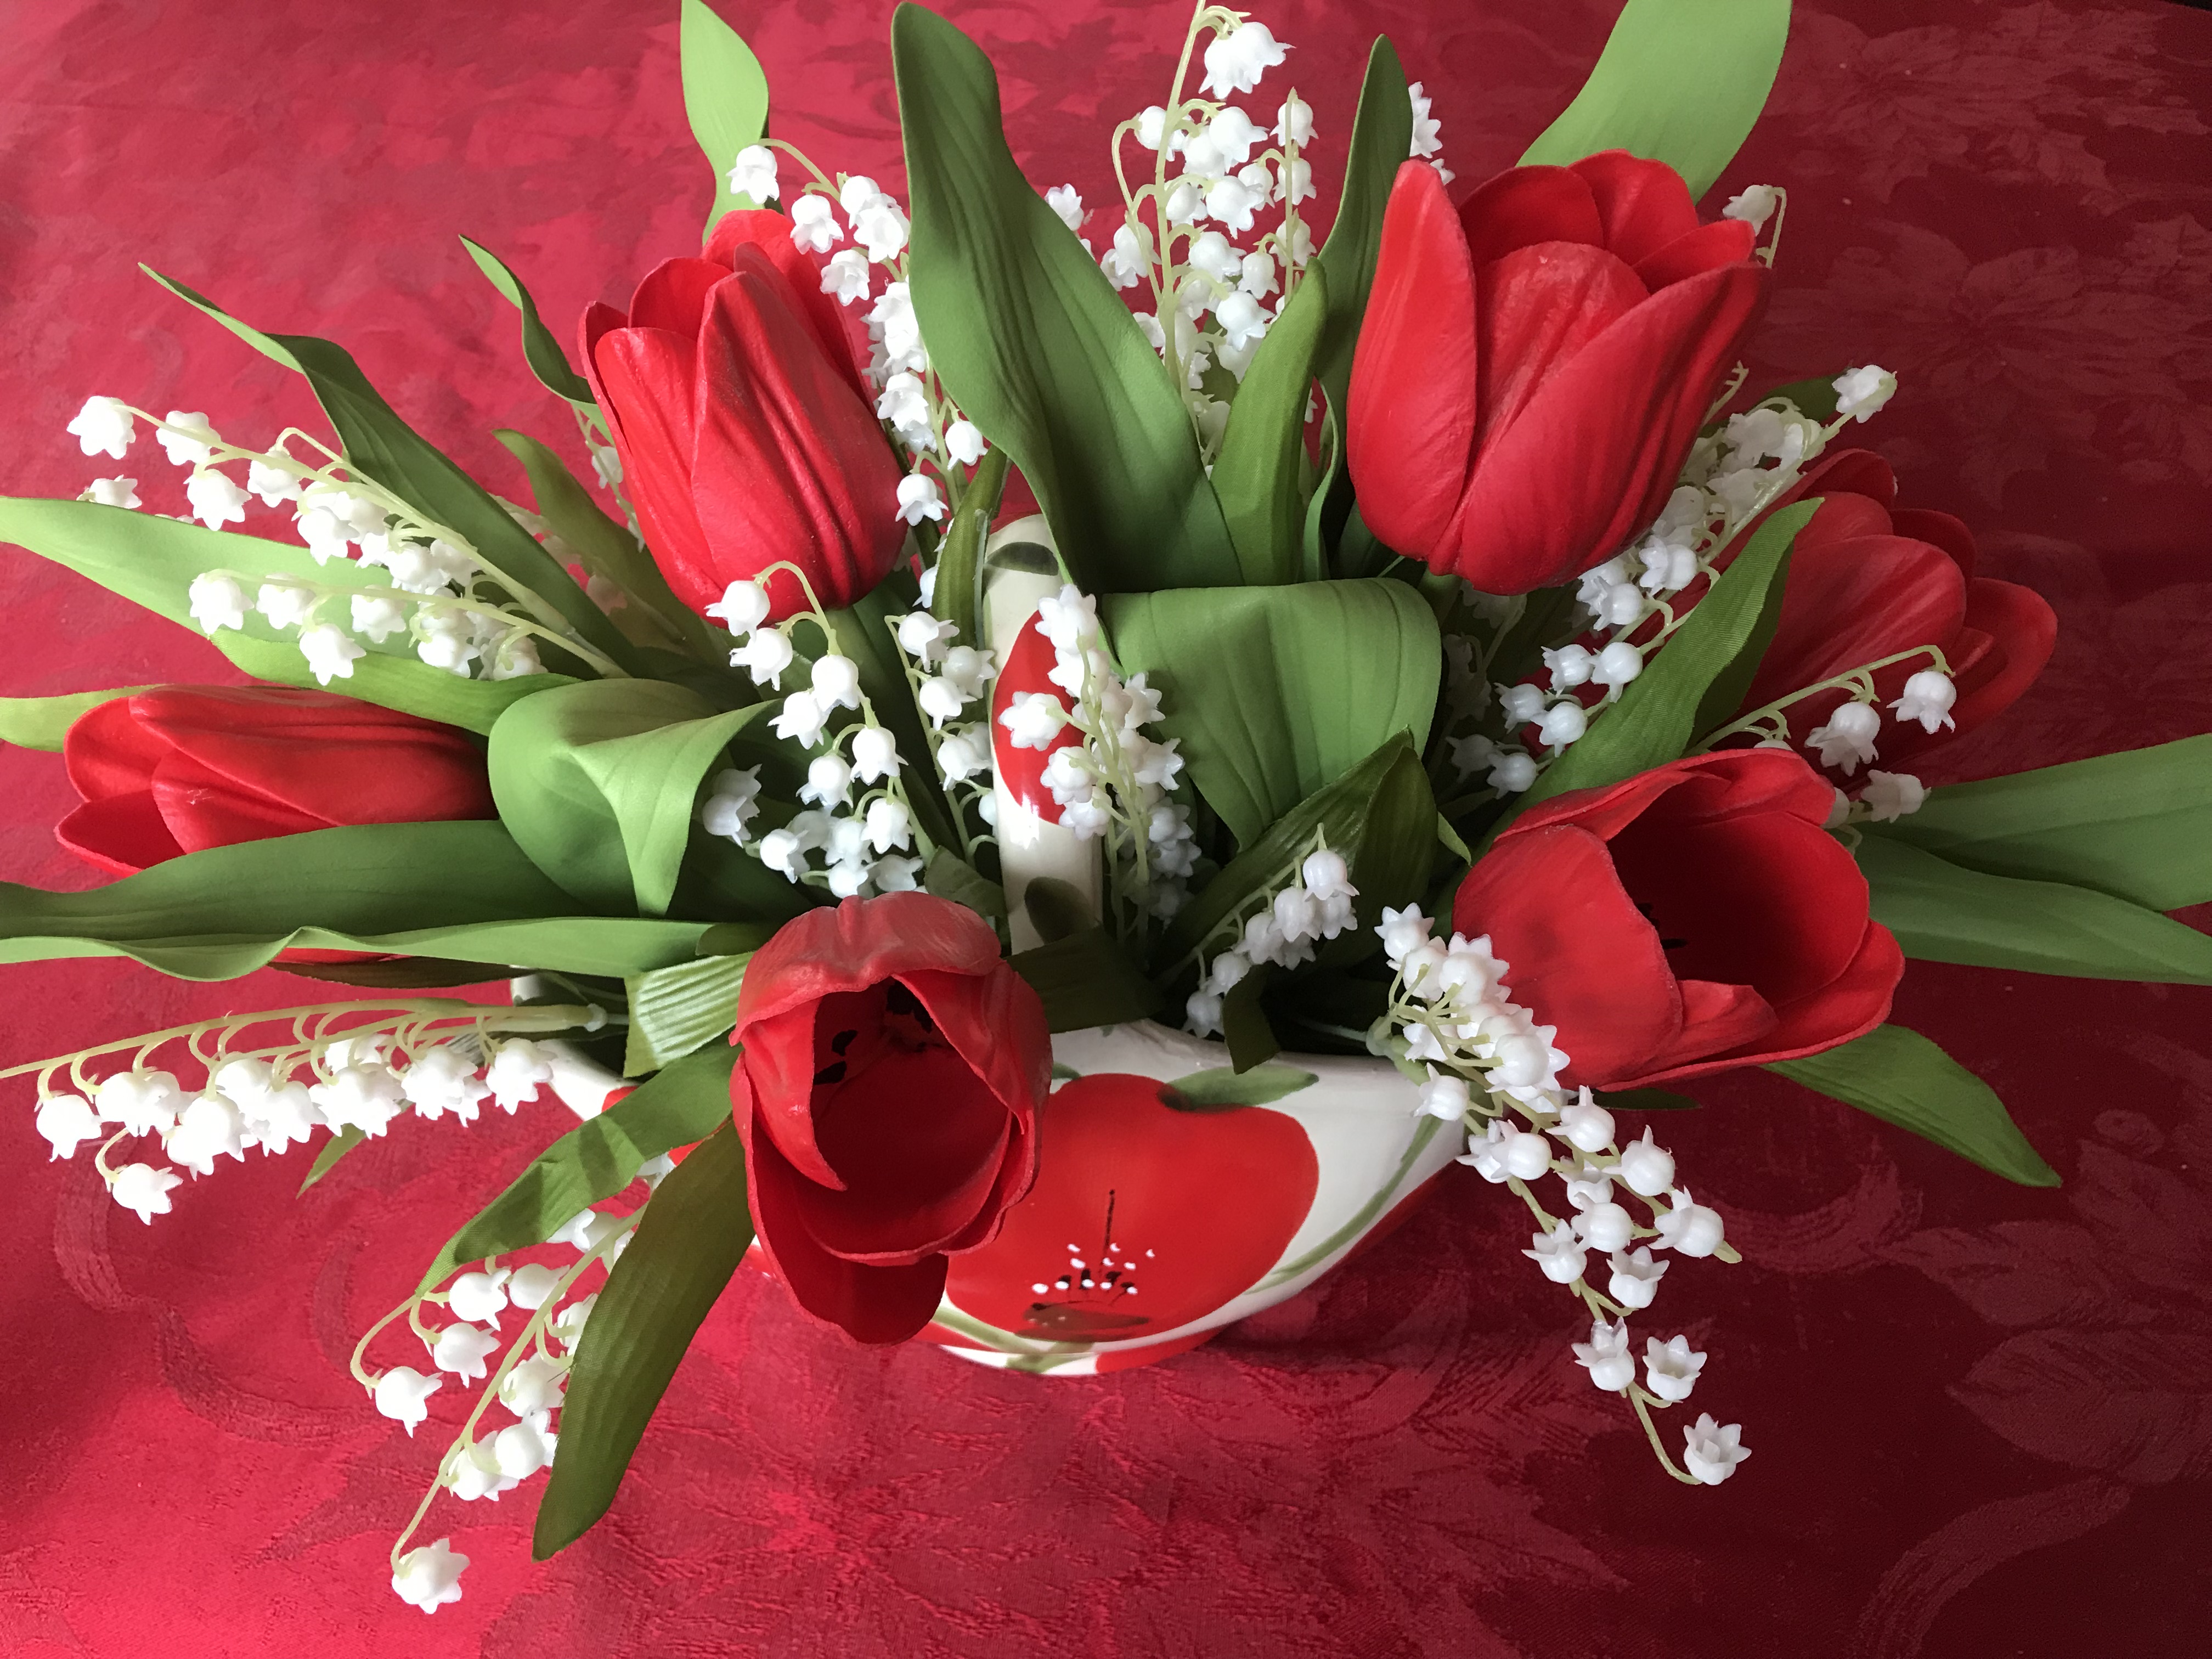 Want to brighten up your winter mood? Make this easy arrangement. Here's what you'll need:
A cool container, often found at a local greenhouse, florist or craft center (I got this one from my sweet husband for Valentine's Day!)
6-8 artificial tulips, your choice of color (to complement your container or decor)
2 bunches of artificial lilies of the valley
one block of floral foam, dry if possible
wire cutters
sharp knife
glue gun with glue sticks, optional
Cut a piece of foam to fit inside your container. Glue it in place if desired.
Cut tulips with wire cutters. In my arrangement I cut them to about an 8-9 inch stem. Since mine is a basket, I stuck 3 tulips into the foam on each side. (I bought all of the tulips the store had, otherwise I would have put 4 tulips on each side.) If you want to glue the bottom of each stem before you stick them into the foam, your arrangement will be more stable.
Cut the stems of the lilies of the valley off of the main bunch stem. Stick them into the foam around the tulips to fill in the spaces. (You can glue these in as well.)
You did it!
Sweet Bunny Wreath
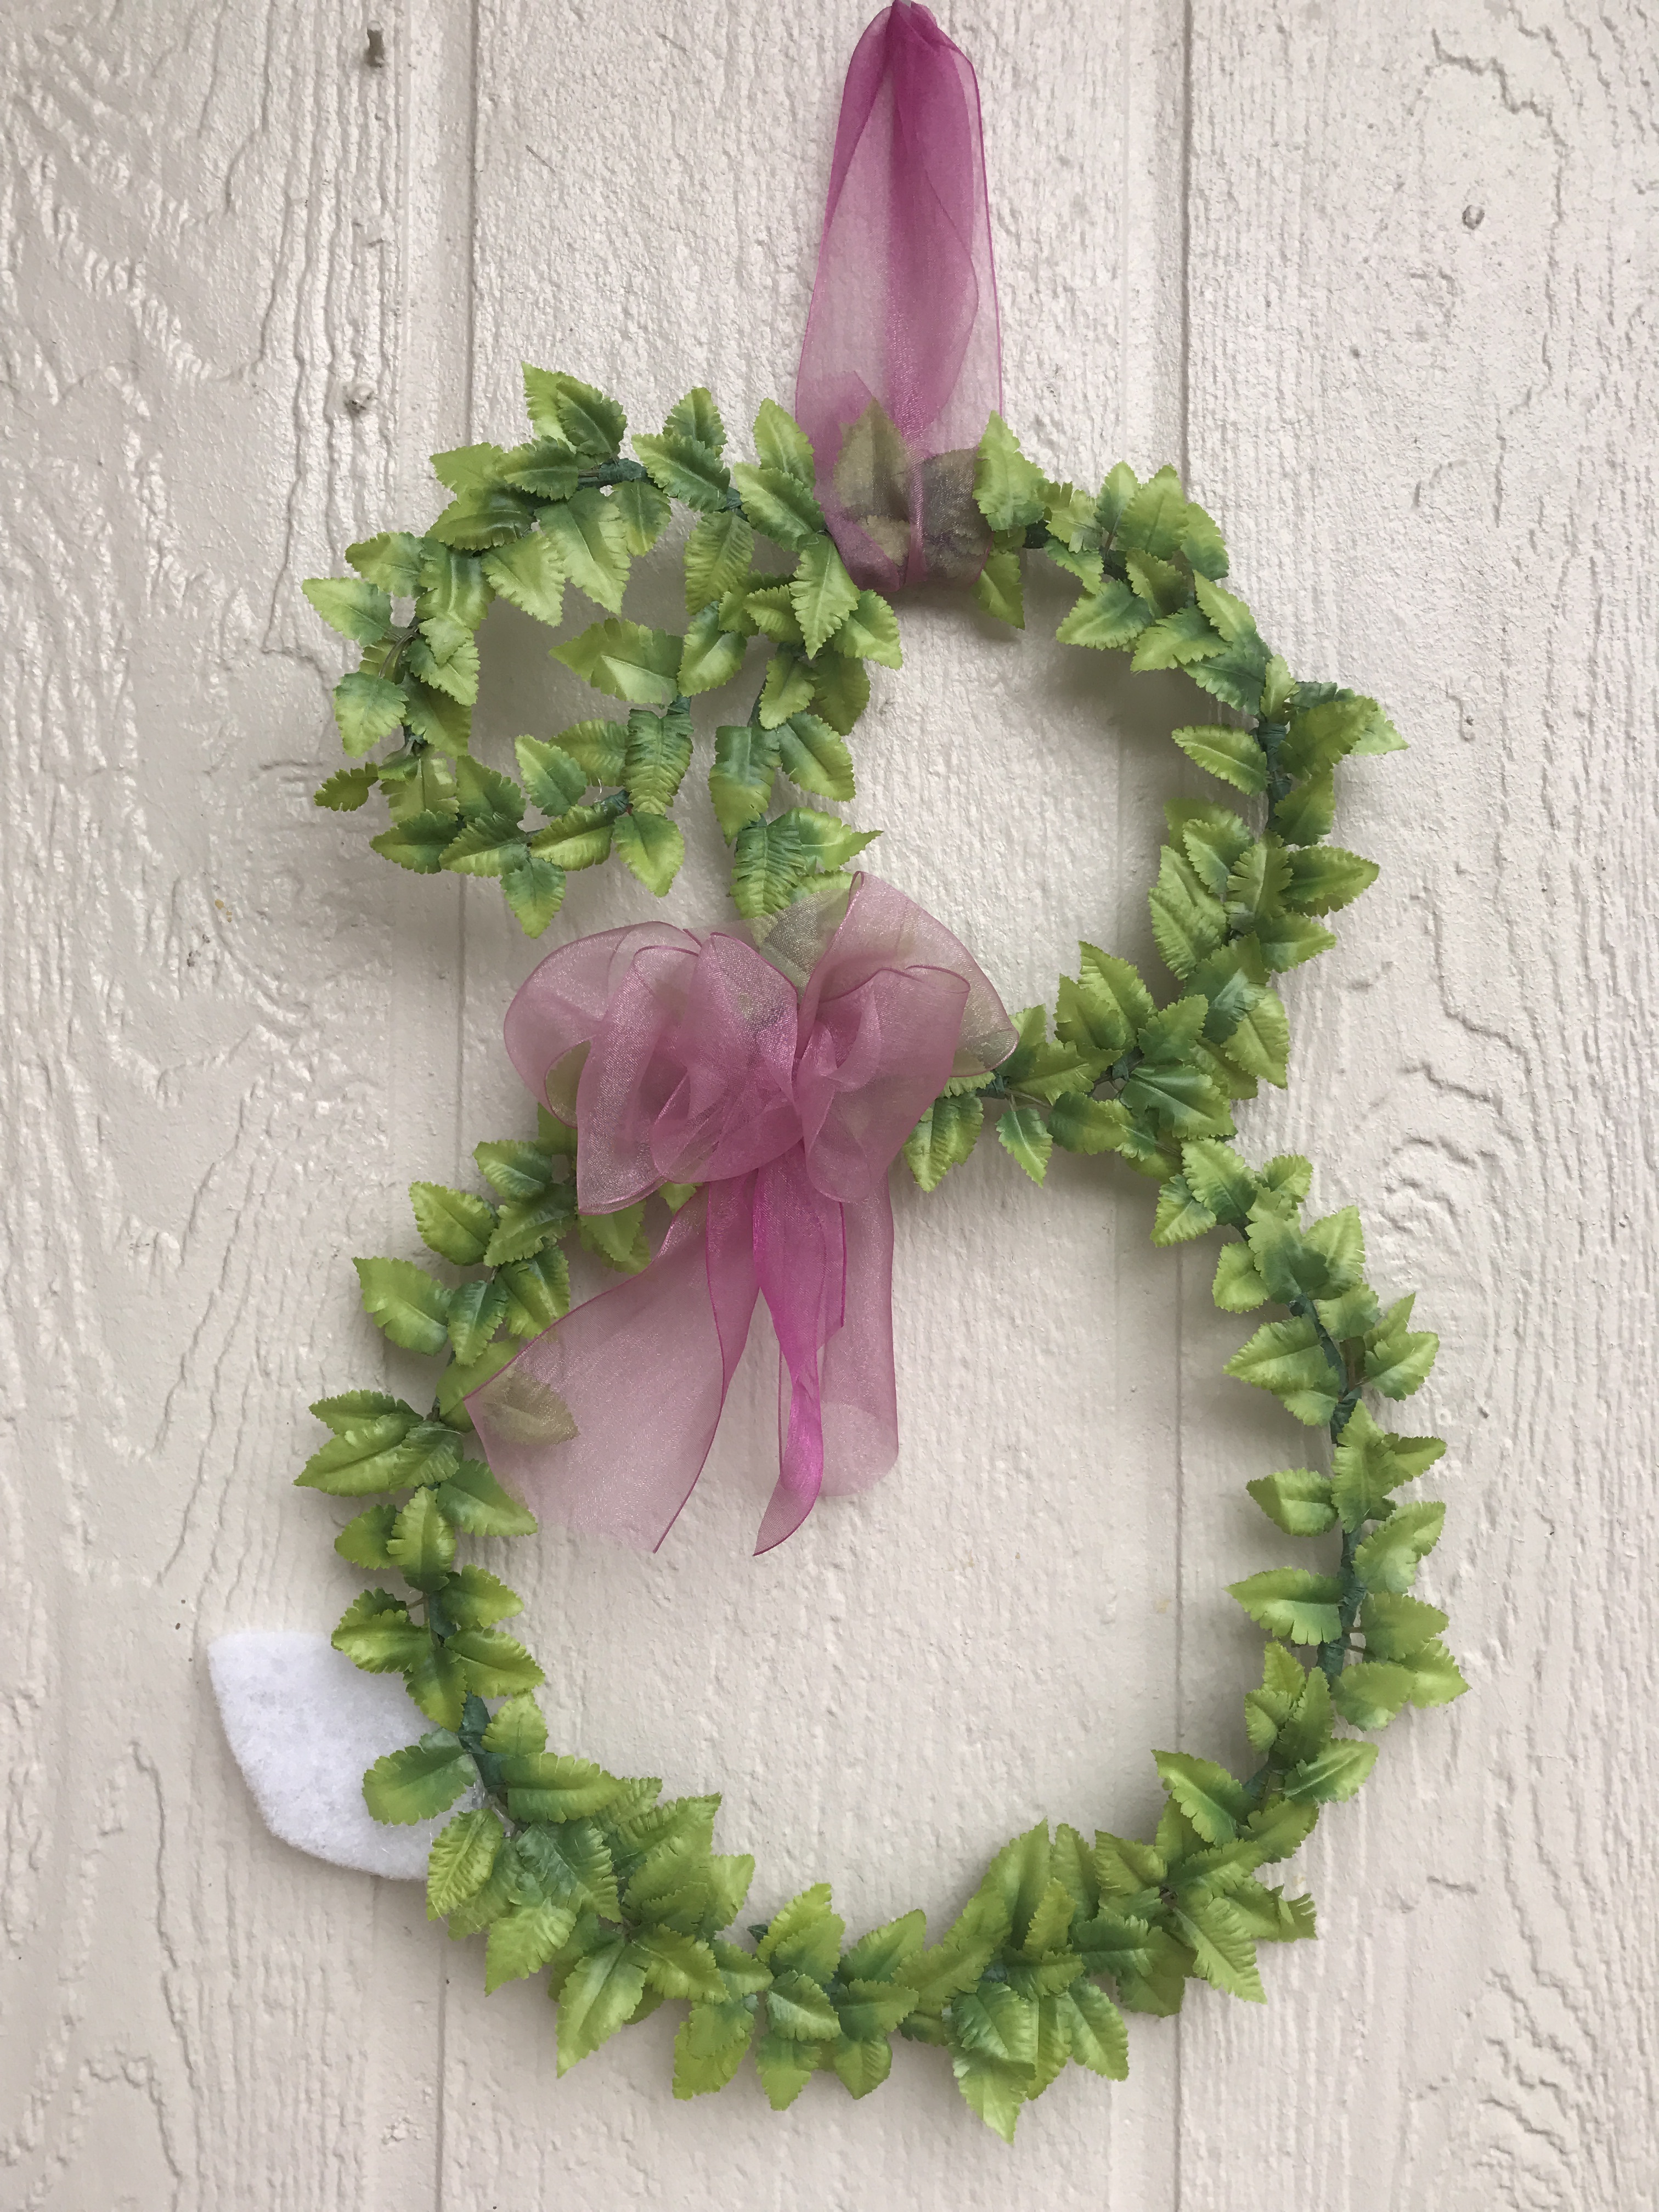 Want to try something new for your entryway this spring? Here's an easy and inexpensive way to greet your guests with a smile.
Supplies:
2 steel rings, one 6 inches in diameter and one 10 inches in diameter
one roll of green floral tape
one artificial greenery bush
wire cutters
hot glue gun and glue stick
3 inch by 4 inch piece of batting
2-3 yards of ribbon for bow and to hang your wreath
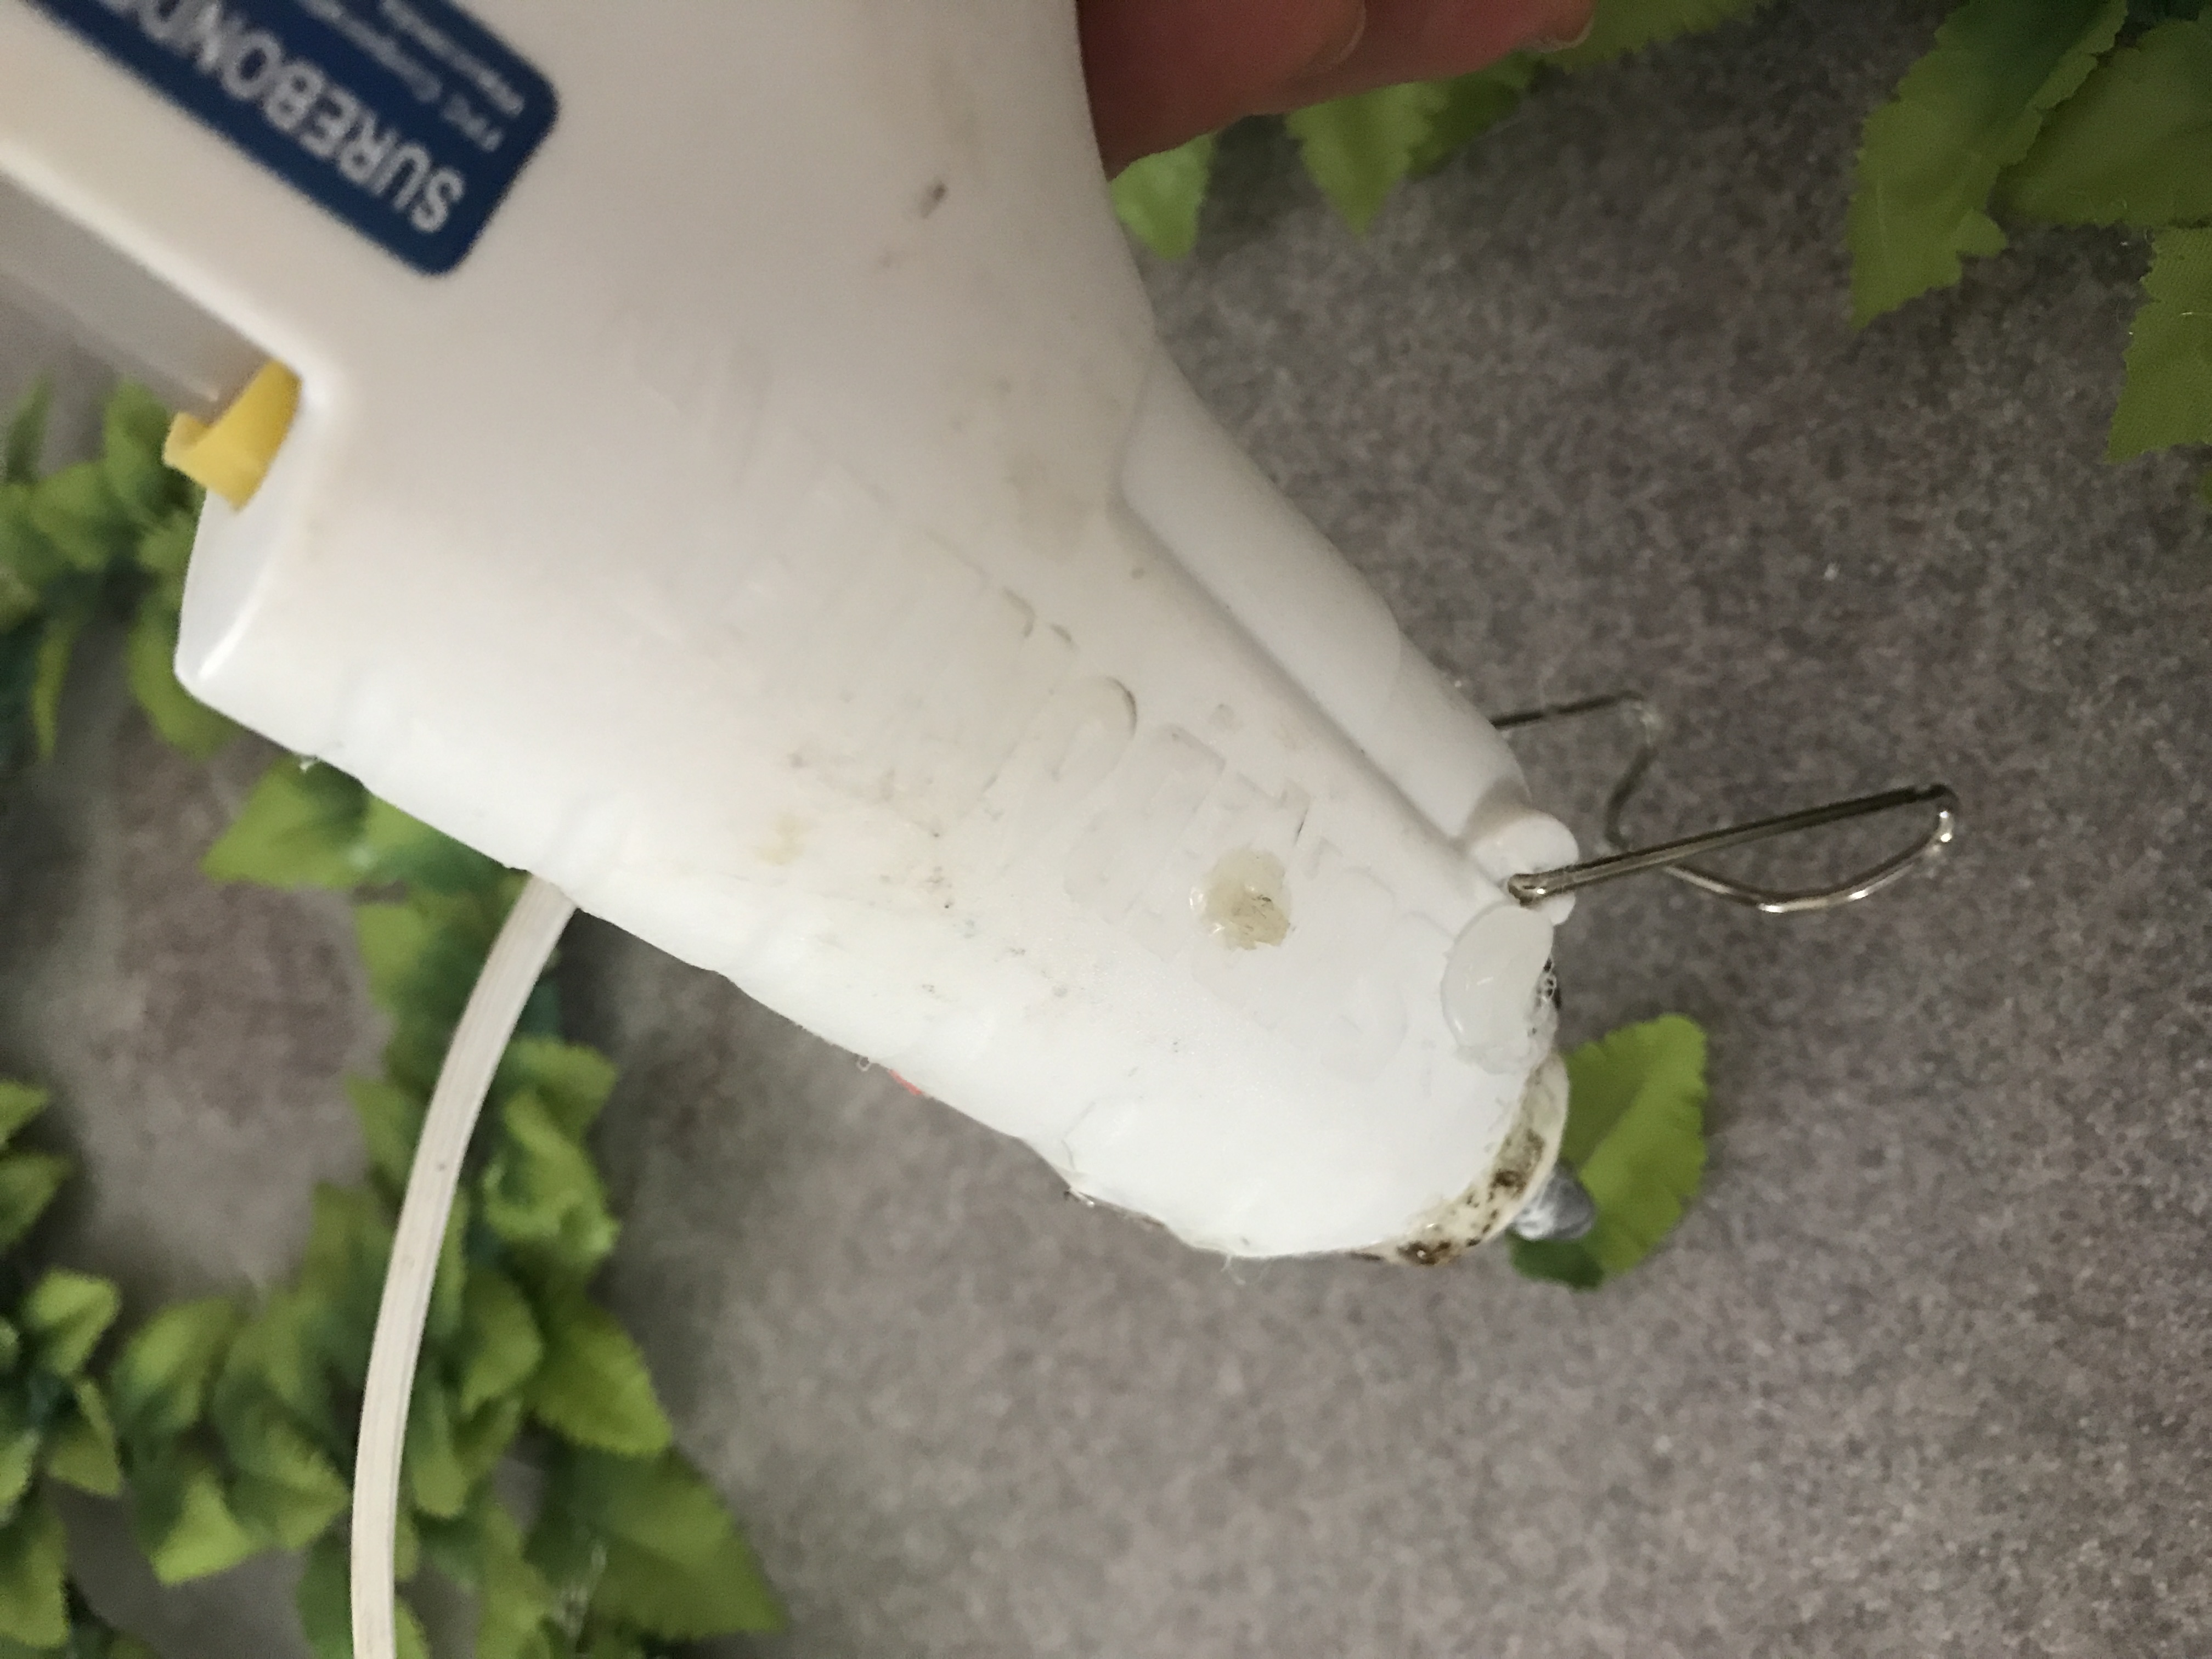
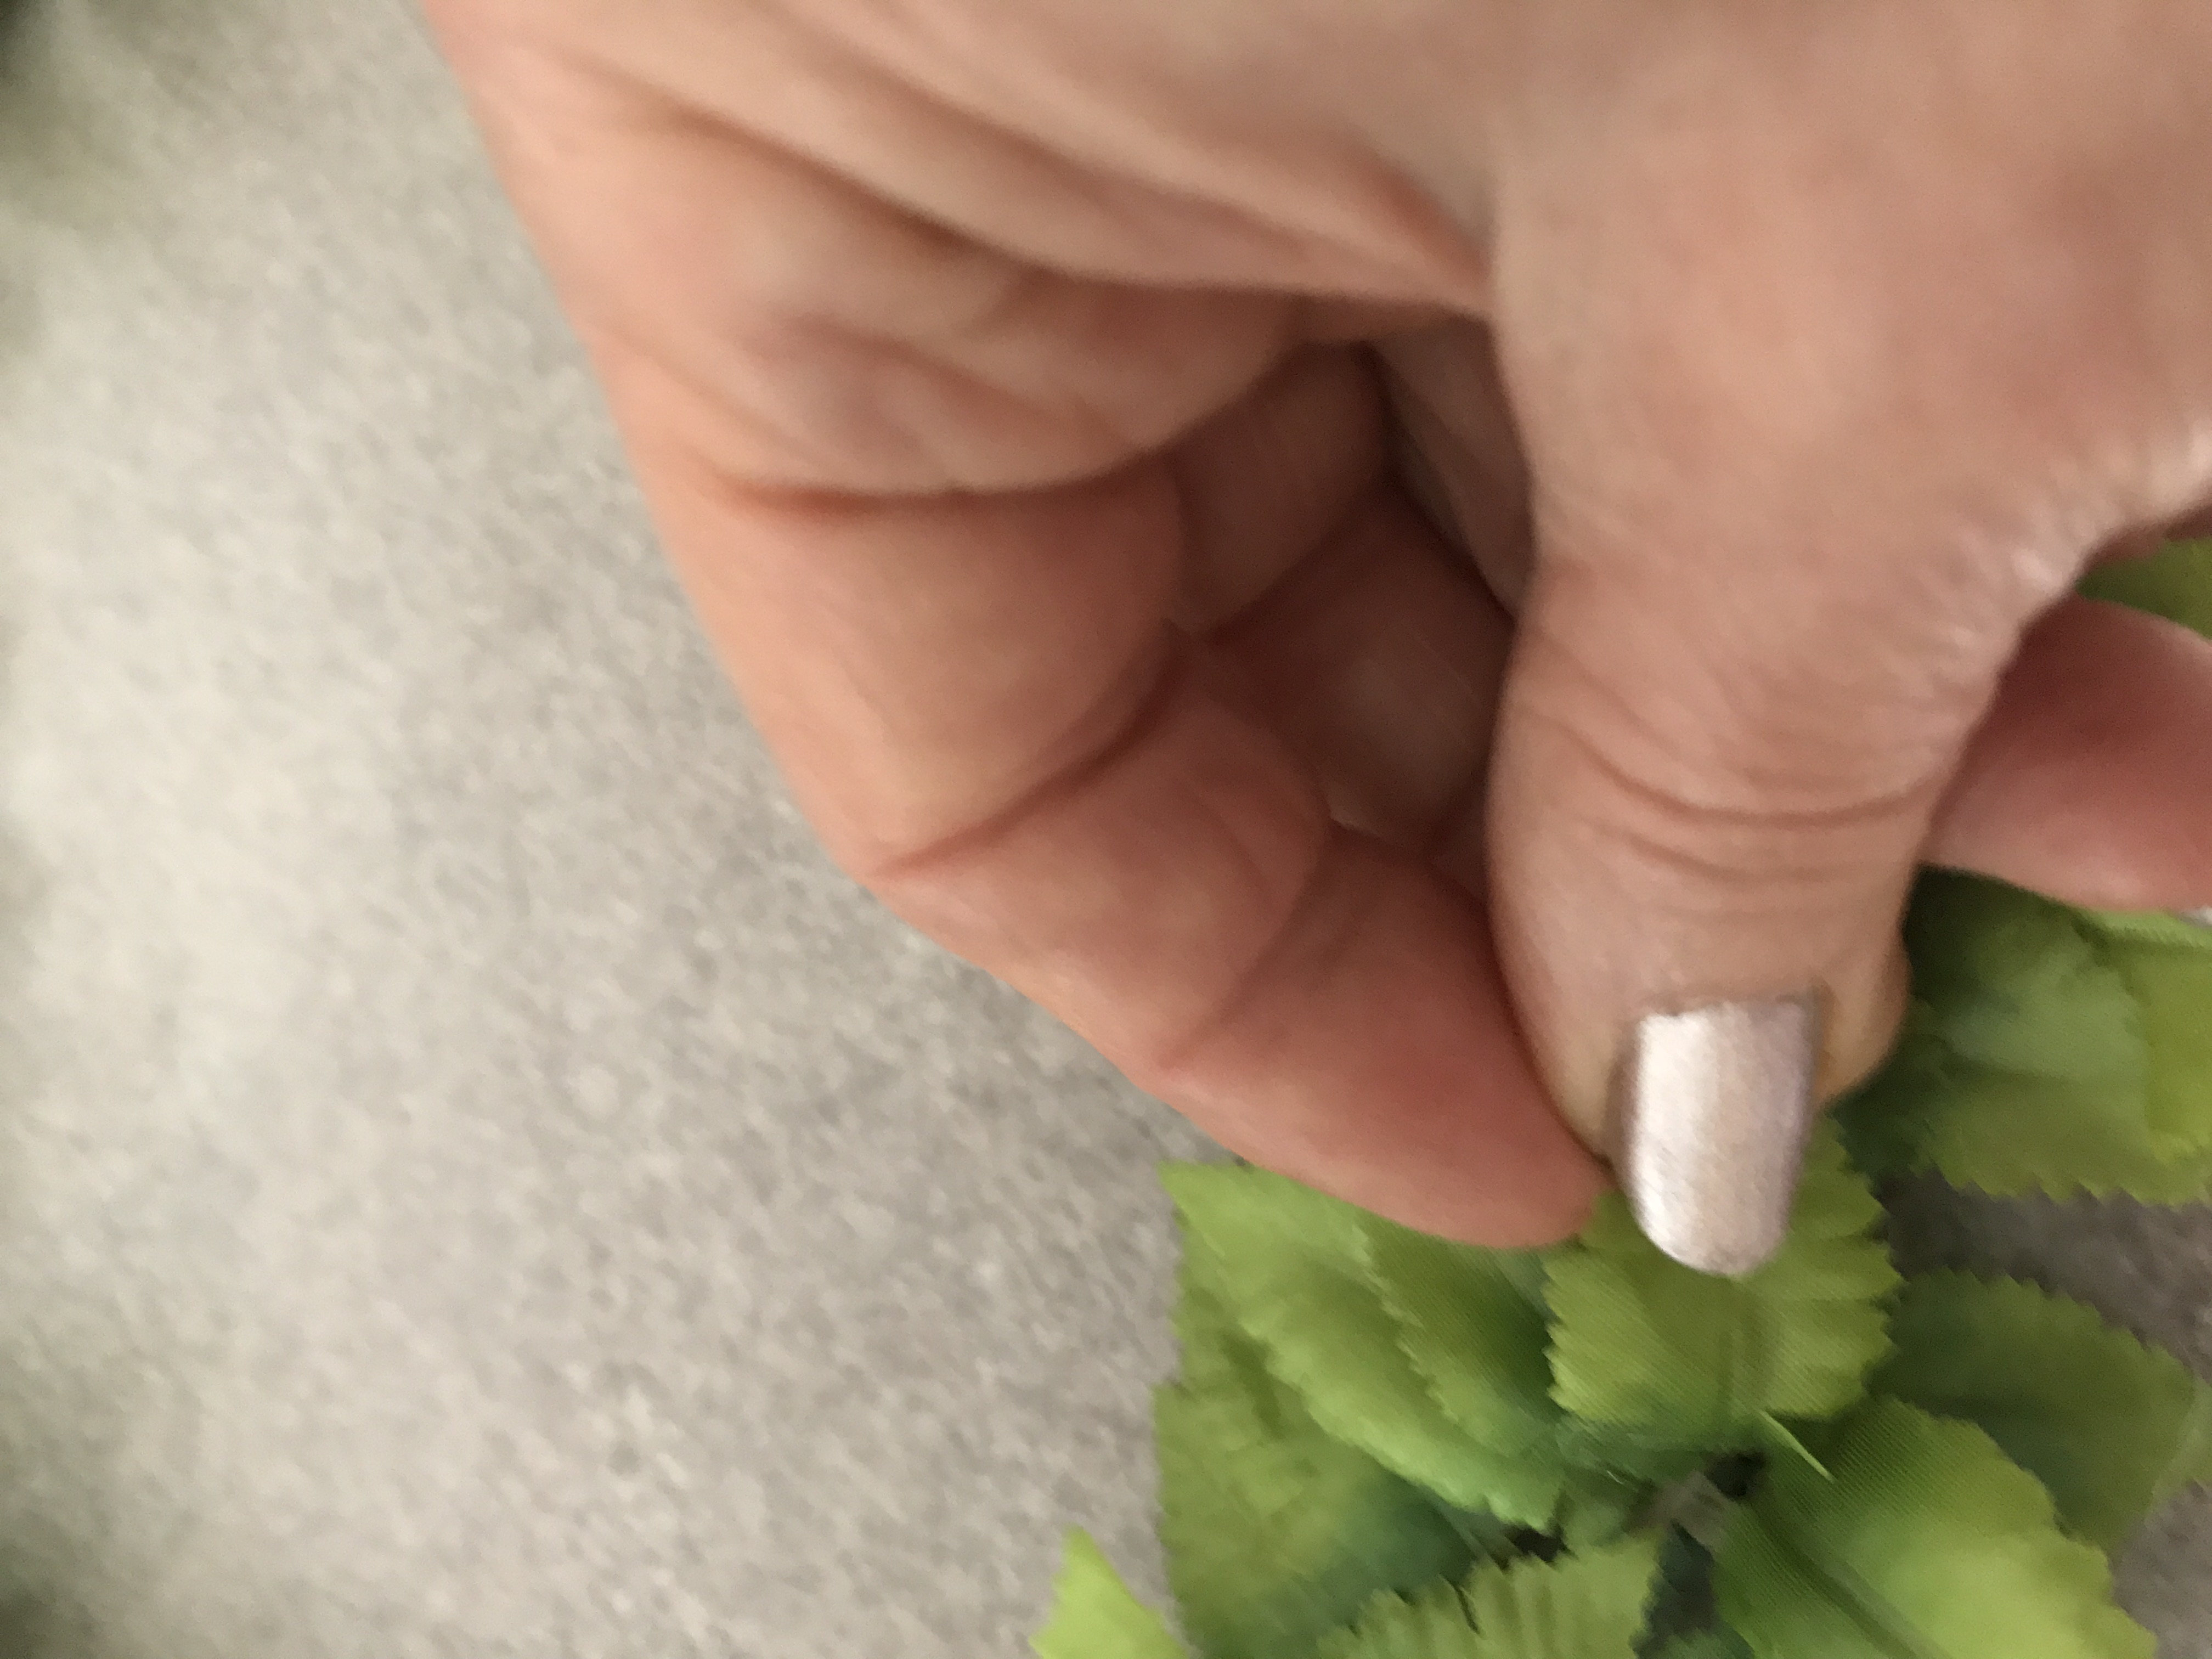
1. Wrap your steel rings with the stretchy floral tape. Use small lengths, if that is easier. Make sure the tape is smoothly wrapped around the rings.
2. Attach the rings together using the same floral tape. You will need to wrap the tape around both rings for about two-three inches, so that it is sturdy.
3. Cut a long branch off of the bush.
4. Lay the branch on top of the ring. Using short lengths of floral tape, affix the branch to the ring, wrapping the floral tape around both at about 2 inch intervals.
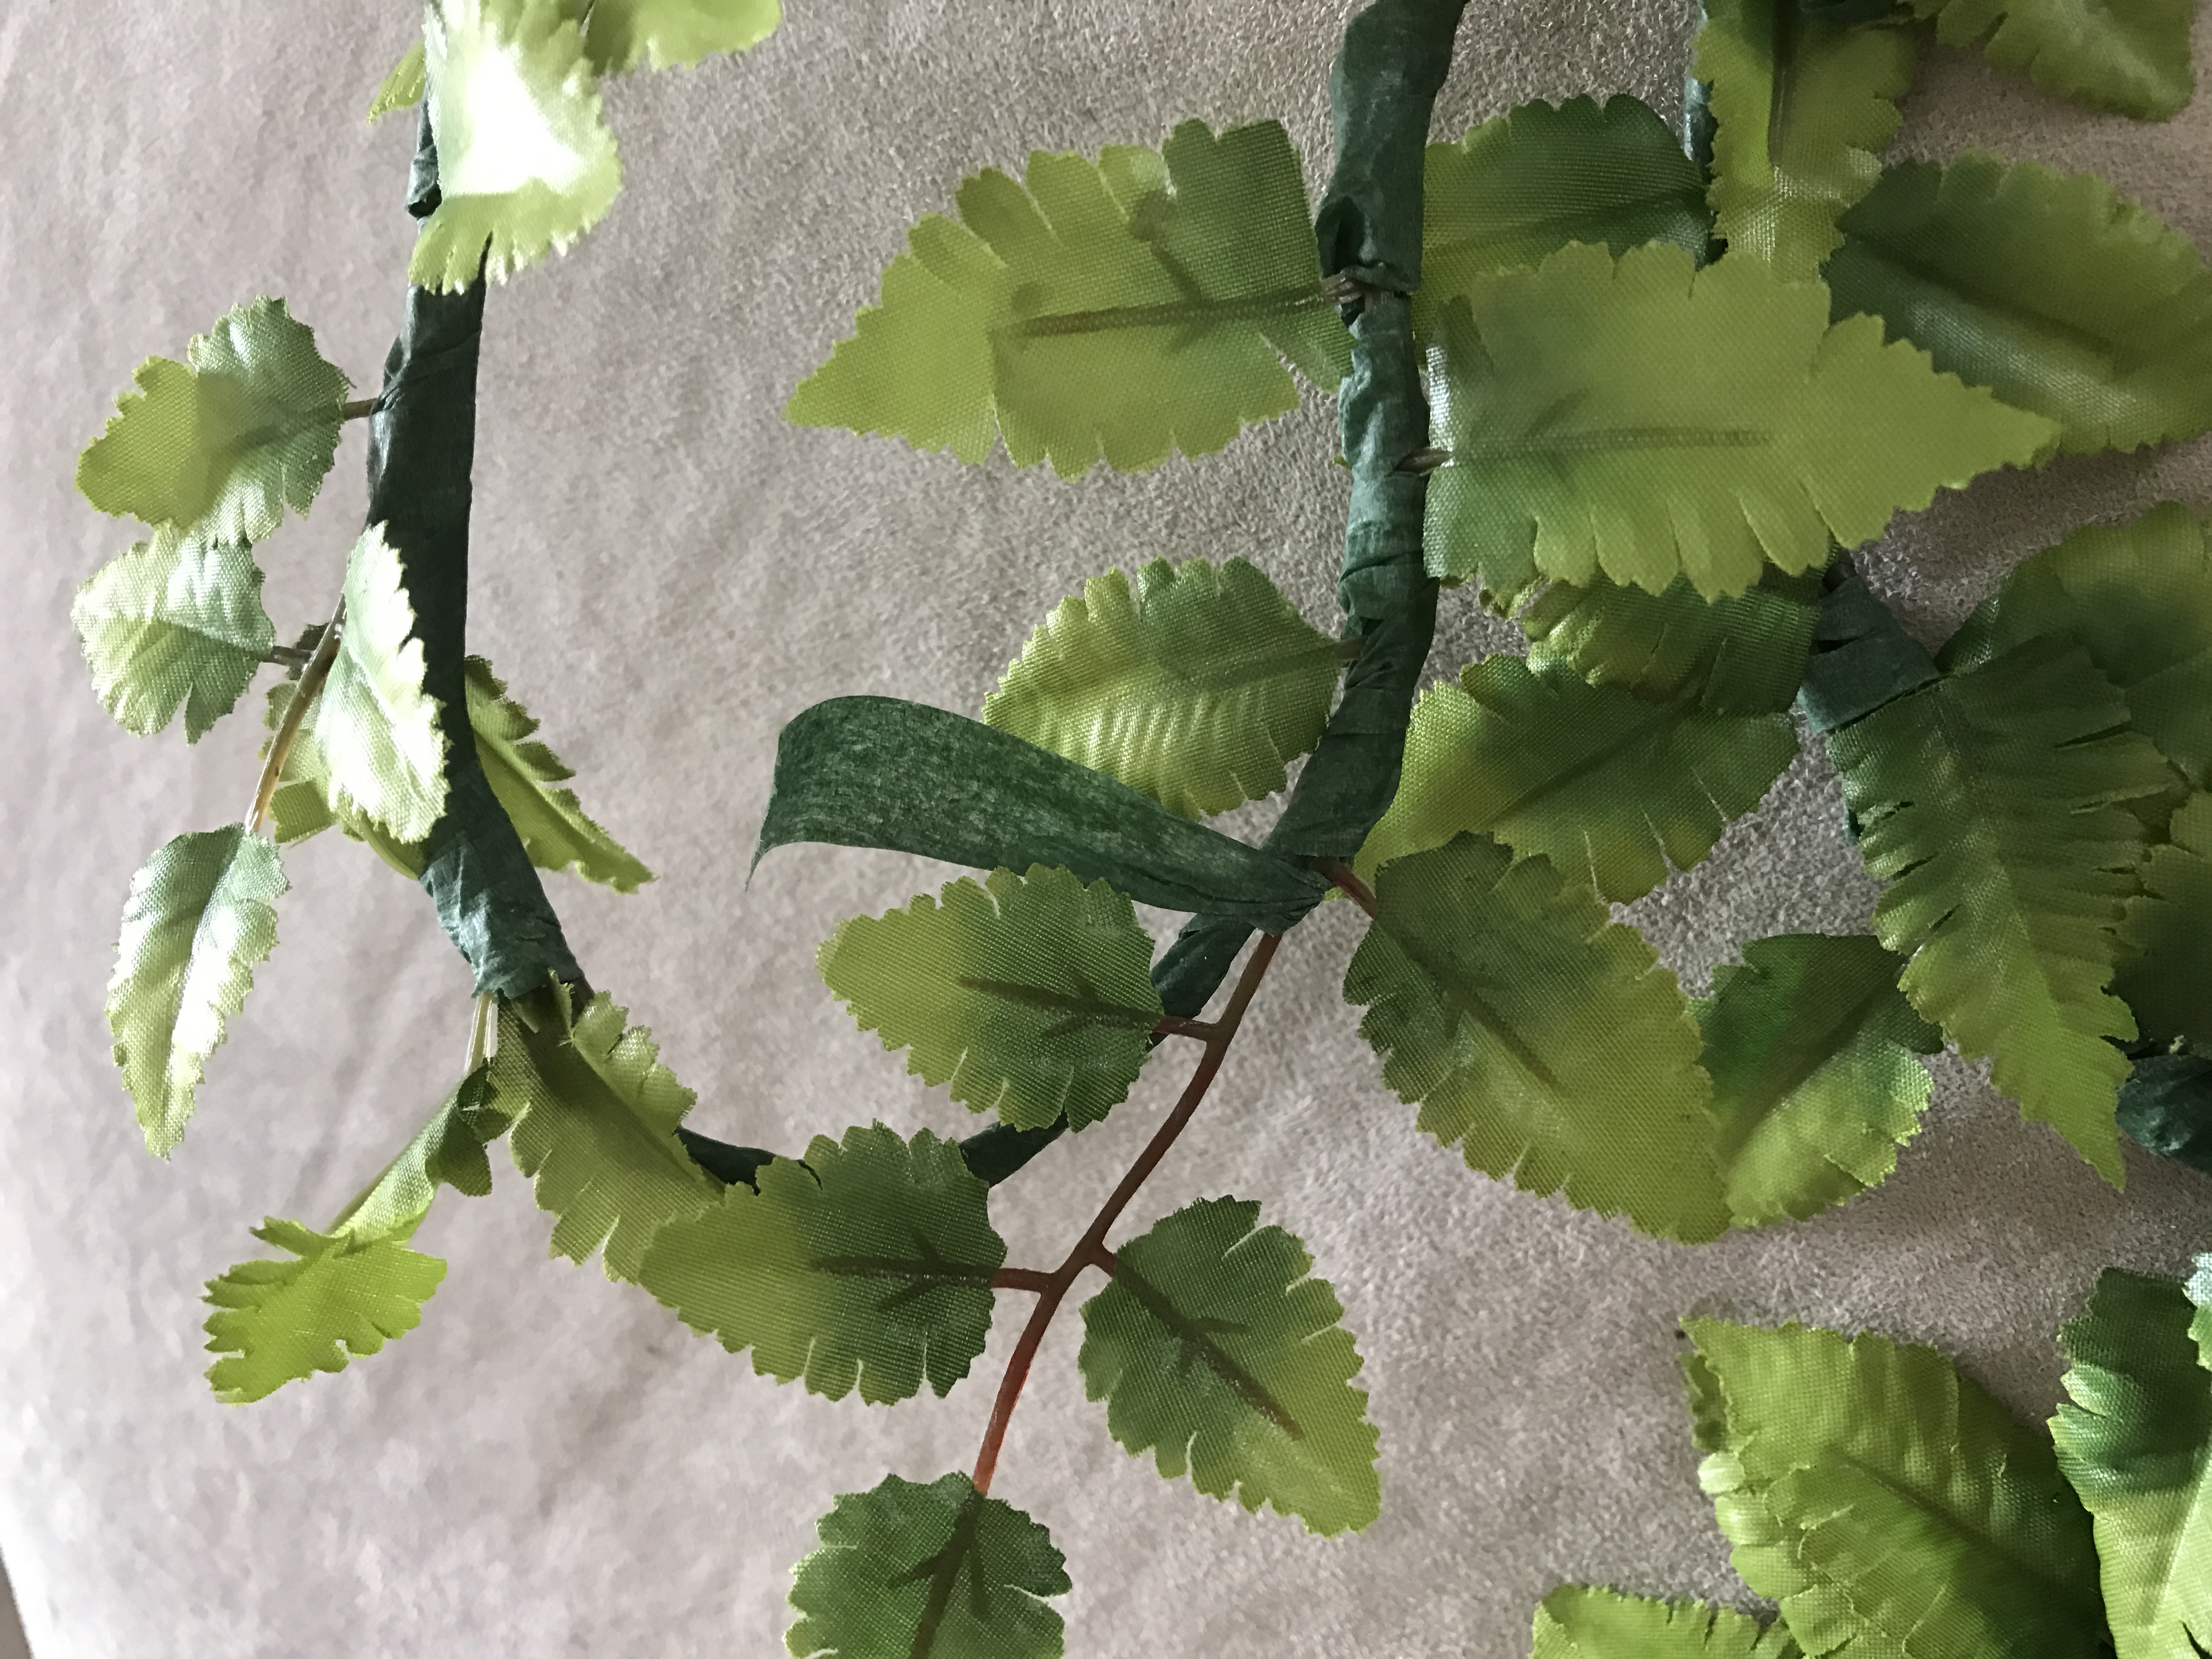
5. Repeat, covering the other ring with the greenery branch.
6. If desired, cut individual leaves off of unused branches and glue places that seem sparse.
7. Tie a bow around the neck of the bunny.
8. Cut a tail for the bunny from the batting, and glue in place.
9. Cut a 8-12 inch piece of ribbon and loop it around the top of the bunny wreath. Tie a knot in the end, and hang it on the wall or your front door. Expect lots of smiles!
Tip: You'll find the steel rings at your local craft stores near the macrame supplies.
Mother's Day Flowers
 With her special day creepin' up, have you ever asked your mother what her favorite flower is? How about her favorite color? Many people I have chatted with have the hum-drum attitude toward Mother's Day and Valentine's Day, declaring them to be "Hallmark card" holidays. They complain that the card, chocolate, and flower industries just want to guilt people into buying their products. So, who cares? Even though you may show your mom you love her every day, why not honor her on the day that's been designated especially for her?
And flowers are just the extravagant indulgence that she may hesitate to include on her grocery list. You know that she pauses and inhales the fragrance of the blooms as they beckon to her. It's also difficult for her to refrain from stopping in to a cute floral shop downtown. So, give it up (think about all the skinned knees she soothed for you) and pick out some decadent posies, so that she can feel the extravagance of them. Because they are hers, just for her.
Some tips for choosing flowers:
-Buy an arrangement unless you know she loves to arrange flowers. (The flowers are already in water, so she doesn't have to worry.)
-Find out and choose colors and flowers that she likes. If you order early, you can get almost any flower you want. In May almost any flower is available.
-When choosing roses, if the rosebuds are too soft, or open, they won't last very long, so choose a different bunch. Alternately, if the bud looks like a bullet, and is extremely hard, it won't open.
-Check to make sure she can handle strong fragrances before buying flowers like: Stargazer lilies, hyacinths, tuberose, stock and gardenias.
-If you by a flowering plant from a florist or grocery store, treat it like a cut flower arrangement. The plants are forced, so they rarely thrive planted in the garden.
-If you want to buy something she can enjoy outside, buy blooming plants specifically grown for gardens. These are usually found at a nursery or garden shop. Here are some examples: geraniums, rose bushes, lavender, lilacs, petunias, lantana, and fuscia.
-If you choose garden flowers, offer to help her plant them as part of the gift. Most moms love to spend time with their kids. Time spent beautifying her garden together is a gift on top of a gift.
Above all, think about your mom. If you don't already know, ask questions, and not, "what do you want for Mother's Day?" Have a conversation with her; get to know her as a person. As a result, both of your lives will become enriched. And, you'll discover the perfect gift for your sweet mom.
Christmas Elf Sock Arrangement
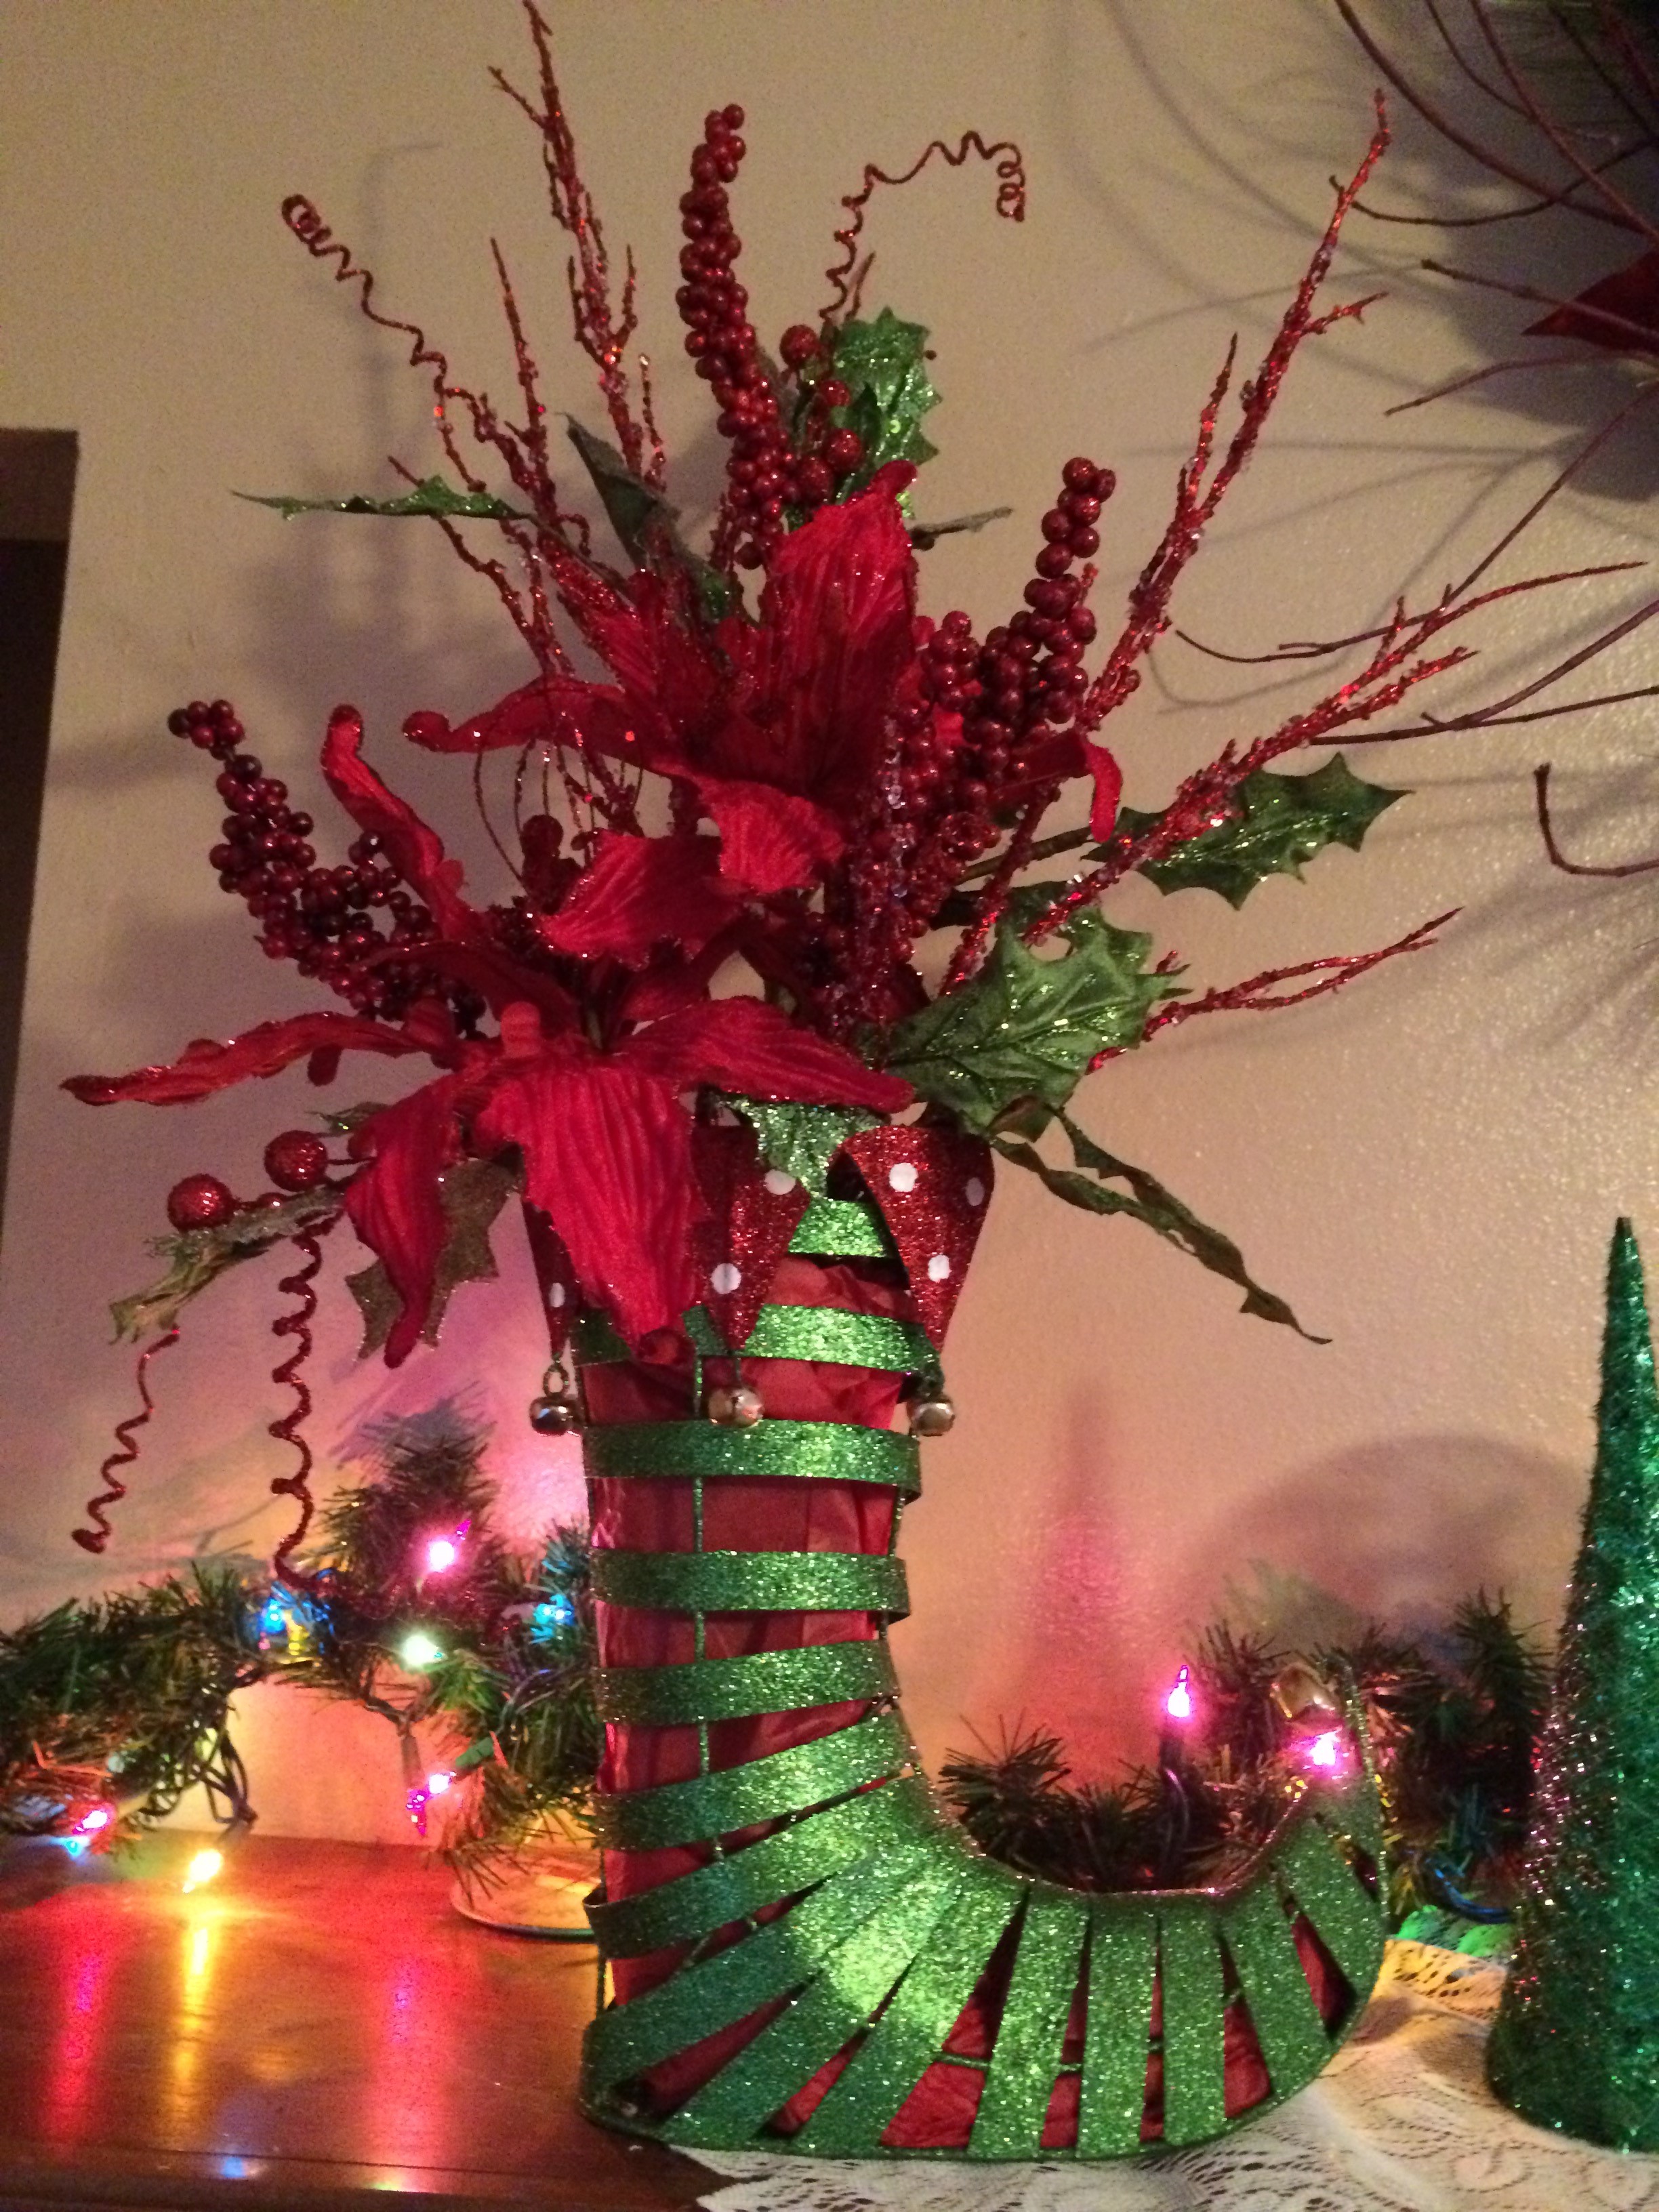
Sometimes a container just "speaks" to me. I found this cute metal glittery sock at Hobby Lobby (a craft store) and decided that it would be perfect for my mantle this Christmas.
Of course I decided to adorn it, so I lined it with red tissue paper to hide the floral foam and stems.
If you decide to make something like this, you'll need:
Stiff floral foam brick
Spanish or green moss, a small handful
Glue gun and sticks
Wire cutter
Tissue paper, your choice of color
2 stems of poinsettias with various other branches connected
2 stems of glittery red branches
To assemble:
Line the sock with red tissue paper.
Cut a 2x2x5 inch piece of floral foam.
Carefully slide the foam into the sock so that the top of the foam is even with the top of the sock. Make sure the tissue paper stays in place. Top with the moss.
Separate some of the branches from one of the poinsettia picks.
With the sock facing to the side, stick the poinsettia into the foam so that it faces forward and half of the poinsettia is over the top of the sock.
Cut about 4 inches off the stem of the other pick and stick the whole pick in behind the first poinsettia. Position the second poinsettia so that it angles up an inch or two and to the right of the bottom poinsettia.
Stick the other branches that you separated from the first poinsettia pick in around the first poinsettia and below the second one.
Stick one of the glittery red picks in behind the top poinsettia.
Cut the other one apart, leaving a tall pick (but slightly shorter than the first glittery red pick) to stick in to the left of the bottom poinsettia.
Pull out any curlicues to add interest.
You can bend or reposition any of the picks for added effect.
And there you have it! A new, whimsical delight to entertain your Christmas fantasies.
Fabulous Fall Arrangement
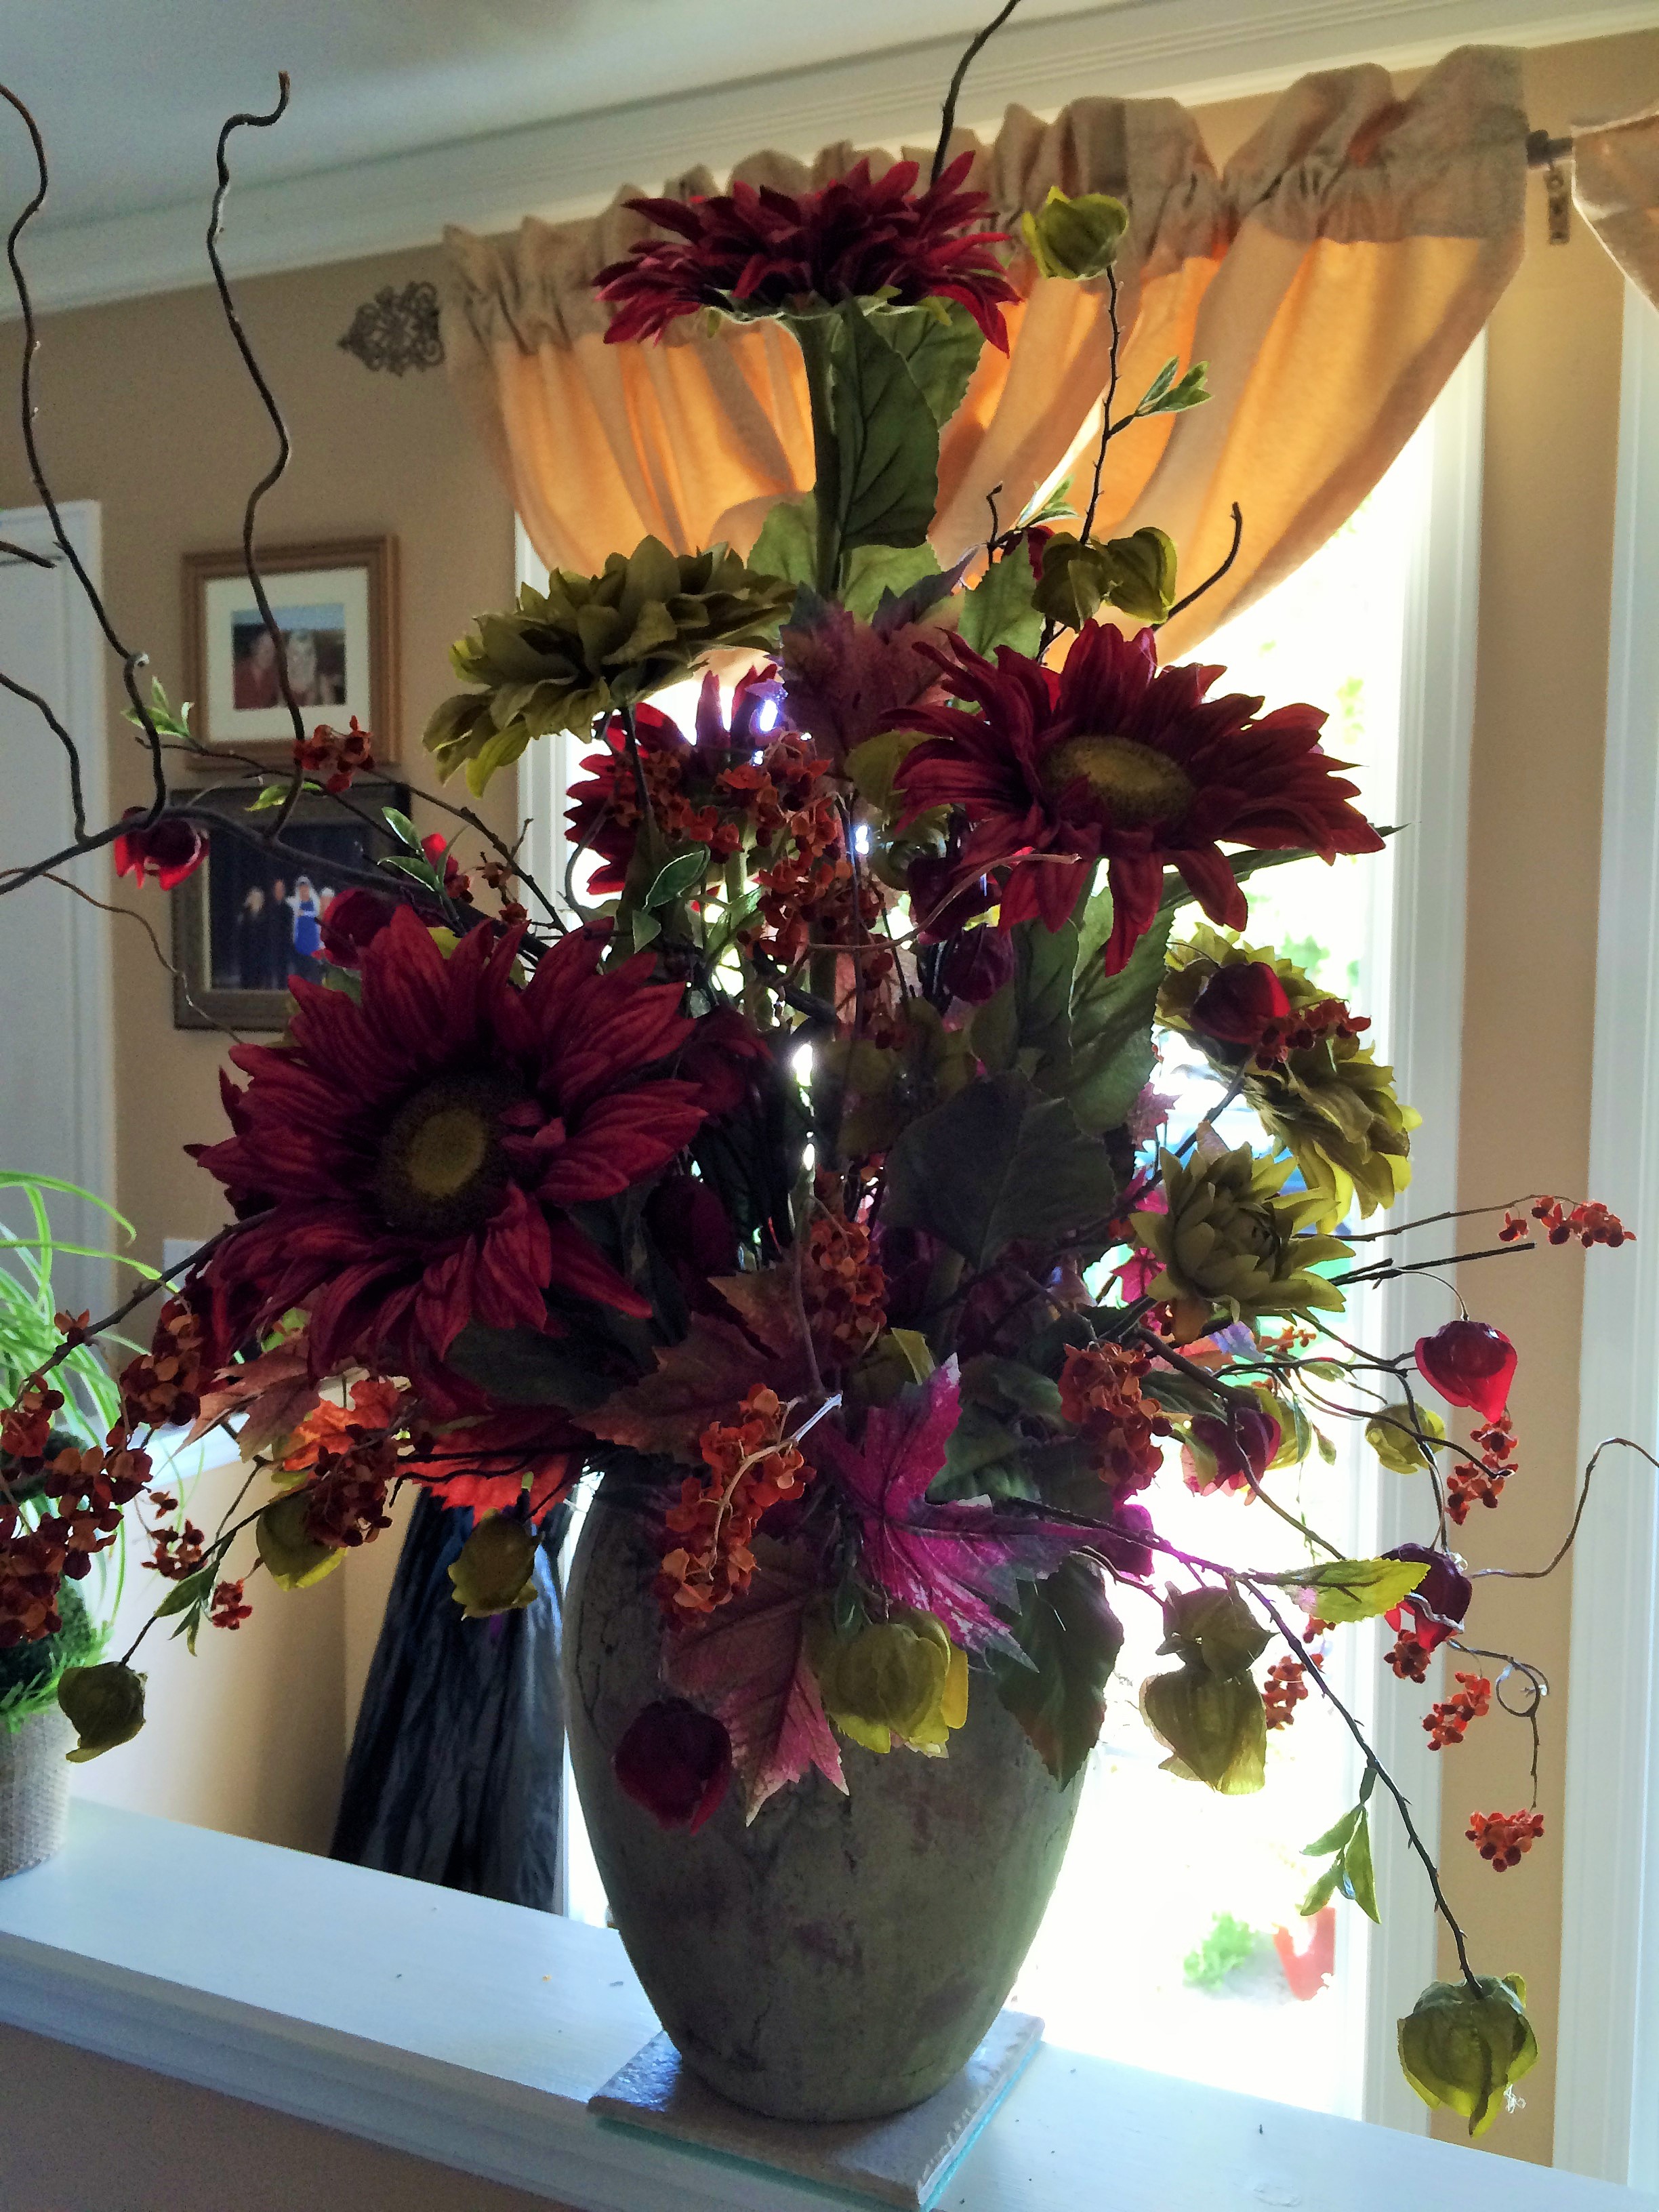
Try making this at home to decorate for your fall celebrations.
First things first.
Decide where you will place your arrangement.
Then, choose a container that you love, either one you already have or search for one in your local florist, garden shop, craft, home furnishing or discount store.
When choosing artificial flowers, search for ones that look realistic. (They don't have to be expensive, but the ones that look more realistic are definitely pricier. Look for sales and take advantage of coupons, including online coupons.) Purchase focal flowers in odd numbers: 1, 3, 5, 7, etc. Odd numbers are more pleasing to the eye.
Here are the supplies you'll need:
One container
Floral foam-1-3 bricks, depending upon how large your container is
A large handful of Spanish moss
3-5 large sunflowers
3-5 large mums or dahlias
4 stems Chinese lanterns, two colors
Dried bittersweet-one bunch
2 large stems fall leaves (about 7 side branches each)
5 stems curly willow
Glue gun, glue sticks (I use low-temp)
Wire cutter
Sharp knife
Cut the floral foam to fit snugly into your container. Hot glue it around the edges or on the bottom to make it more secure. Round off the top of the foam with the knife. Cover the foam with the Spanish moss. (You don't have to secure it; the flowers and leaves that you stick into the foam will secure it.)
I always start with the large focal flowers first.
Cut the stem of the top flower about twice the height of your container with the wire cutter. Squirt a little hot glue on the end and push it down into the floral foam about two inches.
The next flower should be cut about 6 inches shorter. After gluing the stem, push this flower down about two inches into the foam, slightly right of the top flower and angled out a bit.
The flower in front should be cut about 4-6 inches shorter that the last one. After gluing, push this flower into the foam about two inches right in the middle. It should be angled forward.
If you want your arrangement to be all-around, you will need to place two flowers on the opposite side in similar places as you did the front.
Now that you have your shape, use the contrasting or complementing large flowers to fill in the spaces.
Once you have used all of your large flowers, cut your fall leaf branches apart. Glue them in, tucking them in the middle of your arrangement. You can allow a few to frame your arrangement at the base.
Cut the branches of the Chinese lanterns apart, leaving 2 or three longer. Stick one in to the foam about as tall as your top flower.
Then, stick them in all around your arrangement in the spaces, following your large flowers. They can be longer than your large flowers, creating movement and gracefulness.
Add a little glue to the ends of each of the bittersweet branches and stick them in the foam in between the flowers at varying lengths.
At the end cut some curly willow branches and glue them into your arrangement to create drama. Cut one longer than the top flower and stick it in on the left side. Then cut them shorter and don't be afraid to let them stick out of your arrangement. Keep the location of your arrangement in mind; tuck them in to a greater degree in high traffic areas.
Et, voila!
Note: You are not restricted to the flowers and colors that I have used. Choose ones that you love and are readily available!
~If you want to make a smaller arrangement for your dinner table, you can use many of the same principles. Don't be afraid to try!
Molly and Justin's Wedding Flowers
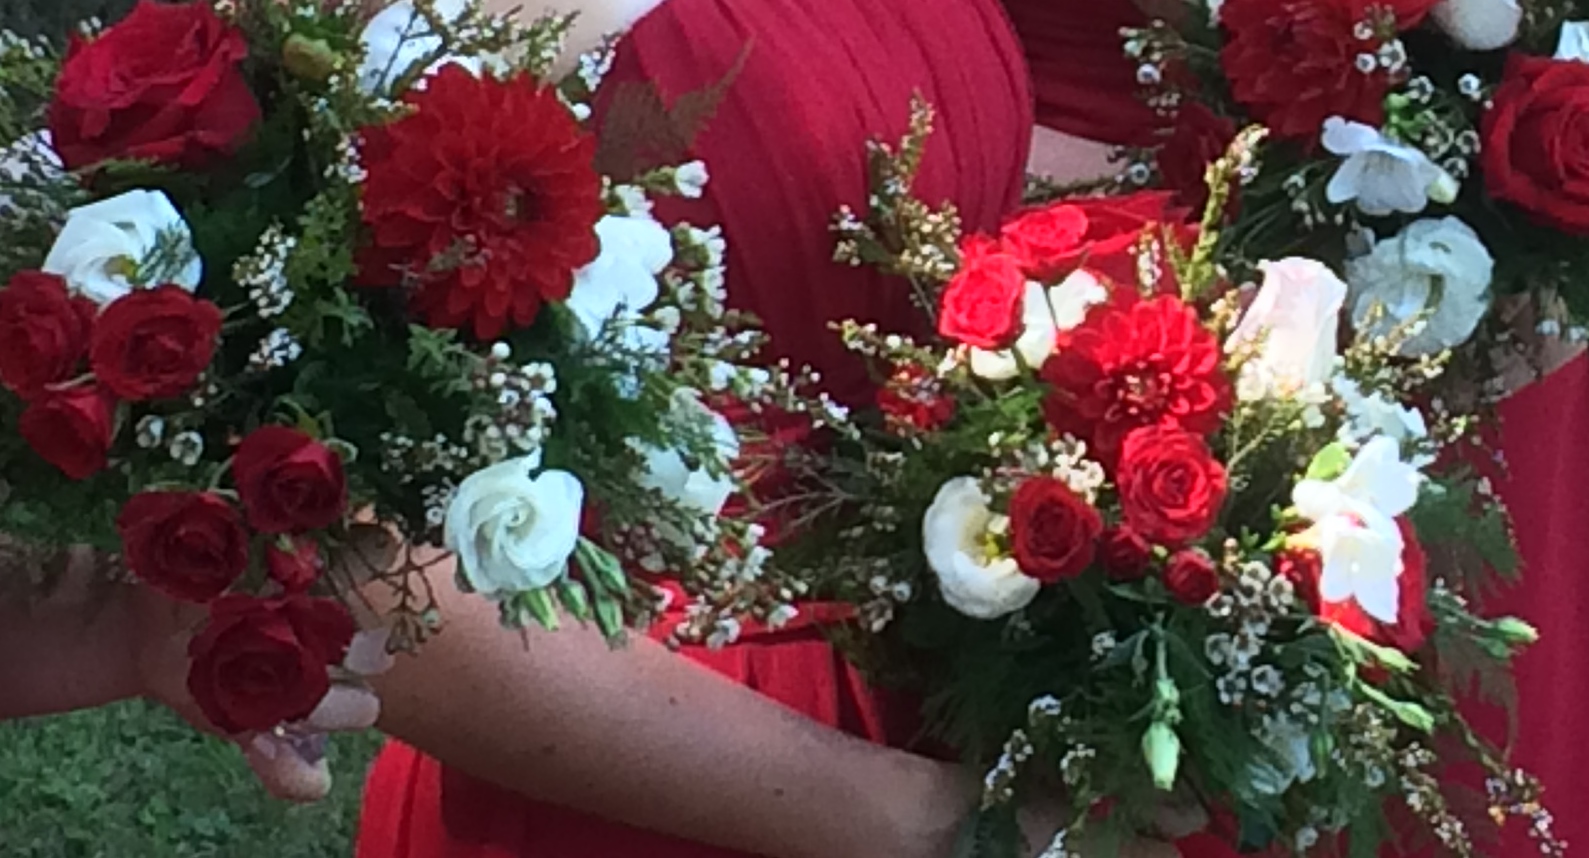
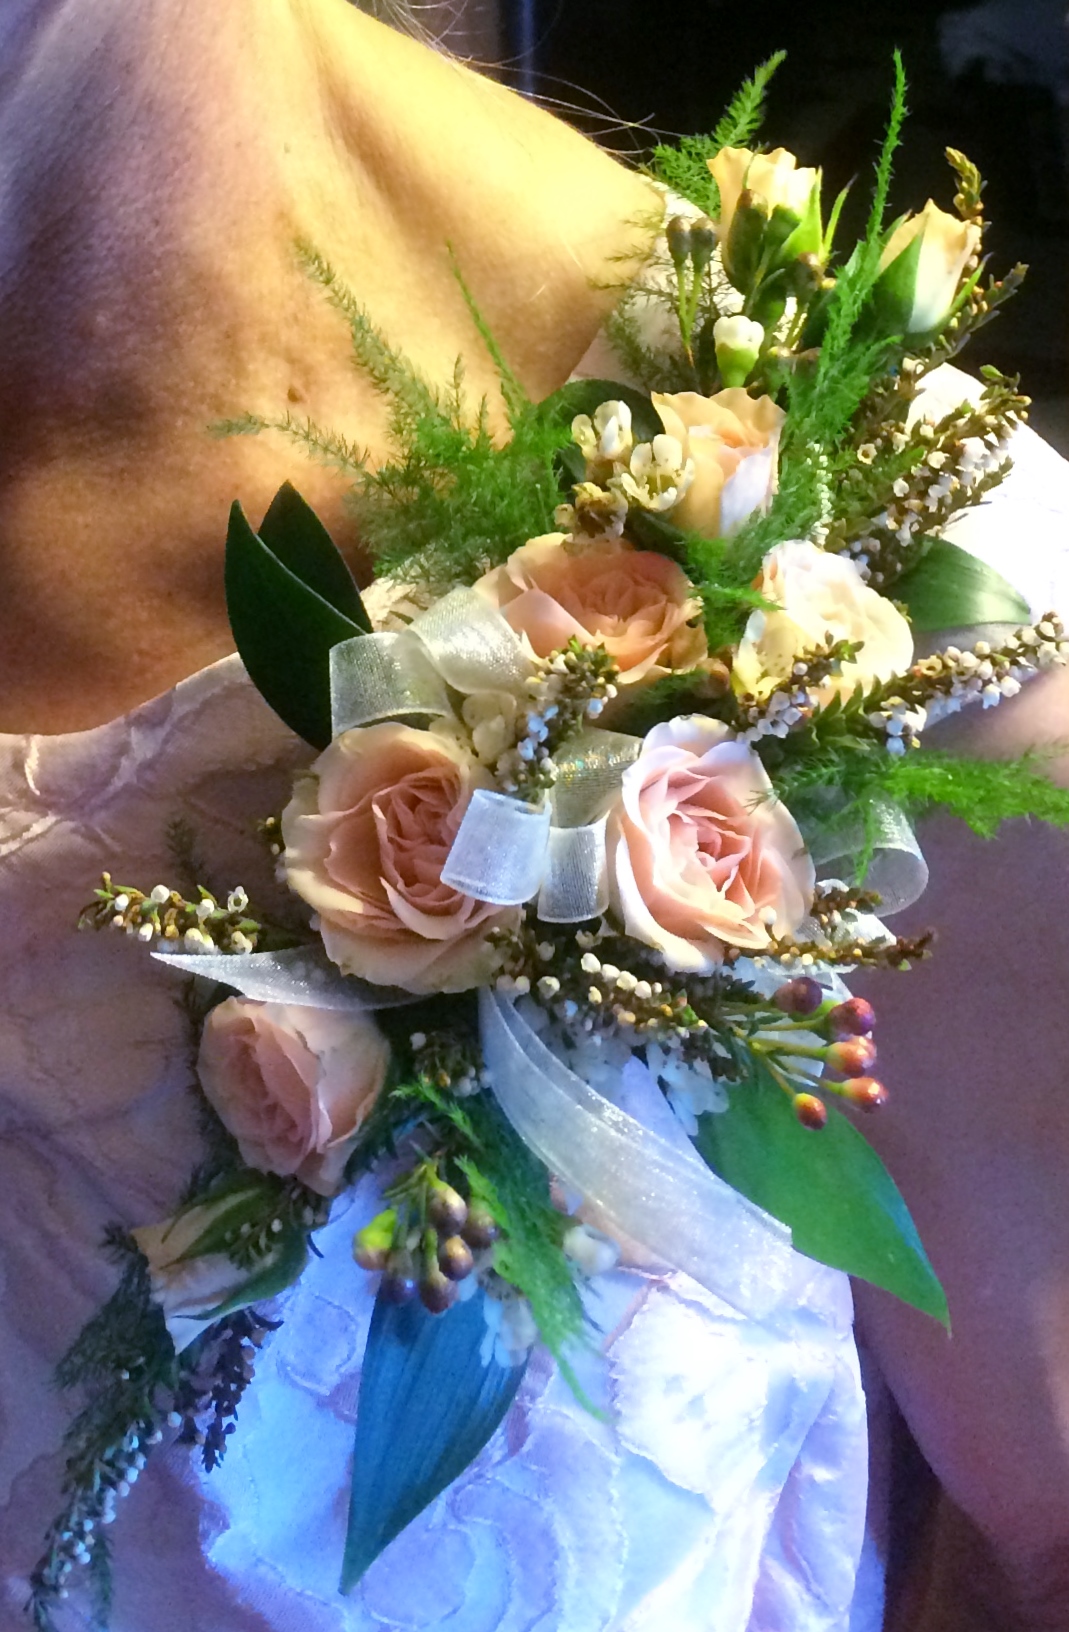
Deep in the lush Wisconsin countryside a sweet love bloomed. It was my pleasure to create bouquets, a flower girl's halo, corsages, and boutonnieres for my best childhood friend, Gretchen's, daughter Molly's, wedding to darling Justin.
Instead of the usual round, hand-tied, basketball type bouquet, I elected to use bouquet holders that have the Oasis foam built into them. That way I could create arrangements that are more stylized. Here is the result:
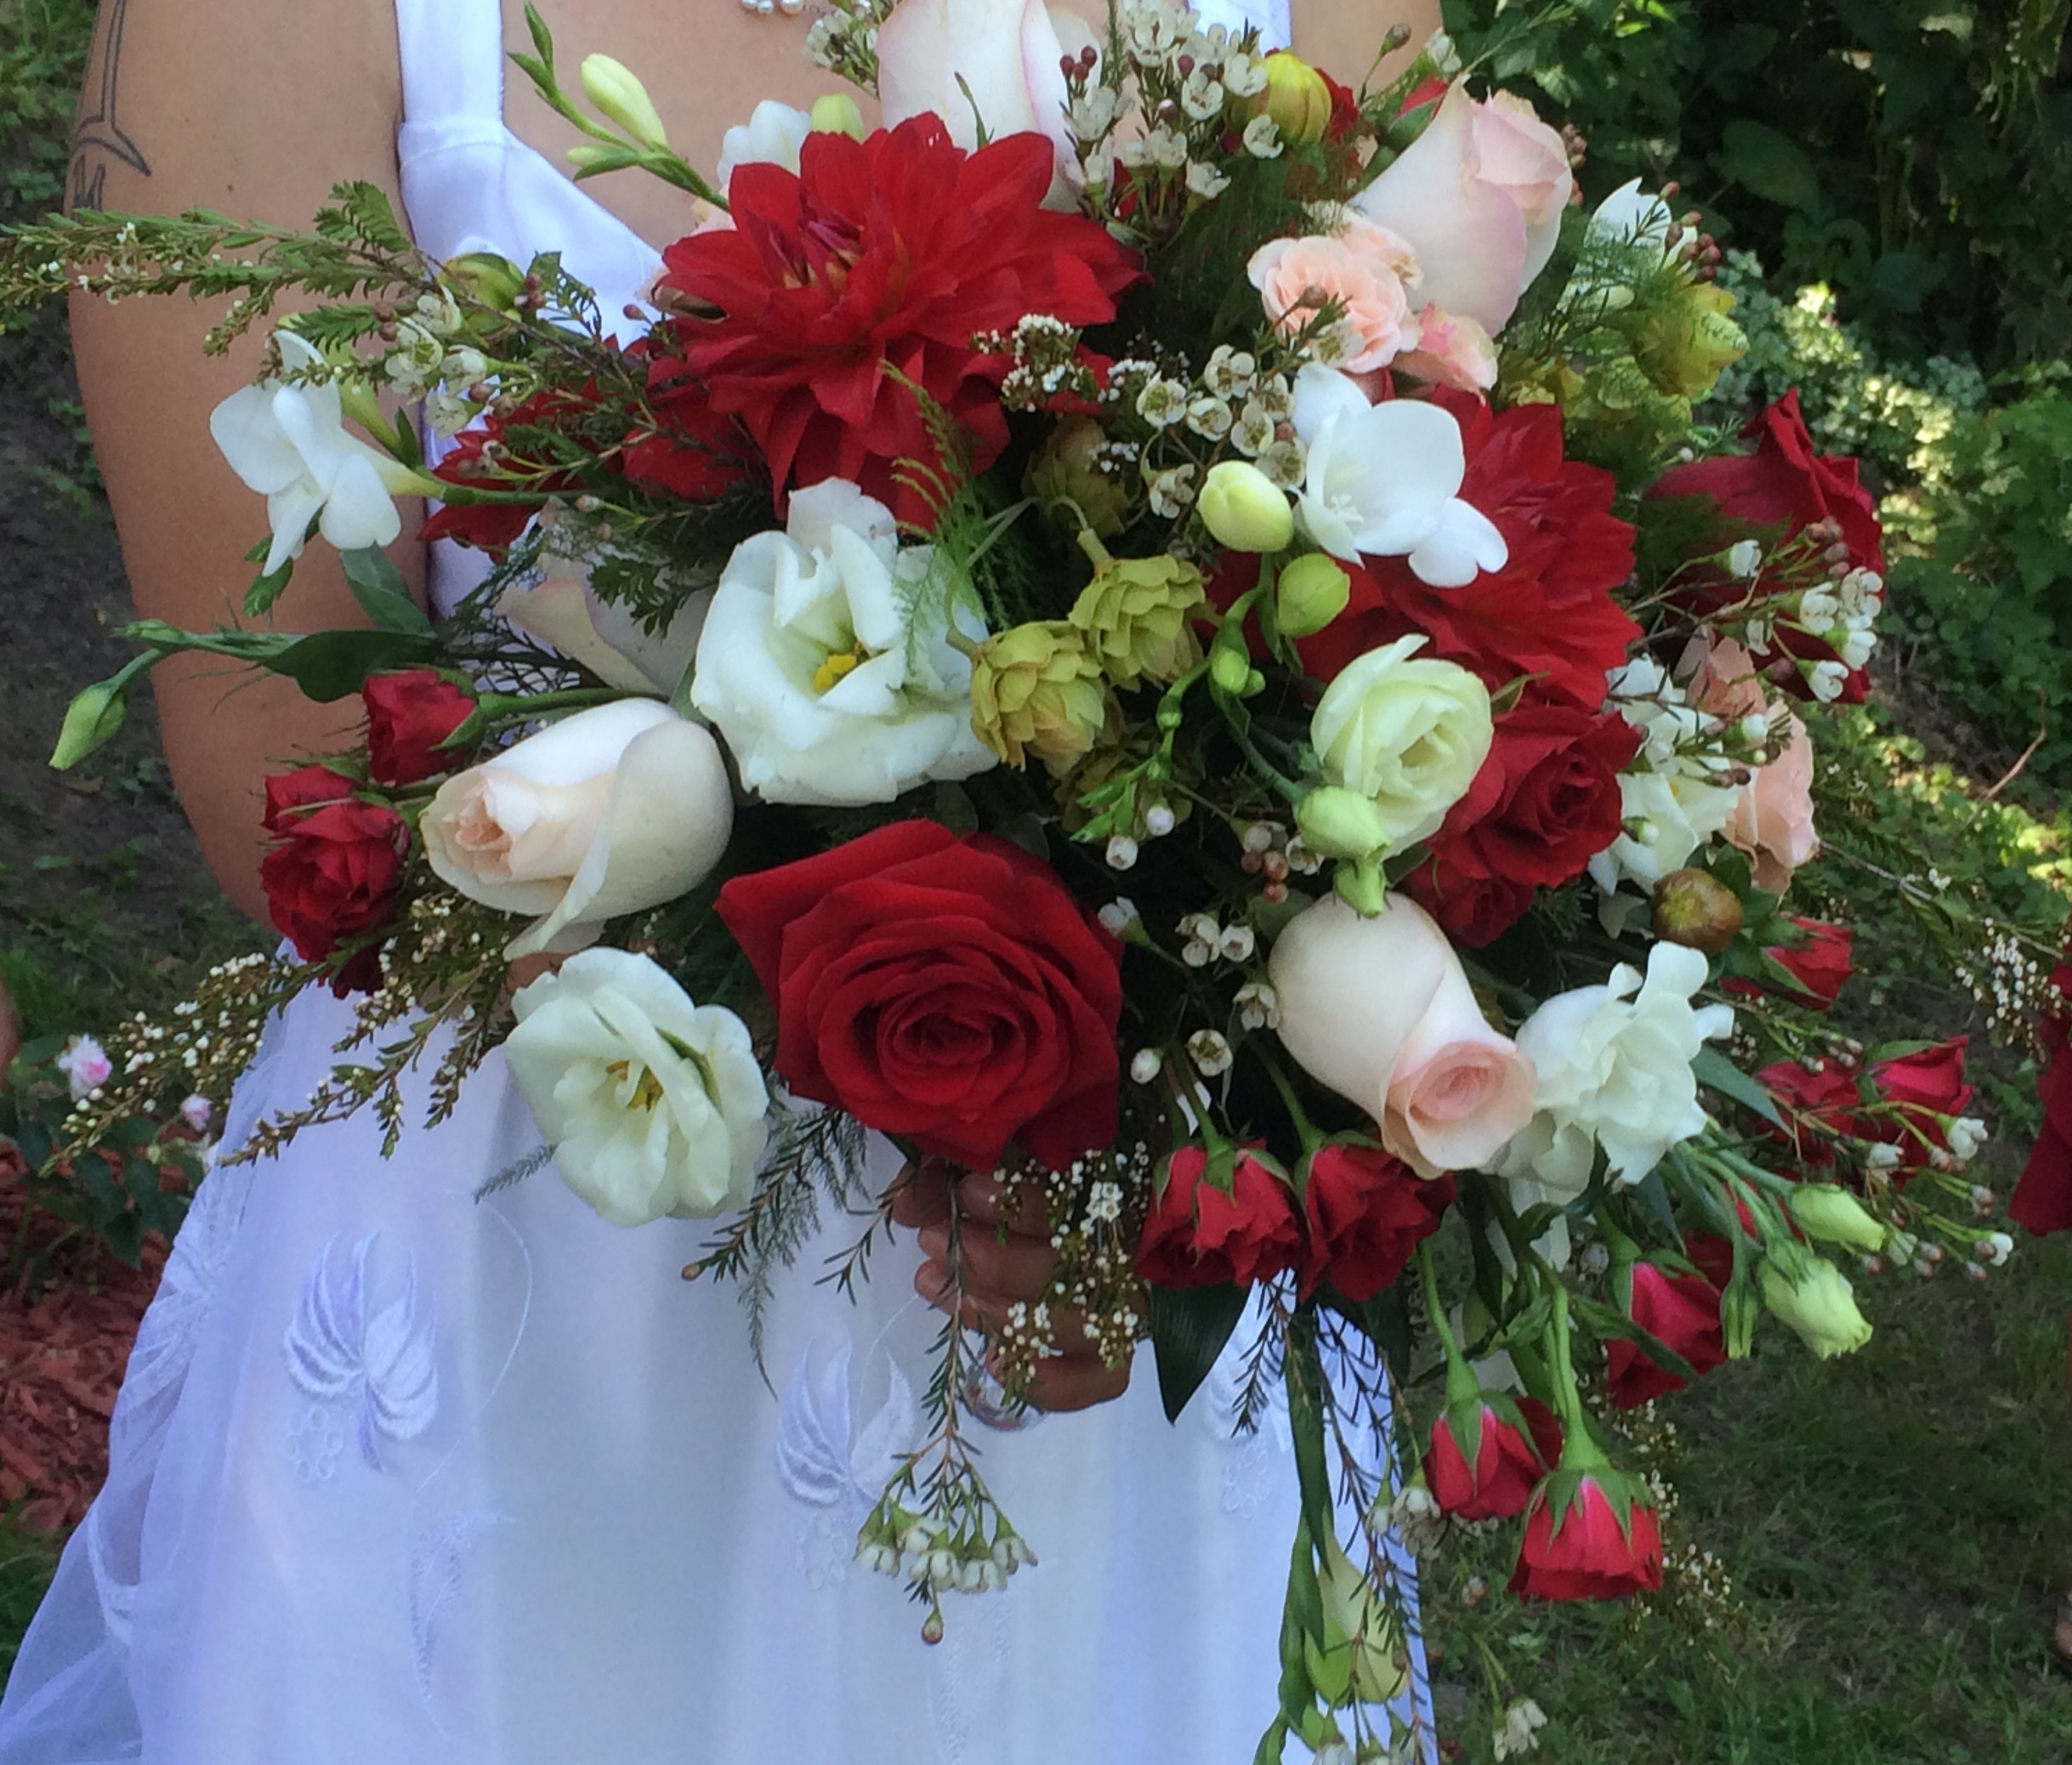
And did you see the hops flowers? Yep, Molly and Justin enjoy craft beer, so I thought it would be cute to pay homage to that pastime. I included the hops in Justin's boutonniere, too. They were both pleasantly surprised.
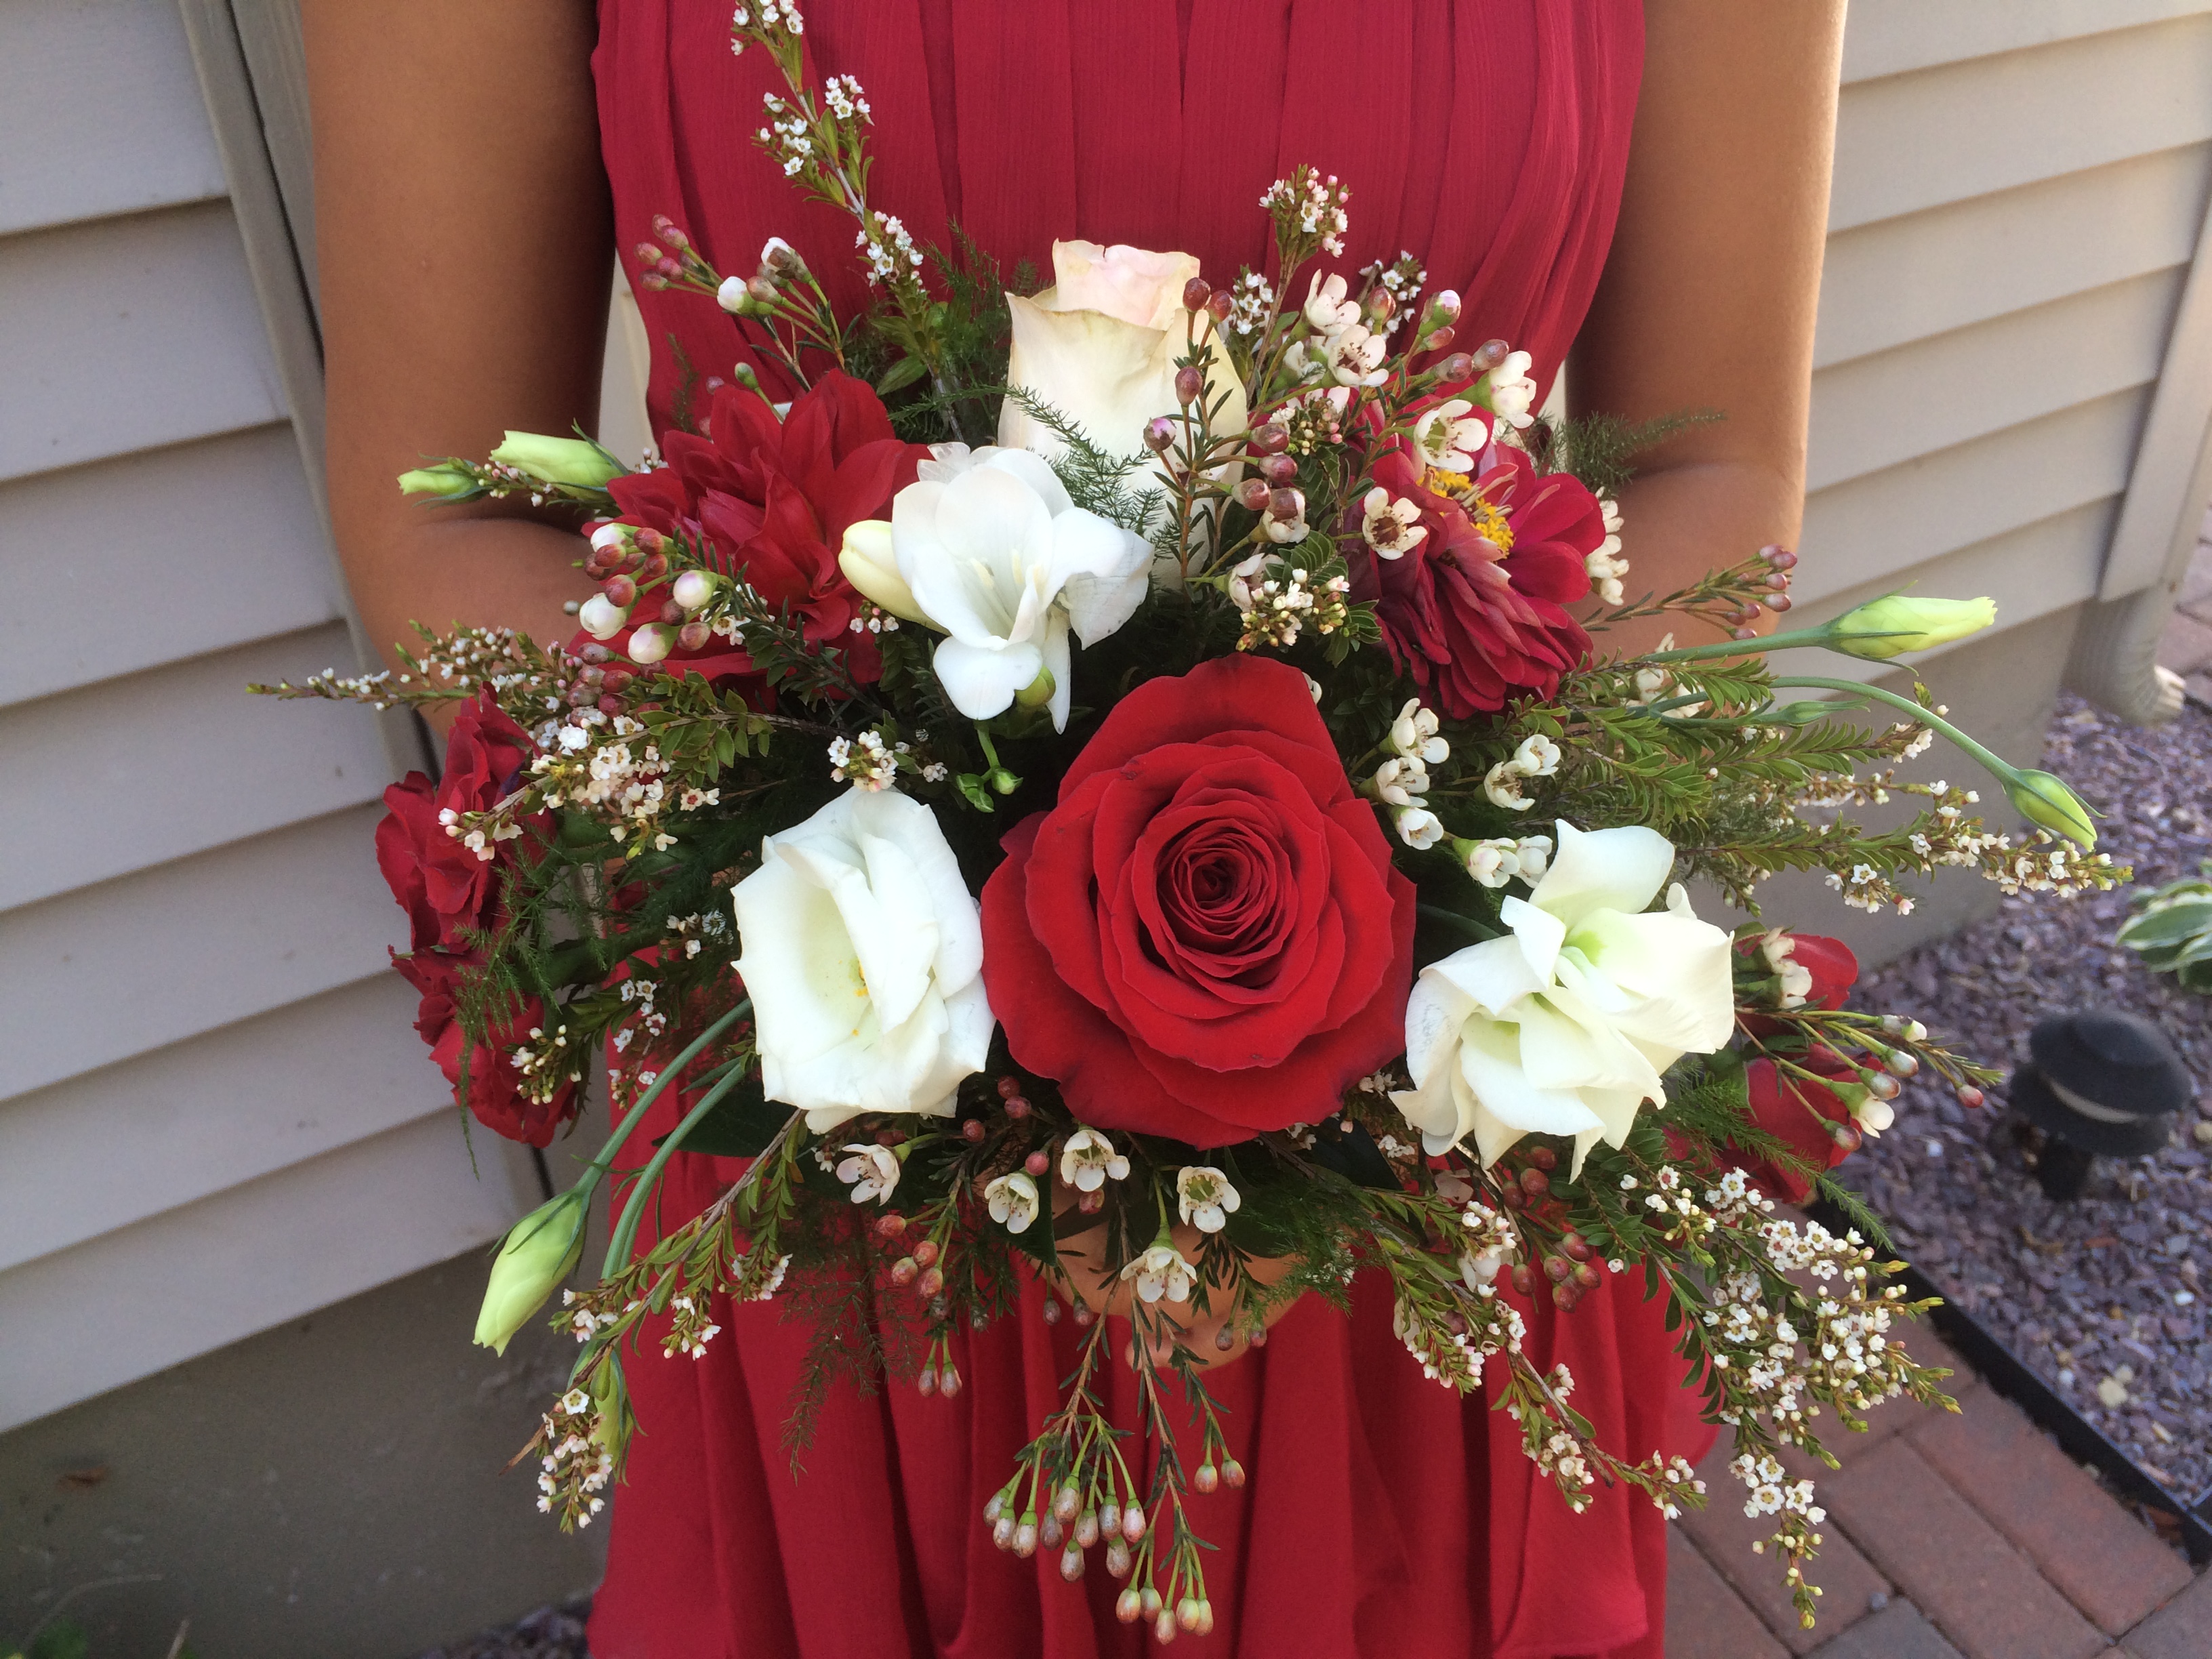
For the bridesmaids, I used most of the same flowers but fewer in each bouquet. Again, I wanted to make sure that there was movement and airiness in the bouquets for the lovely garden wedding.
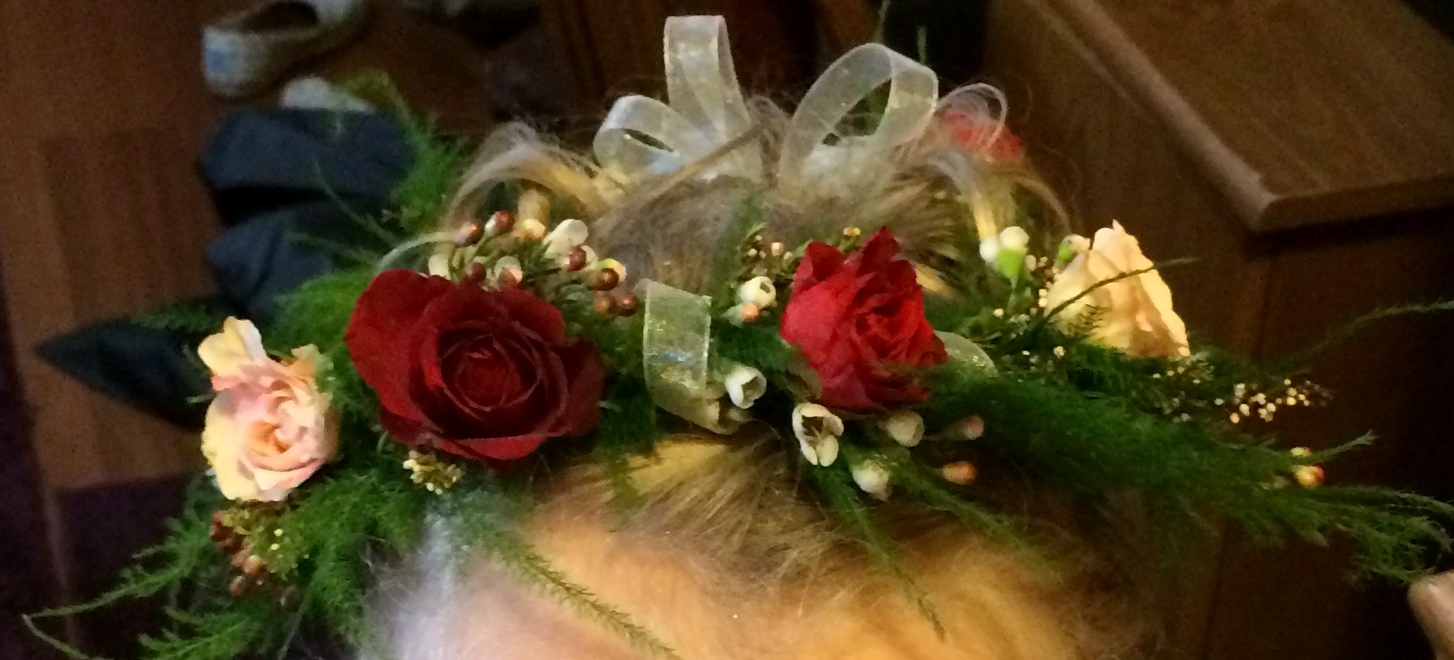
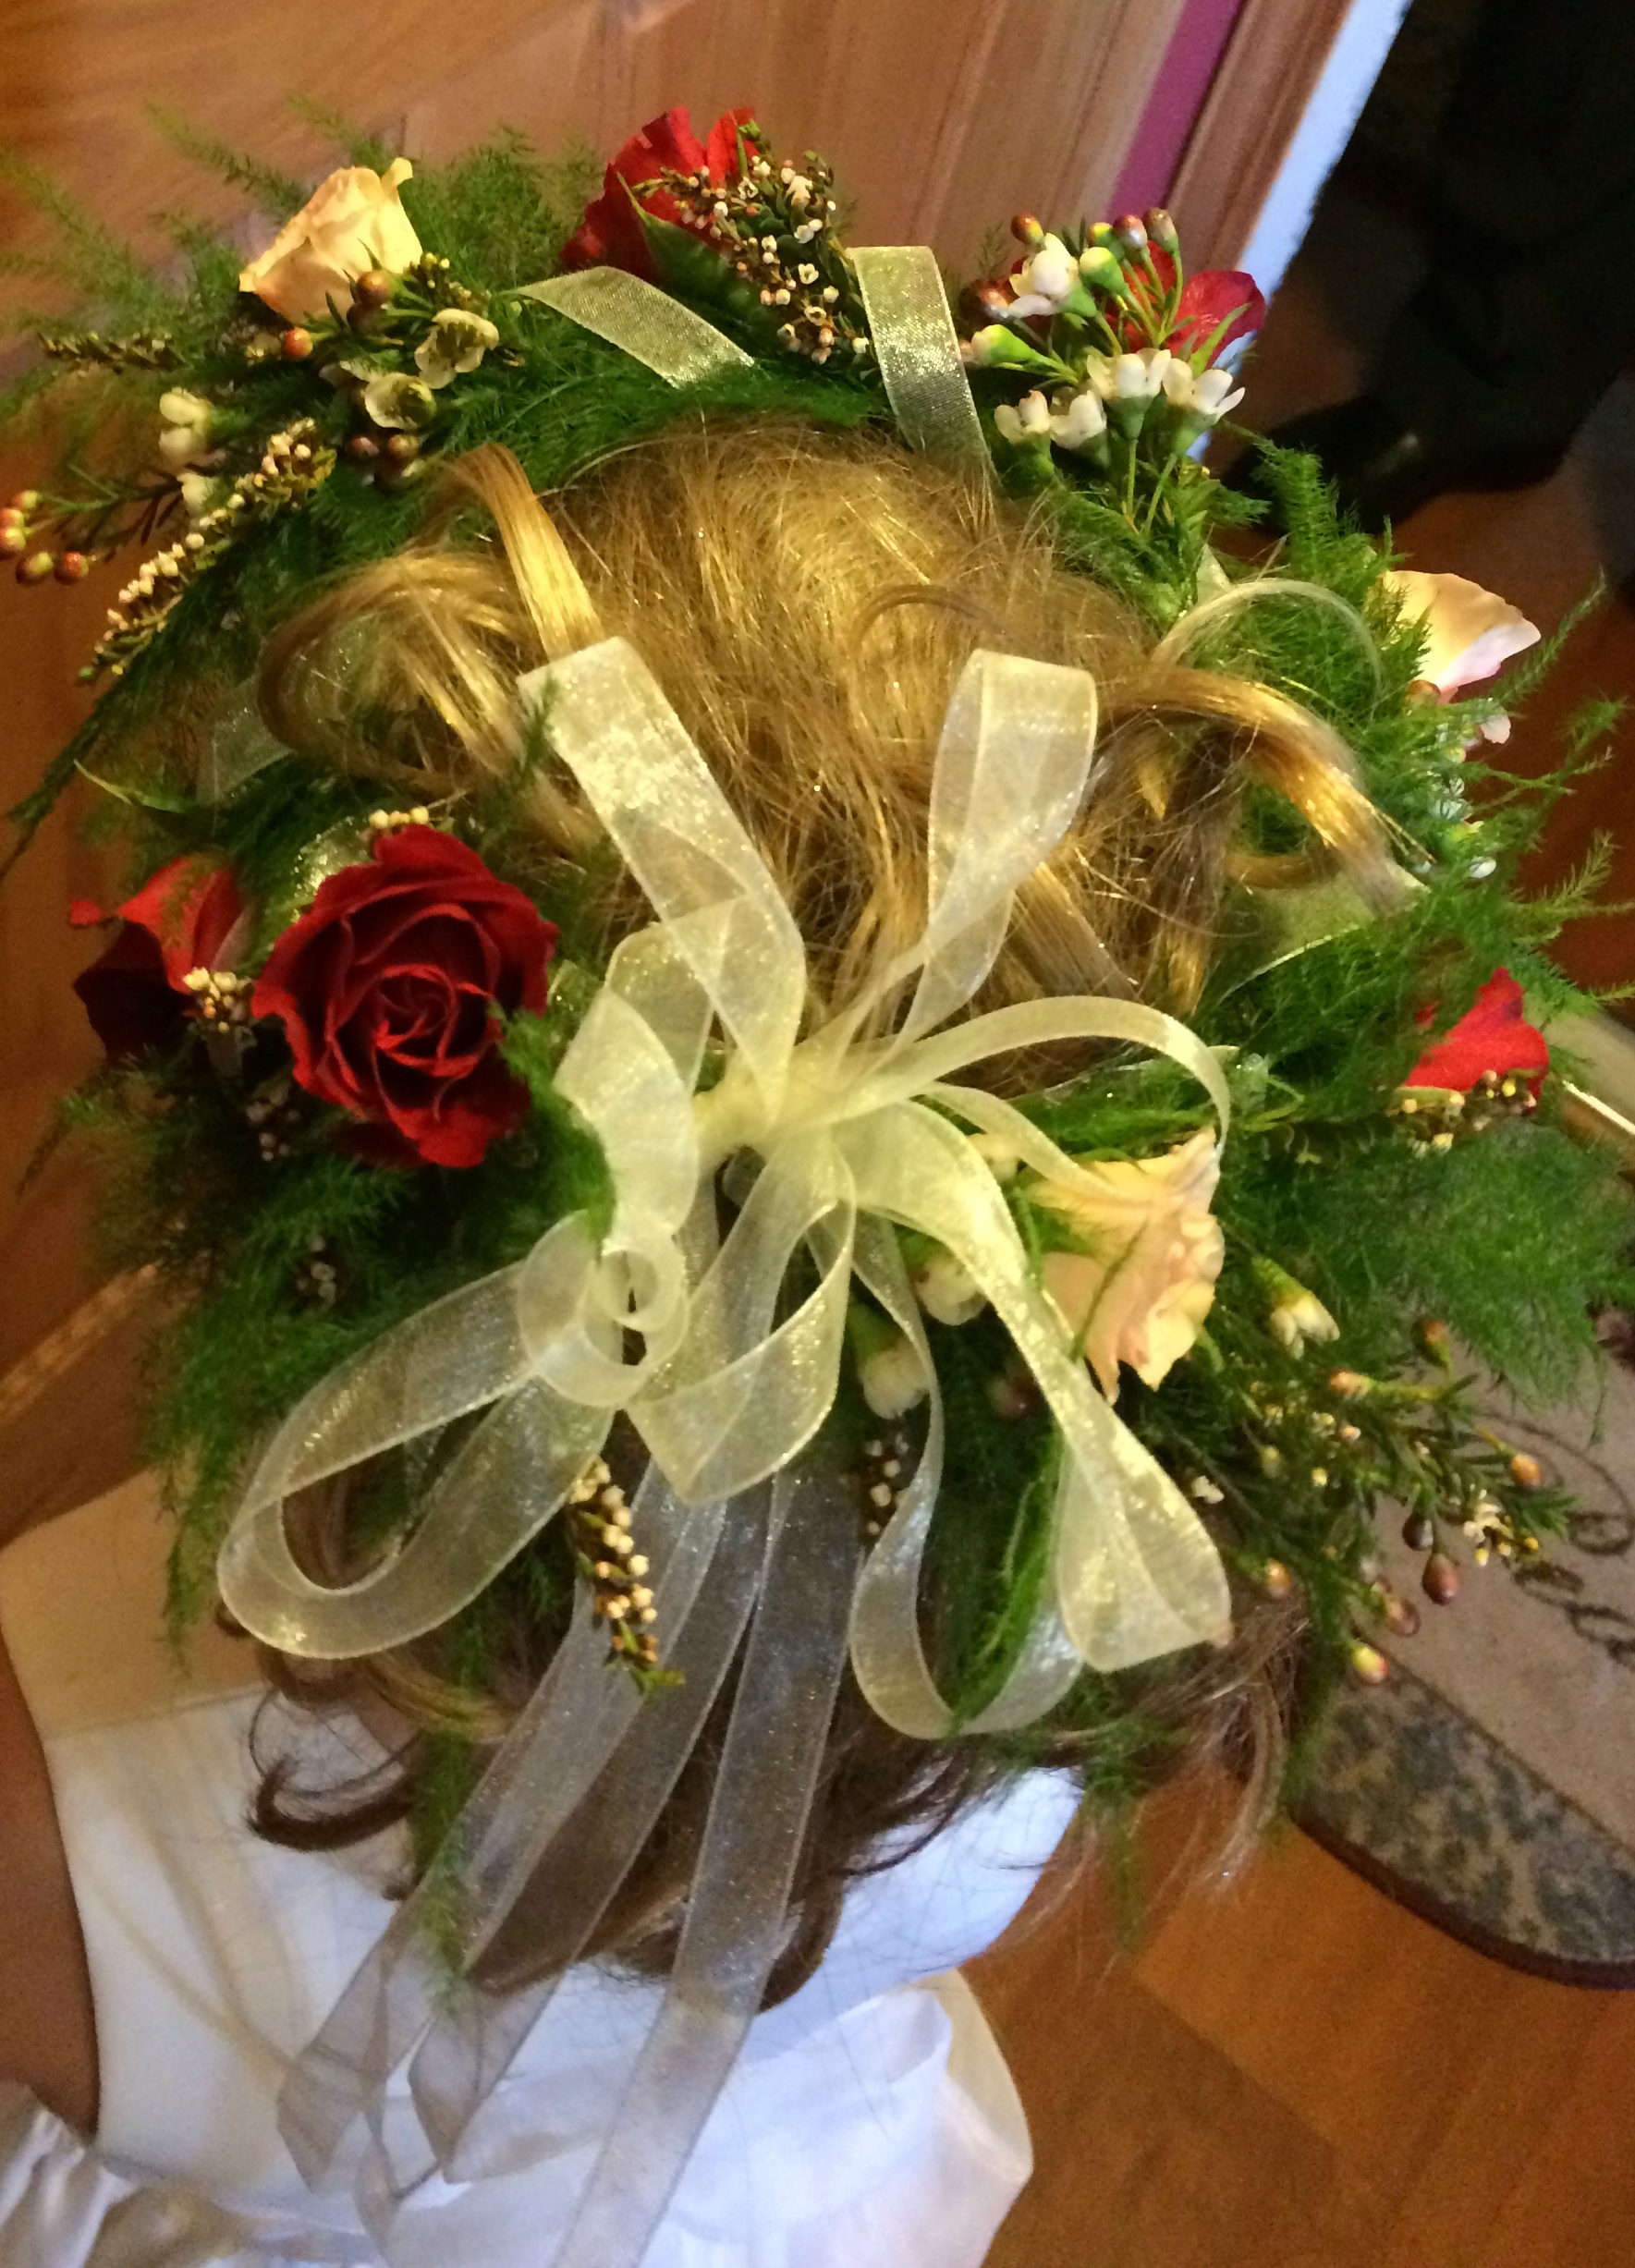
The flower girl was adorable as they all are, and she loved her halo. A halo is constructed similar to the way corsages are made. In this case, I wired and taped flowers, inserting and taping plumosa greens and the filler flowers to hide the tape. Then, when it was the right circumference for her head, I taped the garland into a halo. Next, I wound ribbon around it and left streamers down the back. A bow in the back completes the look.
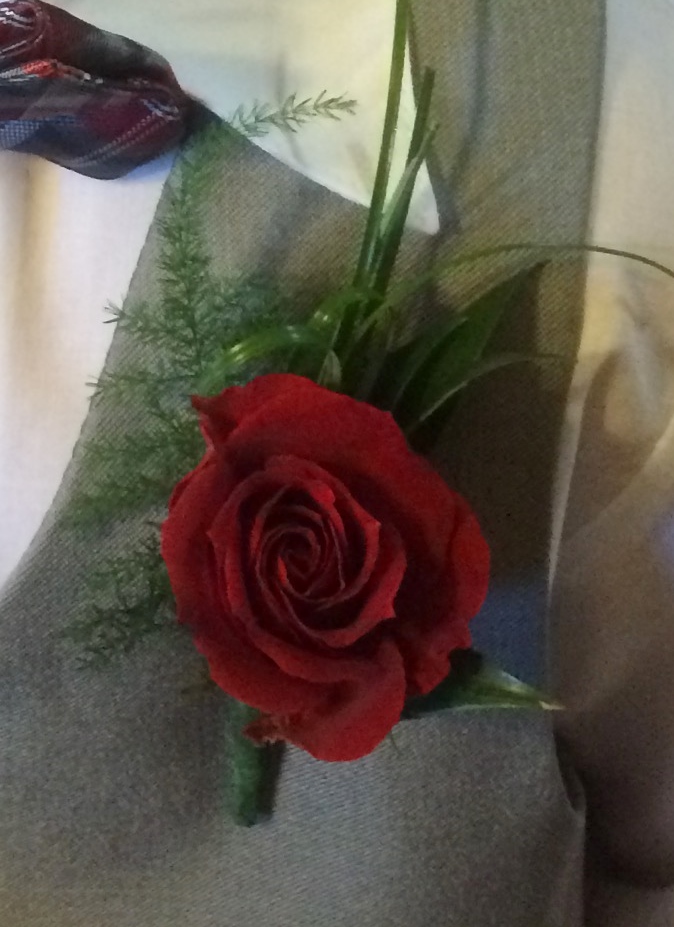
The boutonnieres for the groomsmen, fathers and ring bearer were all the same. I used one red rose (a little spray rose for the ring bearer), bear grass, nagi and plumosa.
Dazzling Dahlia Arrangement
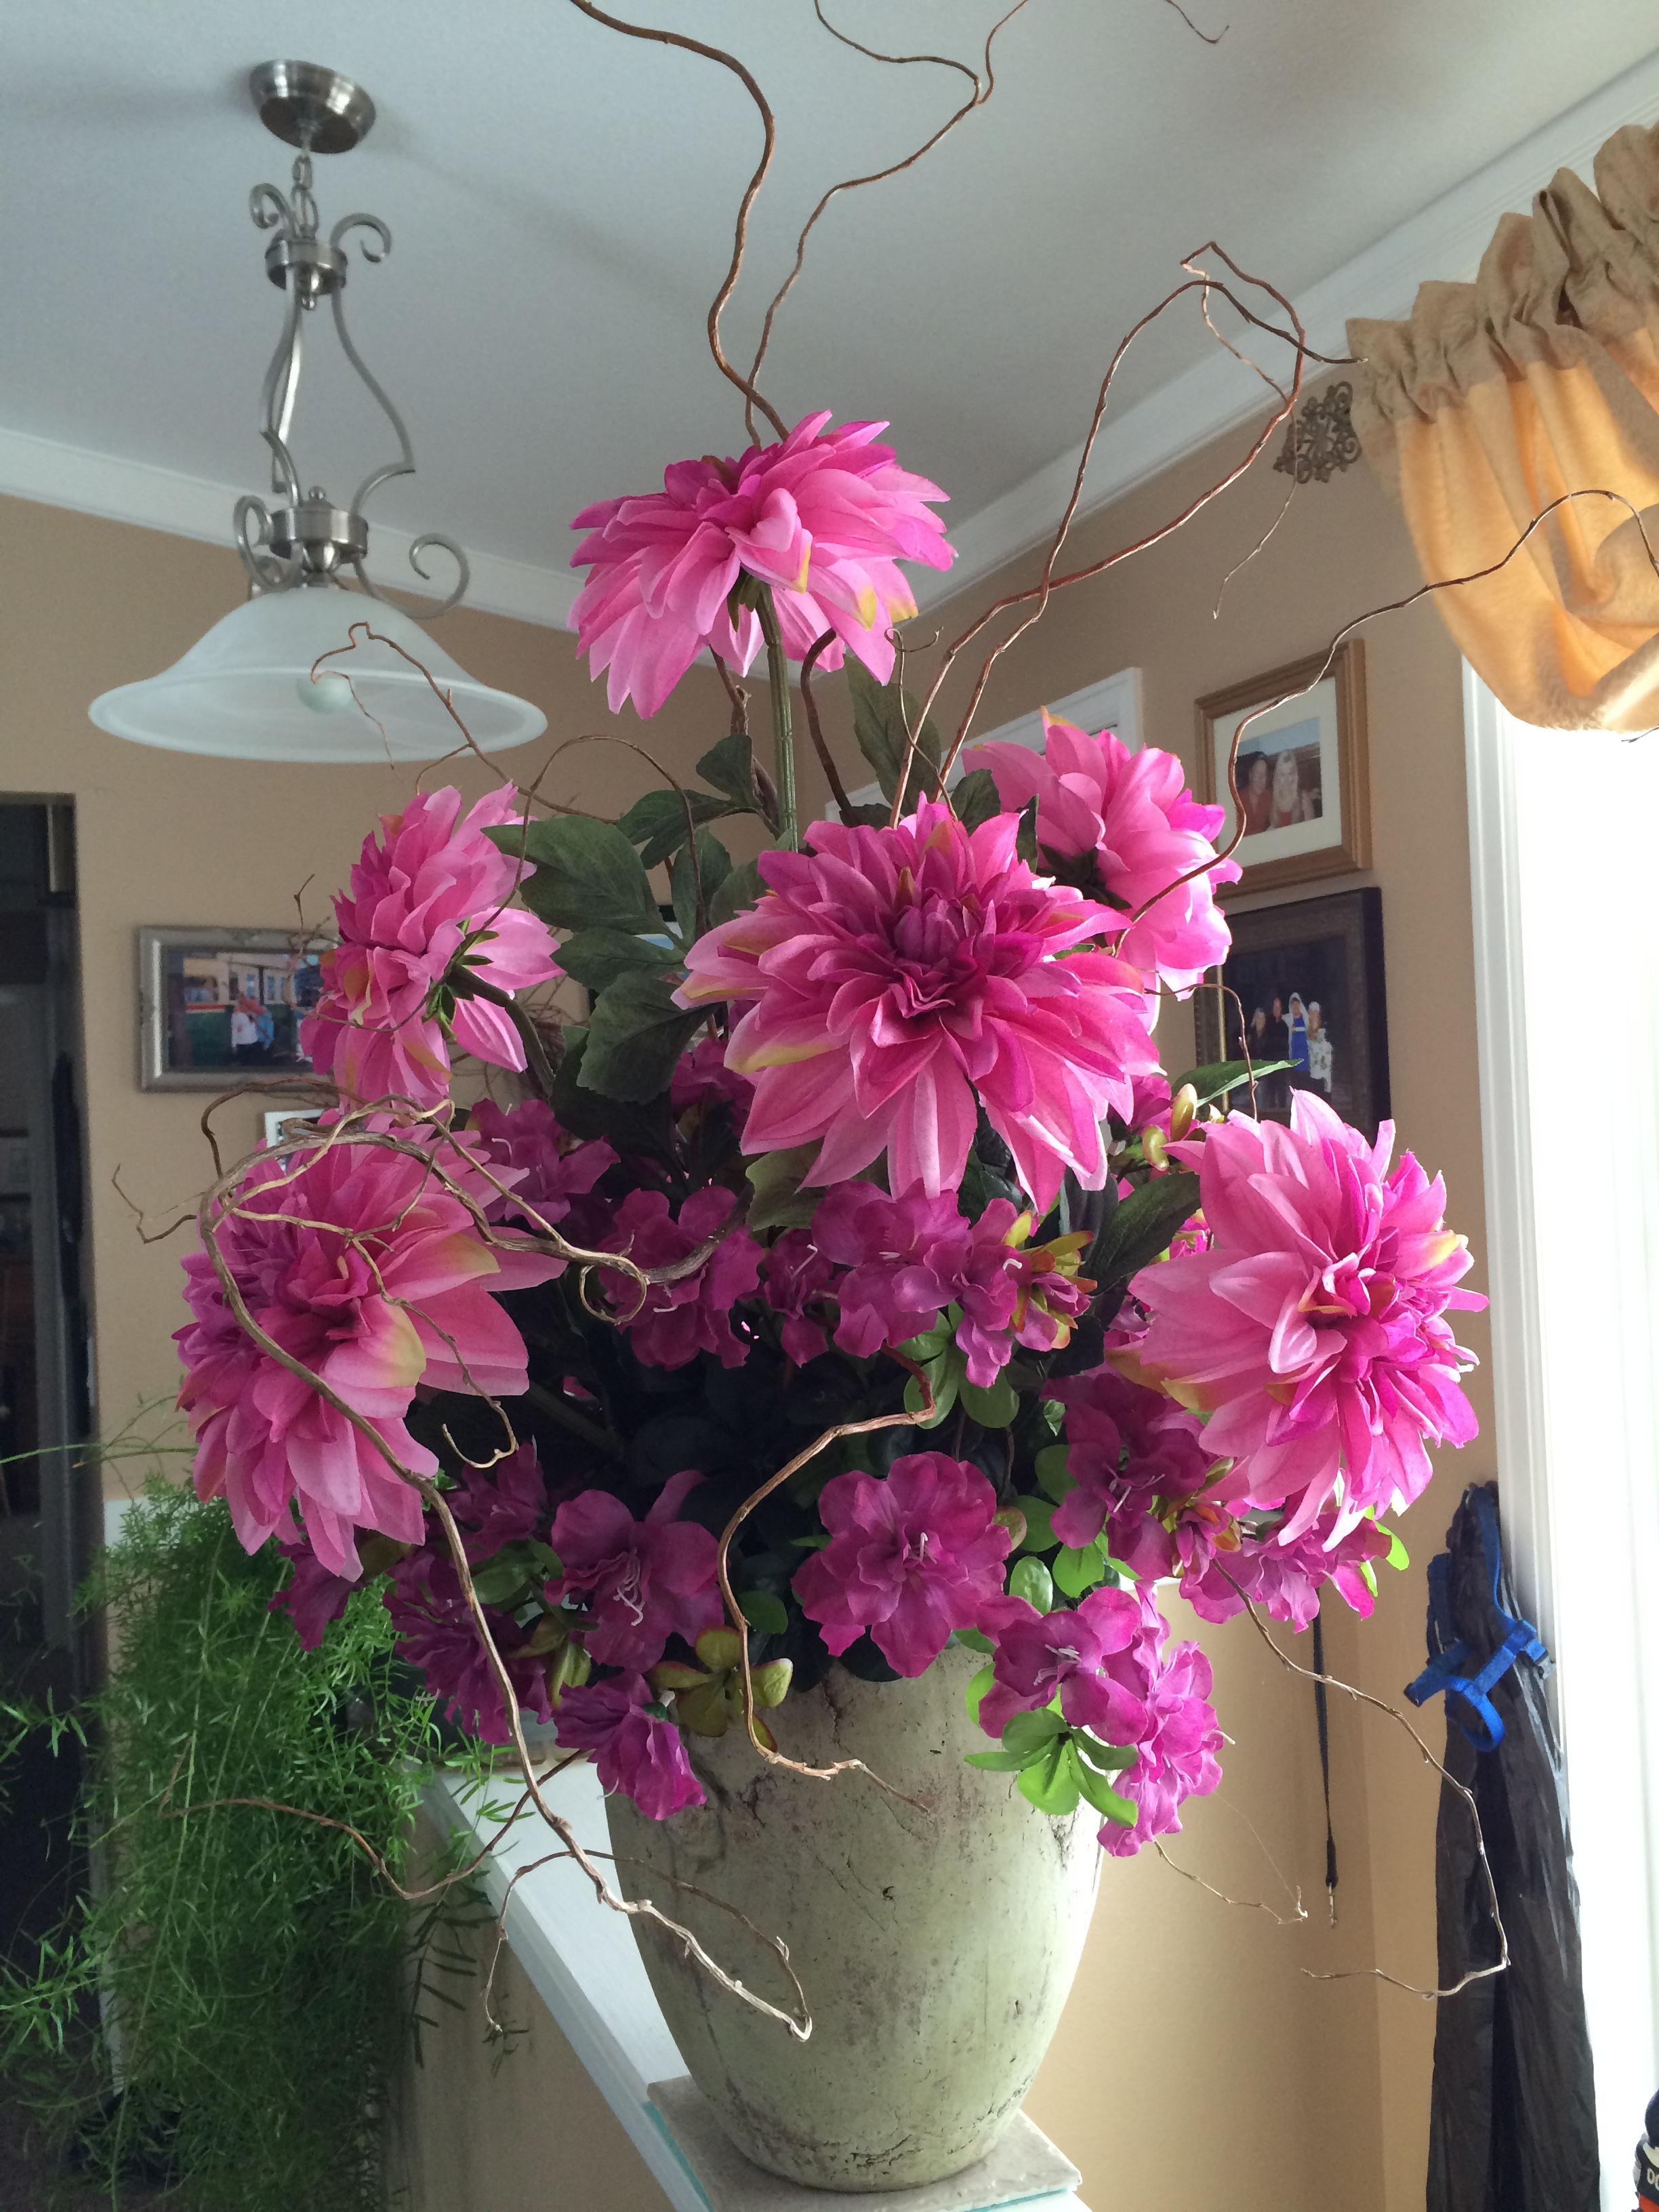
I am always reluctant to let go of all of the holiday finery--the lights, the luminous tree, the glittering ornaments. So, when it becomes clear, even for me, that the holidays are over, I make sure that I arm myself with something to replace those dazzling decorations.
This year I prowled around the local craft stores, looking for some flowers that I hadn't used before. I happened to spy one of my husband's favorites: dahlias. They are simple, yet majestic. Since they had a spectrum of pink, mauve, amethyst, and lavender, I decided to pair them with some azaleas, to bring out some of the plum punch tones.
Here is what you'll need to make this arrangement:
A large container
2 or 3 blocks of Oasis foam or similar
A handful of sphagnum or green moss
7 large blooms (dahlias, large tulips, large iris, Fuji mums, or similar)
3 azalea bushes
One bunch of curly willow
Glue gun and glue sticks
Heavy duty wire cutter
Here is the procedure:
Plug in the hot glue gun. Decide on a container to use. For this size of bloom, you will need to use a container heavy enough to support them. (You may even have one in your storage. I used a concrete garden container.)
Cut the Oasis foam bricks so that they wedge into the container tightly, leaving about an inch above the top of the container.
Cover the exposed Oasis foam with moss. (If you use green moss, you may need to get it damp first to make it more pliable. Don't worry, it will dry nicely.)
Cut the first large flower about 1 to 1 1/2 times as tall as your vase. (Or, if you are using a low bowl, about 18 inches.) Apply a small amount of hot glue on the end of the flower stem. (Do this with all of the flower stems.)Stick it about two to three inches down into the foam, right in to center of your container.
Cut the next flower about six inches shorter. Stick it into the foam at a diagonal to the right of the first flower, closer to the front of the vase.
Cut the next flower three inches shorter than the last flower and stick it into the foam to the left of the last flower, facing forward. Fill in the remaining spaces with the other two flowers.
Turn the vase around. Cut the next flower about the same length as the second flower and stick it into the foam mirroring the placement of the second flower only on the back.
Cut the last flower about the same length as the third flower and stick it into the foam, mirroring the third flower, only putting into the back of the arrangement.
Cut the stems off of the main stem of two and a half of the of the azalea bushes. Stick them into the base of the arrangement, applying hot glue to each of the stems before sticking them into the foam. Be sure to vary the length of the azalea stems, arranging them inside and out of the space in order to create depth and texture.
Cut a long, interesting piece of curly willow taller than your tallest flower, and stick into the foam close to your tallest flower. Add curly willow stalks in spaces next to the flowers (see image).
And voila! You'll love your harbinger of warm days to come!
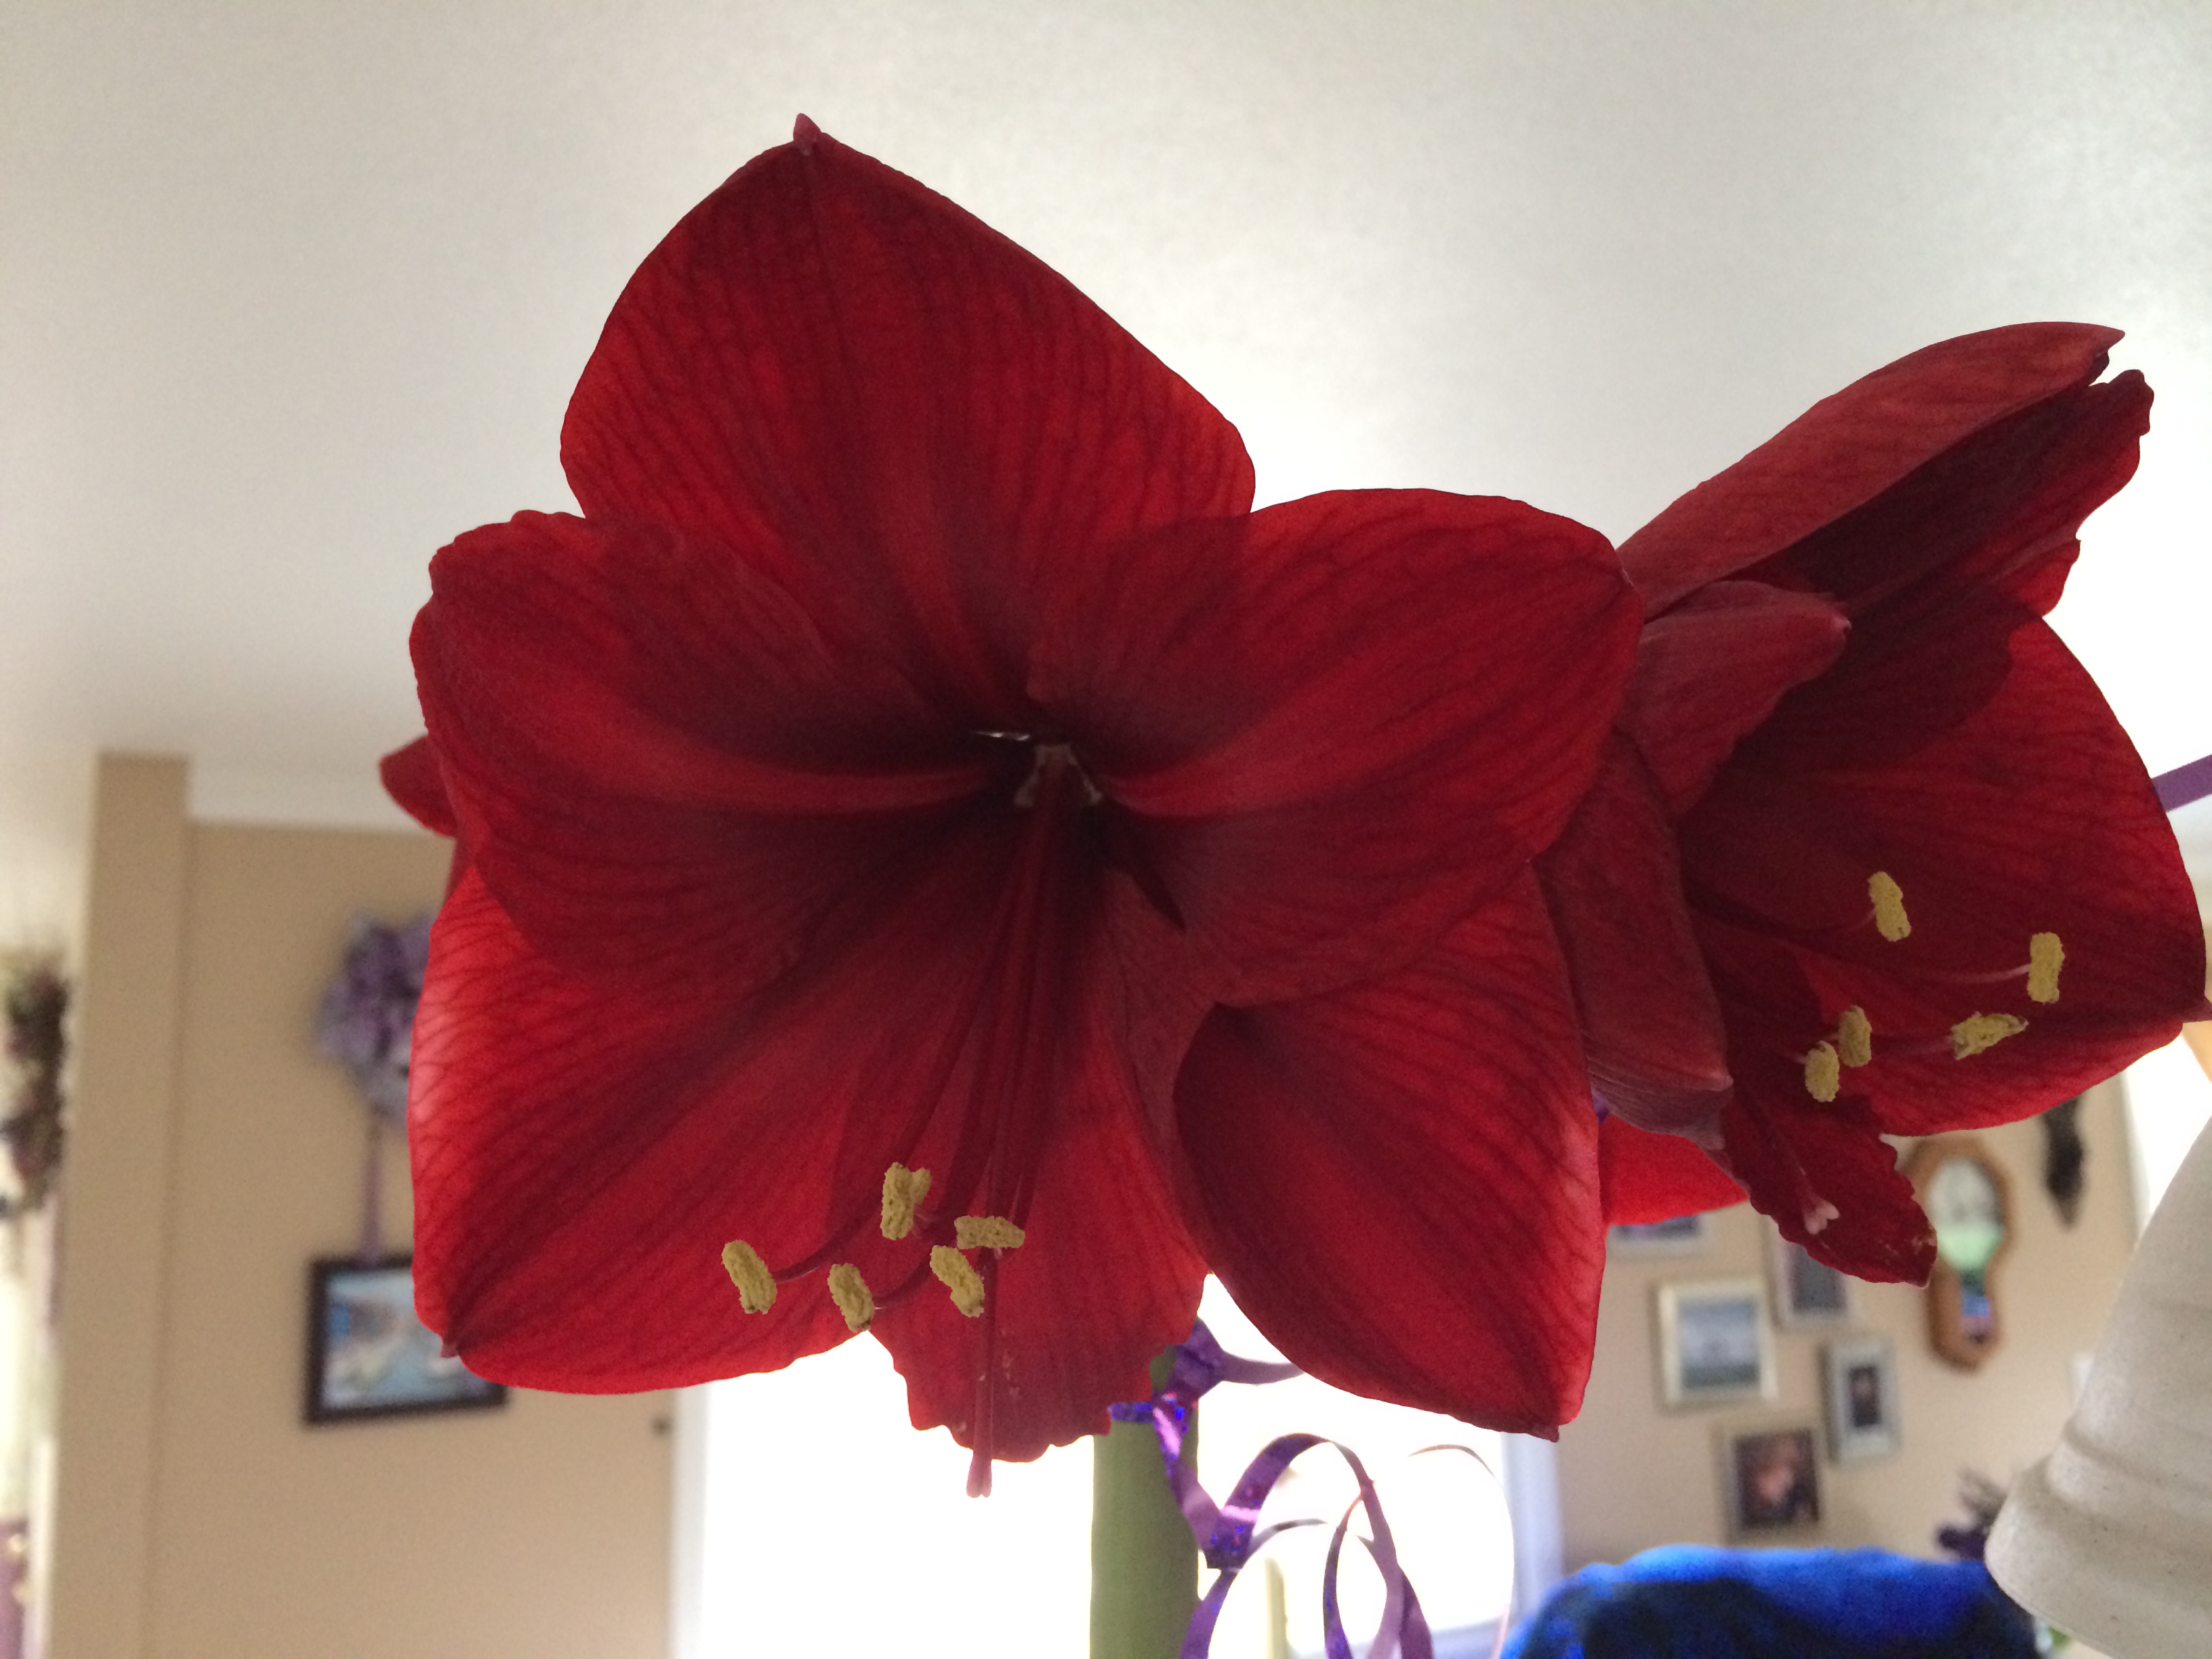
Growing Gorgeous Amaryllis
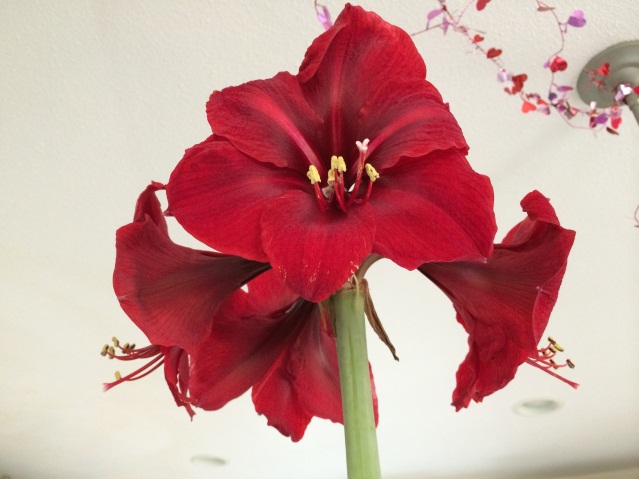
It seems as though we see kits to grow flowers from these bulbs everywhere during the holidays. So much so that we might disregard them. A big mistake. For just a little effort, you can bring gorgeous blooms into your gloomy winter days.
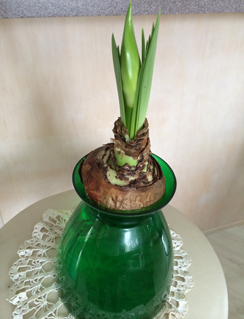
Your local nursery usually has many varieties to choose from. (They may even be on sale right after the holidays!) Ours offered a special vase that the bulb fits in. It uses just water to grow the flowers. Cool, huh? Make sure that only the roots are below the water. Add water as needed just below the bulb. Change the water every two weeks or so, being careful not to disturb the roots too much.
If you don't have one of those vases, however, just plant the bulb in a 6-inch diameter pot with drain holes that has been filled with potting soil. Plant it so that most of the bulb is exposed. Only the roots and about one-half inch of the bulb should be below the soil.
After watering the soil thoroughly initially, water only when the soil feels dry. Do not soak it.
In about a week, you will see green start to sprout. There should be two thin leaves and one thick stalk that will soon become the flower.
It will take about a month for you to see your beautiful blooms. And they last for a couple weeks! Just the right amount of joy to usher you into the spring.
Thoughtful Host/Hostess Gift
"What can I bring?" When friends invite us over, that's the first thing that I ask.
If you would like to take the host or hostess a gift, look out in your garden and see if there are blooms that you can clip. Arrange them loosely in a vase and decorate it according to your event.
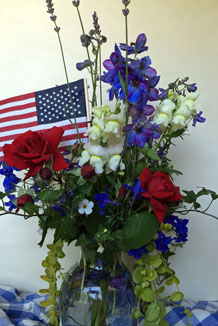
Pictured: Blue hybrid and belladonna delphinium, lavender, red climbing roses, white snapdragons and bacopa, ivy and yellow green creeping jenny.
New Pop of Color
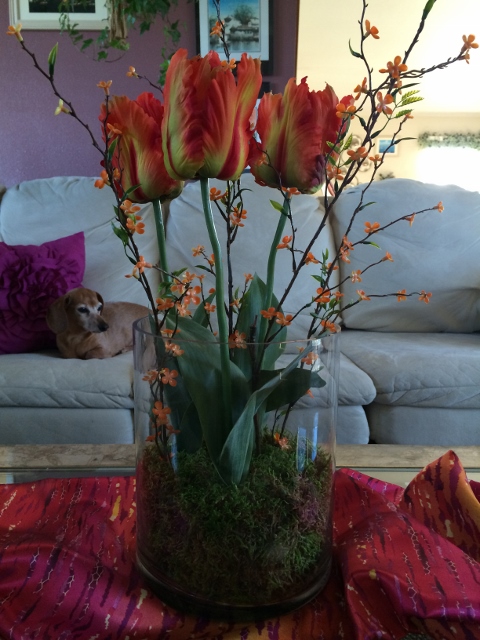
Even though the winter has barely started, I am looking to put a spring in my psyche. Thus, I have decided to introduce a new palette for my living room. Orange is popular lately, so I decided to give our space a new pop of bright tangerine.
Utilizing one of my favorite new vases, I decided to "grow" some parrot tulips inside the vase.
Here's how I did it:
Materials:
-2 blocks of Oasis foam
-green moss to cover the foam (in this case about a 12 inch by 12 inch square)
-3 parrot tulips (artificial)
-1 stem tiny flower branch, artificial (one that has about 5 branches that you can cut apart)
-1 10 inch by 8 inch glass cylinder vase
-1/2 yard of fabric that complements your tulips and decor
-wire cutter
*Dampen the green moss with water. Squeeze out excess and set aside.
*On a cutting board, place the oasis blocks side by side.
*Carefully turn the vase over on top of the foam blocks and press down lightly. Remove the vase and set it aside in the upright position.
*Cut the foam blocks about 1/2 inch smaller than the lines you made by pressing the vase on the blocks.
*Gently pull the moss and position it over the blocks, covering the top and sides.
*Carefully lower the moss covered blocks down into the vase. Wipe the excess moisture off of the inside of the vase.
*Cut the tulip stems with the wire cutter so that the tops will extend about 9 inches above the top of the vase.
*Stick the tulips into the foam equidistant apart, almost all the way down to the bottom.
*Cut the branches of the tiny flower branch apart with the wire cutter. Stick the into the foam between the tulips.
*Drape your half yard of fabric on your coffee table and place your arrangement on top of the fabric.
Voila! A new harbinger of spring to chase away the winter blues!
***Note: If you want to finish off the edges of the fabric, you can sew a simple hem. You can also use iron-on stitch witchery to avoid sewing. I have also been known to fold over the edges and use substantial tape to secure the hems.
Great Gatsby Decorations
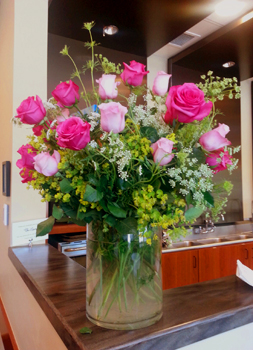 Pots of white flowers were Daisy's favorite, so experiment with large vases filled with peonies, roses, delphinium, larkspur, or just daisies. If you want more color, try this arrangement:
30 pink roses, varying colors, 20-22 inches in length, stripped of their bottom leaves
15 stems of euphorbia
10 stems of Queen Anne's Lace
0ne 8x10 inch clear cylinder vase
Buy or cut about 15 stems of bright yellow green euphorbia (aka Spurge-I'm sure the city won't mind if you trim this beautiful "weed"). They need to be about 18 inches long.
Buy or cut 10 stems of Queen Anne's Lace. (Some places have it growing everywhere!) Fill the vase with warm water and add two packages of preservative found at any florist or grocery store now. Cut 10 stems of the euphorbia about 14 inches long, stripping off the bottom leaves (about 6 inches up) and place them in the vase around the rim, crisscrossing the stems. Add 5 stems, 15-17 inches long to the middle of the vase.
Cut one inch off of the first tall rose stem and place it in the middle of the vase. After cutting the stem a half inch shorter (do this for all of the roses) place the next rose at an angle about two inches away from the first rose. Match it with a rose on the other side of the middle rose. Place the next rose about two inches from that rose. Again, match it on the other side. It should have a fan-like appearance.
Next, cut a rose a half inch shorter that the top rose and position it directly below it, angling it toward the front. There should be about a two inch space between them. Match two roses on either side, placing them between the upper roses. Repeat for the back of the arrangement. Continue filling in the spaces until the arrangement looks the same from any angle.
Next, cut the Queen Anne's Lace so that it fits in between the roses. Fill in the spaces with the ten stems, making sure that some of the stems flow below the edge of the vase. Pull up any euphorbia that has been shoved down too far. This method works for arrangement with fewer roses. Just reduce the number of greens (euphorbia or similar) and filler flowers (Queen Anne's Lace or similar).
Spring for New Blooms
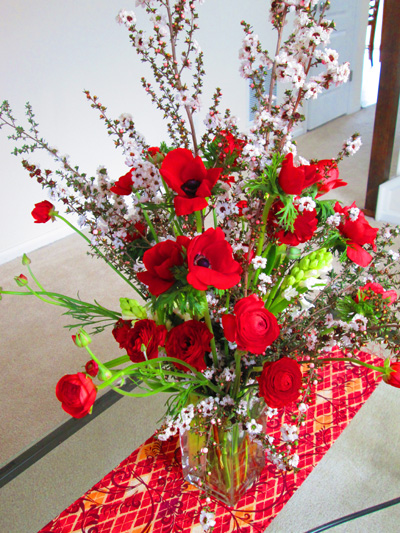 Since we "sprung forward" into Daylight Savings Time, that extra light served to motivate me to create. I started looking around for new projects. First, though, I decided to visit my daughter, brainstorm with her and to bring her some flowers.
As you may have guessed, I try to utilize blooms, branches and boughs from my yard and bring them inside to spruce up our nest. This year, however, even though we have had a mild (and dry!) winter, we were blessed with our famous March snows. Thus, our branches have not budded out as early as in the past. So, to celebrate my daughter's new position, I went off to purchase some blooms.
Sometimes there is so much to choose from that it becomes daunting to choose just what you want. Because you want it all. Here are some suggestions to narrow down the possibilities:
1. Decide which vase or container you will be arranging the flowers in. That will limit the number of flowers you can buy.
2. Decide which type of arrangement you want. In this case I wanted to create a loose arrangement mimicking spring budding branches with other spring flowers.
3. Also, consider the person whom you will be giving the arrangement to. Her tastes, favorite color or decor should factor in to the design. My daughter loves red and has a morning room that features a bright cherry red sofa. (If you are making the arrangement for yourself, decide whether you want the flowers to last, if you just want your favorites, or you want something new.)
After careful consideration, I settled on white leptospermum branches, red anemones with black centers, red ranunculus, and for a sweet spring fragrance, white hyacinths.
To construct the arrangement:
Fill the vase with warm water.
Stir in floral preservative.
Clip at least one inch of the ends of the woody branches. Arrange, crisscrossing the stems to form a mesh to enable other flowers to stand upright.
Scatter or clump the like flowers, depending upon your taste.
Make sure to keep the vase filled with warm water.
And, voila! Instantly a smile forms on your face.
If you aren't sure why you are feeling a bit blue, try picking up a few blooms and brighten up your new Daylight Savings space. The fresh fragrance and perfect petals will surely help to pull you out of the doldrums. And, you'll be well on your way to spring forward into new possibilities.
Evergreen Arrangements
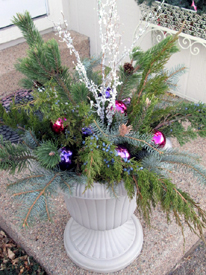 Don't you just long for the scent of evergreen? It always feels so perfect around the holidays. Whether it's nostalgia or just the fresh scent that entices us, most of us want to gather boughs and fashion them somewhere in and around our homes.
This year I decided to create some arrangements using the large garden urns I used for geraniums last summer. After pulling the geraniums out, I left the soil in the urns. That makes a perfect medium to poke the stems of evergreen in, especially since we have had a mild fall and the soil isn't frozen.
First things first. I gathered boughs from several different types of evergreens: juniper with those beautiful blue berries, pine, and blue spruce. I bought some cedar and holly branches, since they don't grow well in this climate. The good thing about evergreen is that you can cut it and leave it in a cool place (might as well be outside) until you need it. It will stay fresh for over a month.
Next, I wanted a little glitter for my arrangement. I went to our local craft store and bought a stem of artificial icicle branches for the center of each arrangement.
Then, alternating with the different types of evergreen, I removed the bottom needles from the stems and stuck the branches upright around the icicles. I continued to place them at about forty-five and thirty degree angles, filling in the spaces until finally some of the boughs hung over the sides of the urns.
It's at this stage that you can be as natural or colorful as you want. I have decided to place colorful Christmas balls in and around the top of the urn for color and to create interest. If you like more natural color, you can clip or purchase some winter berry or pepper berry branches that provide riotous red and pink hues.
Above all be creative with your holiday decorations. They do not need to cost a lot to bring you the holiday glow.
Fall for Fall Splendor
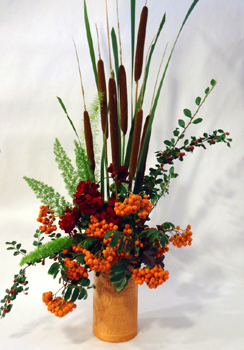 My honey and I were just commenting on how September is our favorite month in Colorado. Annuals burst with renewed energy. Temperatures soar during the day, but chill at night for easy sleeping. Every year I take advantage of the beautiful floral bounty and bring some of it inside to enjoy.
This year I have assembled Mountain Ash berries, Caliope red geraniums, cattails, cotoneaster branches, foxtail ferns and burgundy coral bell foliage. I looked around for a unique container and I found a wine cooler just the right size and color to complement the fall colors.
Since it is essentially a clay pot, I lowered a glass drinking glass down into it so that the water that the flowers needed wouldn't bleed out of the cooler and stain any surface it might come in contact with. I started out by clipping the Mountain Ash berry stems so that their heads would come in contact with the rim of the cooler. The longer stems have multiple berry clusters, so some hang lower. The crisscrossed stems gives the arrangement a structure to hold the rest of the stems in place.
To add height, I added my perennial favorite: cattails. These provide a rich chocolate hue, warming the brightness of the berries. Add several at different heights.
My pots are bursting with riotous color, so I snagged some gorgeous Caliope red geraniums. These last surprisingly long in water as a cut flower and add richness to the arrangement.
Now I was down to accents. Sometimes fall colors can be a bit cliche, so I wanted to ramp up my senses with chartreuse green foxtail fern. I placed a cluster of the vibrant fern and some burgundy coral bell foliage on each side of the arrangement providing contrasting sparks of color and texture. Sweeping diagonally from the top to the bottom, long stalks of cotoneaster with tiny red berries along their stems complement the geraniums and add height to the right side and length to the left side. Voila!
And, all of this from the backyard and a repurposed container. So, wander outside with clippers in hand and see what you can find calling to you. Leaves, branches, berries, rosehips, fall blooms and foliage are just waiting to grace your home. Don't be afraid to do a little clipping.
Tulip-Topped Table Runner
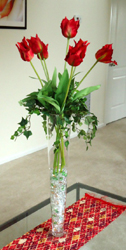 Want to brighten up your living room? Add a colorful table runner to your coffee table. You can easily sew one of your own for about $5-7, or you can look for just the right one in your local home furnishing store. I found fun fabric for the one pictured and embellished it with a flirty fringe.
After I finished my runner and draped it on the table I decided to make an arrangement with impact.
Try this easy arrangement:
Fill a tall vase with clear or colored rocks found at your local Dollar Store or hobby store. Buy a faux silk ivy and place in the top of the vase. Arrange the tendrils so that they dangle down the sides of the vase. Add gorgeous parrot tulips to create a dynamic pop to your living space.
Pussy Willows-a-Buzzin'
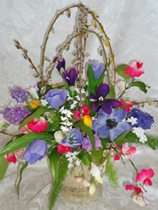 Some plants just intrigue me. Pussy willows just seem to invite me to stroke their soft, bunny-like catkins and whisk me away to fairy land. Be careful, though! The bees love them, too!
Try this burst of spring!
Cut some stalks of Pussy Willows now before the catkins burst. Bend them into a handle to form a basket-like arrangement. Fill in around them with bundles of your favorite spring flowers. You'll have a unique "basket" of flowers.
Red Twig Surprise Arrangement
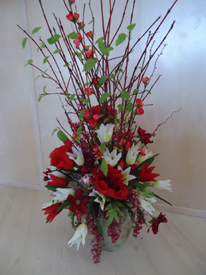 Imagine my surprise when the red-twig dogwood I put in one of my Christmas arrangements started sprouting! Since Christmas greens (in this case pine and juniper) last so long, I just kept watering the floral foam, and voila! Tiny chartreuse leaves springing from the previously dormant twigs. If that's not a harbinger of spring, I don't know what is.
Yep, I finally had to get rid of the dry Christmas greens. But, I kept the twigs in place, and decided to create a spring arrangement around the newly sprouted twigs. I always try to look at the setting first and color coordinate-not matchy-matchy-so that the colors flow into each other. In this case I chose to pull the red out of the painting that this will sit close to in order to bring a pop of vibrant spring into the room. And since I am still using my favorite recycling practice of reusing a fabulous container and, in this case, newly sprouted twigs, along with a few floral additions, the arrangement becomes new again. Renaissance for your living room, all for an amazing $20.
Add a Splash of Spring to Your Space
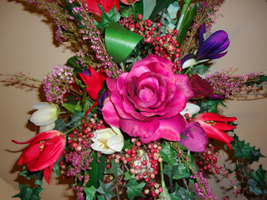 It's always a little sad to clear out all of the sparkly holiday decorations. Your living areas always look really bare, which is kinda depressing. I was determined not to get sucked down into a blue mood. I went to work.
Now, I know what you're thinking: "I'm broke from trying to make the holidays shine with excitement". Turns out, I am, too. So, while dismantling my decorations, I carefully saved the dried flowers that I used in my holiday arrangements, hoping that I could give them a new lease on life in a colorful new arrangement for my living room. But, I didn't just want to use pepper berry and heather in my new arrangement. It was time to head down to the basement.
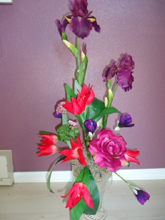 After each season, I pack up the flowers and save them for the next year, with the idea that I might be able to reuse them in a different design. Every year I'm surprised by what I find. I have an idea of what I've saved, but there is always a new flower that I found on sale the previous year that is just waiting to be rediscovered. This year is no exception. I hauled up all of the flowers, not just the newest ones, so that I could choose from my whole collection. I was ready to start.
Before starting to design an arrangement, consider where you will place it. In this cast, the arrangement will stand next to my husband's favorite painting. Splashing with color, the painting gives me several choices of which colors to use in the arrangement.
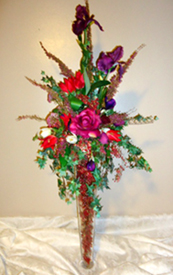
I knew I wanted the arrangement to be tall, so I chose a tall pilsner glass that I used for my daughter's wedding reception. Since I had many pepper berries left over from the holidays, I filled the glass with them for an embellished flair.
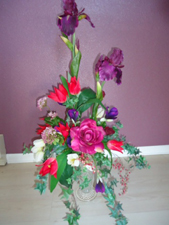 To save money on a container, you can use two 2-inch high by 6-inch across round plastic dishes with their flat bottoms glued together. I secured a piece of foam in the top of the container with florists' tape. Then, I covered the foam with Spanish moss.
I decided to place my container on a shorter vase in order to facilitate arranging.
Select flowers that have impact, with a variety of colors and sizes that complements your vision.
I wanted to add ivy to drape down, linking the arrangement with the vase. In addition I have added pepper berries around the base of the arrangement as well as interspersed throughout the arrangement.
Make sure you tuck flowers in the center of the arrangement, creating texture and curiosity.
For even more texture and to add more natural elements, I added dried heather for height and shape.
Voila! Here it is in its special spot. This gorgeous arrangement springs from found flowers and containers. Don't be afraid to mix and match. This is recycling at its most fun!
Deck with Boughs
Every Christmas season I long for the scent of evergreen. Not just an artificially scented candle, but the real thing. Fortunately, we have several evergreen shrubs and trees waiting in our yard for me to step outside and give them a haircut. (Or, you can buy boughs at any florist, greenhouse or home improvement center.)
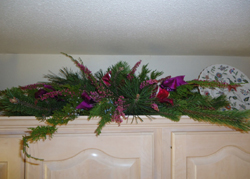
The best initial course of action is to decide where to place the boughs. This year I fashioned a valance and wreath for the front entry, arrangements of boughs draping down from the tops of the cabinets, and a couple of arrangements for inside and outside of our home.
Arrangements with several types of evergreens always look the most appealing. For example, I cut branches of Blue Spruce, juniper (with the berries), long and short needled pine and holly.
This year I found inexpensive fresh garlands at a warehouse store. In addition, look for fund raising opportunities that offer fresh wreaths that will adorn your entryway. Of course you can make your own fresh wreath by combining several types of evergreen. You can keep it simple or you can doll it up with bows, berries, flowers, birds and any other holiday cheer you find. Here's my 2011 Christmas front entryway wreath:
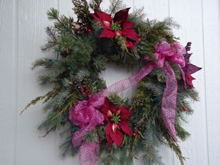
To make a fresh wreath, start with a long pine bough. (You may want to start with a wire frame to make the wreath even sturdier.) Wind it into a circle and lash it with thin wire found at a florist or craft stores. Bundle six to eight inch branches of different evergreens and lash to the circle. Continue around the circle, overlapping the bundles and lashing them to the pine bough or wire frame, so that you can't see the stems of the previous bundle. Determine where the top is and twist a chenille stem (pipe cleaner) at the back to hang it from. Add a bow to the top, the side, or the bottom of the wreath. You can also hot-glue berries, ornaments, birds or weather-proof flowers to your wreath.
If you like a wreath that is not as full, wind several pine boughs and lash them together.
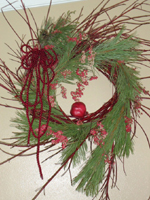 Remember the red twig dogwood wreath I made? For Christmas I stuck pine boughs among the twigs, and added pepper berries and cording. Voila! Inexpensive and gorgeous Christmas essence.
Enjoy the warm praises as all your friends marvel at your clever arrangements and inhale the fresh evergreen during this sweet season.
Last Minute Holiday Decorations
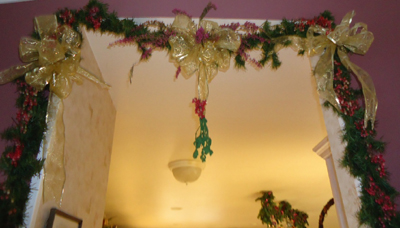
Want some last minute decorations for your holiday party? Grab some good deals at your local craft store. Buy a length of garland and a sprig of mistletoe. Drape at a strategic place so that your guests can take advantage of their kissing spirit. Then, tie a couple bows and stick in some berries and some long lasting flowers along the length of it. Here's the result:
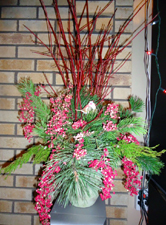 Another idea is to look around your house for a beautiful pot that can hold water. Soak a block of oasis floral foam (available at any florist or at craft stores) and wedge it into the pot. Cut several red twig dogwood twigs and stick them into the foam. Cut pine and juniper branches at varying lengths between 8-12 inches long. Strip the stems of needles about two inches from the end of the branches. Stick into the foam, filling in around the dogwood branches. Add berries, pine cones and perhaps a cute bird. Simple, yet elegant.
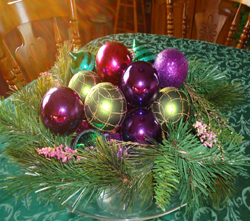
An even easier table decoration is to fill a footed glass dish with colorful Christmas balls. First, wind some artificial greenery are the circumference of the dish. Then add balls to match your decor. They can be of varying shapes and sizes to add sparkle and enchantment. Then use some of the long lasting fresh flowers into the greenery. In this case I used heather, which dries beautifully. Your family and friends will delight in your festive table.
Market Bunches
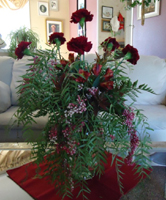 Pictured: Burgundy carnations, red alstroemeria, and pink pepper berry with leather leaf and bronzed buttercup foliage.
Wow, we got dumped on. Even though the forecasters told us that it was coming, and we were somewhat ready, it's always amazing to wake up to 8-10 inches of snow on the ground. Since your flower garden is now shivering under a blanket of snow, now is the perfect time to take advantage of cut flower specials in your local florist or market.
Buy a bunch of gorgeous seasonal flowers, some new and funky greenery and/or filler flowers and arrange them in a pretty vase. Here's how:
Fill a vase with warm water. Add a packet of preservative that came with your bunch of flowers. Stir to dissolve.
Start with the greenery first. After you cut the stems, intertwine them so that they make a structure to stick the flowers into.
Cut at least one inch off of the stems of the flowers, preferably with a sharp knife, so that they will be able to drink the water more effectively.
Arrange the flowers as a one-sided arrangement or one that's all around, depending upon where you will be placing your creation.
If you want to include filler flowers (small flowers like Baby's Breath) insert stems in between the main flowers, being careful not to overpower your main arrangement.
Best Flowers and Berries for Fall
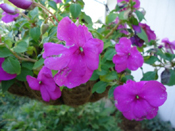 September is the best. Confused flowers think it's still summer and bring us another round of abundant blooms on our roses and annuals. They smile up to the brilliant blue sky unaware of the snowy weather just around the corner. The nights are cooler, so the blooms last longer. Not only do we continue to smell the summer flowers, the fall flowers are just beginning to emerge.
Asters, after hanging around almost all summer teasing us, begin to pop in September. We already whacked them down a couple inches in July so that it would multiply the blooms on each stem. The periwinkle, hot pink, white, lavender and plum blossoms look like mini daisies and delight that corner of the garden.
 Mums, the go-to florist flower since it's so long-lasting, seems to take on a whole new function in the fall garden. It's actually a welcome globe available in a myriad of colors: oranges-peaches, yellows-golds, pinks-burgundies, lavenders-plums, roses-rusts, blushes-whites. Pruning these in July as they emerge will also multiply the blooms.
After the roses take their final curtain call and drop their fading petals, they leave behind gorgeous rose hips. At first they are chartreuse, and then the cool nights burnish them with the startling persimmon orange and scarlet colors of autumn. If you use them in an arrangement, treat them as you would a rose stem. Cut them on an angle with a knife and quickly put them in water. They are equally beautiful on hot-glued to a wreath. They dry gracefully.
 My favorite berry is bittersweet. My dad used to send me these branches. They grew on my dad's property, and actually are parasites, albeit gorgeous ones. They grow best in acidic soil, so sadly I cannot grow them in Colorado. I have harvested them two ways. You can wait until the berries pop open when they reveal a red inner berry. Or, you can pick them when they are still light orange; they will pop later. They are beautiful made into a wreath or in various arrangements. Tuck sprigs of them into a bowl of gourds and mini pumpkins for your dining room table. Make a bittersweet garland for your mantle or for a sweet welcome above your front door.
Mountain Ash berries boast the same color as bittersweet orange before they pop. Or, as we call it in Colorado: Bronco Orange. They hang low in orange-size clusters, two or three to each three-foot branch.
Cotoneaster berries blaze with the spicy red of chiles. These berries climb up each stem, making the whole stem a red hot poker.
Here is an arrangement of most of the flowers and berries. mentioned above. It's fun to bring the bounty to enjoy inside. Experiment with whatever grows in your garden. The result will fuel your soul.

1. Find out the flower of your anniversary month. Order a bouquet from a florist or find a potted plant at a local nursery.
2. What is your spouse's favorite flower or shrub? Find it in his or her favorite color if possible and display the surprise.
3. Arrange a dozen in a vase or put a "this comes with installation" card attached to the shrub.
4. Often flowers from the grocery store don't come with greenery and they look a little naked in a vase. Try clipping greenery from your garden, peony leaves, ferns, iris stalks, ivy, or hydrangea leaves to tuck in the vase with your flowers. "Filler" flowers grow well, too, in a garden. Try using baby's breath, sweet William, coral bells, monte casino, statice, misty blue, forsythia and pussy willows.
5. An orchid plant is an elegant pleasure.
6. A bouquet of orchids will be stunning and will be long-lasting.
7. Remember what s/he said last year when remarking upon how gorgeous lilacs, roses, hydrangeas, camellias, jasmine, in the neighborhood were. Plant one in your own yard so that s/he can always have one to admire.
8. If s/he doesn't have a favorite, visit your favorite florist and choose several that you think s/he'd like. Have the florist arrange them and then deliver them to the workplace, home or just bring them home with you, so that you can see the special gasp the surprise brings.
Workplace Stress Releasers
In a time when we see outsourcing and the push for more productivity there are a few things we can do to make the workplace less like a machine and more like a garden.
1. Cut some blooms from your own garden; arrange them in a vase and set them on your desk, or better yet, a coworker's desk.
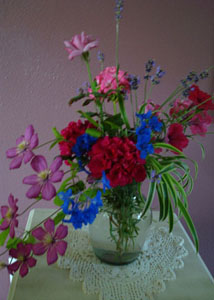
Pictured: lavender and pink swirled rose,
raspberry clematis vine, blue delphinium,
pink and fuscia geranium, fuscia petunia,
lavender sprigs and a spider plant cutting.
2. Bring in a green plant that thrives in low light, and set it on your desk. Here are some choices:
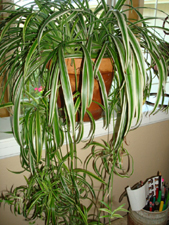
Spider Plant

Peace Lily (Spathyphyllum)
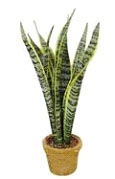
Snake Plant (Mother-in-law's tongue)
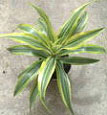
Dracena

Devil's Ivy (Pothos)
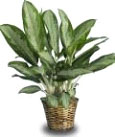
Chinese Evergreen
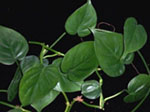
Philodendron
3. If you love those cute little flowering plants you see in the florist shop, greenhouse or grocery store, go ahead and pick one up. They will brighten any space.
Note: Don't expect these to live past a couple weeks. They should be viewed the same way as cut flowers. Also, they don't transplant very well, since they have been "forced" to flower in a greenhouse.