Cake and Cupcakes
Raspberry Almond White Chocolate Chunk Cupcake
Lemon Raspberry Roulade
Pink Champagne Cupcake
Strawberry Cupcakes
Cinnamon Streusel Cupcakes
Peppermint Patty Cake
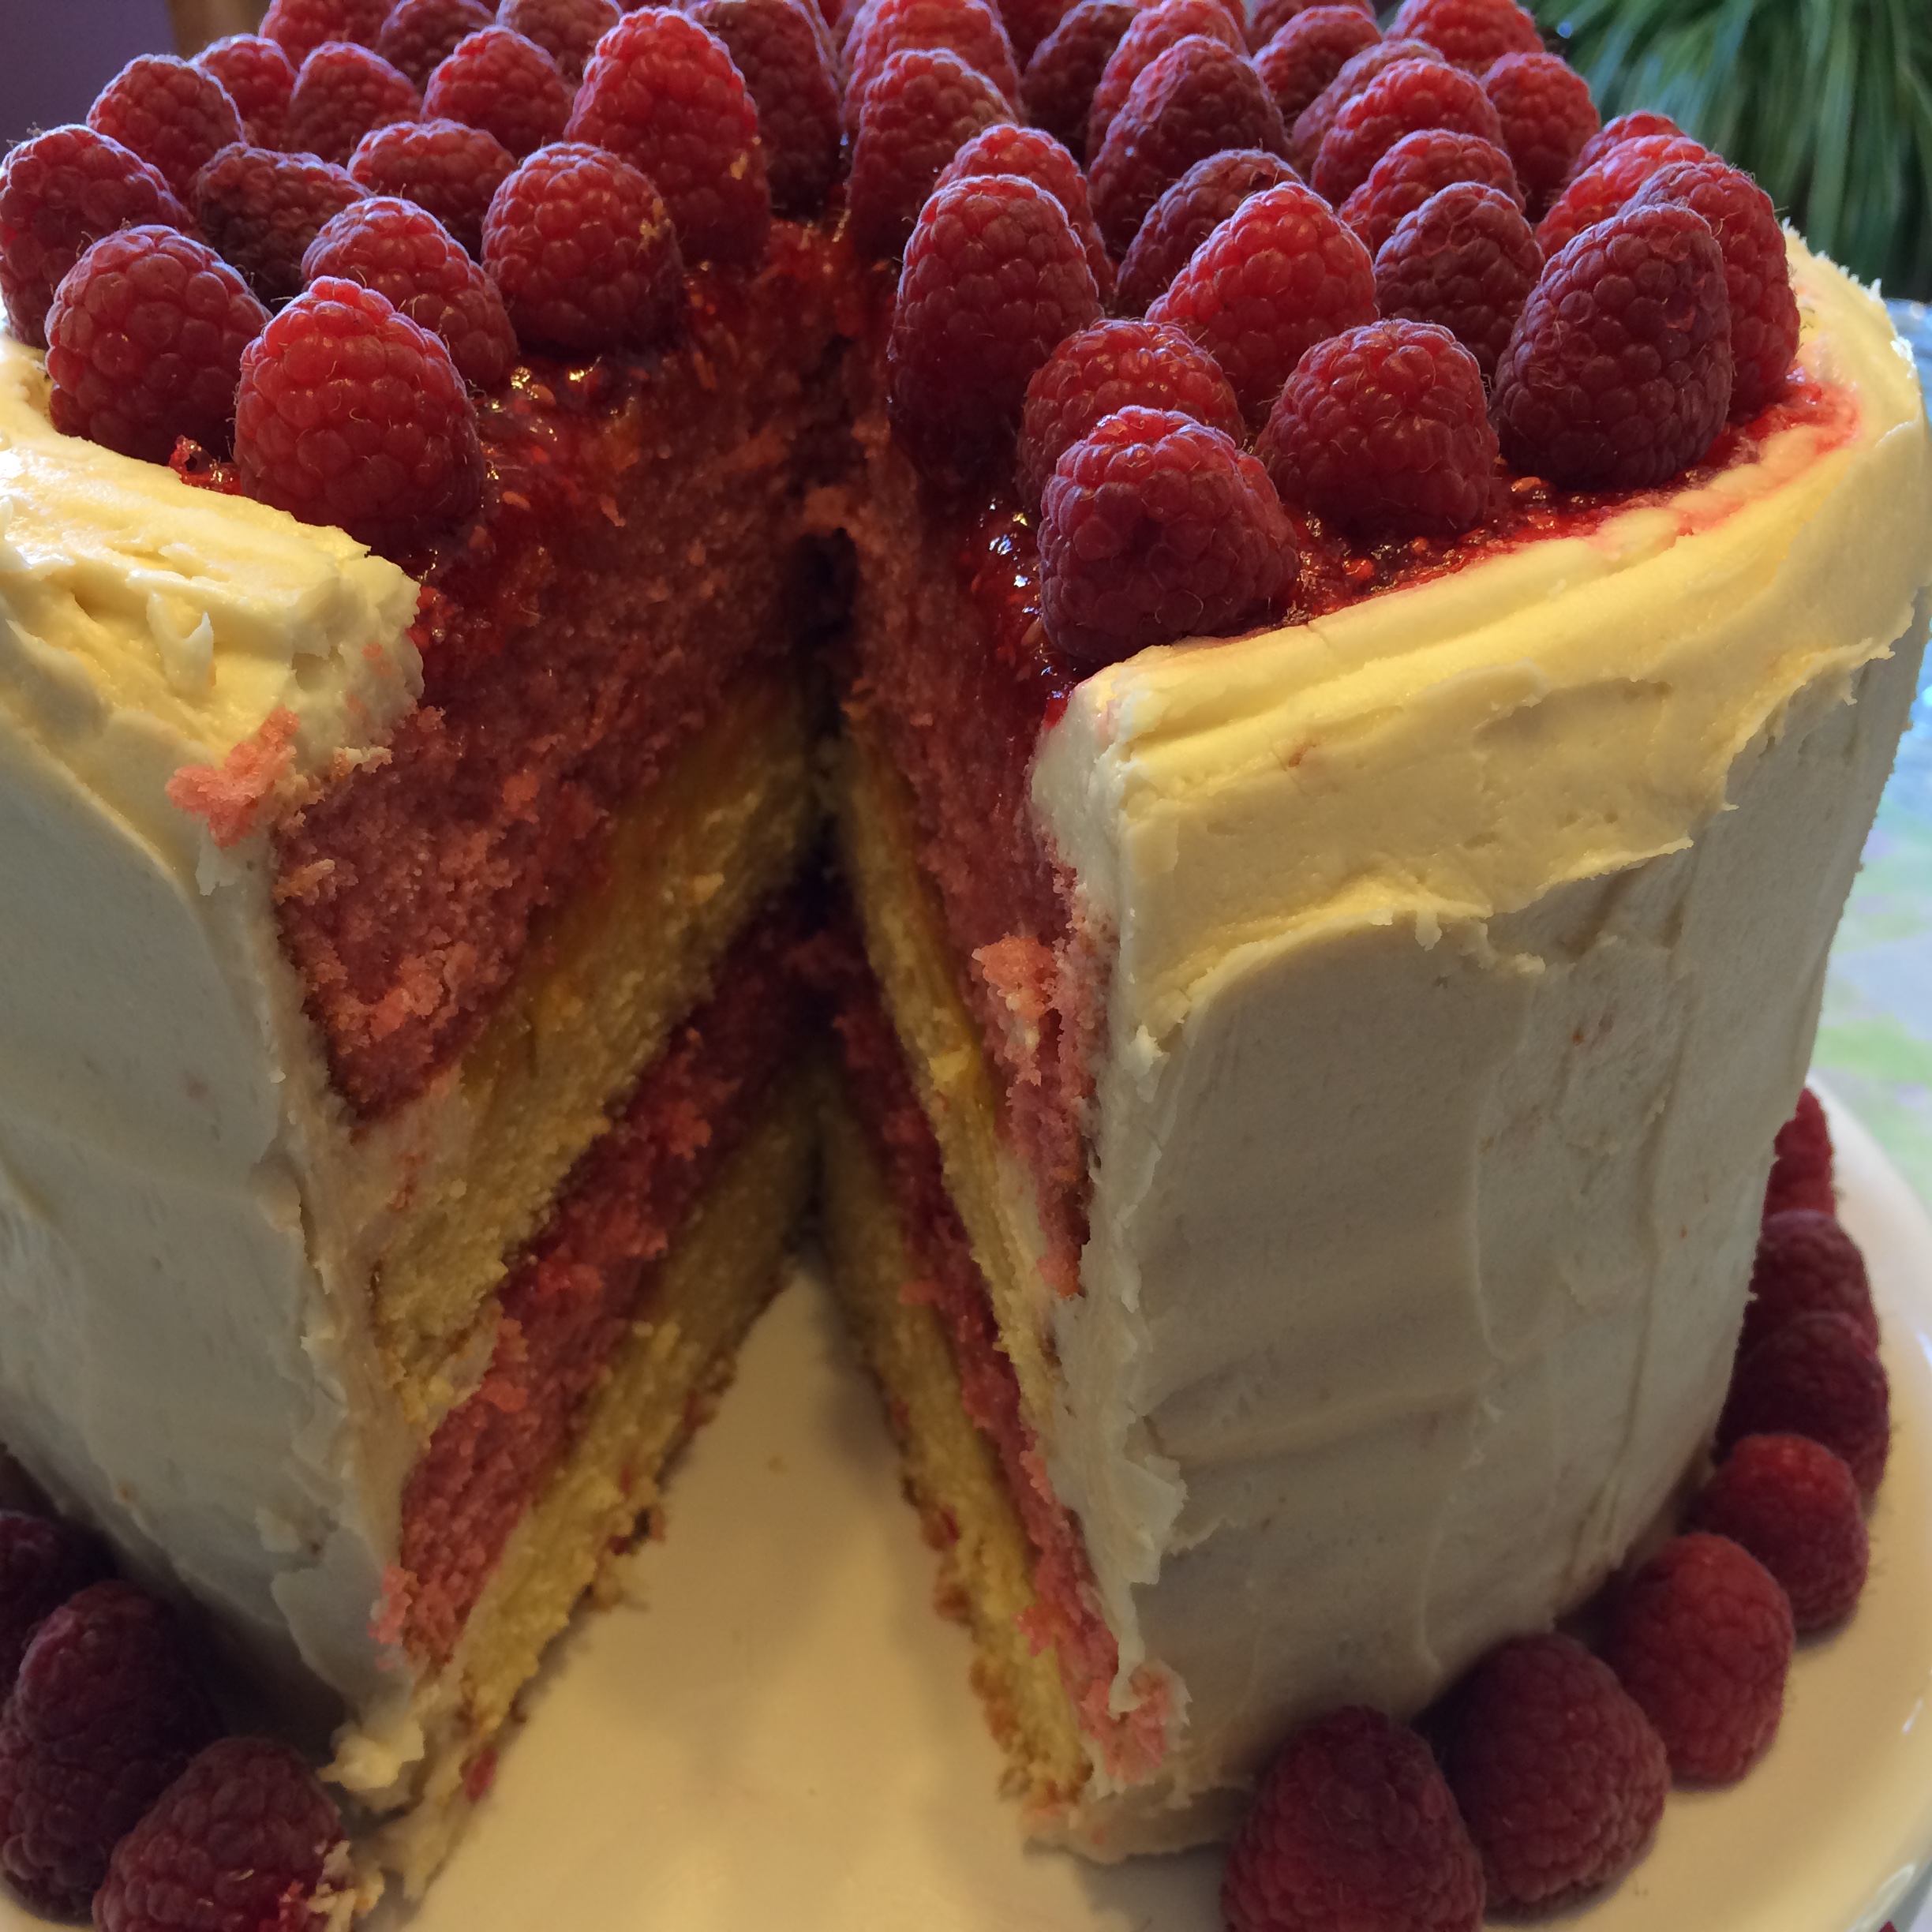
Raspberry and Lime Rum Cake
Raspberry-Lime Mojito Cupcake
High Altitude Chocolate Cupcakes--From Scratch!
Cake Pops
Raspberry Butter Cream Red Velvet Hearts
Pumpkin Cake Roll
Boston Cream Cupcakes
4th of July Cupcakes
Cake Pops
Lemon Bites
Lemon Curd Easter Cake "Eggs"
Black Forest Cupcakes
Red Velvet Lovecakes
Poppy Seed Cake
Candy
Pumpkin Spice Caramel Corn
Really? Homemade Candy Corn?
Pralines
Caramel Corn
Cookies
White Chocolate Macadamia Nut Cookies
Snowy Cherry Almond Bites
Ultimate Sugar Cookies
Stars and Stripes All-American Shortbread with Blueberry Dipping Sauce
Not Yo' Mama's Peanut Butter Cookies
Luscious Easter Macaroon
Pumpkin Spice Apple Cookies
Cherry Raspberry Valentine Cookies
Chocolate White Chocolate Chunk Almond Fudge Cookies
Fairy Cookies
Ginger Crinkles
Addictive Chocolate Chip Cookies
Other Desserts (bars, holiday treats, etc.)
Raspberry-Strawberry "Cupcakes"
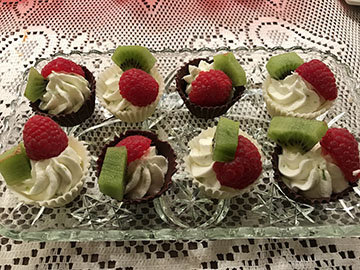
Chocolate Cups with Lime Mousse
Luscious Lemon Bars
Easy Valentine Brownies
Pumpkin Spice Mousse Filled Cream Puffs with Maple Bacon Glaze
Turtle Brownies
Peach Cobbler
Chocolate Scotcheroos Christmas Lollipops
Pumpkin Dip
New York Spree
Banana Nut Muffins
Pie and Pie Filling
Raspberry Rhubarb Pie
Cherry-Raspberry Pie
Strawberry Tarts
Raspberry-Rhubarb Delight with Very Vanilla Spritz
Decadent Brownie Pie
Aromatic Pumpkin Pie
Jams and Jellies
Freshy Fresh Raspberry Freezer Jam
Peach Peel and Pit Jelly
Grape Jelly
Food
Appetizers
Asparagus Puff Pastry Bites
Avocado Wrap
Frittata Muffins
Egg Rolls Extraordinaire
Gruyere Soppressata Puff Pastry Appetizer
Cathy's (Miller Reunion Texas) Caviar
Bacon Nest Potato Skins
Bacon Guacamole
Mandarin and Romaine Endive Boats
Firecracker Stuffed Peppers
Super Bowl Broncos Bean Dip
Caprese Picks
Mushroom Crustades
Are You Ready for Some Nachos?
Amazing Artichoke Dip
Spicy Pepper Relish
Mini Beef Wellingtons
Bread
Extra Cinnamon Cinnamon Rolls
Raspberry Cream Cheese Stuffed French Toast
Bacon-Sweet Potato Waffles
Main Dishes
Sweet and Sour Pork
Mmmm Marsala
Peachy Pork Tenderloin
Healthier Hamburger Cheese Bake
Coq Au Vin
Spicy Crunchy Burrito
Creamy Vegetable Lasagna
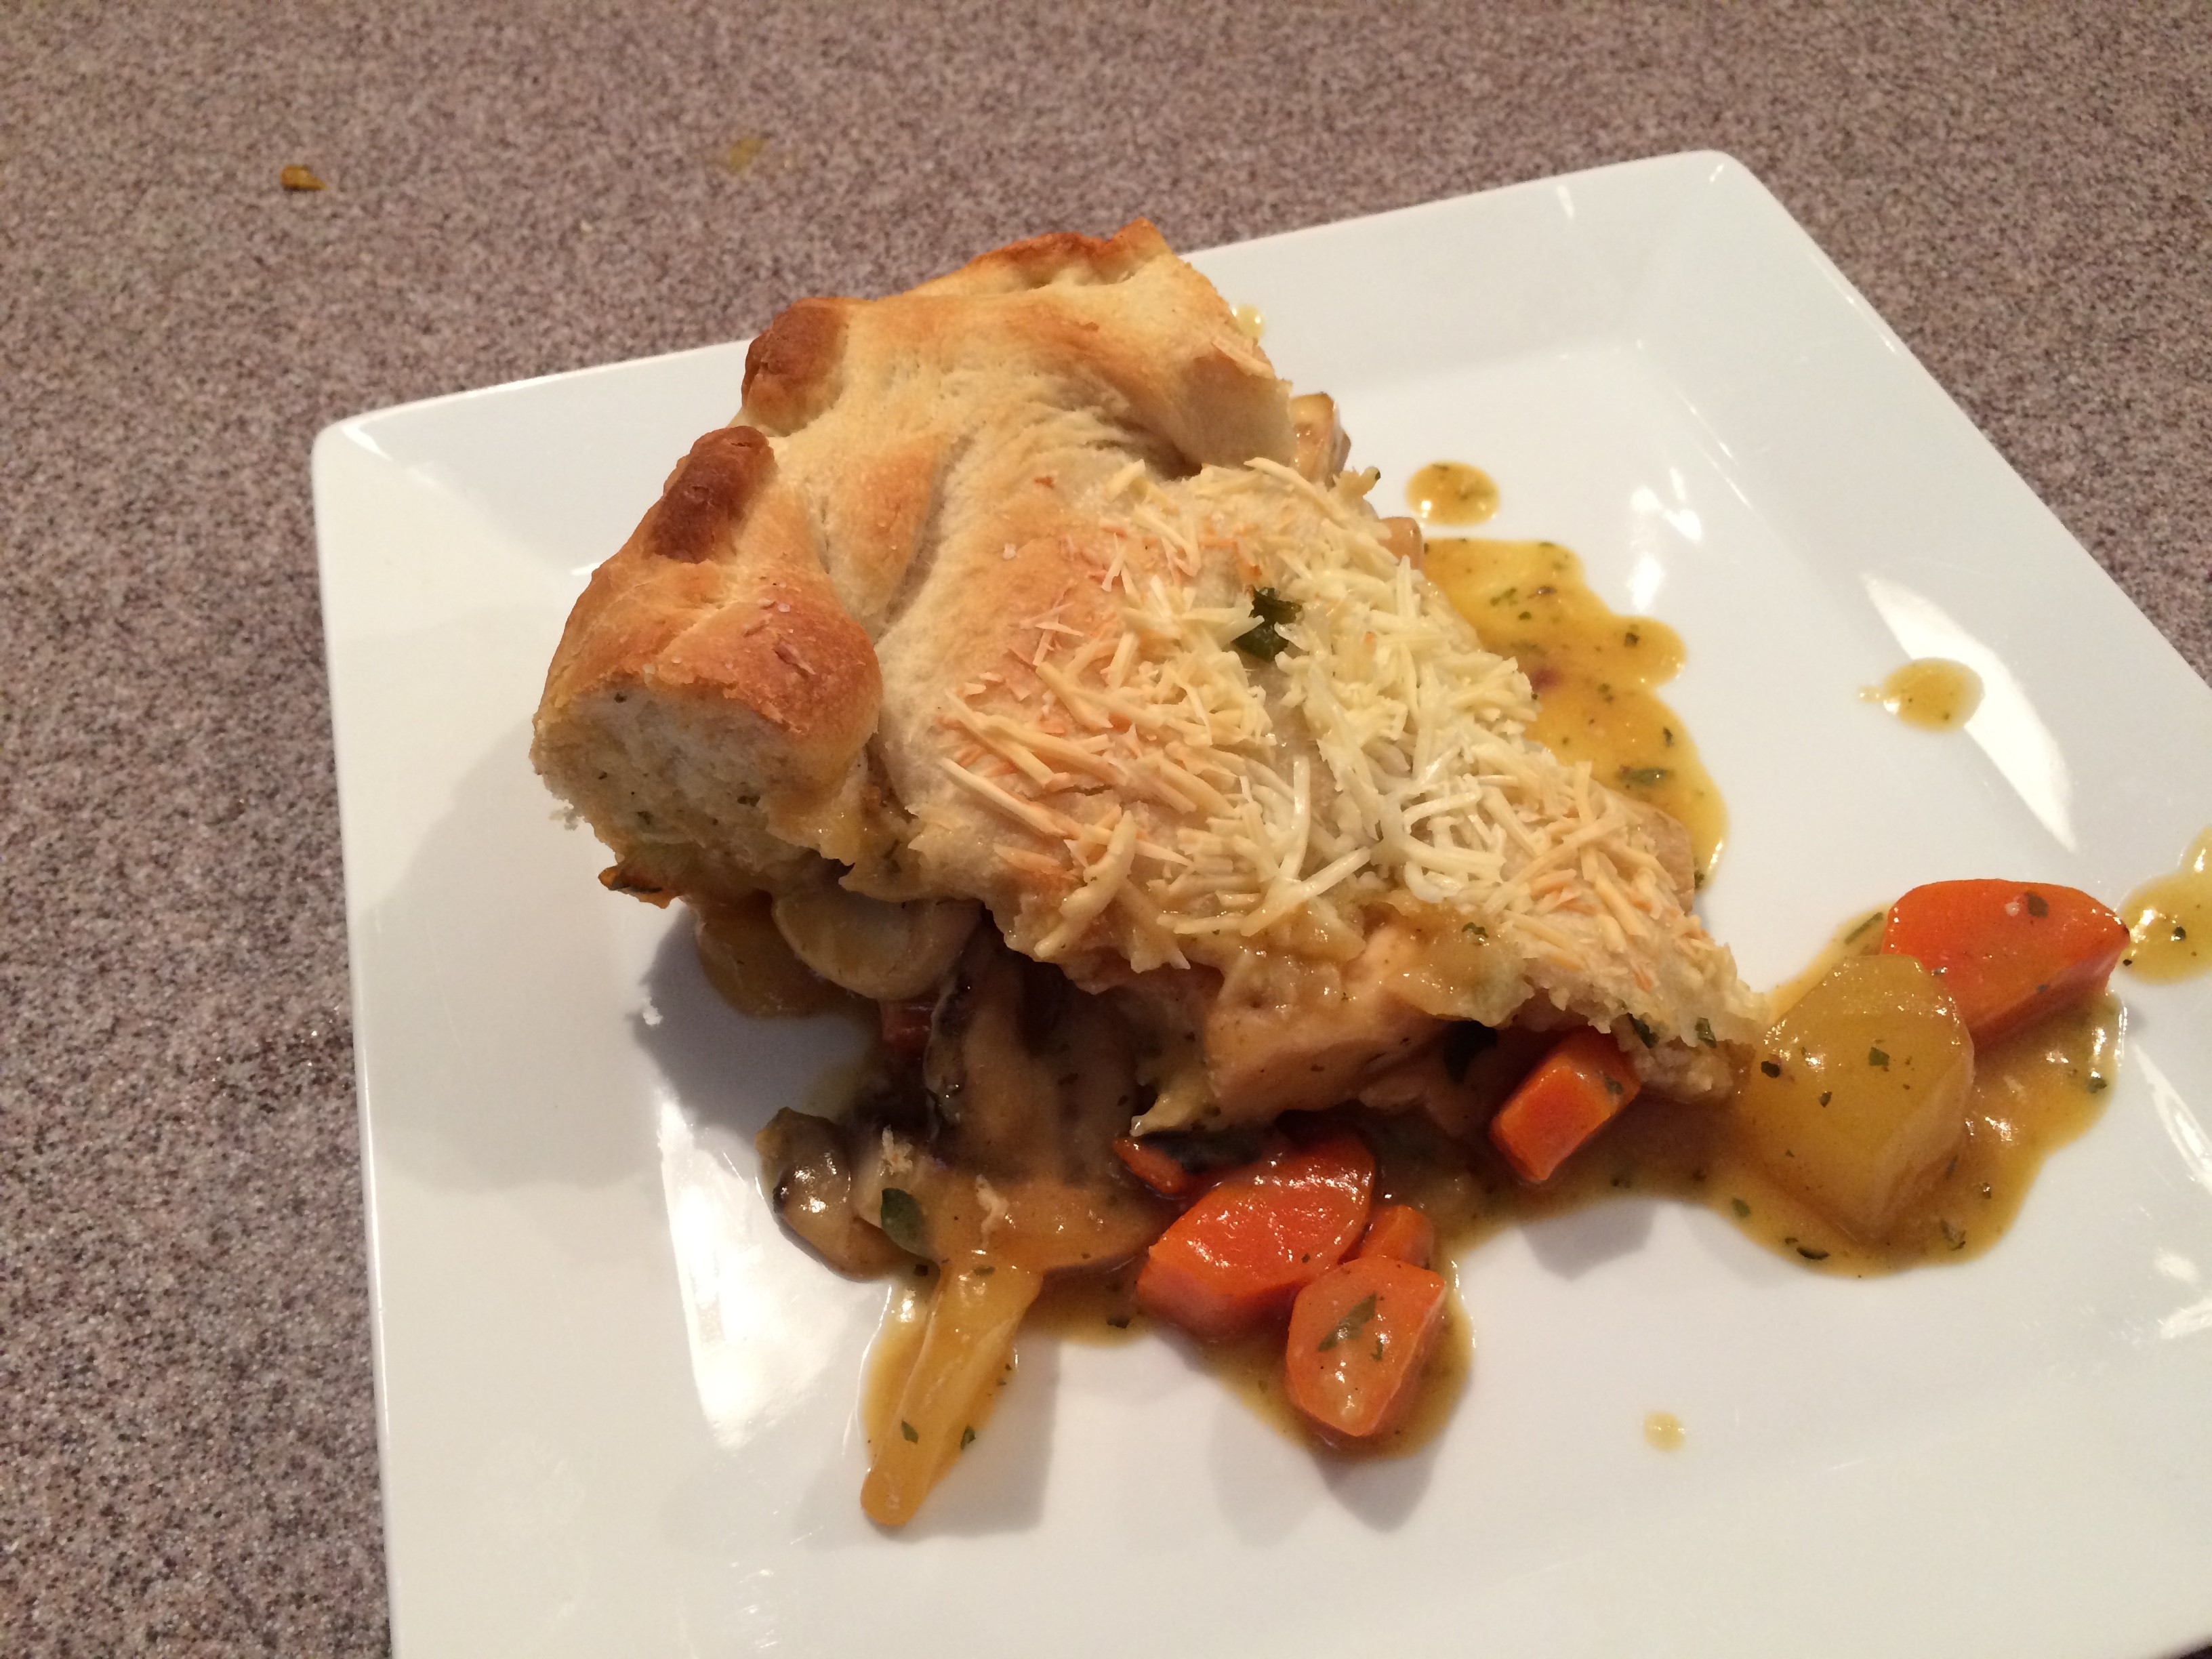
Chicken Pot Pie
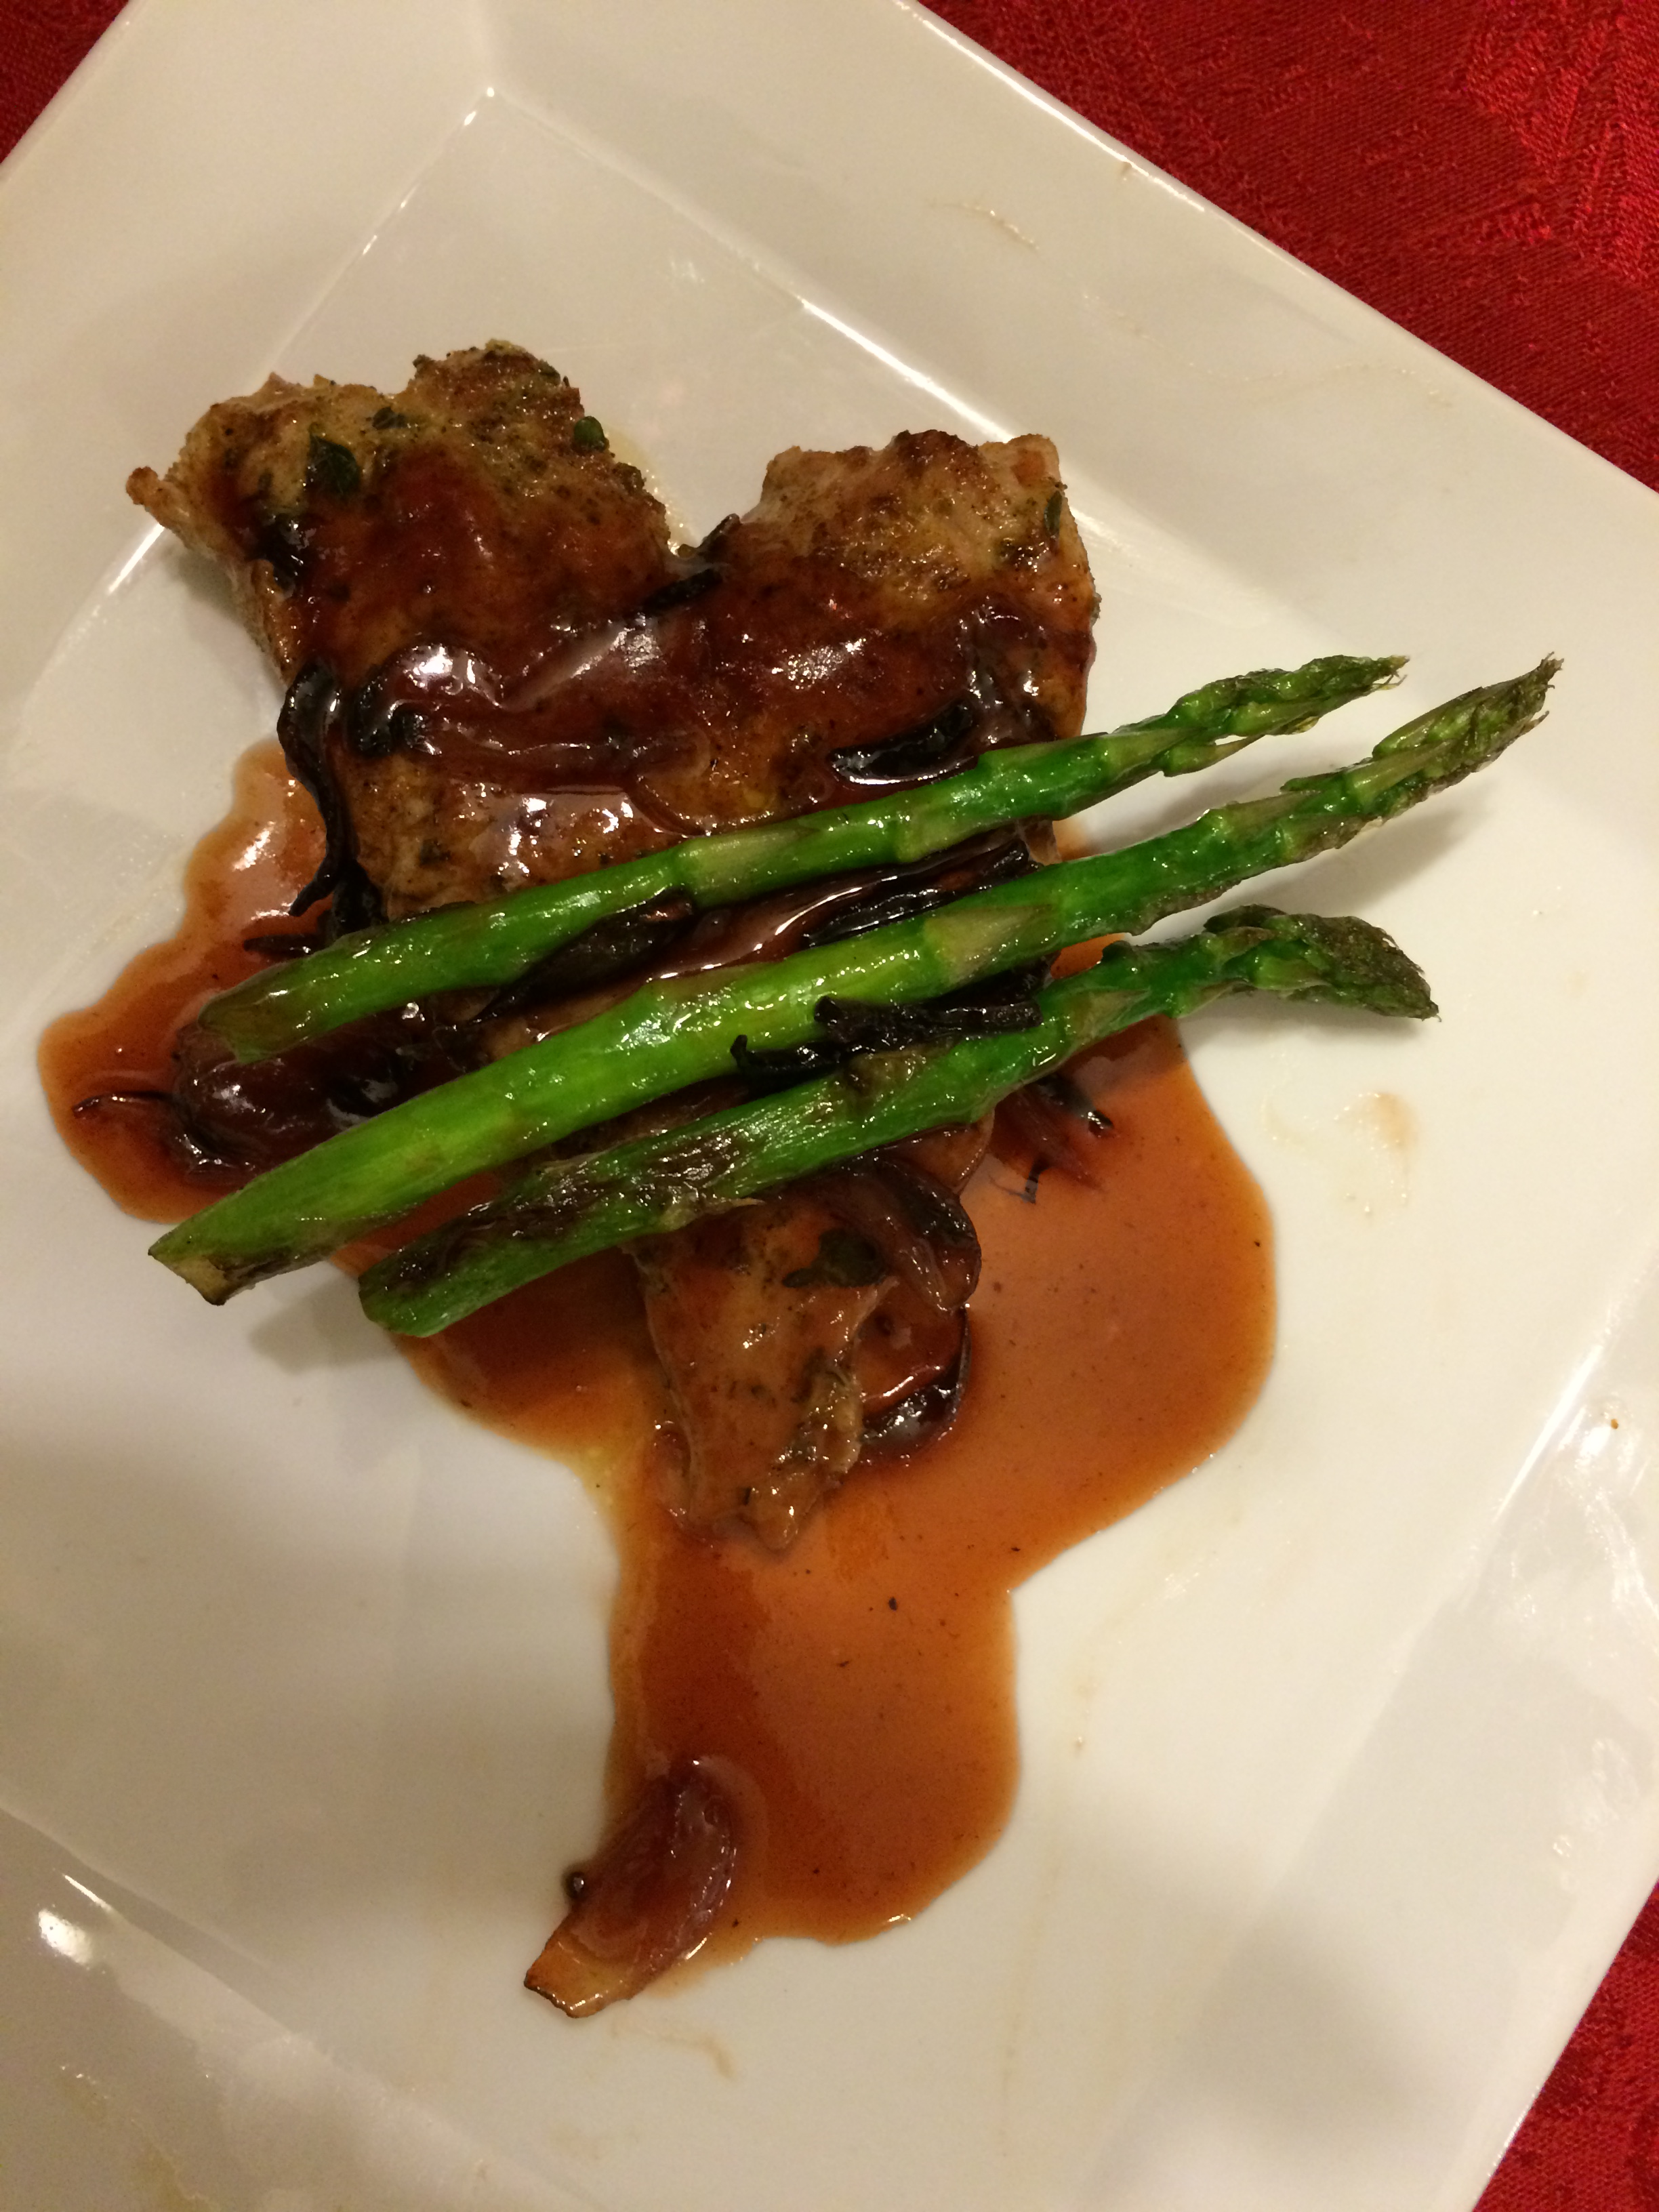
Pork Scallopini with Plum Sauce
Scrumptious Pulled Pork Sliders
Simply the Best Alfredo
Delicious Broccoli and Almond Parmesan Bow Ties
Colorful Pizza for Mom
Chicken Kiev
Meatlove
Pomegranate Pork Loin
Dolmades (Stuffed Grape Leaves)
Salads
Watermelon Basil Salad
Bacon Rose Spinach Salad
Avocado-Corn Confetti Salad
Sweet and Sour Chicken Salad
Easy Chicken Salad
Strawberry Spinach Spring Salad
Copper Pennies "Plus" Salad
Romaine, Pear and Roquefort Salad
Deviled Egg Potato Salad
Terrific Taco Salad
Salad in a Parmesan Cup
Garden Fresh Pasta Salad
Soup
Potato Soup Supreme
Tomato Basil Soup
Chicken Soup Comfort
Butternut-Apple Bisque
Sides
Dad's Favorite Beans
Too Many Cherry Tomatoes?
Superfood: Kale
Miscellaneous
Working with Basil
Preserved Grape Leaves
Drinks
Benefits of Wheat Grass
Vintage Cocktails
Best Margarita

6-7 strips of bacon, cooked until crispy
1/2 cup shredded gruyere cheese
1 tablespoon olive oil
1/2 teaspoon Kosher salt
I egg, slightly beaten
Parchment paper
Preheat oven to 400 degrees.
Line two 17x12 inch baking sheets with parchment paper.
Unwrap and lay the puff pastry on a lightly floured counter. Roll out to flatten. Cut the puff pastry into 18 rectangles.
Break each bacon strip into thirds and place on the rectangles diagonally.
Break off one asparagus spear to where it naturally breaks. Cut the rest of the bunch to that length. Place the asparagus spears on a plate and drizzle the olive oil on top of them. Roll them around until they are covered. Sprinkle with Kosher salt.
Lay three spears on top of each bacon strip.
Top with cheese, dividing the cheese between all the rectangles.
Brush the edges with the beaten egg. Pull two of the points together to form a little bundle.
Brush the outside of the bundle with egg.
Place 12 on one sheet and bake for 15-18 minutes, until golden brown.
Meanwhile, put 6 on the other baking sheet and store it in the refrigerator until it is time to put it in the oven. Repeat baking times.
~These are delicious, warm or cold! Impressive looking, but easy to make.
For the cakes:
1 white cake mix
1/ 4 cup flour
1 small package white chocolate instant pudding mix
4 eggs
1 1/4 cup water
1/2 cup canola oil
1 teaspoon pure almond flavoring
1/2 bar Lindt white chocolate, chopped
For the filling:
~1/4 cup of the frosting
About 1/2-1 cup raspberry jam I used my Freshy Fresh Raspberry Freezer Jam.To view the recipe click here, divided
For the frosting:
1 1/2 cup (three sticks) unsalted butter, room temperature
1/2 teaspoon salt
1/2 teaspoon pure almond flavoring
1/2 teaspoon vanilla flavoring
5 cups powdered sugar, sifted
3-5 tablespoons cream
1/2 bar Lindt white chocolate, melted and cooled
1 tablespoon flour
Topping:
Raspberry jam, reserved from filling
Finely chopped, lightly salted almonds
Preheat oven to 350 degrees.
Line cupcake pan(s) with cupcake papers. This recipe makes about 24.
In a large bowl mix all of the cake ingredients except the white chocolate chunks and beat hard with an electric mixer for 4 minutes. Meanwhile, toss the white chocolate chunks in the one tablespoon of flour. Add the white chocolate chunks and beat for one more minute.
Add about one ice cream scoop of batter to each cupcake paper.
Bake for about 16-17 minutes, depending upon how dark your cupcake pan is and/or the temperature of your oven.
Cool in the pan for 10 minutes. Remove to a rack and cool completely.
For the frosting:
Add the butter, salt and flavorings to the bowl of a stand mixer or a large mixing bowl if you're using a hand mixer. Beat together for about 30 seconds.
Add the powdered sugar and pulse for a few times until the sugar and butter get incorporated. Add cream, one tablespoon at a time, until frosting is smooth and creamy. Mix in melted white chocolate.
For the filling:
Cut a hole into the top of each cooled cupcake, reserving the little piece of cake. (If you can get ahold of a cupcake plunger, this task will be much easier.) Set aside the little piece of cake.
Frost the inside of each hole with a thin layer of frosting. Add about 1-2 teaspoons of jam, filling the hole. Replace the portion of cake you set aside and press down lightly.
Fill a 16-inch piping bag fitted with a large piping tip with the rest of the frosting. Pipe a swirl of frosting over the top of each cupcake. Drizzle raspberry jam over the frosting. Top with finely chopped almonds.
~I wanted to bring cupcakes for the school staff where I work, but I wanted to bring something new. I was a little nervous about whether they would like it or not, but I didn't need to worry. This cupcake was both pretty and delectable! Success!
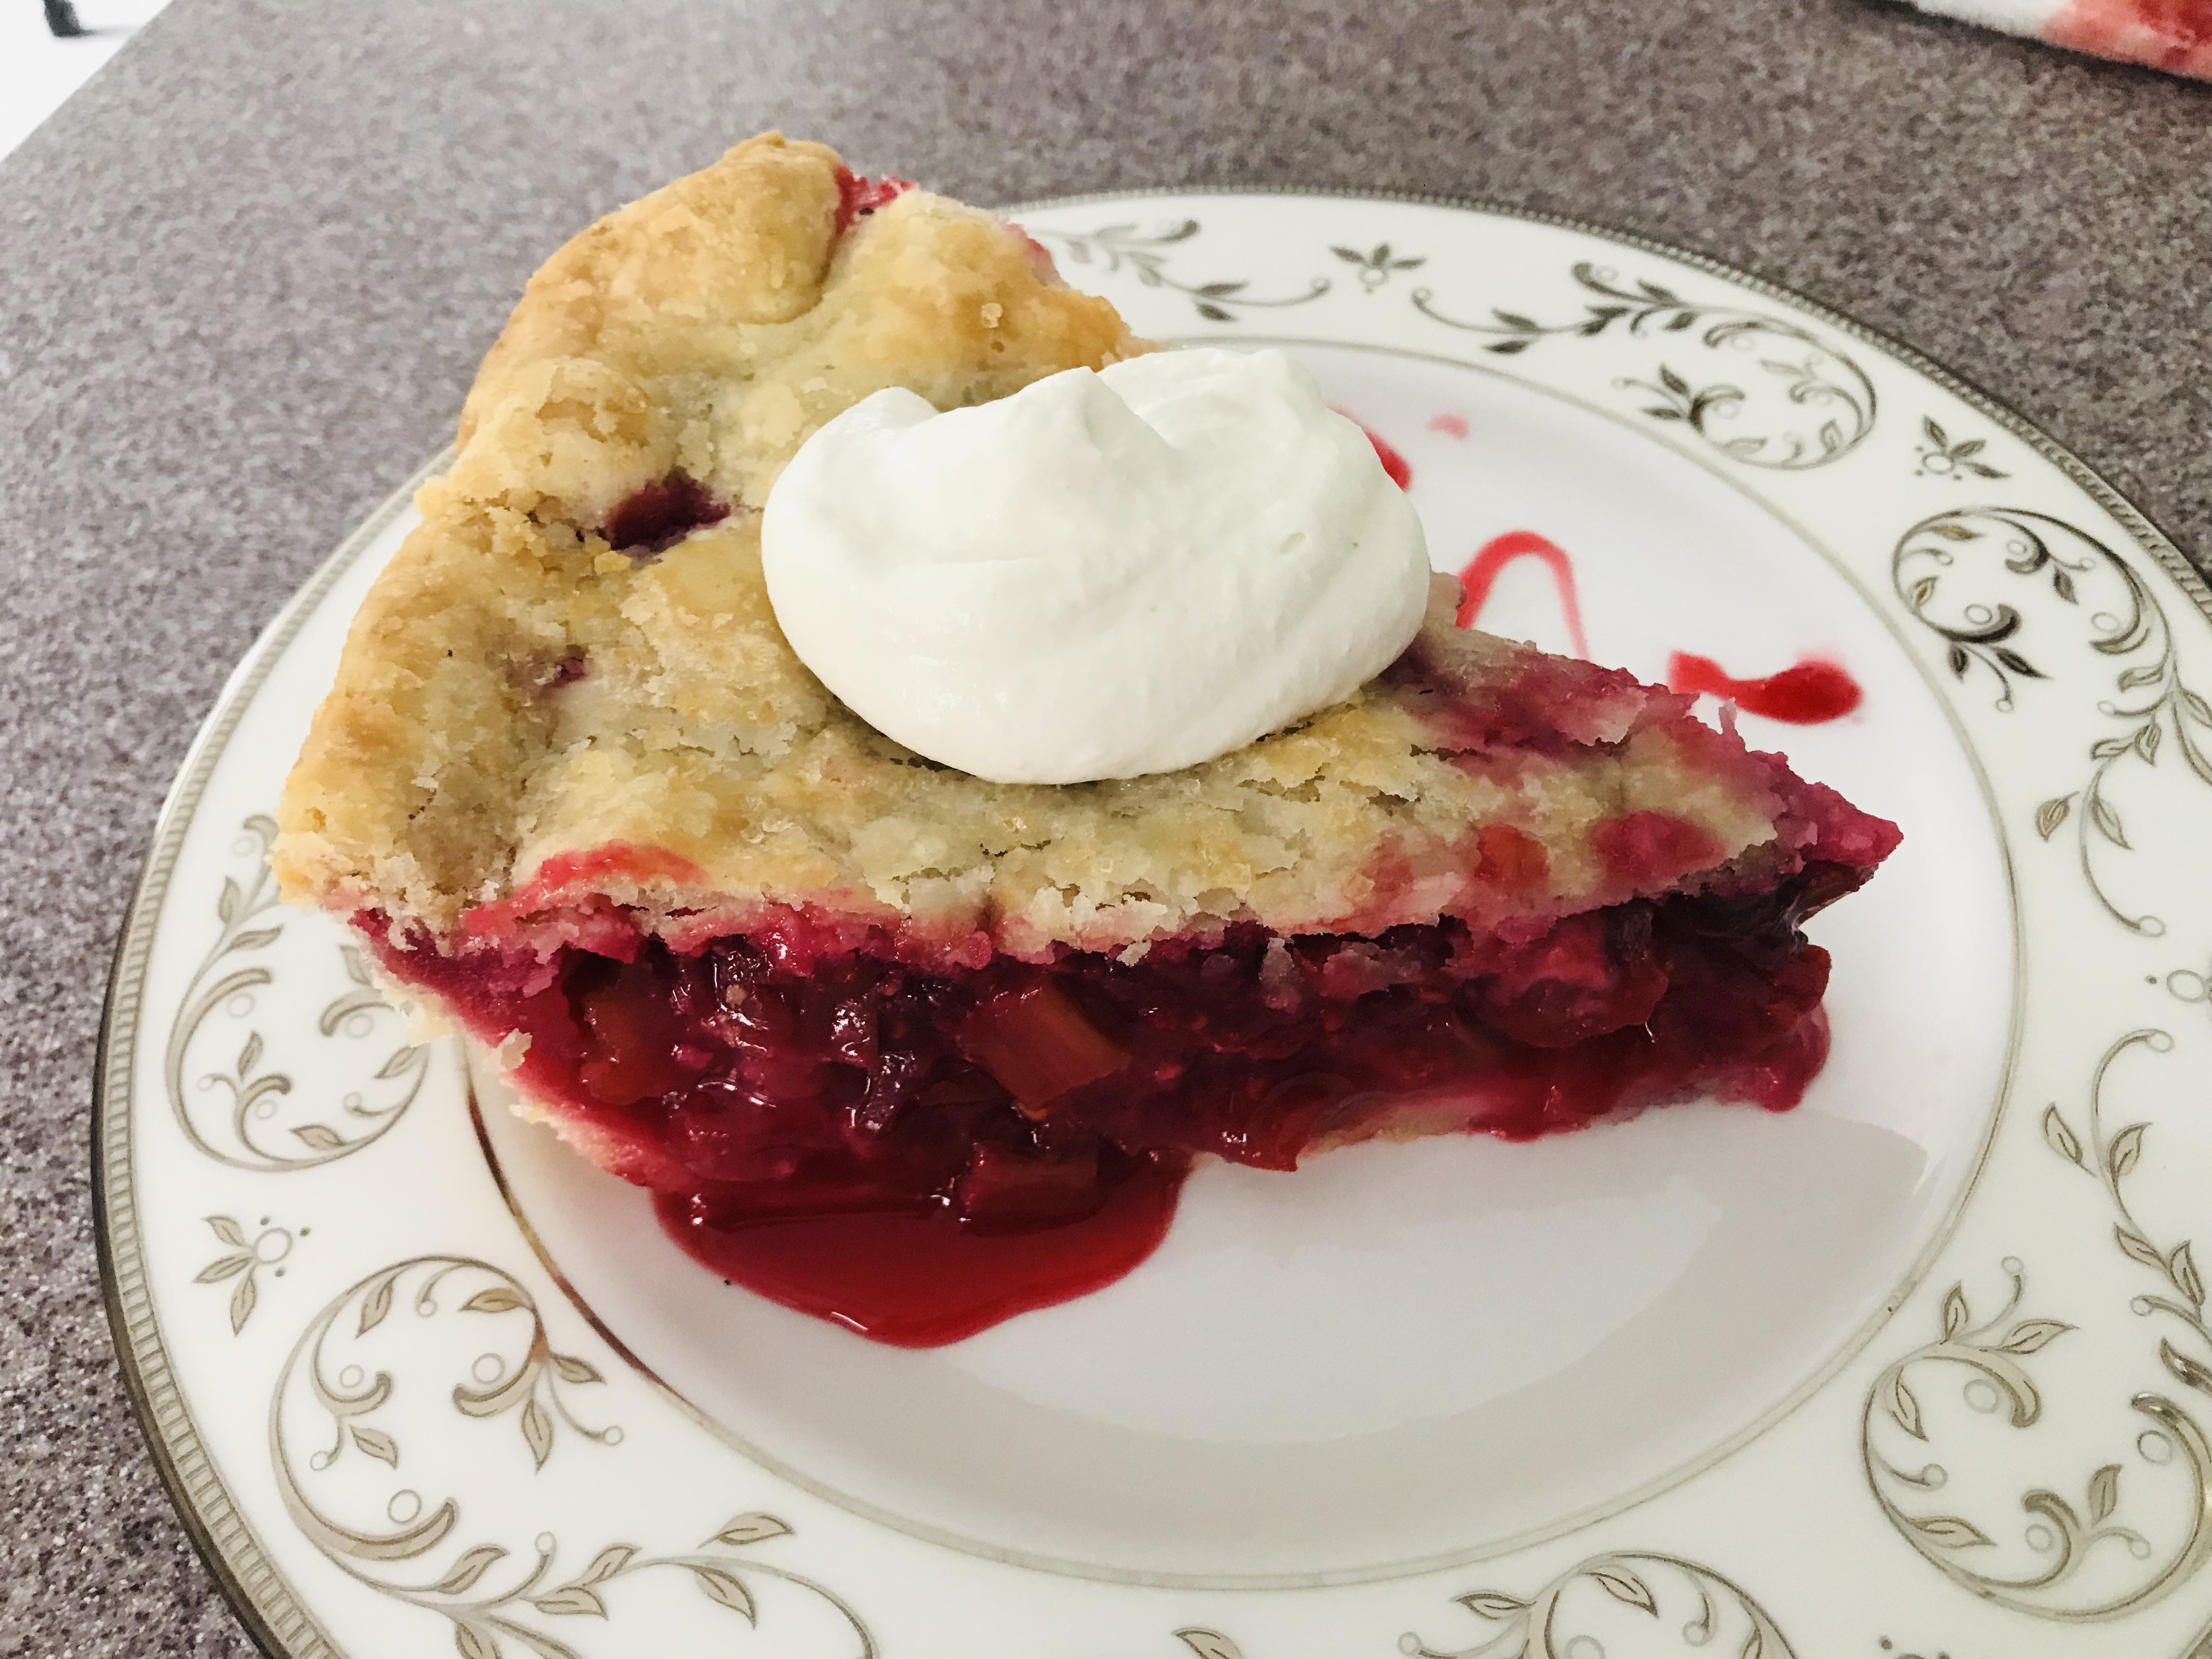
2 1/2 cups flour
1 cup shortening
1 teaspoon salt
1 egg
1 tablespoon white vinegar
3-5 tablespoons ice cold water
For the filling:
1- 12 ounce package frozen raspberries
1/2 cup sugar
1 1/2 tablespoons cornstarch
4 cups diced rhubarb stalks (Do not use the leaves!)
1 2/3 cups sugar
1/3 cup flour
1 tablespoon butter, finely diced
Coarse sugar/white sugar for sprinkling on top
For the crust:
In a large mixing bowl, add the flour and salt and stir. Add the shortening and cut the shortening into the flour/ salt mixture until the mixture resembles small peas.
Into a small bowl, crack the egg and add the vinegar. Slightly beat together with a fork. Add to the large bowl.
Cut the egg mixture into the flour mixture. Then, add the water a tablespoon at a time and cut in until the mixture just comes together.
Put two sheets of plastic wrap, about 18 inches in length for each sheet on a flat surface. Divide the dough in half and place each half on a sheet of plastic. Bring the sides together so that they cover the dough, being careful not to touch the dough at all or at least not very much. Once covered press down lightly and form into a round disk.
Place the dough disks into the refrigerator for 30 minutes.
For the Filling:
After about 20 minutes, thaw the raspberries in the microwave at #3 power at 1-minute increments until thawed. Place in a medium mixing bowl.
Mix the 1/2 cup of sugar and cornstarch together and pour over the raspberries. Mix until incorporated. Set aside.
Dice the rhubarb into 1/2 inch dice. Mix the 1 2/3 cup sugar and 1/3 cup flour together and set aside.
Preheat the oven to 425 degrees.
Roll out the pie doughs to fit a 10-inch deep dish pie plate. Make sure you roll each one out large enough so that the edges hang over at least 1-2 inches. (Keep turning the dough as you're rolling it out and add more flour underneath to keep it from sticking. You can use a long spatula to ensure it doesn't stick before you roll it back on to the rolling pin. Roll the flattened dough back onto the rolling pin to transfer it to the pie plate. Unroll it back on to the pie plate.)
Place the first dough carefully into the plate, lightly press into the sides. Do not press hard enough so that the dough sticks to the plate. Also, do not stretch the dough. Add half of the rhubarb, covering it with half of the sugar and flour mixture. Add half of the raspberry mixture carefully spreading it over the rhubarb. Repeat these steps, ending with the raspberry mixture on top. Spread out the butter pieces over the top of the filling. Cover with the other dough and crimp the edges.
Sprinkle the top of the pie with coarse sugar/white sugar. Cut air holes in the top of the pie. Cover the pie with aluminum foil. Place on a baking sheet that has been covered with aluminum foil. (This pie can be very juicy and may run over the edges.)
Bake for 50 minutes. Remove the aluminum foil off of the top of the pie. Bake for another 15-20 minutes or until the top of the pie is golden brown.
~Oh my gosh this pie will send you to the moon!

3 tablespoons soy sauce
2 tablespoons canola oil
1/2 cup cornstarch
2 eggs, slightly beaten
1/2 cup flour
One onion, coarsely chopped
1 red bell pepper, cut into 1-inch square pieces
3/4 can pineapple chunks, juice reserved
2 small tomatoes, cut into 1-inch square pieces
1 cup white rice, made to instructions on the package
Sauce:
Reserved pineapple juice from can
1/4 cup white vinegar
2 tablespoons canola oil
2 tablespoons brown sugar
1 tablespoon soy sauce
1/2 teaspoon black pepper
2-3 teaspoons corn starch
1/4 cup cold water
Marinate pork cubes in 3 (or so) tablespoons of soy sauce for 1/2 hour. Meanwhile chop the vegetables.
Make one cup of rice according to the directions.
Also, during this time, add the first 6 ingredients of the sauce into a small saucepan. Heat to boiling. Combine the cornstarch and water and stir in until the mixture becomes thick and bubbly. Turn off the heat.
Pour two tablespoons of canola oil into a large skillet. Turn the heat up to medium high.
In three separate bowls, pour in the cornstarch, then the eggs and then the flour. Dredge the pork cubes first in cornstarch, then in egg and then in flour. Fry until golden brown on all sides. Remove to a plate.
Turn the heat up to high and stir fry the bell peppers and onions for two minutes. Add the tomatoes and stir fry for two more minutes. Remove to another plate.
Add the pineapple and fry until browned on at least two sides, about 4 minutes.
Add in the vegetables and the pork. Pour the sauce over the mixture and heat for one minute. Serve immediately with white rice.
~Oh my gosh this is an addicting recipe! Tom and I have to try to restrain ourselves so that we don't eat it all. Sometimes we have leftovers...which are the best!

For the roulade
4 eggs
2/3 cup sugar
1/2 cup flour
1 1/2 tablespoons butter
For the filling
6 tablespoons sugar
2 large egg yolks
one large egg
finely grated zest of one lemon
1/4 cup freshly squeezed lemon juice (2-3 lemons)
2 tablespoons unsalted butter
pinch of salt
For the cream
2 cups heavy whipping cream
1/4 cup powdered sugar, sifted, plus extra for dusting
To serve
6 oz fresh raspberries
Frosting
1 cup unsalted butter, softened
3 cup powdered sugar, sifted
1 tablespoon freshly squeezed lemon juice
3-4 tablespoons heavy cream
Directions
1. Preheat the oven to 350-375 degrees (depending upon how hot your oven bakes). Grease and line a 12x 9 inch baking sheet with parchment paper.
2. For the roulade, place a large heatproof bowl over a pan of gently simmering water. Add the eggs and sugar to the bowl and, using a hand electric mixer, beat for 3-4 minutes, or until doubled in size. Carefully take off the heat and continue to beat for another 4-5 minutes on a medium to high speed.
3. Using a large silicone spatula or metal spoon, fold in the flour in three batches making sure it is all incorporated. Fold in the melted butter in the same way.
4. Gently pour the mixture into the prepared baking sheet and spread evenly using a spatula. Bake for 10 minutes or until just firm and lightly golden brown.
5. Dust a large baking sheet with icing sugar and carefully turn the roulade out. Carefully peel away the baking paper used to line the tin. Starting at a short end, fold the edge of the same paper (or a fresh sheet) over the cake. Roll the cake up into the paper. Allow the roulade to cool completely while rolled.
6. For the filling, first make a curd. In a saucepan, whisk the sugar, egg and egg yolks, lemon juice, lemon zest until smooth. Place over low heat and stir constantly with a silicone spatula or wooden spoon while cooking for about 8-10 minutes. The mixture should bubble and thicken enough to coat the back of a the spatula or spoon. Add butter and stir until it is melted. Place plastic wrap on the surface of the curd to prevent a skin from forming on the surface. Cool in the refrigerator. Can be made in advance up to a week.
7. For the cream, beat the cream and powdered sugar together until soft peaks form when the whisk is removed. Transfer to the refrigerator to chill.
8. For the frosting: Beat the butter and the powdered sugar together. Add the lemon juice and the cream one tablespoon at a time until the frosting is smooth enough to pipe.
9. Once the roulade is cool, unroll it and spread with a generous layer of whipped cream.Top with a layer of curd and half of the raspberries. Re-roll the roulade and place on a serving plate. 10. Pipe or spread the roulade with frosting. Top with reserved raspberries. Dust with powdered sugar.
~A luscious and fancy dessert! (Inspired by The Great British Baking Show.)
3 1/2 cups flour, plus more for rolling out
1 package yeast (2 1/4 teaspoons)
1/3 cup sugar
2 eggs, beaten
1 cup whole milk
4 tablespoons unsalted butter, plus more for greasing pan
2 teaspoons cinnamon
1 teaspoon kosher salt
Vegetable cooking spray
For the filling:
1 1/4 cups packed brown sugar
2 tablespoons cinnamon
1/2 teaspoon nutmeg
1/4 teaspoon kosher salt
6 tablespoons unsalted butter, room temperature
2 cups chopped pecans, optional
1/2 cup maraschino cherries, optional
For the glaze:
1 cup powdered sugar
2 tablespoons cream
1/4 teaspoon pure vanilla extract
1/8 teaspoon kosher salt
To make the dough:
Add the flour, yeast and sugar into a bowl of a standing mixer that is fitted with a paddle attachment, and mix on low speed until combined. Add eggs and mix until combined.
In a saucepan, heat milk, butter and cinnamon over medium low heat until butter is melted, stirring occasionally. Mixture should read between 120 and 130 degrees F. (Use a thermometer.)
Add warm milk mixture and salt to the flour mixture. Beat on low speed for 2-3 minutes, scraping the bowl from time-to-time. Beat on medium speed until the dough is smooth, but it will be sticky.
Lightly spray a large bowl with cooking spray. Dust the counter with a little bit of flour. Dust your hands with flour and then turn out the dough onto the dusted counter. Form dough into a ball and place into the oiled bowl. Turn to coat the whole ball with spray. Cover bowl with plastic wrap and let the dough rise in a draft-free warm place until it is doubled, which will take about 2 hours.
While dough rises, cut 2 pieces of parchment paper to fit 2- 9 inch round cake pans. Butter pans, line with the parchment rounds, and then butter the top of the parchment.
Make the filling:
In a medium bowl, mix brown sugar, cinnamon, nutmeg and salt.
Form the dough and bake:
After punching down the dough, transfer to a floured surface. Roll out to a 16X12 inch rectangle. Spread softened butter over dough with 1/2 inch of the edge of the long sides.
Sprinkle filling mixture evenly over butter. Roll the dough tightly into a log, starting with long edges. Pinch the seam closed. With the seam side down, cut the dough crosswise into 16 equal slices. (At this point you may sprinkle the pans with pecans and cherries, if desired.)
Put 8 rolls in each pan, cut side up. Don't worry if they are not touching. They need to be covered with plastic wrap and set in a warm, draft-free place to rise for 45 minutes to an hour. When they are almost doubled, they will be touching or almost touching. They will swell in the oven as well.
Preheat oven to 375 degrees.
Bake rolls until tops are golden, 18-20 minutes. Remove from oven and invert immediately onto a rack, keeping the pan covering the rolls. Cool 10 minutes.
Make glaze: In a small bowl add all of the glaze ingredients. Whisk until smooth.
Invert pan back over. Drizzle glaze over rolls and serve immediately.
~I have never before had cinnamon rolls with cinnamon not only in the filling, but also in the dough! If this is common, I must have been missing out! These are delicious!
4 stems fresh basil
balsamic glaze
fleur del sel or similar coarse sea salt
Cut the watermelon into 1/2 inch slices. Cut each slice into eighths. Remove rind, including the light pink edges.
Arrange 8-10 wedges of watermelon on a salad plate. Repeat. (You should have enough watermelon for 4 servings.)
Pull the leaves off of the basil stems. Stack about 4-5 leaves on a cutting board. Roll up lengthwise tightly. With a sharp knife, cut across the grain about 1/32nd of an inch all the way down. This technique is called jullienne. Sprinkle the strands of basil over the watermelon. Repeat with the rest of the basil.
Drizzle with balsamic glaze. Sprinkle with fleur de sel.
~So easy and delicious! Perfect for a summertime appetizer or salad!
1 white cake mix
1/4 cup flour, if at high altitude
1 3-ounce package white chocolate pudding mix
1/2 cup vegetable oil
4 egg whites
1 1/2 cup pink champagne
1/4 teaspoon almond extract
For the frosting:
20 tablespoons unsalted butter
1/4 cup shortening
1/4 teaspoon salt
3 cups powdered sugar
1/4 teaspoon almond extract
3/4 cup pink champagne
Red gel no taste food coloring
Pink sprinkles, if desired
Piping bag and decorator tip
Preheat oven to 350 degrees.
Line 1 24-cupcake tin or 2 12-cupcke tins with cupcake papers.
Add the cake ingredients to the bowl of a standing mixer (or use an electric hand mixer) and beat hard for 5 minutes, using the paddle attachment.
Ladle 1/4 cup of batter into each cupcake paper. (An ice cream scoop works well.) Bake for 17-22 minutes, depending upon how dark the finish is of your cupcake tin.
When there is no longer much of a depression in the cupcake when lightly pressed, remove from oven and cool on wire racks.
For the frosting:
Pour champagne into a small saucepan and simmer until it is reduced by half. Stick a toothpick into the red gel no taste food coloring. Swirl the toothpick of red gel food coloring into the reduced champagne until incorporated. Set aside to cool.
When champagne is cool, place the butter, shortening and salt into a bowl of a standing mixer, or use an electric hand mixer. Beat, using a whisk attachment, on low to medium low speed, until butter and shortening are incorporated, about one minute. Add powdered sugar, 2 tablespoons reduced champagne and almond extract and beat on low speed until almost incorporated, about one minute. Add more champagne as needed and beat until frosting becomes light and fluffy.
Add frosting to a (16-inch works perfectly) piping bag with a large star tip and pipe a swirled design on top of the cupcake. Sprinkle if desired.
~Champagne, Moscato or any other sparkling wine or non-alcoholic grape juice will work well in this recipe-just use your favorite. Delicious.
1 box yellow or white cake mix
(1/4 cup flour if at high altitude)
1 small box vanilla pudding mix
4 eggs
1 cup strawberry puree (directions below)
1/4 cup water
1/2 teaspoon pure almond flavoring
Strawberry puree:
10 strawberries
1/2 cup sugar
1/2 cup water
Filling:
10 strawberries, finely diced
1 cup sugar
1 Snack Pack strawberry Jello cup
Frosting:
20 tablespoons (2 1/2 sticks) unsalted butter, softened
3 cups powdered sugar
1/4 teaspoon salt
1-3 tablespoons heavy cream
1/2 teaspoon pure almond extract
1 drop no taste red gel food coloring
Topping: (if desired)
24 strawberries
1 6-ounce bar white chocolate
Sprinkles, your choice
Preheat oven to 350 degrees.
Line cupcake pan(s) with cupcake papers. This recipe makes about 24.
In a large bowl mix all of the cake ingredients and beat hard with an electric mixer for 5 minutes.
Bake for about 17-22 minutes, depending upon how dark your cupcake pan is.
(Dark pan: 17-18 minutes, Light pan: 20-22 minutes) Cool in the pan for 10 minutes. Remove to a rack and cool completely.
For the filling:
Place the finely diced strawberries in a medium bowl. Stir in the cup of sugar. Melt the Jello in a small saucepan until it is liquified. Pour over and stir into the strawberries. Refrigerate until the cupcakes are cool.
When the cupcakes are cool, cut a small round section, about the size of a quarter, and about one inch deep in the top of each cupcake, removing and reserving the small piece of cake. (There are cool gadgets to accomplish this easily.)
Fill the hole with the strawberry-Jello mixture and replace the small piece of cake.
For the frosting: Using a whisk attachment on an electric mixer, beat the butter for about 10-20 seconds. Add the powdered sugar and salt. Beat for about 45 seconds or until it just comes together. Add the almond extract and one tablespoon cream. Beat for a few seconds. Add the rest of the cream, one tablespoon at a time, beating between each addition, to achieve the correct consistency (Smooth, but not runny.)
**The whisk attachment is the key, otherwise it's difficult to keep this frosting from "breaking".
Beat the butter in a standing mixer on medium-high speed, using the whisk attachment until smooth. Turn the mixer off. Add powdered sugar and salt and mix on medium-low speed until sugar is incorporated about 45 seconds or a minute. Add cream and vanilla and whisk on medium-high speed until it is light and fluffy. This takes about 4 minutes. Be sure to scrape the bowl a couple times, or as needed. Easily doubled or tripled.
Pipe the frosting on the cupcakes.
Topping:
Break up the white chocolate into a microwave safe bowl. Heat for about one minute or until melted.
Dip the strawberries in the chocolate and then into the sprinkles. Refrigerate until needed to top the cupcakes.
~I thought I'd try something new for Valentine's Day. What a sweet surprise when we bit into the strawberry filling!
1 teaspoon paprika
1/8 teaspoon cayenne pepper
1/4 teaspoon freshly ground black pepper
1 teaspoon salt
1/2 teaspoon onion powder
1/2 teaspoon dried basil
4 boneless, skinless chicken breasts pounded flat
1 tablespoon canola oil
4 tablespoons butter, divided
1/2 pound mushrooms, sliced
3/4 cup Marsala wine
3 chicken bouillon cubes
1 cup water
Mix the first seven ingredients together and pour into a shallow dish (e.g., a pie plate). Coat the chicken breasts in the flour mixture lightly.
Melt 2 tablespoons of the butter and the oil together in a large skillet over medium-high heat. Saute the chicken breasts until lightly browned, about 3-4 minutes per side. Remove from skillet onto a plate and set aside.
Add one tablespoon of butter to the pan and add the mushrooms. Saute until golden brown. Pour Marsala into the pan and scrape up the browned pieces from the bottom of the pan. Reduce this liquid by half. Add the water and chicken bouillon cubes and simmer for about four minutes. Set the heat at medium and put the chicken breasts back into the pan. Cook the chicken breasts in the liquid for about five minutes or until cooked through and the sauce has thickened slightly. Stir in remaining two tablespoons of butter. Serve immediately.
~When I go to an Italian restaurant, I often order Chicken Marsala due to its smooth, velvety sweetness. This recipe is inspired from several "Marsalas" I have sampled. Lose yourself in the silkiness.
1/2 cup water
1-3 ounce package vanilla instant pudding mix
1/2 cup vegetable oil
4 large eggs
1/2 teaspoon pure almond flavoring
1/2 teaspoon pure vanilla extract
Cinnamon Streusel Filling
7/8 cup flour
1/2 cup brown sugar
6 tablespoon unsalted butter, softened
1 teaspoon cinnamon
Pinch of sea salt
Preheat oven to 350 degrees.
Line cupcake pan(s) with cupcake papers. This recipe makes about 24.
In a large bowl mix all of the cake ingredients and beat hard with an electric mixer for 5 minutes.
Meanwhile, add all of the streusel ingredients into a medium mixing bowl. Using a fork, cut the butter into the dry ingredients until the mixture looks like small peas.
Using a small 1-1/2-inch ice cream scoop, carefully pour one scoop of batter into the bottom of each cupcake paper. Sprinkle about one tablespoon of the streusel mixture in top of the cake batter in the papers. Add one more scoop of batter on top of the streusel filling, smoothing it out to cover the streusel filling.
Bake for about 17-22 minutes, depending upon how dark your cupcake pan is.
(Dark pan: 17-18 minutes, Light pan: 20-22 minutes)
Cool in the pan for 10 minutes. Remove to a rack and cool completely.
Cinnamon Buttercream Frosting
2 1/2 sticks unsalted butter, softened
2 1/2 cups powdered sugar
1-2 teaspoons ground cinnamon (I use 2 teaspoons.)
1/4 teaspoon salt
1 teaspoon pure vanilla extract
1-3 tablespoons heavy whipping cream
Using a whisk attachment on an electric mixer, beat the butter for about 10-20 seconds. Add the powdered sugar and cinnamon. Beat for about 45 seconds or until it just comes together. Add the vanilla and one tablespoon cream. Beat for a few seconds. Add the rest of the cream, one tablespoon at a time, beating between each addition, to achieve the correct consistency (Smooth, but not runny.)
**The whisk attachment is the key, otherwise it's difficult to keep this frosting from "breaking".
Pipe or spread onto cooled cupcakes.
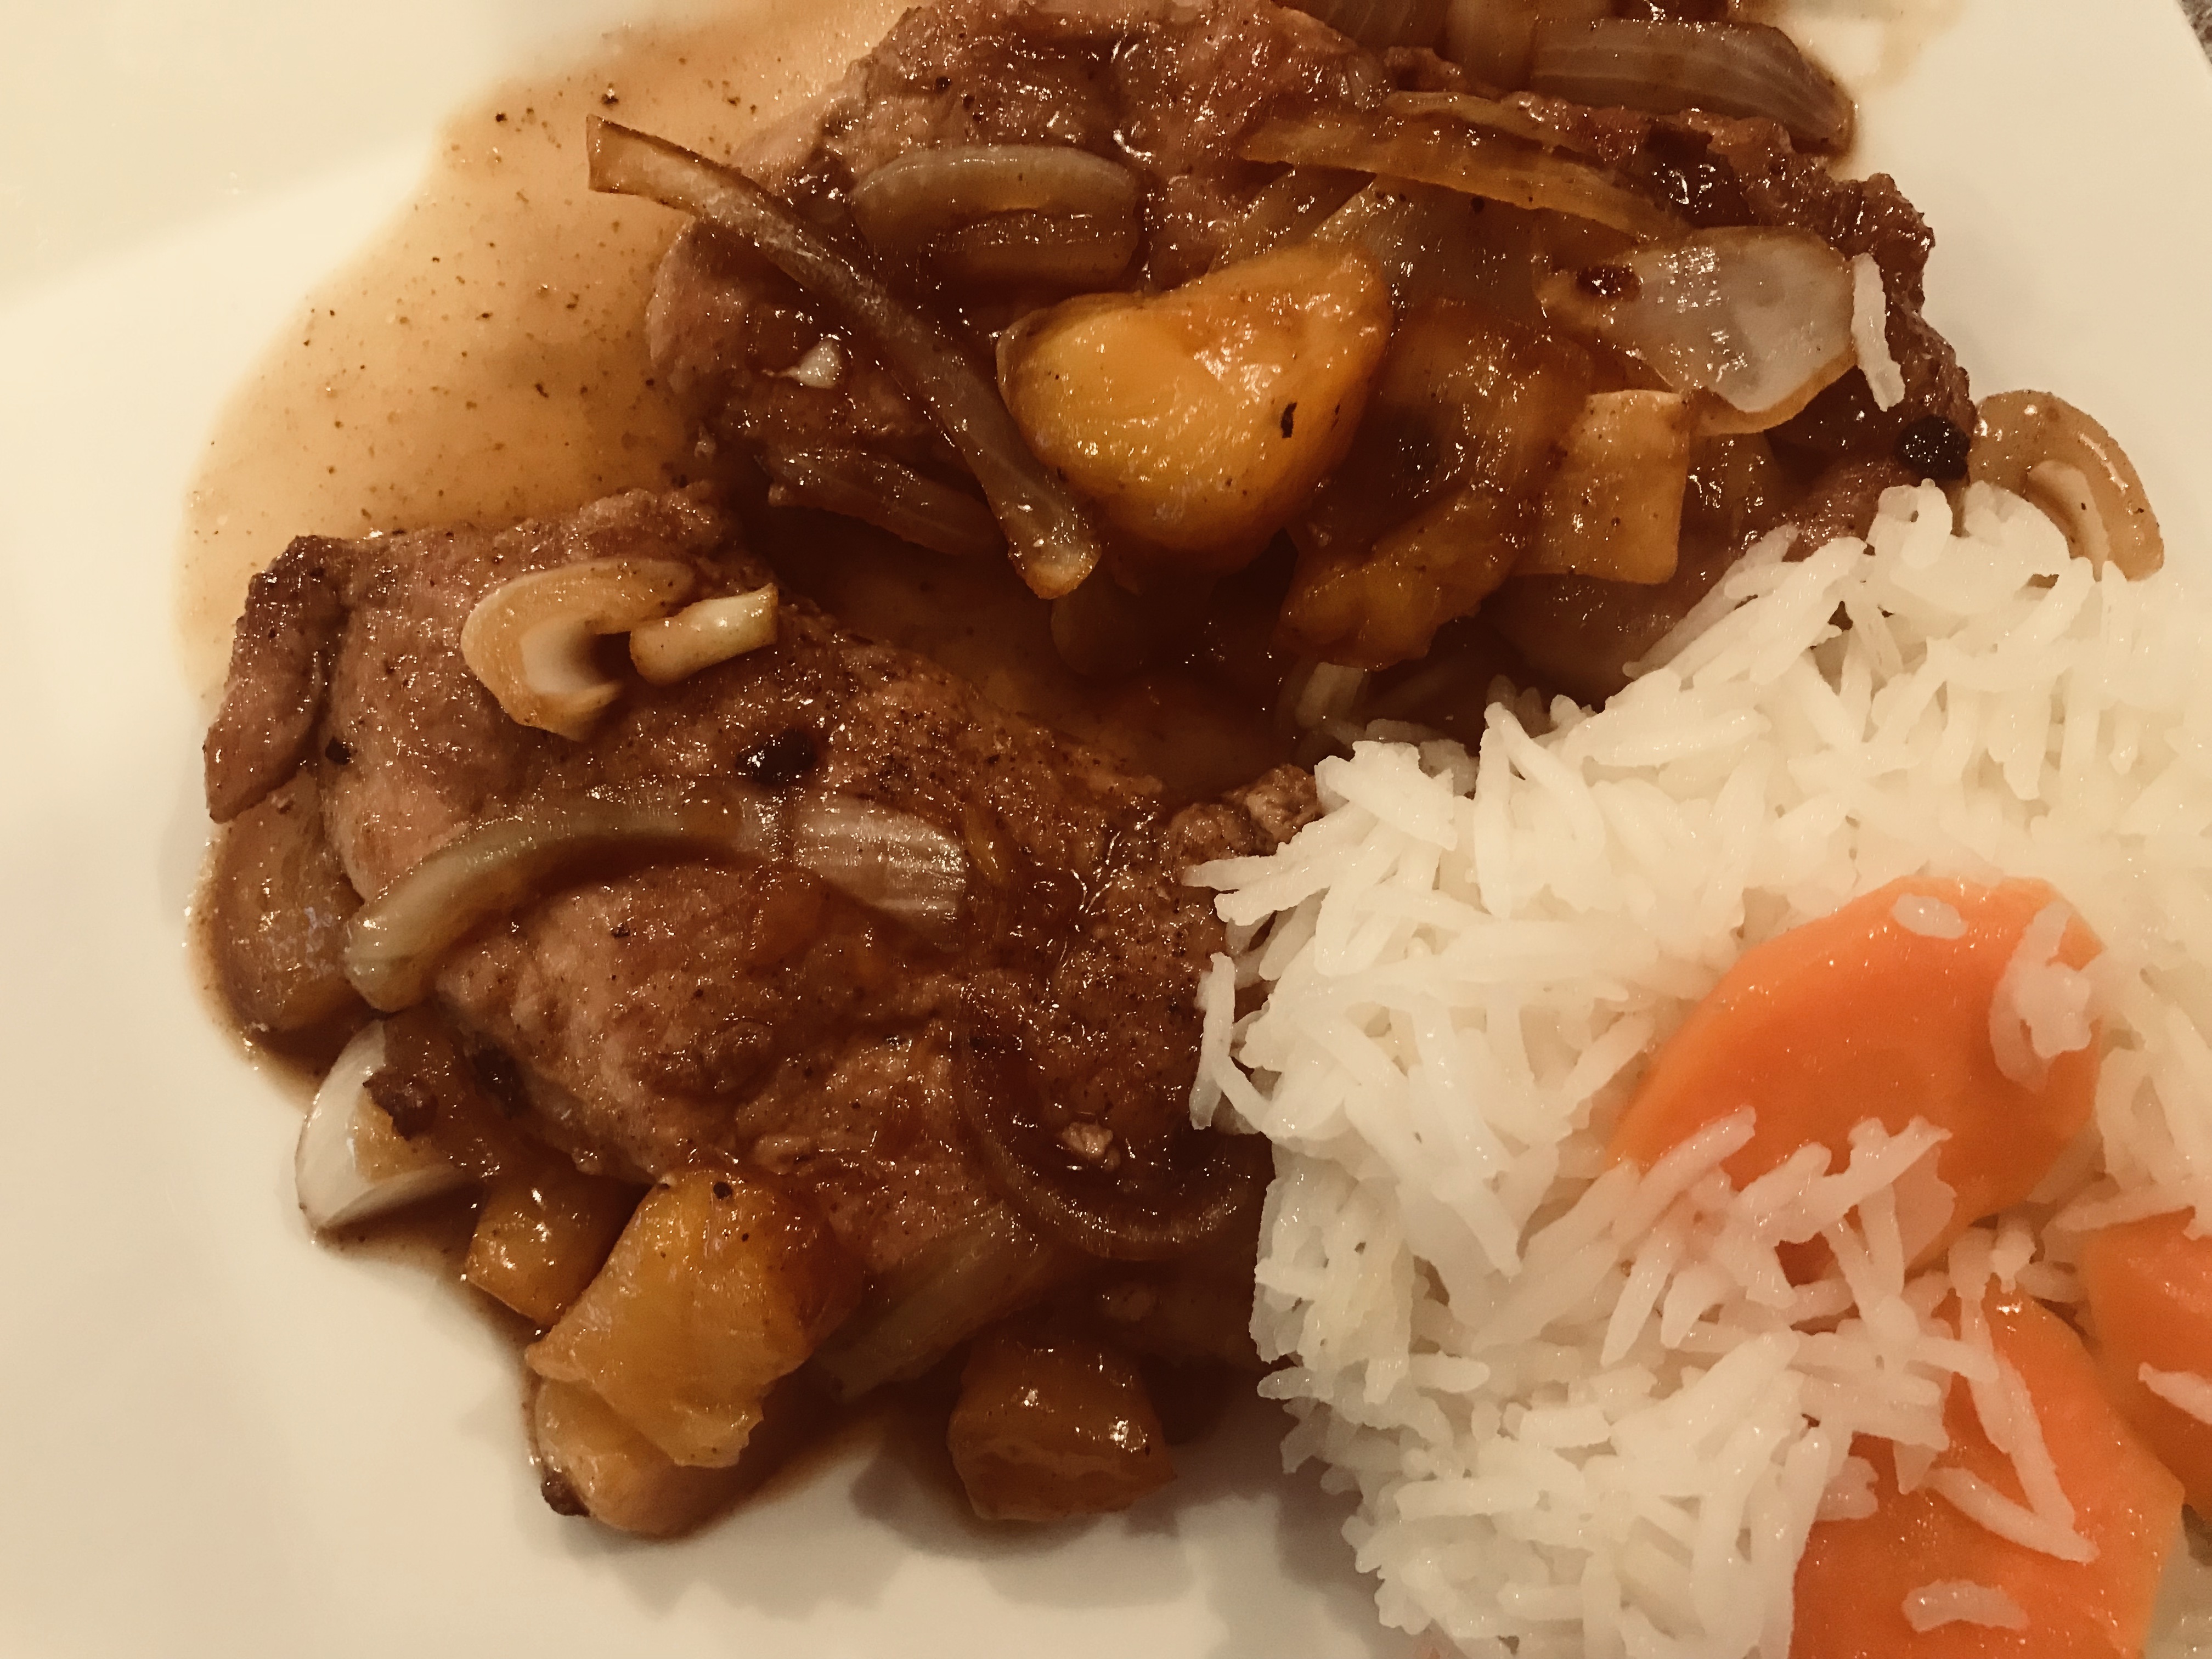
One small onion, thinly sliced
1/2-1 teaspoon salt
1/4 teaspoon pepper
1/2 teaspoon onion powder
1/4 teaspoon red pepper flakes (optional)
2 tablespoons canola oil, divided
1/2 cup peach juice
2 tablespoons apple cider vinegar
2 tablespoons brown sugar
3 peaches, peeled and diced
Plastic wrap
Cut tenderloin into 2-inch slices. Place cut side up on plastic wrap. Cover with another sheet of plastic wrap. Pound until the pieces are 1/8 inch thick.
Pour one tablespoon canola oil into a medium-hot skillet. Carefully swirl the oil so that it covers the bottom of the skillet. Sprinkle the tenderloin cutlets on both sides with all the seasonings except the red pepper flakes. Saute the cutlets on both sides, about 3 minutes per side. Remove from heat and set aside.
Add another tablespoon oil to skillet and stir-fry onion slices for about 3 minutes.
Sprinkle red pepper flakes on top of the onions. Deglaze the skillet by pouring in the peach juice and the vinegar. (I use my home canned peaches and juice, but you can just buy canned peaches and use those.) Stir in the brown sugar. Reduce the liquid for about five minutes. Stir in peaches and cook for one minute. Add the tenderloin and any juices back into the skillet. Turn each piece, coating both sides with the sauce. Serve immediately after the tenderloin pieces are hot.
Pair with rice and a vegetable of your choice.
~This is an easy and quick, yet elegant meal. Sweet and tart to warm your heart.
1 lb. ground beef
1 onion, peeled and diced
1 teaspoon salt
1/2 teaspoon pepper
1/4 teaspoon red pepper flak4es
1/2 teaspoon garlic powder
1/2 teaspoon onion powder
1 jar Prego pasta sauce, your favorite
1 bag extra wide noodles
1- 8 ounce package Neufchatel cheese, softened
8 ounces fat free cottage cheese
4 ounces light sour cream
1 red bell pepper, diced
one handful fresh spinach
In a large skillet, sprinkle ground beef with seasonings and saute until beef is cooked through and onions are transparent. Drain excess fat. Add the Prego sauce and simmer till everything is hot.
Meanwhile, cook the noodles according to the package instructions. Drain.
In a medium bowl, combine the cheeses, sour cream and bell pepper.
Half the sauce
half the noodles
All of the cheese mixture
All of the spinach, layering it to cover the cheese mixture
Rest of the noodles
The rest of the meat sauce
Cover with aluminum foil or glass cover and bake for 30 minutes. Uncover and bake for another 10 minutes or until bubbly.
Even though this recipe has a fair amount of cheese in it, you can feel better about it with the addition of the vegetables. Delicious!
Here's how I did it:
For each "cupcake":
Cut the stems off of and slice two strawberries. Arrange in the bottom of a cupcake paper. (I actually used three papers so that the juice from the berries did not leak through.) Top with as many raspberries to cover the strawberries.
If desired, squirt a dollop of whipped cream on top.
A very pretty and sweet way to indulge without the extra calories!
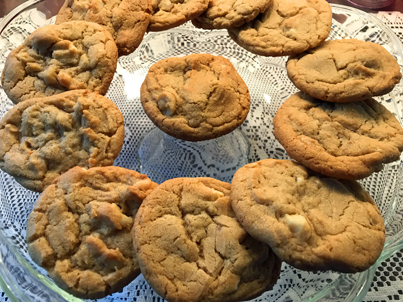
1 cup brown sugar, packed
2/3 cup white granulated sugar
1 teaspoon salt
3/4 cup shortening (I use Crisco.)
1/4 cup unsalted butter, softened
2 eggs
1 teaspoon vanilla extract
1 teaspoon baking soda
2 tablespoons hot water
4 oz. white chocolate, chopped into small chunks
1/2 cup macadamia nuts, coarsely chopped
Preheat oven to 350 degrees.
In a small skillet, toast the macadamia nuts on low heat, for about 5 minutes (or until golden), stirring frequently. Remove from heat and pour into a heat-proof bowl to cool.
In a standing mixer, on low speed mix first four dry ingredients thoroughly.
Add shortening, butter, eggs, and vanilla extract into dry mixture add mix on low speed until just moistened.
Combine baking soda and hot water and mix into dough until just incorporated.
Stir in chocolate chunks and toasted macadamia nuts.
Drop by teaspoons or tablespoons depending upon your cookie size preference onto cookie sheet.
Bake at 350 degrees for 10-13 minutes, depending upon the size of cookie and the tendency of your oven.
~This familiar recipe has been modified to accommodate white chocolate lovers. Toasting the macadamia nuts really makes a huge positive difference in flavor. My kids crave the dough. (Yikes, raw egg alert!)
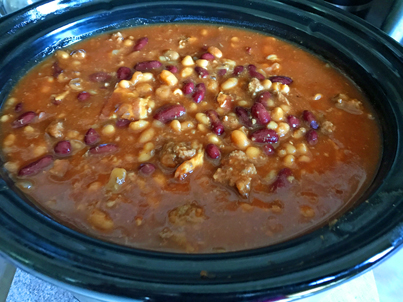
1 pound ground beef
1 large onion, chopped
1/2 pound bacon, cut into one inch pieces
Mix together and stir into above:
1 cup ketchup
1 cup brown sugar
Mix together and stir into above:
2 tablespoons mustard
2 tablespoons vinegar
2 tablespoons cornstarch
Add: 3-15 ounce cans pork and beans 1 or 2 15-ounce cans kidney beans
Bake for one hour at 350 degrees, or in a crock-pot on low for four hours.
~These beans can be a side dish at a potluck or a meal at home. After tasting these beans, my dad said that I should open up a restaurant and just serve these beans!
1 slice pickled jalapeno, finely chopped
1 tablespoon freshly squeezed lime juice
1 garlic clove, minced
1 cup cooked brown rice
2-4 tablespoons salsa, your favorite
2 whole wheat tortillas, 10 inches in diameter
1 tablespoon canola or peanut oil
In a small bowl, using a fork, mash the avocado with the jalapeno and lime juice.
Heat the tortillas, 10-20 seconds each in the microwave.
Spread half the avocado mixture along the center of each tortilla. Top with about 1/2 cup rice. Spread with salsa.
Fold the sides of the tortilla toward the center, and then roll it up.
Heat the oil in a saute pan. Fry the wrap on all sides until golden, beginning with the seam side. Remove and drain on paper towels.
Easily doubled and tripled.
~This seems simplistic, but it is a delicious, nutritious treat.
Mousse:
4 ounce package cream cheese, softened
juice and grated peel of 2 limes
1/4 cup sugar
1/2 cup heavy whipping cream
Garnish:
1-2 kiwi fruit
10-20 raspberries
Melt chocolate in a double boiler or microwave. Carefully fill each baking cup, one at a time, immediately draining out excess chocolate. Place in mini muffin tin to assure shape retention. Place in freezer for at least 10 minutes or until set. Peel off baking cup.
Beat cream cheese with juice, peel and sugar until smooth. In another bowl, whip cream until it holds soft peaks. Fold cream into cream cheese mixture. Fill piping bag with mousse and pipe into chocolate cups. Cut kiwi across into 1/4 inch slices. Cut each slice into fourths. Garnish with kiwi triangles and raspberry halves.
~My daughter, Natalie and I tried milk chocolate, white chocolate and dark chocolate for her graduation from CU Engineering School celebration. Dark chocolate was preferred, followed by white and then milk chocolate. This is an absolutely elegant dessert tidbit.
2 tablespoons chopped onion
4 chicken legs, drumsticks and thighs (or 8 thighs)
12 small whole onions (frozen works well)
2 medium-sized carrots, peeled and cut into 1/2 rounds
1/2 teaspoon dried thyme leaves
1 clove garlic, minced
1 lb. fresh mushrooms, sliced
3 tablespoons butter
4 sprigs fresh parsley, plus more for garnish, if desired
1 medium bay leaf
3 cups Cabernet Sauvignon or Burgundy wine
Preheat oven to 350 degrees.
Brown the chopped onion and bacon in a large skillet. Remove to a casserole dish or Dutch Oven. Add the chicken to the skillet, being careful not to crowd the pan. You may have to brown the chicken in two batches. Brown on all sides. Remove and place in the container with the bacon and onions. Add onions, carrots and dried thyme leaves, and saute for about 5 minutes. Add the minced garlic and saute for 30 more seconds. Add this mixture to the casserole or Dutch Oven. Add the butter to the skillet and saute the mushrooms on both sides. Meanwhile, make a bouquet garni with the parsley and bay leaf. Add this to the casserole. Add the mushrooms to the casserole dish. Carefully pour the Cabernet Sauvignon into the skillet and scrape up the browned bits. Heat to boiling and pour over chicken and vegetables.
Cover and bake in oven for 2 1/2 hours. Remove bouquet garni before serving. Garnish with sprigs of parsley, if desired.
~A luscious, comforting solution to those chilly nights!
Freeze 1 cup or 6 ounces peppermint patties while mixing the cake.
Cake:
1 chocolate fudge cake mix, plus 1/4 c. flour
1/2 cup chocolate milk
3/4 cup water
1 package chocolate instant pudding mix
1/2 cup vegetable oil
4 large eggs
1 teaspoon vanilla flavoring
1 cup peppermint patties, cut into fourths
2 tubs chocolate frosting
Preheat oven to 350 degrees. Butter and flour two 9-inch round cake pans, (or use Baker's Joy). Cut two 9-inch rounds of parchment paper and place in the bottom of both pans. Butter and flour the paper as well (or spray with Baker's Joy).
Mix all of the cake ingredients above but the peppermint patties and beat hard using an electric mixer for 5 minutes.
Fold in peppermint patty pieces.
Divide the batter equally into the two cake pans, and smooth the top.
Bake for 25-30 minutes.
Cool on wire rack for 10 minutes. Take out of pans, peel off the parchment paper, and cool thoroughly on wire racks.
Place one layer on a cake round or on a cake plate. Tuck pieces of wax or parchment paper around the perimeter of the cake. Frost the top of the first layer. Top with second layer. Frost the top and sides of the cake. Remove the wax paper. Fill a piping bag fitted with a large star tip and create a shell border around the base of the cake. Pipe several extended stars on the top layer.
1/2 cup milk
1/4 teaspoon salt
1/8 teaspoon pepper
1/2 cup finely chopped broccoli
1/4 cup finely chopped red pepper
2 tablespoons sliced green onion (about one, white and green parts)
2 strips cooked crispy bacon, crumbled
1 tablespoon finely chopped jalapeno pepper, optional
1/2 cup shredded cheddar cheese (2 ounces)
Cooking spray
Preheat oven to 350 degrees. Spray 12 cup muffin tin with cooking spray.
To cook the bacon:
Line a microwavable plate with two squares of paper towel. Arrange the bacon on top of the paper towel. Cook on high for one minute. Flip the bacon over, paper towels and all. Cook for another minute. Check the bacon. If needed, flip it again and cook for another 30 seconds. If they're still not done, cook for 10-second increments until crispy.
With a fork, beat eggs, milk, salt and pepper in medium bowl until just combined. Stir in broccoli, red pepper, green onion, bacon (and jalapeno pepper, if desired).
With an ice cream scoop, spoon evenly into the 12-cup greased muffin tin (about 1/4 cup in each).
Bake for 20 minutes. Sprinkle each muffin with cheddar cheese. Return to oven for 1-2 more minutes.
Cool on wire rack for 5 minutes.
~These surprisingly addictive bites can disappear quickly! Make sure you make enough for your event. Good warm and at room temperature (even cold!).
1 onion, diced
4-6 slices pickled jalapenos, finely chopped
1/2 teaspoon spice mix, recipe follows
1 teaspoon cumin
1/2 teaspoon salt
1/2 teaspoon pepper
2 cups sharp cheddar or pepper jack cheese (or a combination), shredded
4 large flour tortillas
4 corn tostada rounds
1-3 tablespoons oil
Shredded lettuce, picante sauce or salsa, and sour cream for garnish
Spice Mix:
2 tablespoons salt
2 tablespoons garlic powder
1 tablespoon black pepper
1 tablespoon onion powder
1 tablespoon cayenne pepper
1 teaspoon oregano
2 tablespoons paprika
~Combine all ingredients and store in an airtight container.
In a medium bowl season the ground beef with the spice mix, cumin, salt and pepper and lightly incorporate.
Saute the ground beef, onion and jalapenos together in a large skillet until meat is thoroughly cooked and onion is translucent.
To assemble:
Heat each flower tortilla in the microwave for 20-30 seconds. (This makes them pliable.) Add about ½ cup of the meat mixture to the center of the flour tortilla. Top with about 1/2 cup shredded cheese. Place a tostada round on top of the cheese. Spread 1/2 cup of the meat mixture on top of the tostada round.
Carefully fold the edges of the flour tortilla over the meat. Fry in oil in a shallow skillet with folded edges down first. Flip over when the first side turns golden. Fry the other side until it turns golden.
Garnish with your favorite salsa, lettuce and sour cream.
Serves 4-8.
~I saw something similar to this on a TV commercial, so I decided to try it at home. What an indulgent treat!
1-2 cups baby spinach leaves
1 hard-cooked egg, quartered lengthwise
4-5 grape tomatoes, 1-2 strawberries, sliced
1 ounce goat cheese, crumbled
1 mushroom, sliced
1 bacon rose, instructions, below
1 strip of bacon, cooked crisp and crumbled, reserving 1 tablespoon bacon grease
Vinaigrette: (2 servings, easily doubled)
2 tablespoons cider vinegar
1/2 tablespoon lemon juice
2 tablespoons sugar
1/2 teaspoon salt
4-5 dashes Tabasco sauce
1 teaspoon chopped fresh chives
1 tablespoon reserved bacon grease
5 tablespoons olive oil
Add all ingredients into a cruet and shake vigorously.
Bacon Rose: Line a microwave safe plate with a paper towel. Take a strip of bacon and wind it into a shape of a rose. Cover loosely with another paper towel. Microwave for about 30 seconds to one minute on high or until crisp.
On each salad plate, arrange the spinach leaves, egg, strawberries, tomatoes, mushrooms, goat cheese and crumbled bacon. Top with bacon rose. Drizzle with vinaigrette.
~Love this new take on an old favorite! Mix and match with vegetables and fruit you love.
2 tablespoons soy sauce
2 tablespoons oil (I use peanut or canola)
1 stalk celery, finely chopped
3 green onions, finely chopped
1/2 head cabbage, finely sliced
1 carrot, finely shredded
1/4 pound mushrooms, finely chopped
1 package egg roll wrappers
1 egg, lightly beaten
oil for frying
Marinate pork in soy sauce for 30 minutes. In a large skillet or wok, heat 2 tablespoons oil and add all of the vegetables. Stir-fry for 3-5 minutes. Add pork and soy sauce marinade and stir-fry for one minute. Pour into strainer and drain thoroughly. Roll mixture in egg roll wrappers according to directions on the back of the package. Seal edges with egg wash. Fry in deep fryer at 350 degrees until golden brown. Serve with sweet and sour sauce.
Sweet and Sour Sauce:
1/2 cup pineapple juice
1/4 cup white vinegar
2 tablespoons oil
2 tablespoons brown sugar
1 tablespoon soy sauce
2-inch square piece of onion and red bell pepper
1/2 of a medium tomato, chopped
2 tablespoons reserved chopped pork
1 teaspoon cornstarch
2 teaspoons water
Combine seven five Sweet and Sour Sauce ingredients in a small saucepan. Bring to a boil. Turn heat down and simmer for 5 minutes. Combine cornstarch and water together and pour into boiling liquid to thicken. Strain and pour into a dipping container.
~These mouth-watering morsels are a culinary delight. The down side is that you may have trouble enjoying the egg rolls you order at any restaurant in the future.
(Choose two or three different types. I usually use carrots, broccoli and mushrooms.)
2 tablespoons peanut, canola or olive oil
3 large onions, sliced
1 1/2 tablespoon + 1 tsp. salt or to taste
11 oven-ready lasagna noodles
2 1/2 cups milk
1 cup chicken stock or vegetable stock
(If using vegetable stock, add 1/2 teaspoon of each of these herbs: marjoram, oregano, parsley and basil to the creamy parmesan sauce.)
3 garlic cloves, peeled and smashed
3 tablespoons butter
5 tablespoons flour freshly ground pepper to taste
1 1/4 cups grated Parmesan cheese
1/4 lb. Fontina cheese, grated
1/4 lb. Gruyere cheese, grated
Vegetable spray
Heat oil over medium heat in a large skillet. Add onion-cook until soft and golden brown, about 5-8 minutes. Set aside.
Mix 1 1/2 tablespoons salt and two quarts very hot tap water in a 9x13 inch lasagna pan. Add noodles and soak until soft and pliable, about 10 minutes. Drain and stack loosely. (Noodles tend to stick together as they dry, but pull apart easily.)
Make creamy Parmesan sauce:
Microwave milk, stock and garlic in a one quart microwave safe container on high power until steaming hot, about 6 minutes. (Or slowly heat in a medium saucepan over medium-low heat.)
Fish out the garlic cloves.
Melt 3 tablespoons butter over medium heat in a large saucepan; when foaming subsides, whisk in flour and continue to cook, whisking constantly, until well blended, for about one minute. Pour in milk mixture all at once and whisk vigorously until sauce is smooth and starts to bubble and thicken. (Sometimes I mix 1 tablespoon cornstarch with 3 tablespoons cold water and whisk that in, if the mixture has a difficult time thickening.) Stir in 1/2 cup Parmesan, 1 teaspoon salt and pepper to taste. Remove from heat; place plastic wrap directly on the surface of the sauce.
Adjust rack to upper middle position and heat oven to 425 degrees.
Spray pan with vegetable spray.
Smear 1/2 cup of the sauce over bottom of baking dish.
Mix the Fontina and Gruyere cheese together in a bowl.
Assemble the next 4 layers in the following order: 3+ noodles, (Tear two noodles lengthwise to fit the gaps in the pan.), 1 cup sauce, half of the onions, half of the cooked vegetables, 3/4 cup shredded cheese and 2 tablespoons Parmesan cheese. Assemble final layer with remaining noodles, sauce and cheeses.
Seal with foil and bake until bubbly, about 35 minutes. Remove foil, and then bake until cheese is spotty brown, 5-7 minutes longer. Let stand 10-15 minutes before serving.
**Note: you may need more oil to saute vegetables like mushrooms, before layering them in the lasagna.
~A decadent, dreamy lasagna!
1 box yellow cake mix (I use Betty Crocker SuperMoist.)
1/4 cup flour if you're at high altitude
1 3-ounce package instant vanilla pudding mix
2/3 cup water
1/2 cup peanut oil
1/2 cup white rum
Zest of 2 limes
Juice of 2 limes
4 eggs
1/2 teaspoon pure vanilla extract
1/2 teaspoon pure almond extract
For the raspberry cake layers:
1 box white cake mix (I use Betty Crocker SuperMoist.)
1/4 cup flour if you're at high altitude
1 3-ounce package instant vanilla pudding mix
2/3 cup water
1/2 cup peanut oil
1/2 cup raspberry freezer jam (like Freshy Fresh Raspberry Jam, recipe here: http://lovetohelpyou.com/FoodPage.html#raspberryjam
4 eggs
2 tablespoons Chambord liqueur
1/2-1 teaspoon no taste red gel food coloring
1 teaspoon pure almond extract
Preheat oven to 350 degrees.
For each type of cake:
Spray 2 non-stick 9 inch cake pans with vegetable spray or Baker's Joy.
Beat all ingredients in a stand or hand mixer at first at slow speed for 30 seconds, and then at medium speed for 4 minutes 30 seconds.
Divide the batter between the two pans.
Bake for about 30 minutes or until a toothpick when inserted into the center comes out clean.
Cool on a wire rack for ten minutes. Remove from pan and cool completely.
For the lime cake filling: Lime Curd:
3-4 large limes
Zest of three limes
1/2 cup freshly squeezed lime juice
2 whole large eggs
4 large egg yolks
3/4 cup sugar
Dash salt
2 tablespoons butter, diced
While the cakes are baking, make the lime curd. In a small saucepan combine the sugar, eggs and egg yolks, salt and lime juice. Cook on medium heat until thick and bubbly. Stir in butter a tablespoon at a time. Whisk in lime zest.
Pour into a bowl. Cover with plastic wrap, making sure that the wrap sits right on the surface of the lime mixture. This way it doesn't form a skin on the surface. Refrigerate until cool.
For the raspberry cake filling:
1/2-1 cup raspberry freezer jam
Frosting: (You may want to double this recipe, if you like lots of frosting.)
1/2 cup unsalted butter, softened
4 cups powdered sugar
2 tablespoons cream
1 teaspoon salt
2-3 tablespoons water
2 tablespoons corn syrup
1 teaspoon pure vanilla extract
1/4 teaspoon almond extract
Topping and garnish:
3 6-ounce containers of fresh raspberries
To Assemble:
Put one of the lime cakes on a cake plate.
(If you want the plate to remain clean, cut several squares of wax paper and slide them under the cake, covering the cake plate.)
Fill a 16-inch or larger piping bag fitted with a large round piping tip with frosting.
Pipe a rim of frosting around the cake. Spread the top of the cake with half of the lime curd.
Top with a raspberry cake.
Pipe a rim of frosting around the cake. Spread the top of the cake with half of the raspberry jam.
Repeat with remaining cake layers and fillings.
Spread the sides of the cake with the remaining frosting.
Remove the wax paper.
Ring the bottom of the cake with raspberries. Put the remaining raspberries on top of the cake.
~Oh my gosh, we loved this cake! What a symphony of flavors!
Two sticks unsalted butter (half pound), at room temperature
1/2 cup sugar
1 3/4 cup flour
1/4 cup corn starch
1/4 teaspoon salt
For the topping:
6 large eggs at room temperature
3 cups sugar
2 tablespoons grated lemon zest, (about 4-6 lemons)
1 cup freshly squeezed lemon juice
1 cup flour
Pinch of salt
Powdered sugar, for dusting
Preheat the oven to 350 degrees.
Cream the butter and sugar in the bowl of an electric mixer until fluffy, about 3 minutes. Meanwhile, whisk the flour, corn starch and salt together in a medium bowl. Turn the mixer on low and add the flour mixture. Mix until just combined.
Press dough into a 9x13 pan, leaving a 1/2 inch lip around the edges.
Bake for 15-20 minutes until set but not too brown. Remove and cool on a baking rack.
For the topping, beat the eggs, sugar, lemon zest, lemon juice and flour together. Pour over the still warm crust. Bake for 30-35 minutes until the custard is set. Remove from oven and let cool on a baking rack.
When cool, dust with powdered sugar and cut into squares.
~I have looked high and low for the perfect lemon bar. This is the ideal combination of buttery, yet crisp and tender crust, topped with a bright and refreshing lemon custard. Your lemon fans will sing with delight!
2 tablespoons vegetable oil
1 cup white granulated sugar
1 teaspoon vanilla extract
2 eggs
3/4 cup flour (add 1 tablespoon more flour for high altitude)
1 teaspoon baking powder
1 teaspoon salt
2-3 tablespoons red jam (raspberry, strawberry, plum, etc.)
Preheat oven to 350 degrees.
Melt butter in medium saucepan over low heat.
Let cool slightly.
Stir in cocoa, oil, sugar, eggs and vanilla until thoroughly incorporated.
Fold in dry ingredients.
Bake in ungreased 8x8 square pan for about 20 minutes.
Remove from oven and cool on a baking rack.
Cut into your favorite heart shape.
Top with your favorite raspberry or strawberry preserves. Shown: Freshy Fresh Raspberry Jam
~ This was the first recipe I memorized. I baked these brownies by myself when I was eight years old. The cool thing is that you probably already have all the ingredients in your pantry! These decadent brownies are very fudgie and a quick chocolate fix!
1 can Niblets corn
1/2-1 cup grape tomatoes, halved
1 can kidney beans, drained and rinsed
1 small sweet onion, peeled and diced
2 avocados, peeled and diced
Lime vinaigrette:
1/4 cup olive oil
zest and juice of 2 fresh limes
1 tablespoon brown sugar
1/2 teaspoon ground cumin
1 jalapeno pepper slice, minced, optional
Dash of salt and pepper
Combine first four ingredients in a large bowl. Toss. Add avocados. Mix all the vinaigrette ingredients in a small bowl or cruet. Whisk or shake thoroughly. Pour the vinaigrette over the avocados, letting it stream into the rest of the salad. Gently fold the avocados into the rest of the mixture, taking care not to break up the chunks. (Make sure the avocados are thoroughly coated so that they don't turn brown.) Refrigerate for about an hour before serving.
Easily doubled or tripled.
~What a delicious way to get your fiber! In addition, we have all heard the great benefits of avocados. Get creative with this recipe, mixing and matching your favorite fruit and vegetables.
1/4 cup flour if you're at high altitude
1 3-ounce package instant vanilla pudding mix
2/3 cup water
1/2 cup peanut oil
1/2 cup white rum
Zest of 2 limes
Juice of 2 limes
4 eggs
1/2 teaspoon pure vanilla extract
1/2 teaspoon pure almond extract
Preheat oven to 350 degrees.
Beat all ingredients at first at slow speed for 30 seconds, and then at medium speed for 4 minutes 30 seconds.
Line cupcake tins with cupcake papers.
Scoop batter into papers, using an ice cream scoop for best results. Fill about two-thirds full.
Bake for 22 minutes for full sized cupcakes or 14-15 for mini cupcakes.
Frosting:
1/4 cup Crisco
1/4 cup butter, softened
1/8 teaspoon salt
4 cups powdered sugar
1/2 teaspoon pure vanilla extract
1/2 teaspoon pure almond extract
2-4 tablespoons heavy cream
1/2 cup raspberry jam (I used Freshy Fresh, recipe here.)
1 sweet potato, peeled and diced
2 carrots, peeled and sliced into quarter inch rounds
1 sweet onion, diced
1 teaspoon salt
1/2 teaspoon black pepper
1/2 teaspoon garlic powder
1/2 teaspoon onion powder
1/2 teaspoon dried marjoram
1/2 teaspoon dried parsley
1- 32 ounce container chicken stock
1/2 cup white wine
2 chicken bouillon cubes, optional
2 tablespoons heavy cream
1 teaspoon dried chives
Heat the oil in a large stockpot and saute vegetables, salt, pepper, garlic powder onion powder, marjoram and parsley until almost tender. Pour the wine in and scrape up any bits from the bottom of the pan. Add chicken stock. Bring to a boil and then turn down to medium heat and simmer for 5-10 minutes. Check for flavoring and add more salt, (or even a chicken bouillon cube or two, if desired.) Add cream and chives and heat until just before it boils.
Serves 4. Easily double or tripled.
~I have searched for a potato soup that is flavorful and I have finally developed one I think you'll love. It's just creamy enough to be velvety, but not too much to make you feel guilty.
9 thin slices of sopressata sausage**
6 ounces of gruyere cheese, grated
Whole grain mustard
1 egg, lightly beaten
Parchment paper
Baking sheet
Preheat oven to 450 degrees.
Defrost the puff pastry in the refrigerator for several hours or overnight.
Cut in half.
On a floured board, roll each sheet of puff pastry into approximately 10 inch squares.
Place the parchment paper on the baking sheet and place one of the puff pastry sheets on the parchment.
Brush the egg about one quarter inch around the perimeter of the pastry sheet.
Spread a thin layer of mustard on the remaining surface of the pastry sheet.
Place the soppressata slices, overlapping slightly, on top of the mustard.
Cover with the grated cheese.
Place the remaining puff pastry sheet on top, pressing lightly to seal the edges. With a sharp knife, trim off the edges.
At this point you can refrigerate the finished pastry until you are ready to bake.
About 30 minutes before serving, brush the surface with egg. Cut slits in the top (decoratively if desired) for venting.
Bake for 20-25 minutes. Cut into desired number of squares.
*I learned about DuFour puff pastry from a Martha Stewart episode. DuFour is made with butter instead of oil to make it extra delicious. It is found in Whole Foods or Sprouts Market or probably any specialty food market.
**Soppressata sausage is also found at Whole Foods and Sprouts Market in prepackaged containers.
~This recipe is inspired by one of Ina Garten's with a couple modifications. It is really easy and perfect for those savory lovers in your family. Delicious.
1 tablespoon dry yeast (one package)
2 tablespoons sugar
1 cup very warm tap water
1 teaspoon salt
1 tablespoon vegetable oil (I use canola.)
2-3 cups flour
2 tablespoons shredded Parmesan cheese, optional
Filling:
2-4 boneless chicken breasts, diced
1-2 tablespoons vegetable oil
1/2 -1 teaspoon salt
1/2 teaspoon pepper
1 teaspoon garlic powder
1 medium onion, peeled and diced
1/2 cup carrots (1-2 large carrots), thinly sliced
1 potato, peeled and diced
1 1/2 cups chicken stock
1/2 cup white wine, optional (or substitute with additional 1/2 cup chicken stock)
1 teaspoon dried thyme
1 teaspoon dried parsley
2 tablespoons cornstarch mixed with 3 tablespoons cool water
About two hours before serving, in a large bowl dissolve the yeast in the warm water with the sugar. Set aside for 10 minutes. This "proofs" the yeast, making sure the yeast is active. Add the salt, oil and enough flour to make the dough smooth and elastic. Knead until this is accomplished. Put the dough into another greased bowl, covering it with plastic wrap. (Grease the plastic wrap as well.) Let it rise in a warm, draft-free place for one hour or until doubled in size.
About one hour before serving, saute the chicken on all sides. Season with salt, pepper and garlic powder. Remove and reserve. Add diced onion, carrots, diced potato, wine, chicken stock, thyme, and parsley. Bring to a boil. Stir in the cornstarch mixture until thick and bubbly. Add the chicken back into the sauce. Add more salt to taste.
To assemble, grease a 10-inch pie plate. Divide the dough in half. Roll out each half into an approximate 12-inch circle. Put one of the circles in the bottom of the pie plate, making sure the sides of the dough are over the sides of the pie plate. Pour the chicken mixture into the pie plate. Cover with the other circle of dough. Pinch the edges and make slits in the top of the pie to allow steam to escape. Sprinkle with Parmesan cheese, if desired. Bake on a foil lined baking sheet at 400 degrees for 20 minutes.
`This pie is made with a pizza crust (a lot less fat!) instead of a traditional pie crust (quite a bit of fat!). This recipe is so versatile making it easy to add any vegetable that you would like. You have to be careful, though. It is addicting!
1 large tomato, peeled and diced
1 tablespoon oil
1 small onion, diced
1/4 celery stalk, finely diced
1 tablespoon tomato paste
2 tablespoons pinot noir wine
1/2 cup whole milk
1-2 slices pickled jalapeno pepper, chopped (optional)
1/2-1 teaspoon salt
1/4 teaspoon black pepper
1/2 teaspoon garlic powder
1/2 teaspoon onion powder
5 basil leaves, rolled up and julienned (or 1 teaspoon dried basil)
In a medium saucepan, saute the onion and celery until transparent. Meanwhile, put the 4 peeled and chopped tomatoes in a food processor and whirl for about 30 seconds until smooth (no need to remove seeds).
(An easy way to peel tomatoes: Plunge tomatoes in boiling water for 30 seconds. Then immerse them immediately in ice water. The skins should slip right off.)
Note: You may substitute canned tomatoes. You will need 2 large cans. Just reserve 2 or 3 of these small tomatoes to dice, before adding the rest into the food processor.
Deglaze the pan with the tomato paste and wine. Stir until smooth.
Add the tomato puree, diced tomatoes and milk to the sautéed vegetables and wine mixture. Stir in the jalapeno pepper, if desired, salt, pepper, garlic powder and onion powder. (Also stir the dried basil in if you are not using fresh basil.) Bring to a boil; turn the heat to low and then simmer uncovered for about 1/2-1 hour, stirring often.
Stir in fresh basil leaves 5 minutes before serving.
~With our bountiful tomato harvest we kept coming up with new recipes to try. This one is warm and comforting with a little zing!
3/4 cup cider vinegar
1 tablespoon water
1/2 cup canola or vegetable oil
1 cup sugar
1 teaspoon salt
1/2 teaspoon pepper
Cool marinade in refrigerator.
1 can pinto beans
1 can black-eyed peas
1 can white or yellow corn
1 can black beans
Drain all of the above, and pour into a large mixing bowl.
1 small jar pimentos
1 small onion
1 red or green bell pepper
1-2 stalks celery, trimmed
1-2 jalapeno peppers
Chop pimentos, onion, bell pepper, celery and jalapeno peppers quite small. Mix into beans, peas and corn.
Pour cooled marinade over bean/vegetable mix. Marinate overnight before serving. Drain to serve. Serve with your favorite tortilla or corn chip.
**Note: Keeps for 2 months in refrigerator while in marinade. Easily doubled or tripled.
You can save marinade and reuse for another batch.
~Wow, what a delicious dip for your next tailgate party! Cathy had many requests for this recipe at our family reunion. I took the liberty of renaming this recipe because now Cathy is famous for it.
1-12 ounce bag frozen raspberries
1 teaspoon almond flavoring
1/2 cup sugar
1 tablespoon cornstarch
2 crusts for 9 or 10 inch pie (I use the Never Fail Pie Crust-recipe below)
3-4 tablespoons sliced almonds
2 tablespoons sugar
9 or 10 inch pie plate
Pour cherry pie filling into a colander and drain some of the cherry sauce.
Thaw raspberries and put into a medium sized mixing bowl. Sprinkle with almond flavoring.
Mix sugar and cornstarch together. Pour over raspberries and gently incorporate. Let stand while you roll out the crust.
When the bottom crust is in the pie plate, pour the raspberries into the colander with the cherries. Stir gently and let drain for just a minute.
Pour filling on top of the crust. Top with remaining pie crust. Brush the top pie crust with water and sprinkle the almonds all over the top. Then, sprinkle the 2 tablespoons of sugar on top of the almonds.
Slice several slits into crust so that steam can escape. Put pie on cookie sheet in case the filling bubbles over. Cover top crust with aluminum foil for the first 20 minutes.
Bake at 425 degrees for 35-40 minutes.
Never Fail Pie Crust
2 1/2 cups flour
1 cup shortening (e.g., Crisco) This makes the crust flaky.
1 teaspoon salt
1 egg, slightly beaten
1 tablespoon vinegar
4-5 tablespoons ice cold water
Combine flour and salt in a large bowl. Cut shortening into flour and salt mixture, until mixture looks like small peas. Add egg and vinegar and incorporate into flour mixture. Add water as needed, and mix until dough forms a ball. Try not to over mix. Cover and refrigerate for about 30 minutes. (It's easier to roll out if you do this.)
Roll out, turning and adding flour as needed. When you get the desired circumference, carefully roll the crust back onto the rolling pin. (You may need to use a spatula to tease the crust off of the counter.) This will make it easy to transfer the crust onto the pie pan. This can make 3 crusts, but I usually just make one 2-crust pie with it.
~If you follow these instructions, it really can't fail. Don't be discouraged, however, if it doesn't work the first couple times, if you're not an experienced pie maker. (The more you practice, the better you'll be.) If you are experienced, this will be no sweat.
~Our family adores this pie. While the pie was inspired by my grandma, I added the sugary almonds on top for a special crunch.
Dressing:
4 tablespoons sugar
2 teaspoons salt
1/2 teaspoon pepper
1/4 cup white vinegar (or your favorite)
1/4 cup white wine
1/2 cup salad oil
Saute chicken that has been seasoned with salt and pepper. (A little garlic powder makes the chicken burst with flavor as well. Just use your favorite seasonings.) Cool in the refrigerator. Right before serving, combine salad ingredients, including chicken. Combine dressing ingredients and pour over salad. (If you would like to make the dressing ahead of time, it only makes the dressing more flavorful.)
Feel free to add your favorite vegetables.
~Doesn't this sound too simple to be good? It's actually amazingly delicious! If you're wondering what to do with leftover turkey, try using it in this salad. It works just as well. My friend Lisa served this to me for lunch on a fun day at her house.
Thanks, Lisa!
1 celery stalk, finely sliced
1 onion, finely diced
4 hard-cooked eggs, chopped
1/2 cup grapes, each one sliced in half
1-2 teaspoons seasoning salt
1/2 cup Miracle Whip
1 tablespoon mustard, your favorite
2 tablespoons freshly squeezed lemon juice
1 tablespoon sugar
1/4 teaspoon black pepper
Chop chicken into bite-sized pieces and put in large bowl. Add celery, onion, eggs and grapes.
In a small bowl, mix Miracle Whip, mustard, lemon juice, and sugar. Pour over chicken, vegetables, grapes, and eggs. Fold in. Sprinkle with seasoning salt to taste and pepper. Give it one more toss and chill until ready to serve.
~Sometimes chicken salad can be somewhat bland. The addition of eggs, grapes and the spark of lemon juice into this recipe make it a quick, easy and scrumptious anytime salad.

1 1/2 cups sugar
2 cups buttermilk
2/3 cup vegetable oil
4 teaspoons vanilla
2 cups flour
2/3 cup cocoa powder
1 teaspoon baking powder
1 1/2 teaspoon baking soda
1/2 teaspoon salt
Preheat oven to 350 degrees.
Line 2 cupcake tins with cupcake papers.
In a large bowl of a standing mixer cream the sugar, buttermilk, oil and vanilla for about 2 minutes.
Note: If you don't have buttermilk, you can stir in 2 tablespoons freshly squeezed lemon juice into 2 cups of regular milk. Let it sit on the counter for at least 5-10 minutes before adding it to the batter.
In another large bowl, sift the flour, cocoa powder, baking powder, baking soda and salt.
Add the dry ingredients gradually to the wet ingredients and mix until they are just combined.
With an ice cream scoop, fill the cupcake papers about two-thirds full. Bake for 20 minutes or until they spring back when lightly touched.
~ I developed this recipe for the Family and Consumer Science class I taught. The recipe needed to be straight-forward as well as delicious for these high school bakers! We all agreed our baking experience was successful. And luscious.
Frost with Chocolaty Chocolate Frosting. Recipe follows.
8 ounces (1 stick) unsalted butter
6 ounces semisweet chocolate, chopped
Pinch of kosher salt (about 1/8 teaspoon)
1/4 cup unsweetened cocoa powder, sifted
2 teaspoons pure vanilla extract
2/3 cup sour cream
3 cups powdered sugar
Melt the butter in a large saucepan over low heat. Stir in the chocolate. Remove from heat when melted. (Be sure not to "cook" the chocolate; it will burn.) Stir in the salt, sour cream and vanilla until smooth. Stir in the sifted cocoa. Sift in the powdered sugar. (Sifting will help avoid lumps.) With an electric mixer beat in the powdered sugar, (starting out at a low speed and then gradually turning up to medium-high or high speed), until frosting is smooth.
Let the frosting cool for 20 minutes before frosting your cupcakes or cake.
~I paired this recipe with the High Altitude Chocolate Cupcakes for our FCS Foods class. It's a rich and worthy topping for a sweet cupcake.
1/2 teaspoon salt
1/2 teaspoon paprika
1/4 teaspoon sage
1/8 teaspoon pepper
1 pork tenderloin
Cooking spray
1/3 cup plum jam
3 tablespoons cider vinegar
1 large shallot, peeled and sliced (optional)
Stir together first five ingredients in a small bowl. Cut pork crosswise into six 1-inch pieces. Place each piece between two pieces of plastic wrap and pound to 1/2 inch thickness. Rub pork with spice mixture. Heat a large non-stick skillet over medium-high heat. Spray pan with cooking spray. Sear pork pieces, three minutes on each side. Remove from heat and keep warm.
If desired, add the shallot to the pan and stirfry for one minute.
Add jam to pan. Melt for 30 seconds, scraping the pan to loosen bitty pork pieces. Remove from heat and stir in vinegar. Spoon over pork.
~This recipe is one of the easiest, fastest, most delicious main dishes I have ever made. Pair with asparagus drizzled with olive oil and sprinkled with Kosher salt, roasted in a 450 degree oven for 10-20 minutes, depending upon the altitude and the crunchiness you prefer. Also super easy.
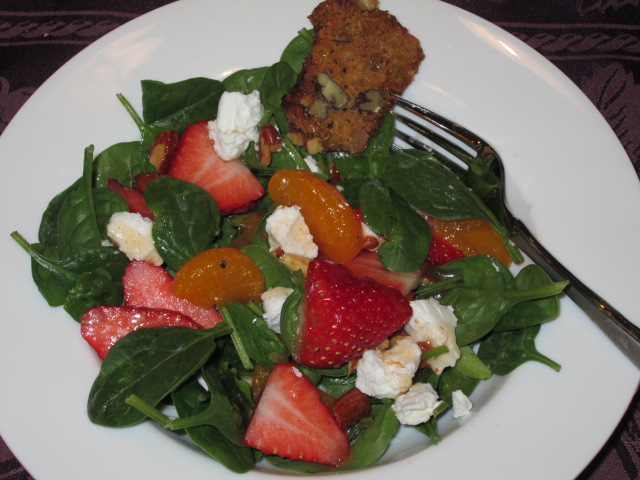
1/2-1 cup baby spinach leaves
3-4 strawberries, sliced
5-6 mandarin orange sections
1 ounce goat cheese, crumbled
1-2 tablespoons chopped, roasted and salted almonds
Croutons of your choice
Strawberry Vinaigrette:
1/2 teaspoon salt
dash of pepper
1/4 cup canola oil 1 tablespoon minced parsley
1 tablespoon sugar
2 tablespoons white vinegar
1 tablespoon strawberry jam, warmed
3 dashes of Tabasco sauce
Assemble the ingredients for the salad on each plate or in each bowl. In a cruet or similar container, shake all the ingredients for the vinaigrette until they are evenly mixed.
Drizzle over the salads.
~This salad is inspired by the delicious one at Corner Bakery, with a few changes. We love its unique flavor combination. Experiment with different breads sliced thinly and toasted for a delightful crouton variation.
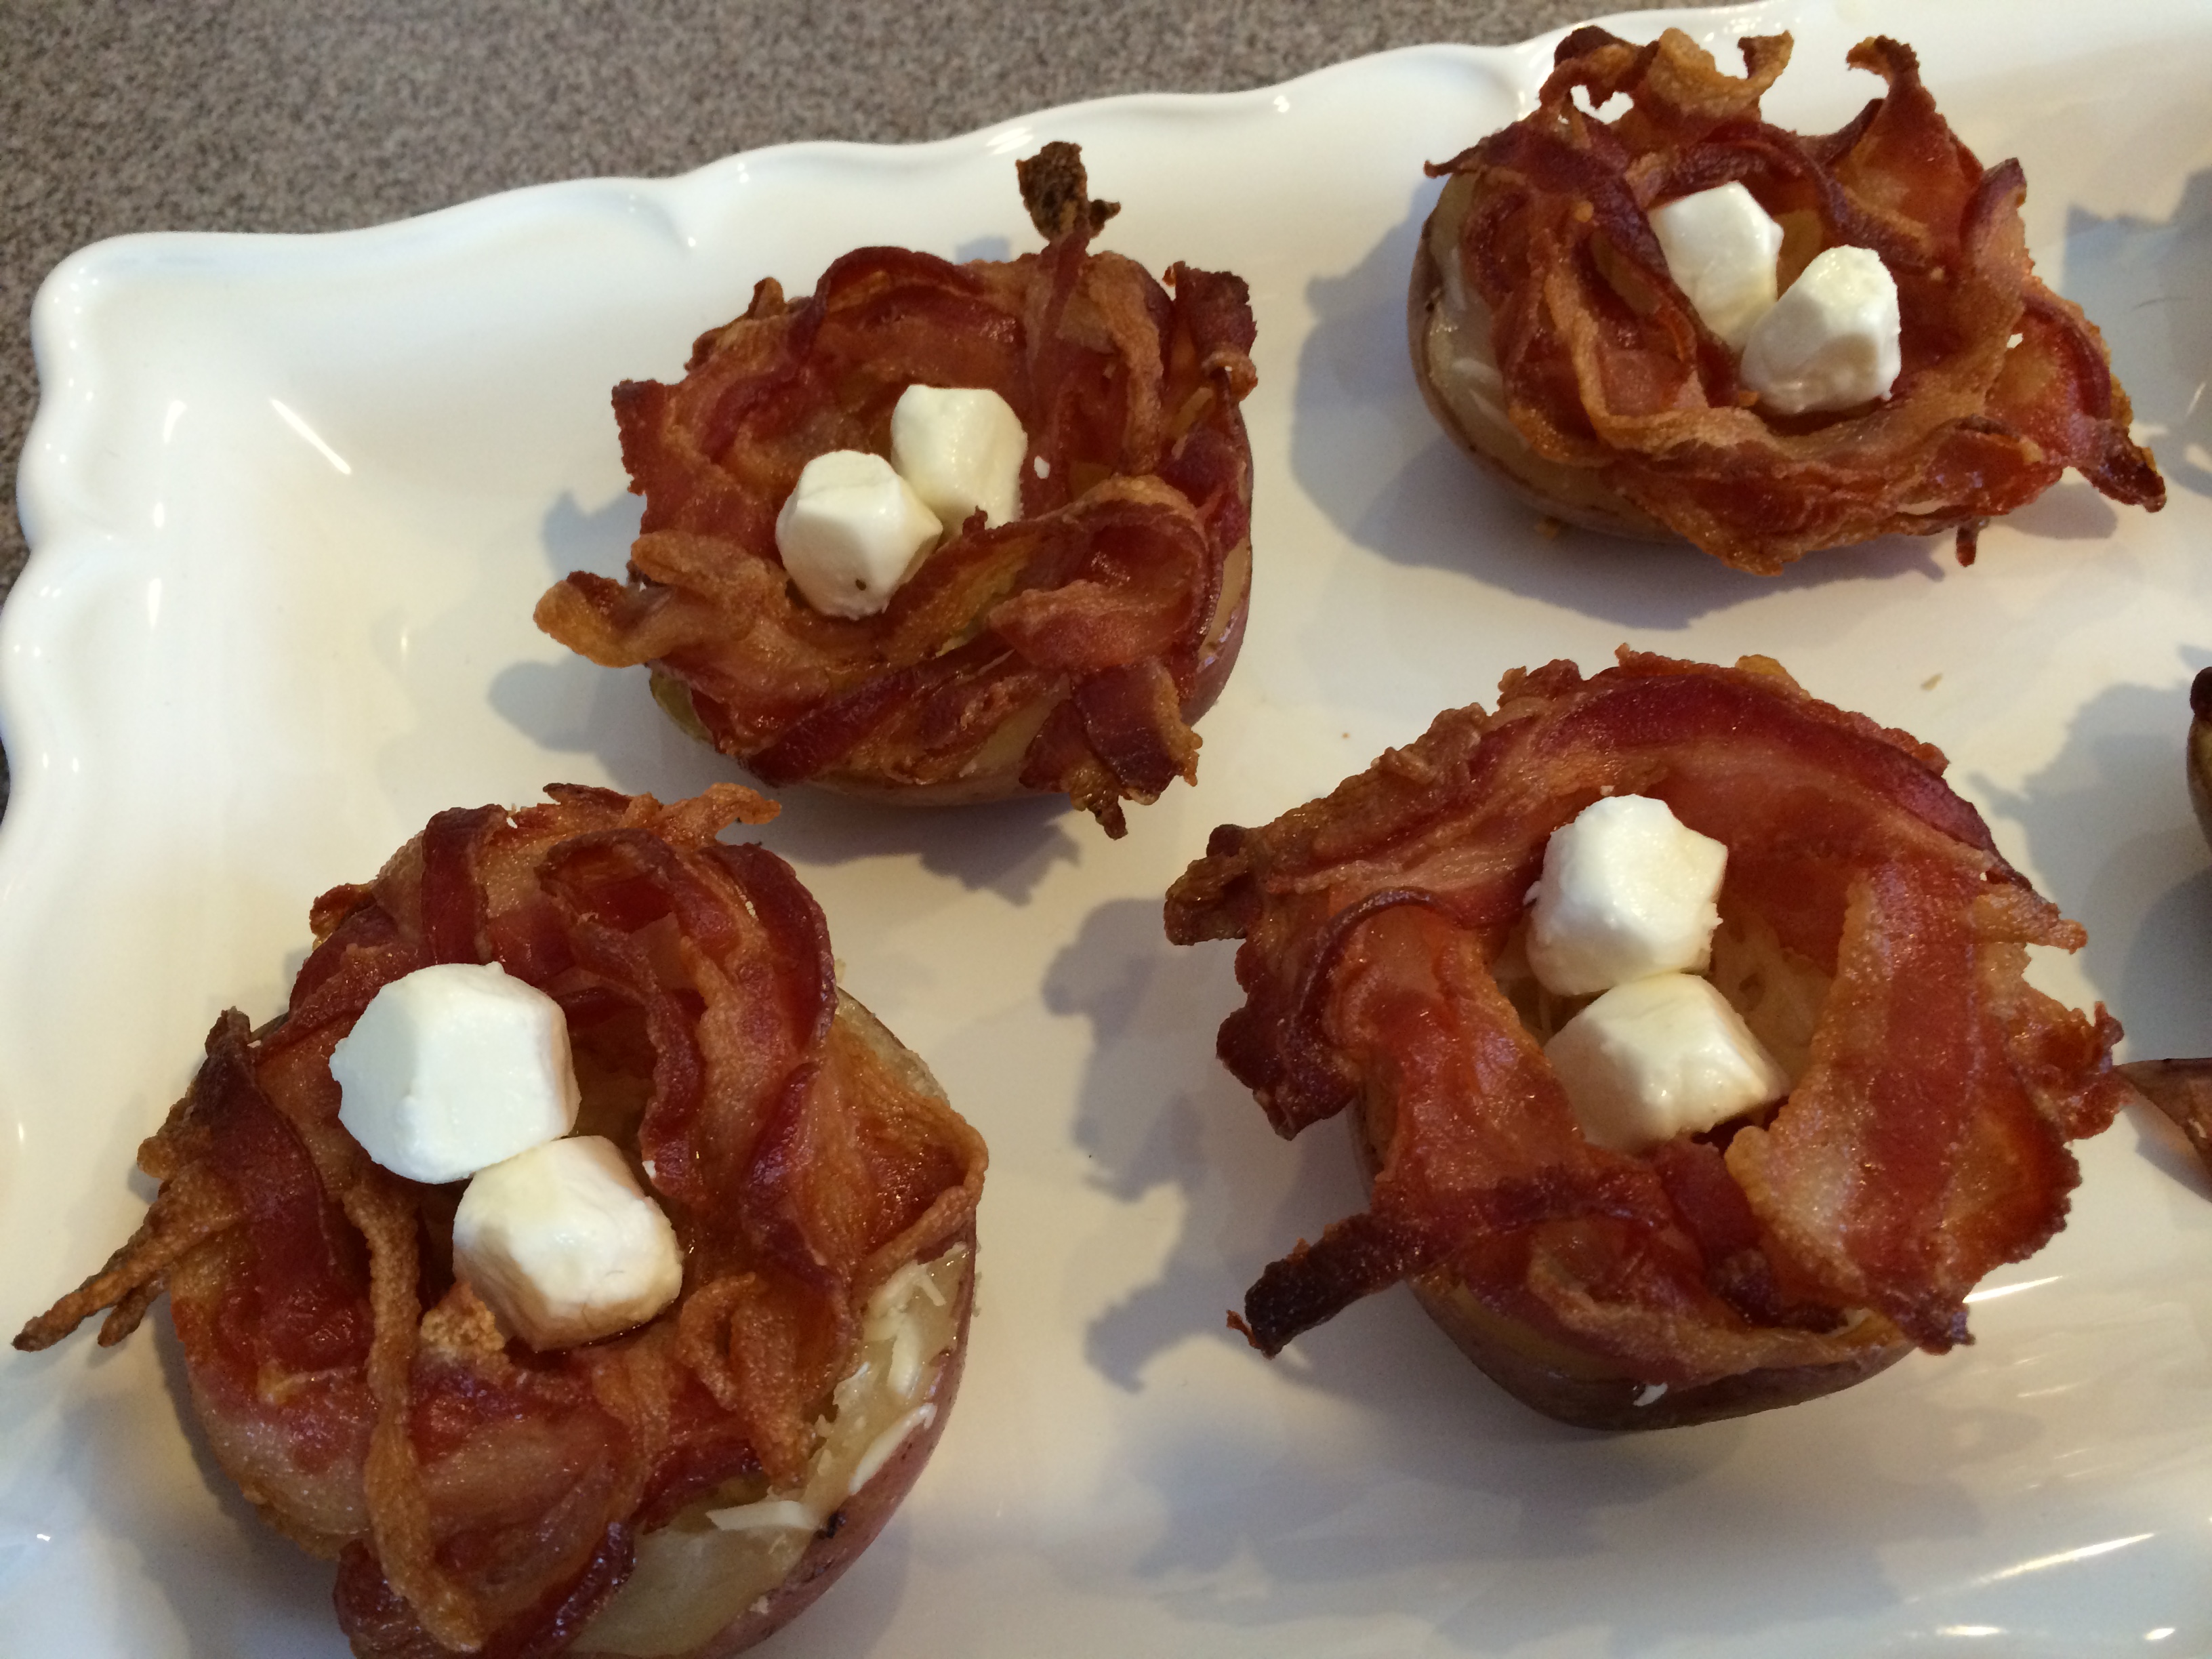
1/2 pound center cut bacon, thinly sliced lengthwise
3 potatoes, baked
1/4-1/2 cup shredded parmesan cheese
12 fresh perle mozzarella balls
Vegetable spray
Preheat oven to 400 degrees.
Cut the baked potatoes lengthwise. Scoop out most of the potato inside, leaving about one-quarter inch. Reserve the scooped out potato for another recipe.
Note: To bake potatoes, cover with foil and bake in a preheated 400 degree oven for 1-2 hours, depending upon the size of the potatoes and the elevation of your surroundings.)
Line a baking sheet with parchment paper or foil. Put a cooling rack on top of the lined baking sheet. Spray with vegetable spray.
Arrange the thin strips of bacon in an oval pattern, overlapping then to create the appearance of a nest. The "nests" should be a little larger that the rims of the baked potatoes. Bake for 25-30 minutes or until crispy.
Meanwhile, put the scooped out potatoes on another baking sheet. Sprinkle with parmesan cheese. Bake in the oven until the parmesan cheese is melted, about 5-10 minutes. (If the potatoes have been baked previously and are cool, they may need to be baked for 15-20 minutes in order to be warmed through.)
When the bacon is crispy, remove from oven and cool for about 5 minutes.
When cooled, place the bacon on top of the potato skins. Add 2 perle fresh mozzarella balls to each nest to simulate eggs.
~I created these as part of our annual competition at Easter dinner. This year the challenge was to make edible nests. Since I knew that bacon lovers were coming to dinner, I knew these would be a hit!
Note: this recipe is easily doubled or tripled
1 cup sugar
1 cup white vinegar
1 cup vegetable oil
1 teaspoon dry mustard
1 teaspoon Worcestershire sauce
1 teaspoon salt
1 teaspoon coarsely ground black pepper
1 (10 3/4 ounce) can tomato soup
1 pound carrots, peeled, sliced and cooked
1 medium onion, sliced
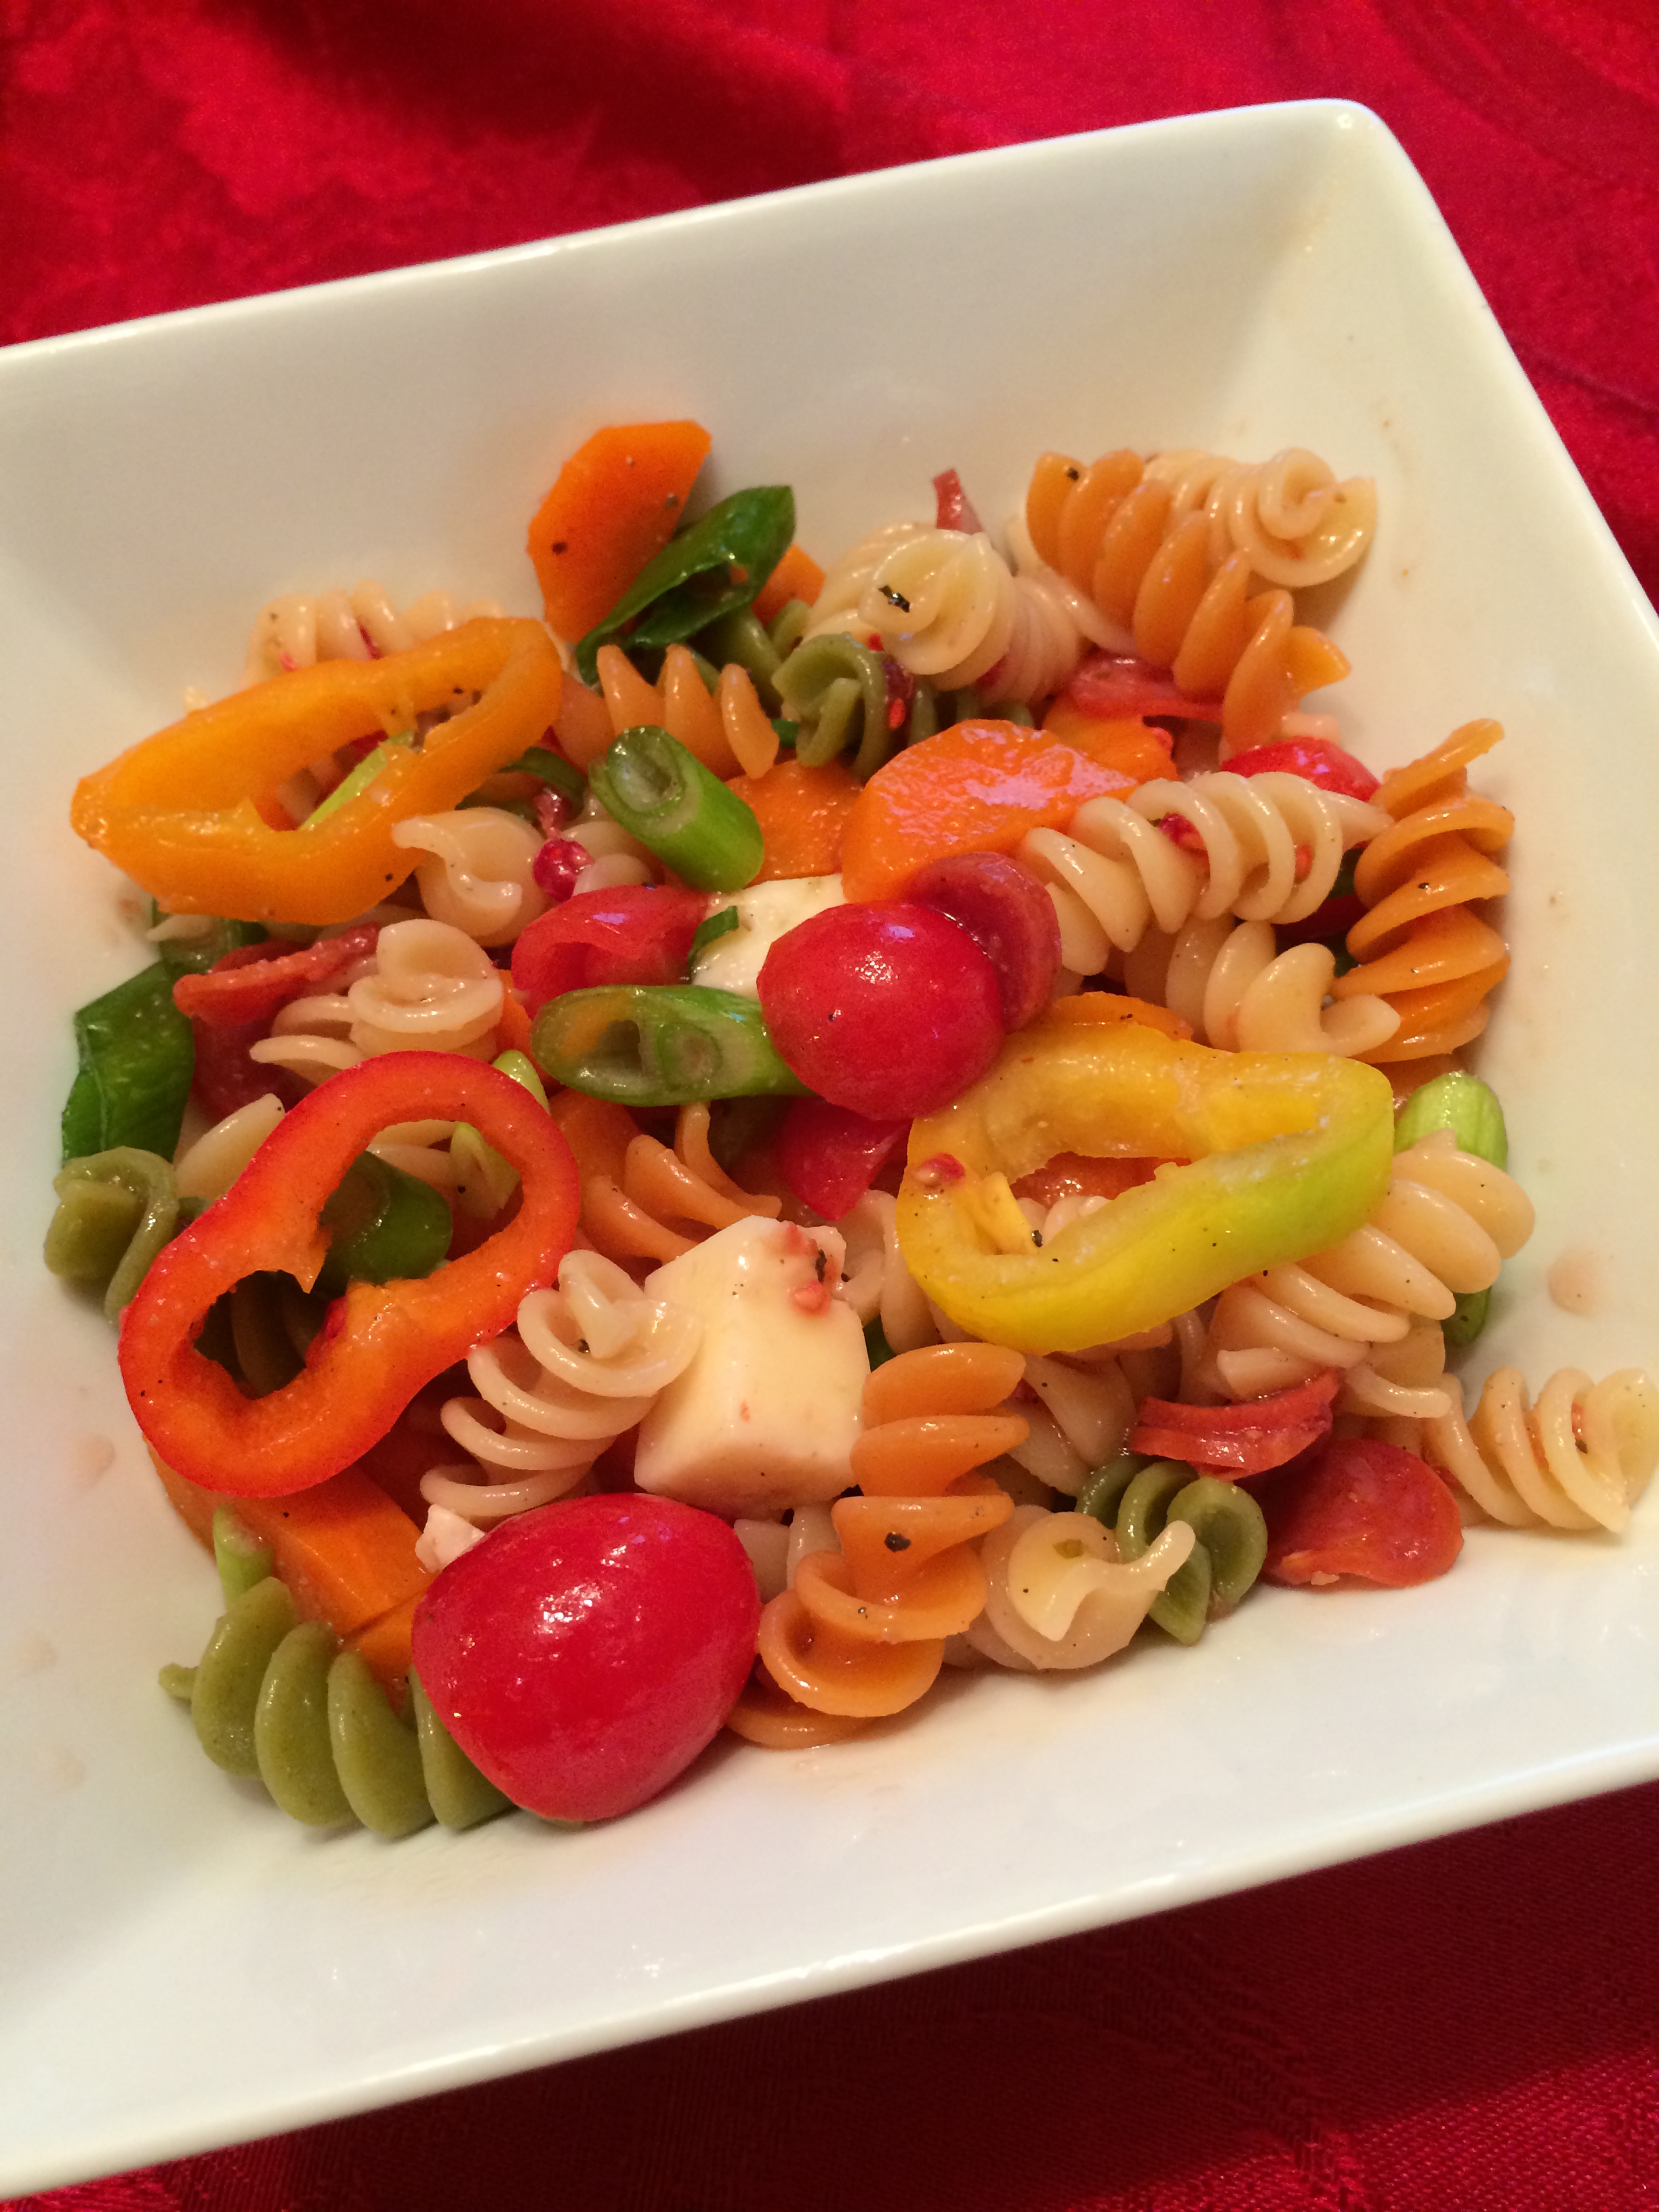
1 red bell pepper, coarsely chopped (or assorted colors of baby bells, sliced)
1/2 cup sliced back olives
10 cherry tomatoes, halved
Optional: pepperoni, cubed mozzarella cheese, cooked rotini noodles, green onions, green beans or any other vegetable
Combine the sugar, vinegar, oil, mustard, Worcestershire, salt and pepper in a saucepan over medium heat and bring to a boil. Remove from the heat. Pour the soup into a large bowl. Slowly whisk in the hot marinade. Add the carrots, bell pepper and onion as well as any other ingredient you prefer. Stir gently to combine and refrigerate overnight. This salad will keep for weeks in the refrigerator.
~Traditionally this salad was only meant for carrots, hence the name. (This is inspired by one of Paula Deen's recipes.) However, upon tasting this exquisite marinade, my son Ted said, "Why don't you put noodles into it?" That gave me the idea to add all kinds of ingredients that go into Italian deli salads. Have fun trying different delicacies to this salad. This is the best one of its kind you'll ever experience.
6 large egg yolks, room temperature
3/4 cup sugar
3 tablespoons cornstarch
Pinch of salt
1 1/2 cups scalded milk
1/2 teaspoon pure vanilla extract
1 teaspoon Chambord (raspberry) liqueur, or your favorite (You may substitute 1/4 teaspoon pure almond extract for the liqueur.)
1 tablespoon butter
1 tablespoon heavy cream
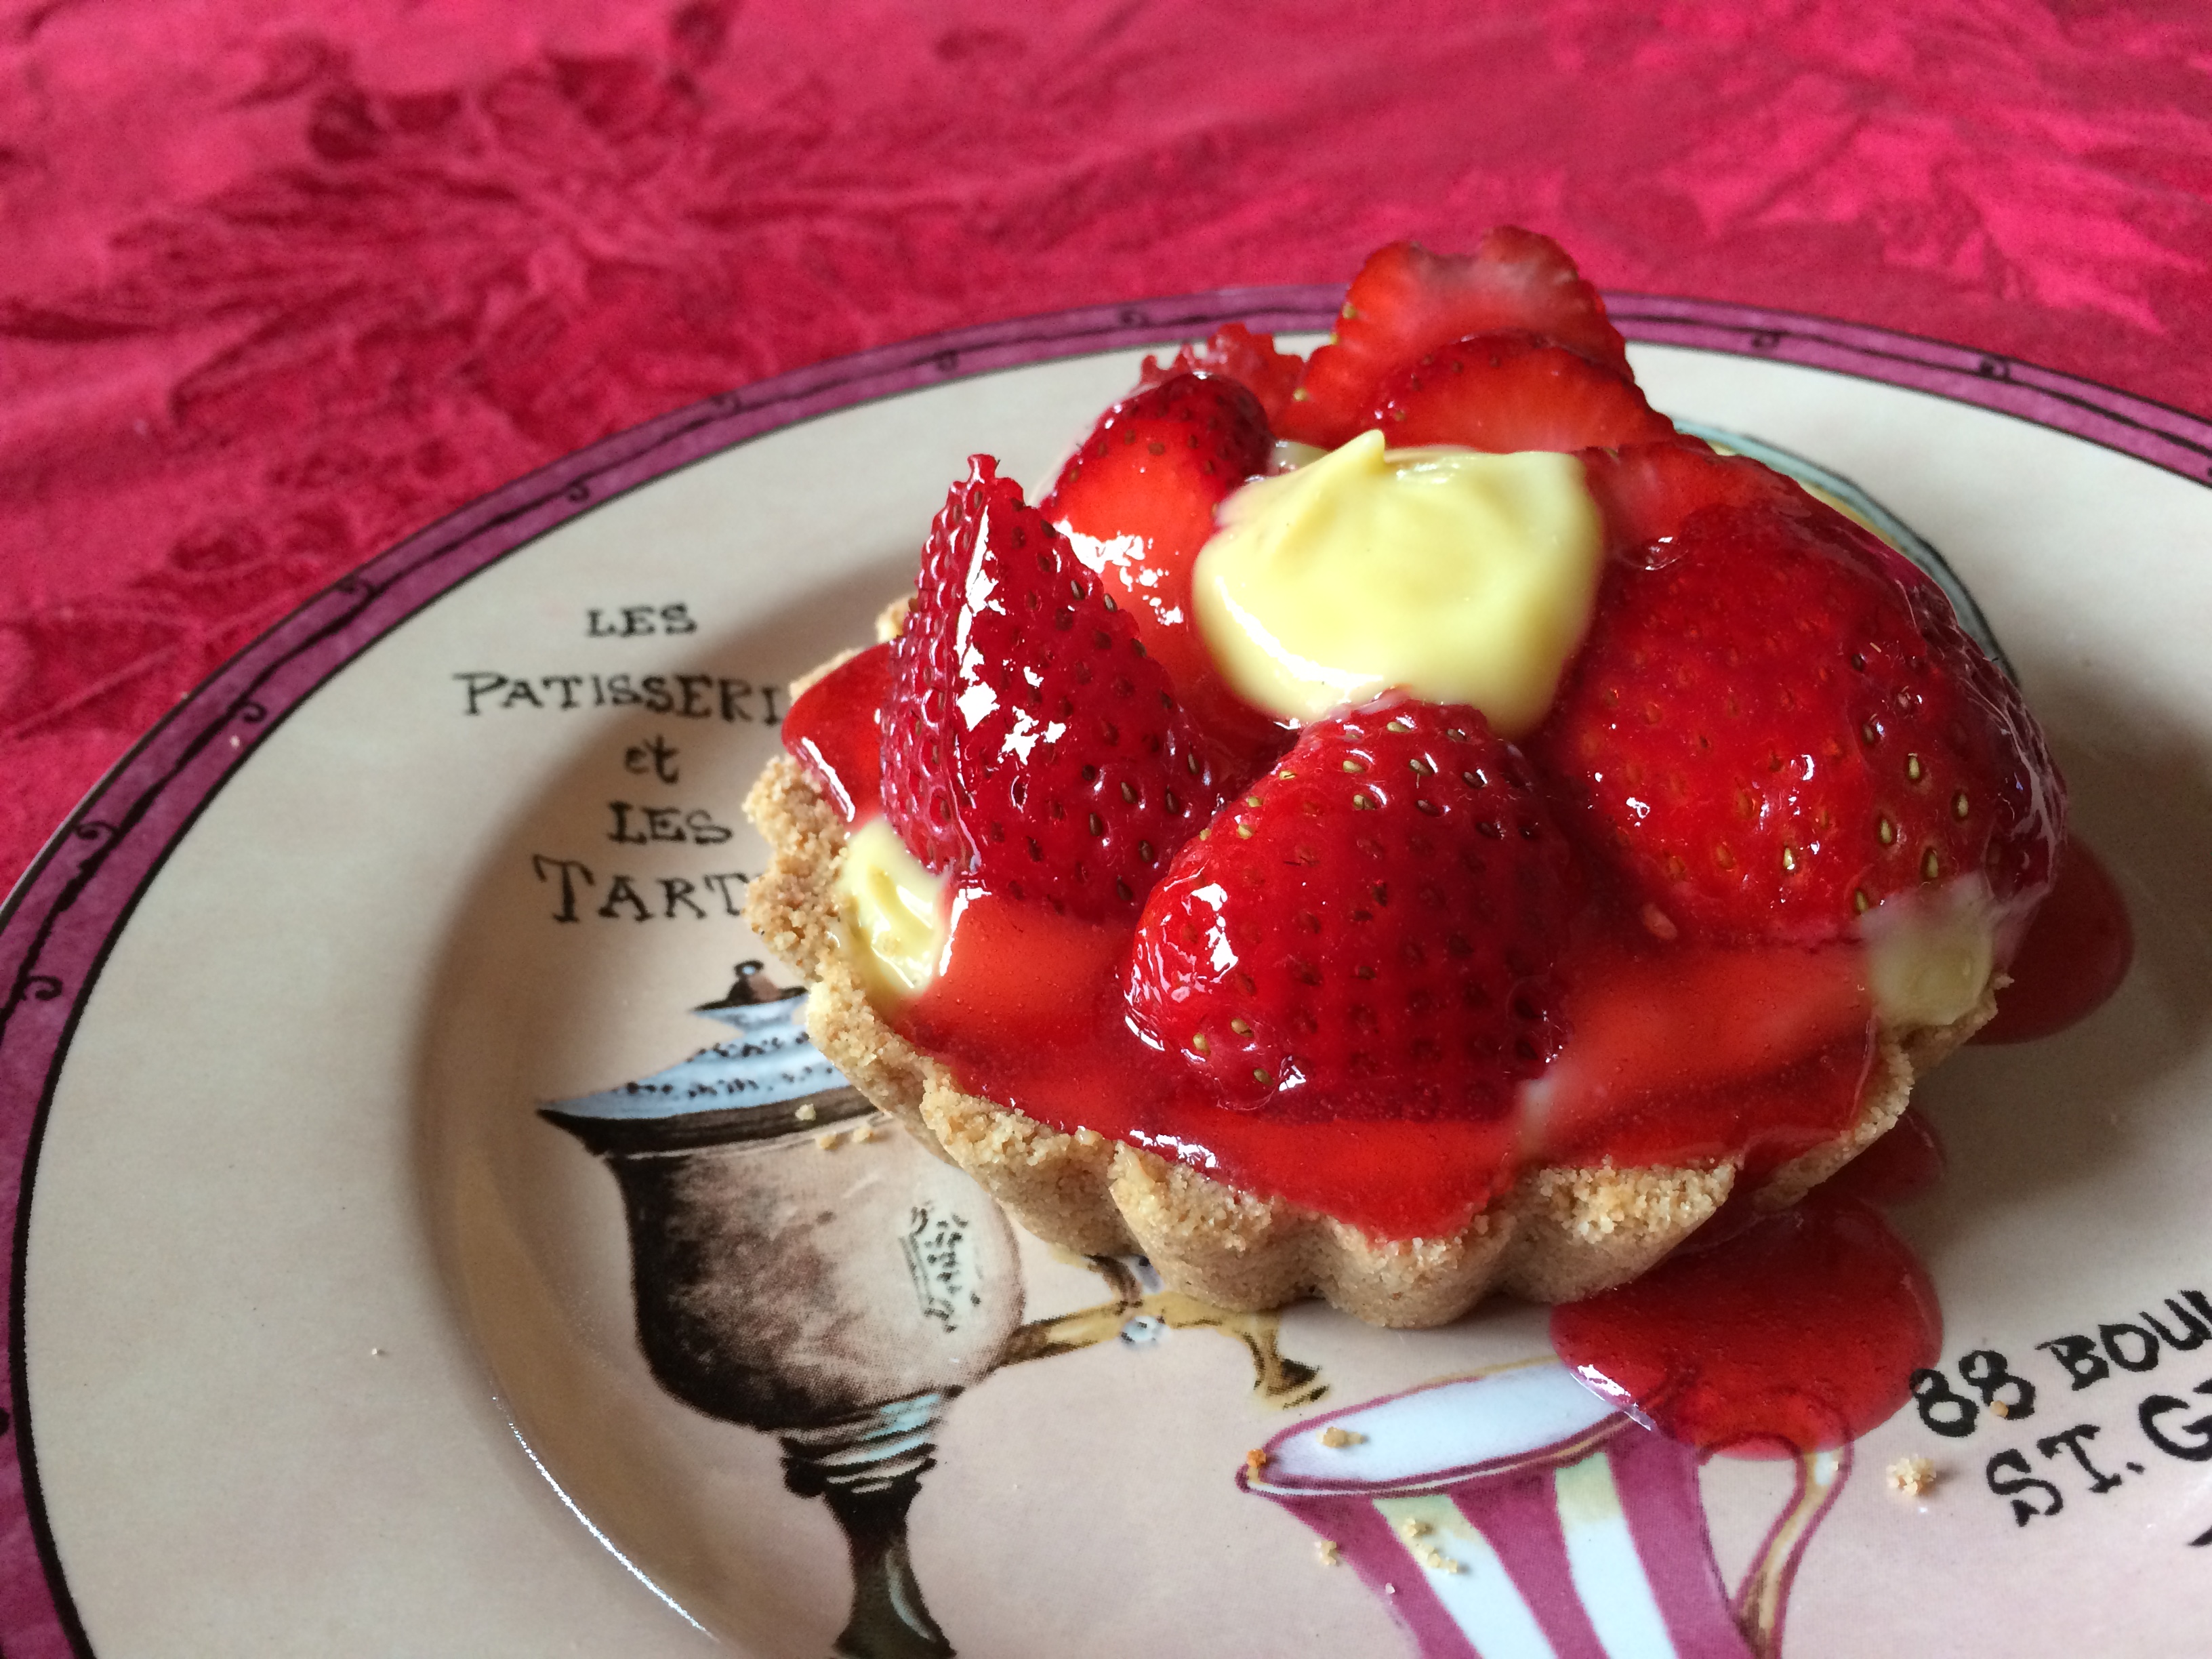
2 pints whole strawberries, hulled and sliced 1/3 cup raspberry jelly
4 4-inch tart pans (with removable bottoms, preferably)
Preheat oven to 350 degrees.
For the Crust:
Place the vanilla wafers in a food processor. Whirl until the wafers become crumbs. While the food processor is still going, pour the melted butter in using the feed tube.
Divide the crumb mixture among the 4 tart pans. Press the crumb mixture on all sides, so that the crust you form is firm.
Place the tart pans on a baking sheet and bake for 8-10 minutes. Cool on a wire rack.
Pastry Cream:
In the bowl of an electric mixer fitted with the paddle attachment, beat the egg yolks and sugar on medium-high speed for 4 minutes, or until very thick. Reduce to low speed, and stir in the salt and the cornstarch.
Slowly pour the hot milk into the egg mixture with the mixer still on low. Stop the mixer and scrap down the sides to make sure mixture is smoothly incorporated.
Pour the mixture into a medium saucepan and cook over low heat, stirring constantly with a wooden spoon, until the mixture thickens, 5 to 7 minutes. If the mixture starts to appear curdled after it starts boiling, just start using a whisk and beat it until it is the consistency of pudding, about 2 minutes longer. Stir in the vanilla, Chambord, butter, and heavy cream. Pass the custard through a sieve into a bowl using a rubber spatula. Cover with plastic wrap, making sure to place it directly on the custard and refrigerate until cold.
Before serving, remove tart shells from the tart pans and fill the tart shells with the pastry cream. Arrange the berries decoratively on top of the cream. Melt the raspberry jelly with 1 teaspoon of water and pour over the top of the tarts.
~These may sound difficult, but they're the real deal. I didn't think I liked pudding until I tried this recipe. Now I know what it is supposed to taste like! These are easily prepared early in the day and then assembled right before serving. This recipe is inspired by Ina Garten, with a few tweaks for my personal preferences.
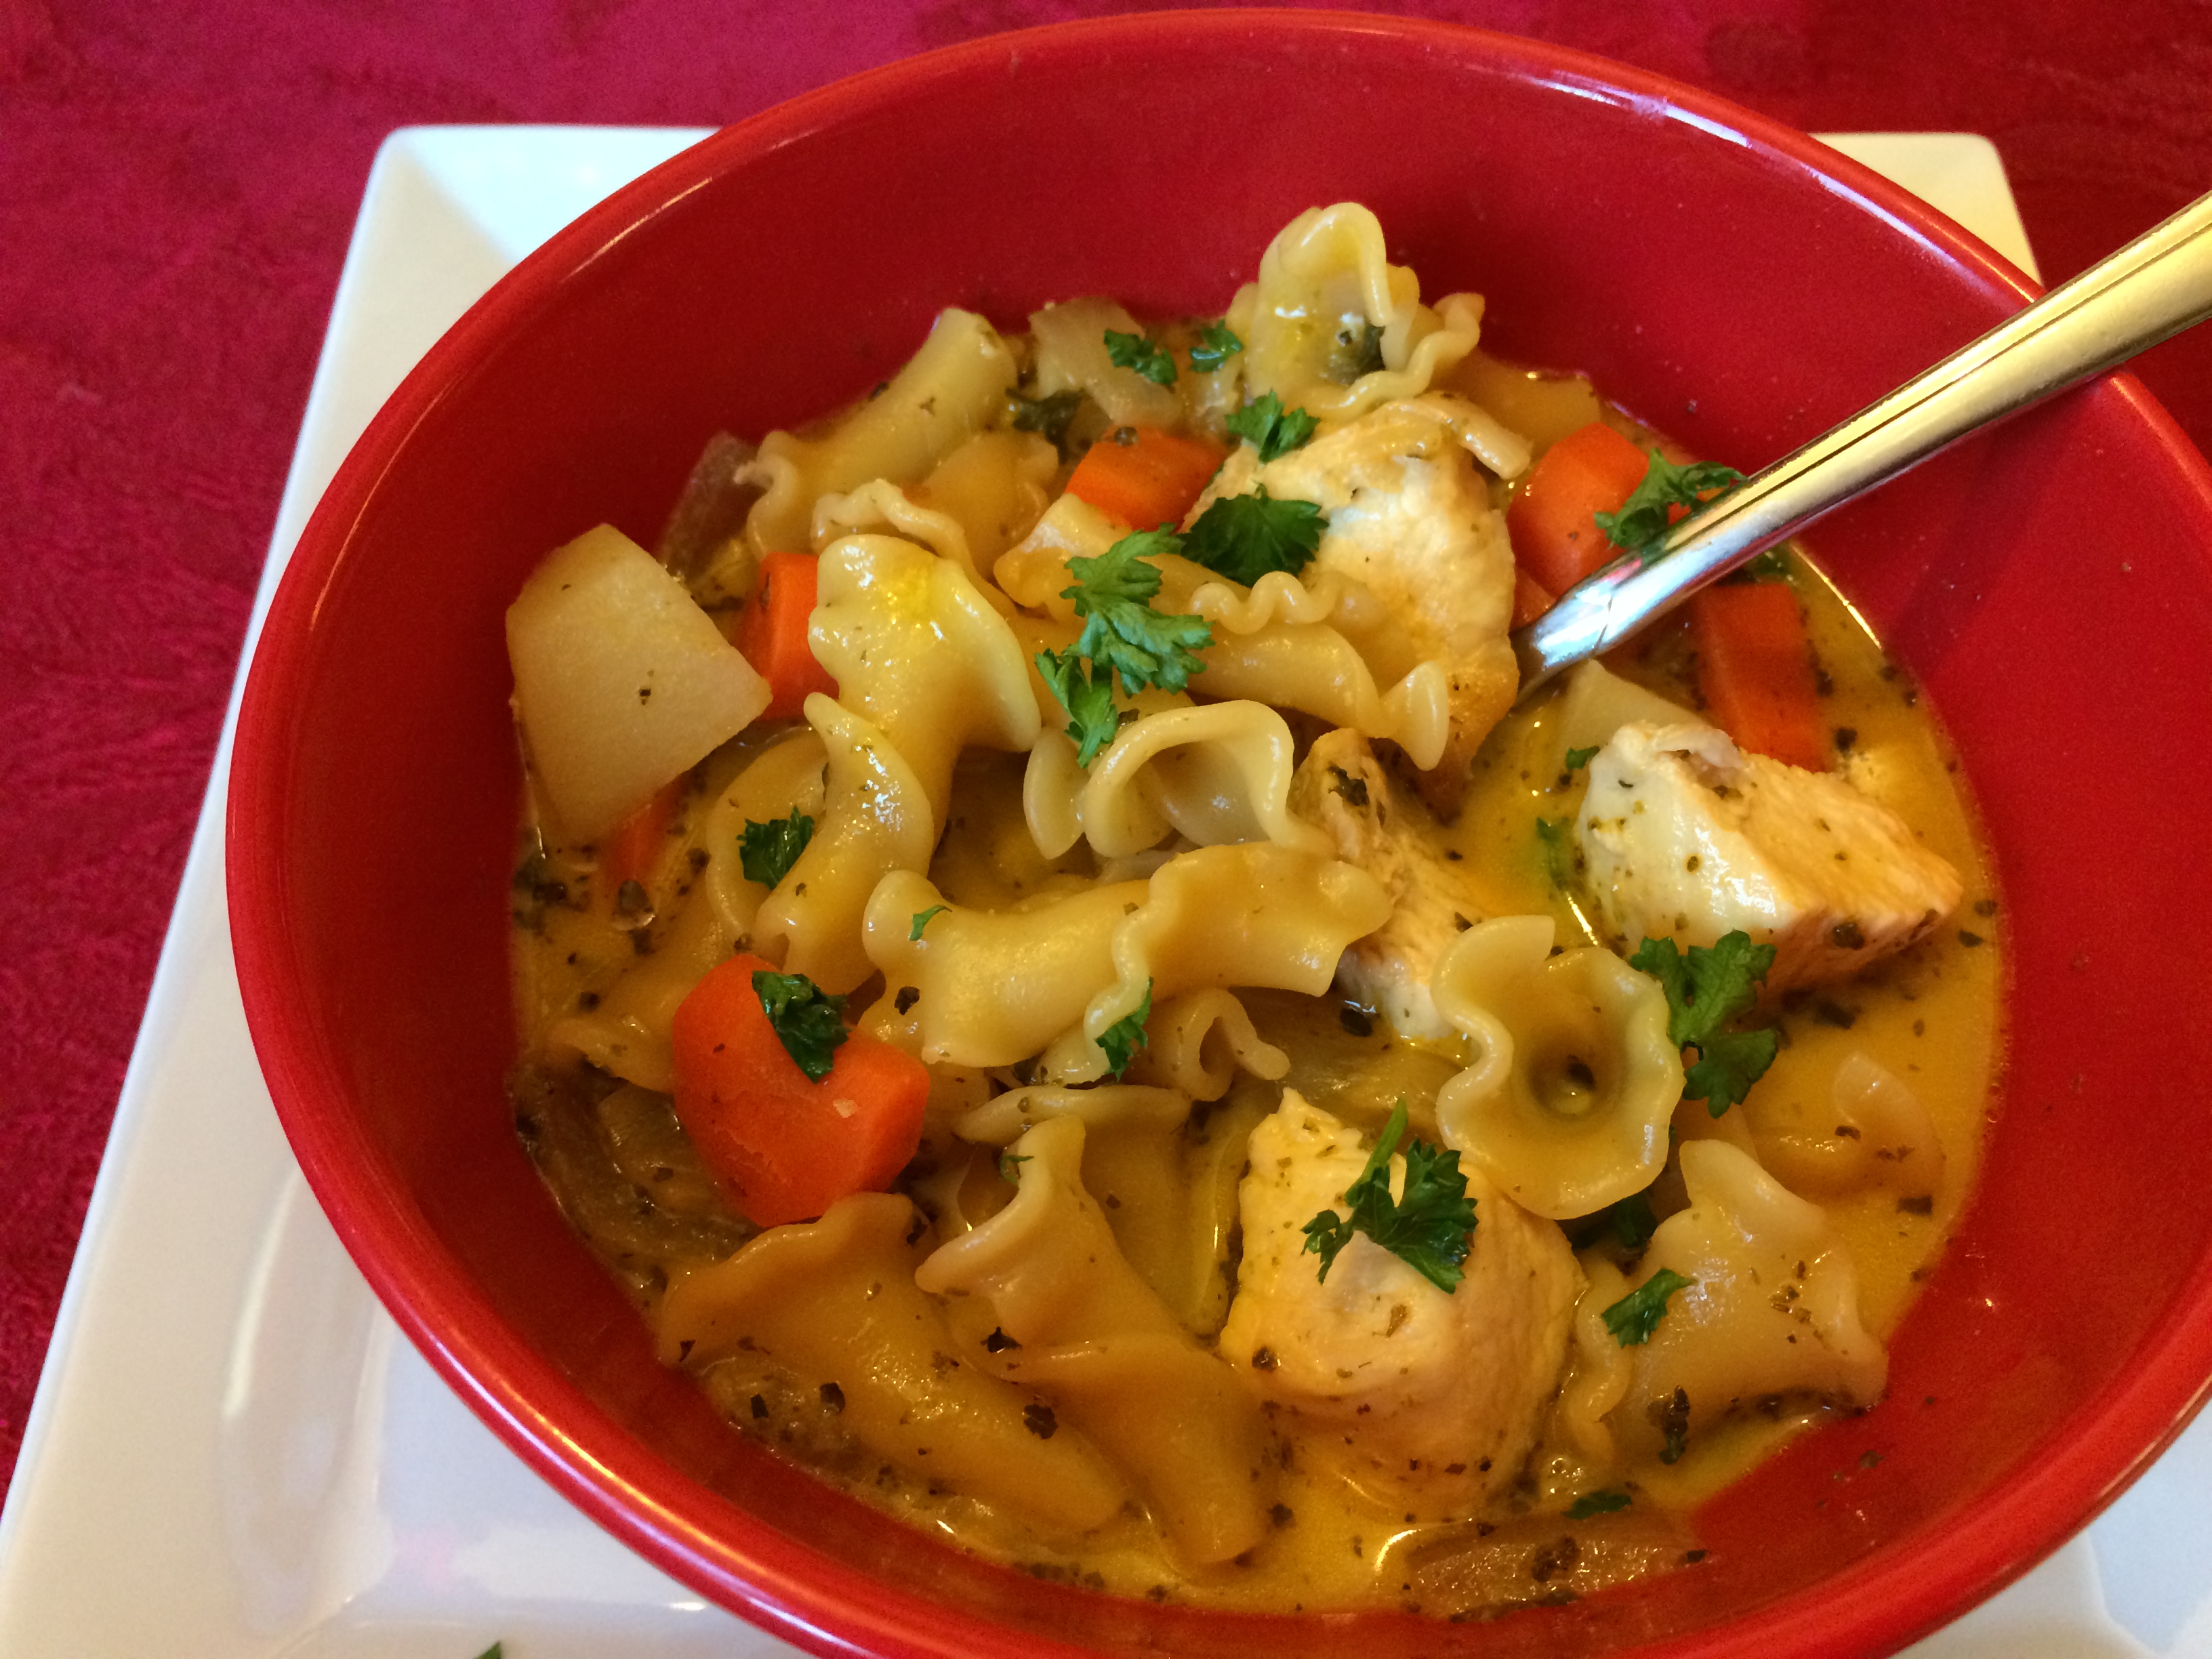
1 chicken breast, cubed
1/2 teaspoon salt, divided
1/4 teaspoon garlic powder
1/4 teaspoon onion powder
2 teaspoons freshly chopped parsley, divided
1/2 teaspoon dried oregano
1/2 teaspoon dried marjoram
1/2 teaspoon fresh thyme leaves (or 1/4 teaspoon dried thyme)
1 -2 tablespoons oil (I use canola oil.)
3 carrots, peeled and diced
1 onion, peeled and diced
2 potatoes, peeled and diced
1 slice pickled jalapeno, finely chopped
3/4 cup white grape juice or Riesling wine
1/4 cup liquid from pickled jalapenos
1 32-ounce container chicken stock (I use Kitchen Basics.)
3 chicken bouillon cubes
1 1/2 cup pasta, your favorite
1/4 cup cream
Sprinkle chicken breast cubes with 1/4 teaspoon salt, the garlic powder and onion powder. Let sit for 15-30 minutes.
Heat oil in a large skillet and saute the chicken on all sides. Do not overcook. Remove from pan and reserve in a bowl.
Add the vegetables and herbs to the skillet, reserving 1 teaspoon parsley, and sprinkle with remaining salt. Saute for about 5 minutes, using a spatula to scrape up the chicken and vegetable bits periodically from the bottom of the pan.
Deglaze the pan with the grape juice/wine and pickling liquid, further scraping up the bits. Add the chicken stock and bouillon. Bring to a boil and then simmer for about 10 minutes. Add pasta and cook according to directions, 7-12 minutes. Add chicken back to the soup. Simmer for 5 more minutes. Turn off the heat and stir in cream. Garnish with reserved parsley. Serves 4-6.
~Ok, I know what you're thinking: this recipe has a lot of ingredients--and steps! However, it will surely be worth the little extra time it takes to make this gorgeous full-bodied comfort for your winter blues.
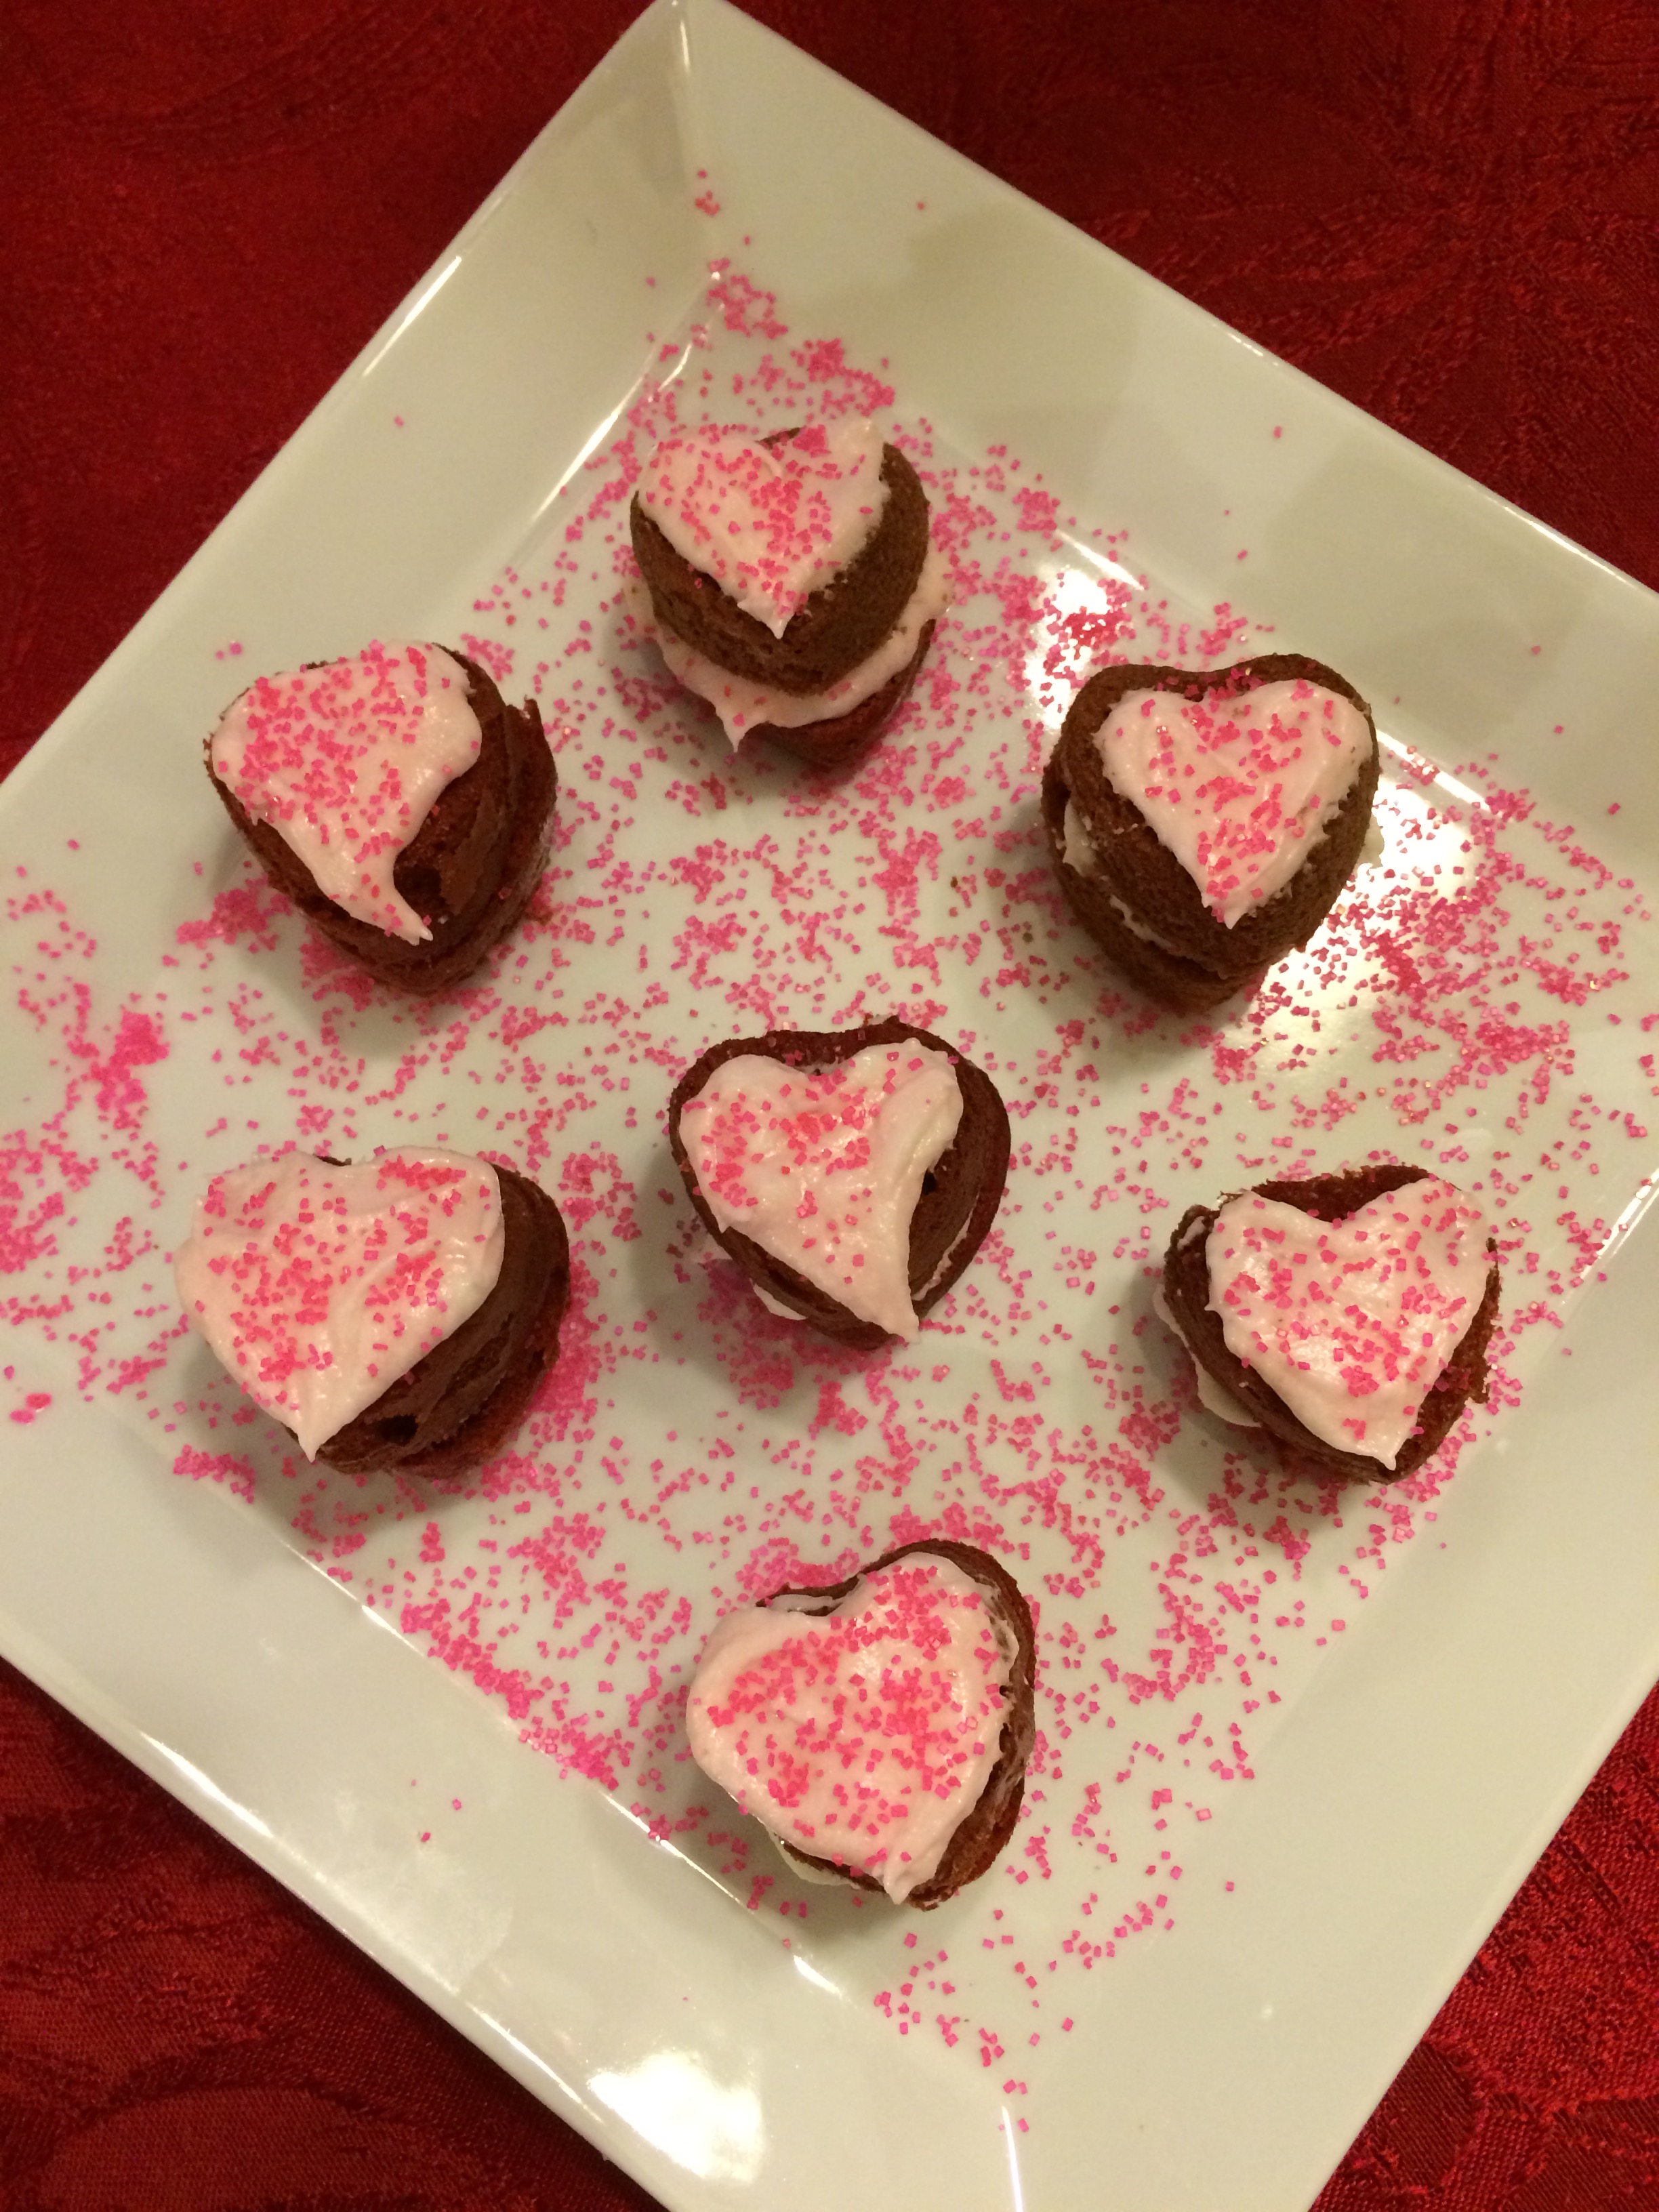
One German chocolate cake mix (18.25 ounce)
1/2 box instant vanilla pudding
1/2 box instant chocolate pudding
1/2 cup canola oil
4 eggs
1 1/3 cup water
1 teaspoon vanilla
2 teaspoons unflavored concentrated gel red
food coloring
vegetable spray (or Baker’s Joy) decorative sugar, if desired
One or two heart-shaped mini cupcake pans Piping bag fitted with large star tip
Frosting:
1/4 cup butter, softened
1/4 cup shortening
3/4 teaspoon salt
4 cups powdered sugar
1 teaspoon pure vanilla extract
1-2 tablespoons cream
2-3 tablespoons raspberry puree
2 tablespoons corn syrup
Preheat oven to 350 degrees. In a bowl of an electric mixer, combine all of the cake ingredients together. Mix on low speed for 30 seconds and then on medium speed for 4 minutes, scraping the bowl at least twice. Spray the pan(s) liberally with vegetable spray. Using an ice cream scoop, fill each heart 1/2 full. Bake for 10-12 minutes. Cool for 5-10 minutes and turn out onto a cooling rack.
For the Frosting:
In a large bowl beat the shortening and salt with an electric mixer until fluffy. Add powdered sugar and vanilla. Beat on a low speed and add cream one tablespoon at a time until frosting almost reaches desired consistency. Add corn syrup and beat well. Add more cream if needed. Reserve 1 cup of frosting.
Once the hearts are cooled, you may need to slice the bottom off of the hearts if they got too puffy while baking.
Add the frosting, except the reserved amount, into a large piping bag. Pipe a small amount of frosting on the bottom of half of the hearts. Top with another heart, preserving the smooth side of each heart.
For the Raspberry Puree:
Strain about 1/2 cup of Freshy Fresh Raspberry Jam or your favorite raspberry jam through a mesh strainer. This will yield a few tablespoons seedless puree. Or, you can use 2-3 tablespoons seedless jam, if you prefer.
Stir the raspberry puree into the reserved frosting thoroughly.
Spread the tops of the heart "sandwiches" with the raspberry buttercream, making sure to follow the outline of the heart. Sprinkle with decorative sugar, if desired.
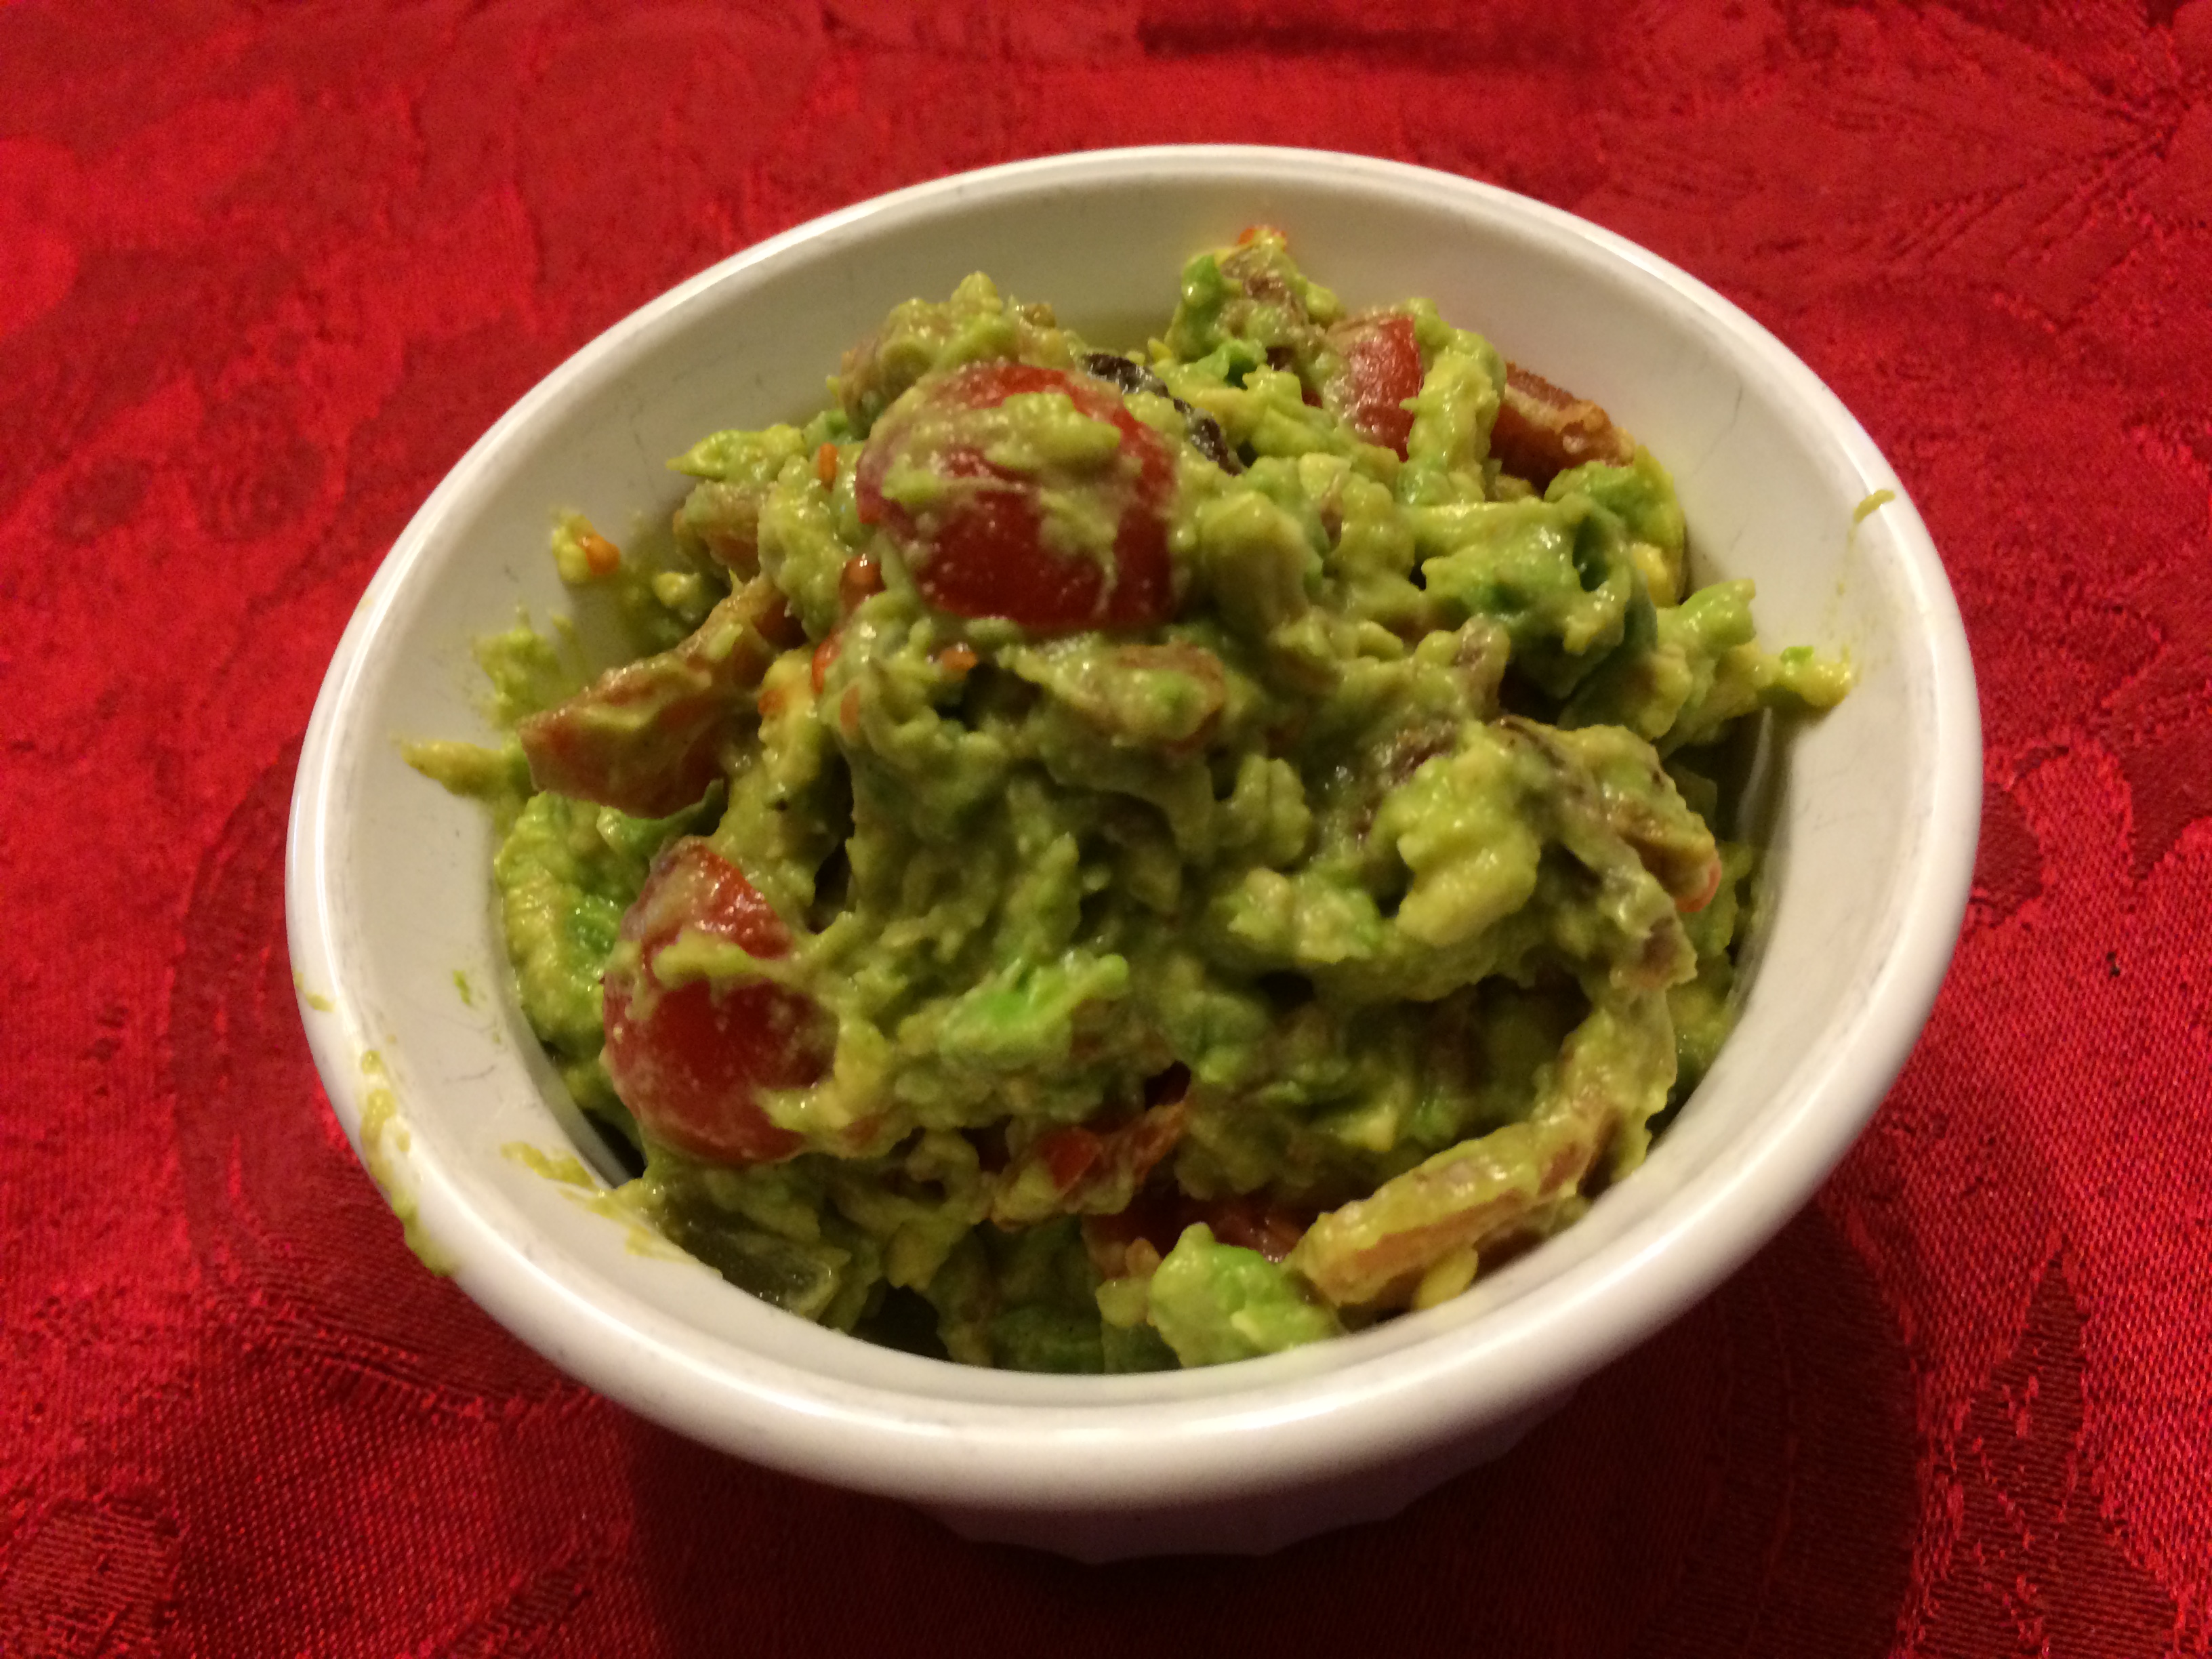
1 1/4 cups diced tomatoes
1 tablespoon lime juice
6 pickled jalapeno slices, finely chopped
8 strips bacon, cooked until crisp, cooled and chopped
1 teaspoon cumin
1 tablespoon garlic powder
1 tablespoon onion powder
Mix all ingredients. Serves approximately 20 people.
~A new and refreshing spin on an old favorite. Have fun serving several types of tortilla chips with this addicting dip. Or, try using this filling to make your BLT (and avocado) sandwiches!
~This recipe is easily halved or quartered.
1/2 cup sliced almonds
3 tablespoons sugar
Dash salt
Salad:
1 head Romaine lettuce, julienned (Be sure to discard the outer leaves before slicing.)
1/4 cup finely chopped celery
2 whole green onions, chopped
1-11 ounce can mandarin oranges, drained (I prefer Dole)
3-4 endive heads
Dressing:
1/4 cup canola oil
2 tablespoons vinegar
1/2 teaspoon salt
dash of pepper
2 tablespoons sugar
1 tablespoon chopped parsley
3 dashes of Tabasco sauce
Line a baking sheet with waxed or parchment paper. In a small skillet over medium heat, cook almonds, sugar and salt, stirring constantly until almonds are coated and sugar and salt are dissolved. Watch carefully as they will burn easily. Pour out onto the waxed or parchment paper to cool.
Mix all dressing ingredients and chill for at least an hour.
Mix romaine, celery and onions. Just before filling the endive boats, add almonds and oranges. Toss with dressing.
Separate the leaves of each endive head. (Each leaf looks like a little boat.) Make sure they are dry. Fill each one with the salad, making sure that each boat has a mandarin orange slice on it as well as some of the sugared almonds.
~For a pretty presentation, pour about one pound of dried red beans or dried green peas onto a medium platter. Nestle the endive boats onto the beans or peas. This prevents them from tipping and makes everyone want a bite of boat.
~This appetizer is always a crowd pleaser. (It is inspired by a Colorado Cache Cookbook recipe.) My only problem with this recipe is that I have to monitor the almonds while they are cooling or they disappear!
(add 2 more tablespoons for high altitude)
3/4 cup plus 1/2 cup powdered sugar, divided
1/2 teaspoon salt
1 cup cold butter, cubed
2 teaspoons pure vanilla extract
1/2 teaspoon almond extract
1/2 cup dried cherries, chopped
1/4 cup chopped roasted and salted almonds
Preheat oven to 350 degrees.
In a bowl of a food processor, pulse the cake flour, 3/4 cup of the powdered sugar and the salt about five times. Add the butter and both extracts. Pulse about 10 times or until the mixture is the size of small peas. Add cherries and almonds and pulse about 5-7 more times. Dough will be crumbly.
Shape into 1-2 inch balls. You will need to press pretty hard. Arrange on an ungreased baking sheet, one inch apart.
Bake for 10-12 minutes.
Cool for 10 minutes.
Add the 1/2 cup powdered sugar into a low flat dish, like a pie plate. Roll the warm balls in the powdered sugar, coating them thoroughly. Cool completely. If desired, roll them in powdered sugar again.
~Oh my gosh, these bites are a delightful surprising change from the typical powdered sugar balls. If you don't like cherries or almonds, you can switch up any type of dried fruit or nut that you prefer.
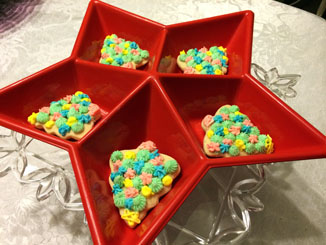
1 cup butter, softened
1 cup sugar
1 egg
1 teaspoon vanilla
1/2 cup buttermilk (If you don't have buttermilk, stir 1 teaspoon lemon juice into 1/2 cup milk.)
1 teaspoon baking powder
1 teaspoon baking soda
3 1/2 - 4 cups flour
Cream butter and sugar together until fluffy. Add egg and beat thoroughly. Beat in vanilla and buttermilk. Stir in dry ingredients until just incorporated. (The larger amount should be used for high altitudes.)
Roll out and cut into your favorite shapes. (If the dough seems too soft to roll out immediately, wrap the dough in plastic wrap and chill in the refrigerator for about one-half to one hour.)
Bake for 9-10 minutes. Cool completely before frosting.
Frosting
1/4 cup shortening
1/4 cup butter, softened
1 teaspoon pure vanilla extract
1/4 teaspoon salt
4 cups powdered sugar
2-3 tablespoons milk or cream
A few drops of food coloring
Sprinkles, if desired
Beat the shortening and butter until fluffy. Beat in vanilla and salt. Stir in powdered sugar until moistened. Add milk or cream, one tablespoon at a time until frosting becomes desired consistency.
Divide the frosting into separate bowls for all of the colors that you plan to use. Stir in a couple drops of food coloring into each bowl of frosting.
Spread or pipe frosting on each cookie in your desired design. Sprinkle with colored sugar, if desired.
~I recently discovered this forgotten beloved recipe buried in my recipe file. Try it, and you'll fall in love with sugar cookies all over again!
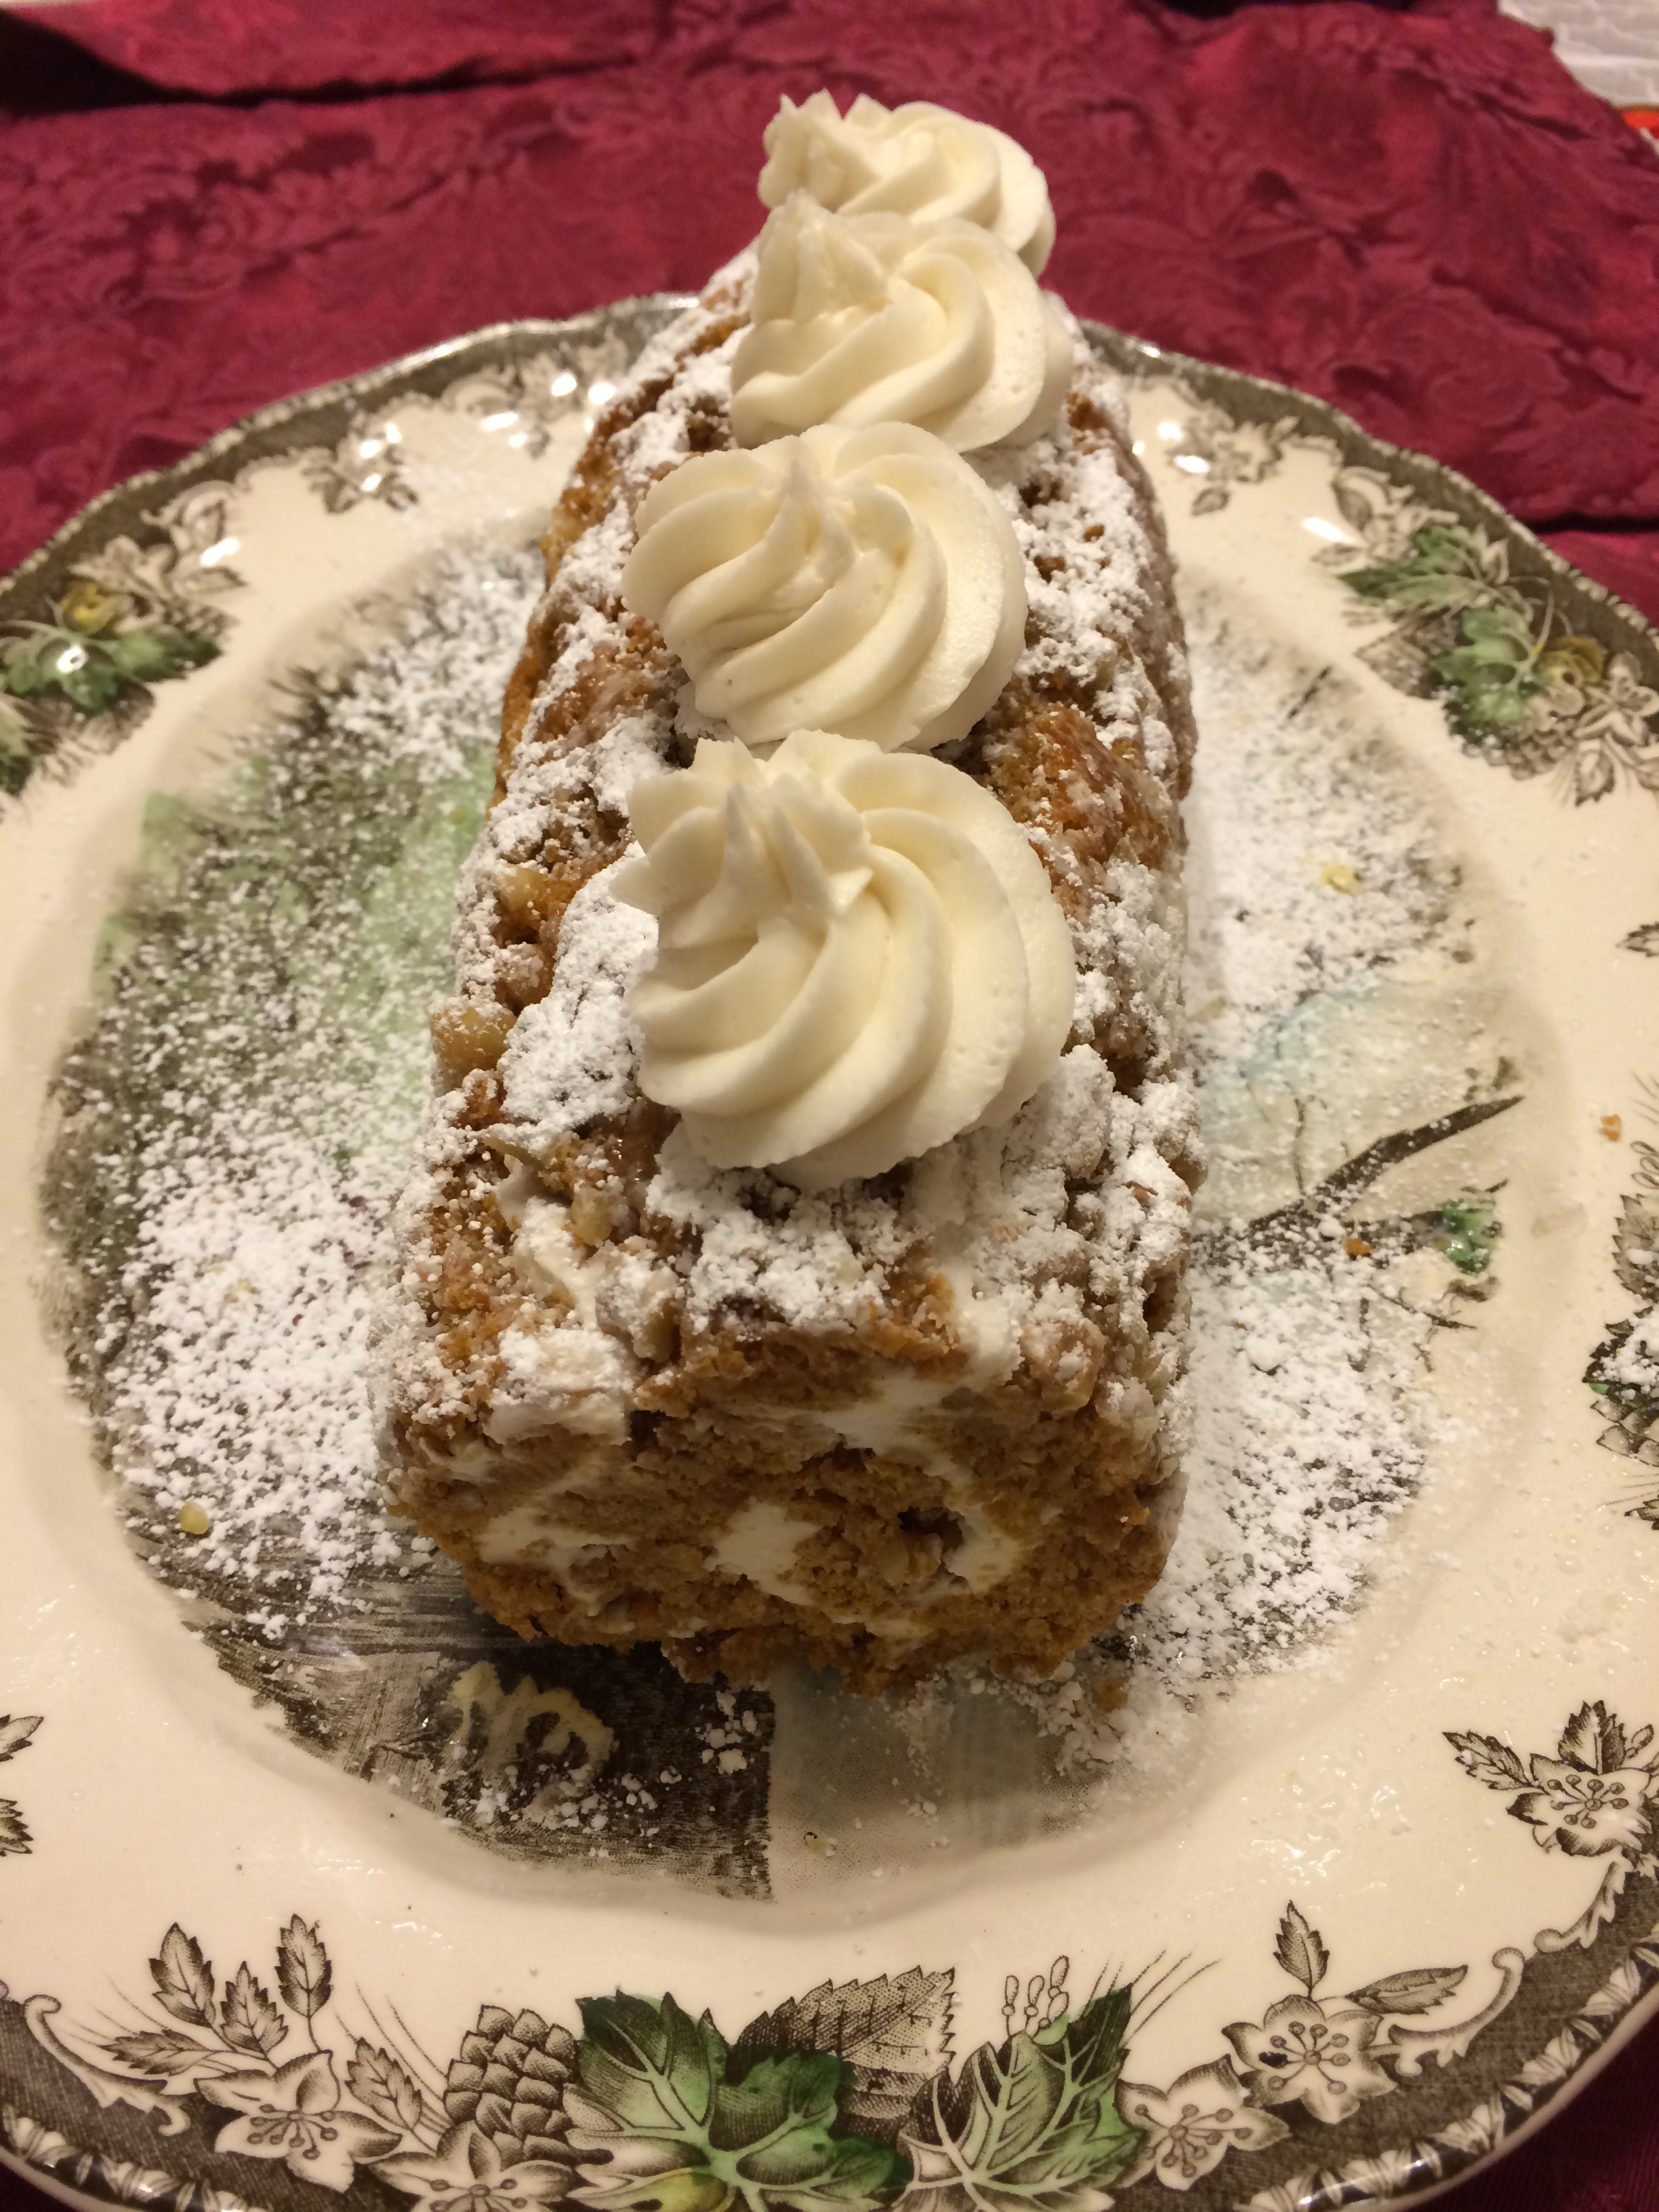
3 large eggs
1 cup sugar
2/3 cup solid pack pumpkin
1 teaspoon fresh lemon juice
3/4 cup flour
1 teaspoon baking powder
2 teaspoons cinnamon
1 teaspoon ginger
1 teaspoon nutmeg
1/4 teaspoon salt
1 cup finely chopped walnuts or pecans
powdered sugar
Filling:
1 cup powdered sugar
8 ounces cream cheese, softened
4 tablespoons butter, softened
1/2 teaspoon vanilla extract
Alternate Filling:
1/2 cup butter, softened
1/2 cup shortening
2 cups powdered sugar
pinch of salt
1/2 teaspoon vanilla
2-3 tablespoons of milk
In a large bowl, beat eggs on high for 5 minutes, gradually adding sugar. Stir in pumpkin and lemon juice. In a separate bowl, stir together flour, baking powder, cinnamon, ginger, nutmeg mixture. Spread batter on a greased and floured 10x15-inch jelly roll pan. Top with chopped nuts and bake at 375 degrees for 15 minutes. Cool 5 minutes. Liberally sprinkle the cake with powdered sugar. Place a clean kitchen towel over the cake. Then, place another jelly roll pan over the kitchen towel. Turn over so that the cake is on the towel. Roll up the cake and keep covered. Cool to room temperature.
In a medium bowl, beat all filling ingredients until smooth. Carefully unroll cooled cake and spread with filling. (Reserve 1/4 cup of the filling if you want to pipe a decoration on top of the cake.) Roll cake up again and chill thoroughly before serving. Sprinkle with additional powdered sugar, if desired. Pipe swirls of filling on top if desired.
To serve, cut with a serrated knife. Serves 8-10.
~Heavenly aromatic velvety dessert! This sounds like a process, but this is a beautiful, indulgent dessert. Try it for a luscious change at one of your holiday gatherings.
For the Puffs:
1 1/4 cups water
1/2 c + 2 tablespoons butter
1 1/4 c flour
5 eggs at room temperature
Pinch of salt
Preheat oven to 375 degrees. Boil water and butter together. Remove from heat. Add flour all at once, beating rapidly until dough forms a ball. Cool seven minutes. Add eggs, one at a time, beating thoroughly after each until dough is smooth. Grease and flour cookie sheets, or use Silpats. (If you use Silpats, you will not need to grease and flour them first.) Drop or pipe by small teaspoonsful two inches apart. Bake 16 minutes until brown and puffed. Put a little slit in the side of each one, and slide them back into the oven for 10 minutes more.
Remove from oven and cool completely.
For the Pumpkin Spice Mousse:
1 cup cold whipping cream
1-15 ounce can pumpkin puree
1 teaspoon cinnamon
1/2 teaspoon nutmeg
1/2 teaspoon allspice
1/4 teaspoon ground ginger
1/8 teaspoon ground cloves
1/8 teaspoon salt
1/3 cup evaporated milk
1 small package instant vanilla pudding
1 teaspoon pure vanilla extract
For the glaze:
1/2 cup brown sugar
1/4 cup maple syrup
2 slices bacon, cooked and finely chopped
Pour the whipping cream into a large bowl. Whip the cream with an electric mixer for 1-2 minutes or until medium peaks take shape. Set aside.
In another large bowl, whisk the spices and salt into the pumpkin puree. Stir in evaporated milk. Beat in the instant pudding and vanilla. Fold in the whipped cream until completely combined. Chill in the refrigerator for at least an hour.
For the glaze:
In a medium saucepan, combine the brown sugar and the maple syrup. Cook over medium heat, stirring occasionally until the mixture boils and the sugar is dissolved.
To cook the bacon: Place the bacon between paper towels and put it on a microwavable plate. Microwave for 2 minutes. Flip the paper towels over. Microwave for one minute intervals until the bacon is thoroughly cooked and crisp. Chop finely and stir into to the brown sugar and maple syrup glaze.
To assemble:
With a serrated knife, slice the cream puffs in half horizontally. Spoon or pipe about one teaspoon of the mousse on to the bottom of each pastry. Replace the tops.
Place on a decorative plate.
Drizzle the glaze over the cream puffs.
~These are a pumpkin spicy new addition to your holiday entertaining!
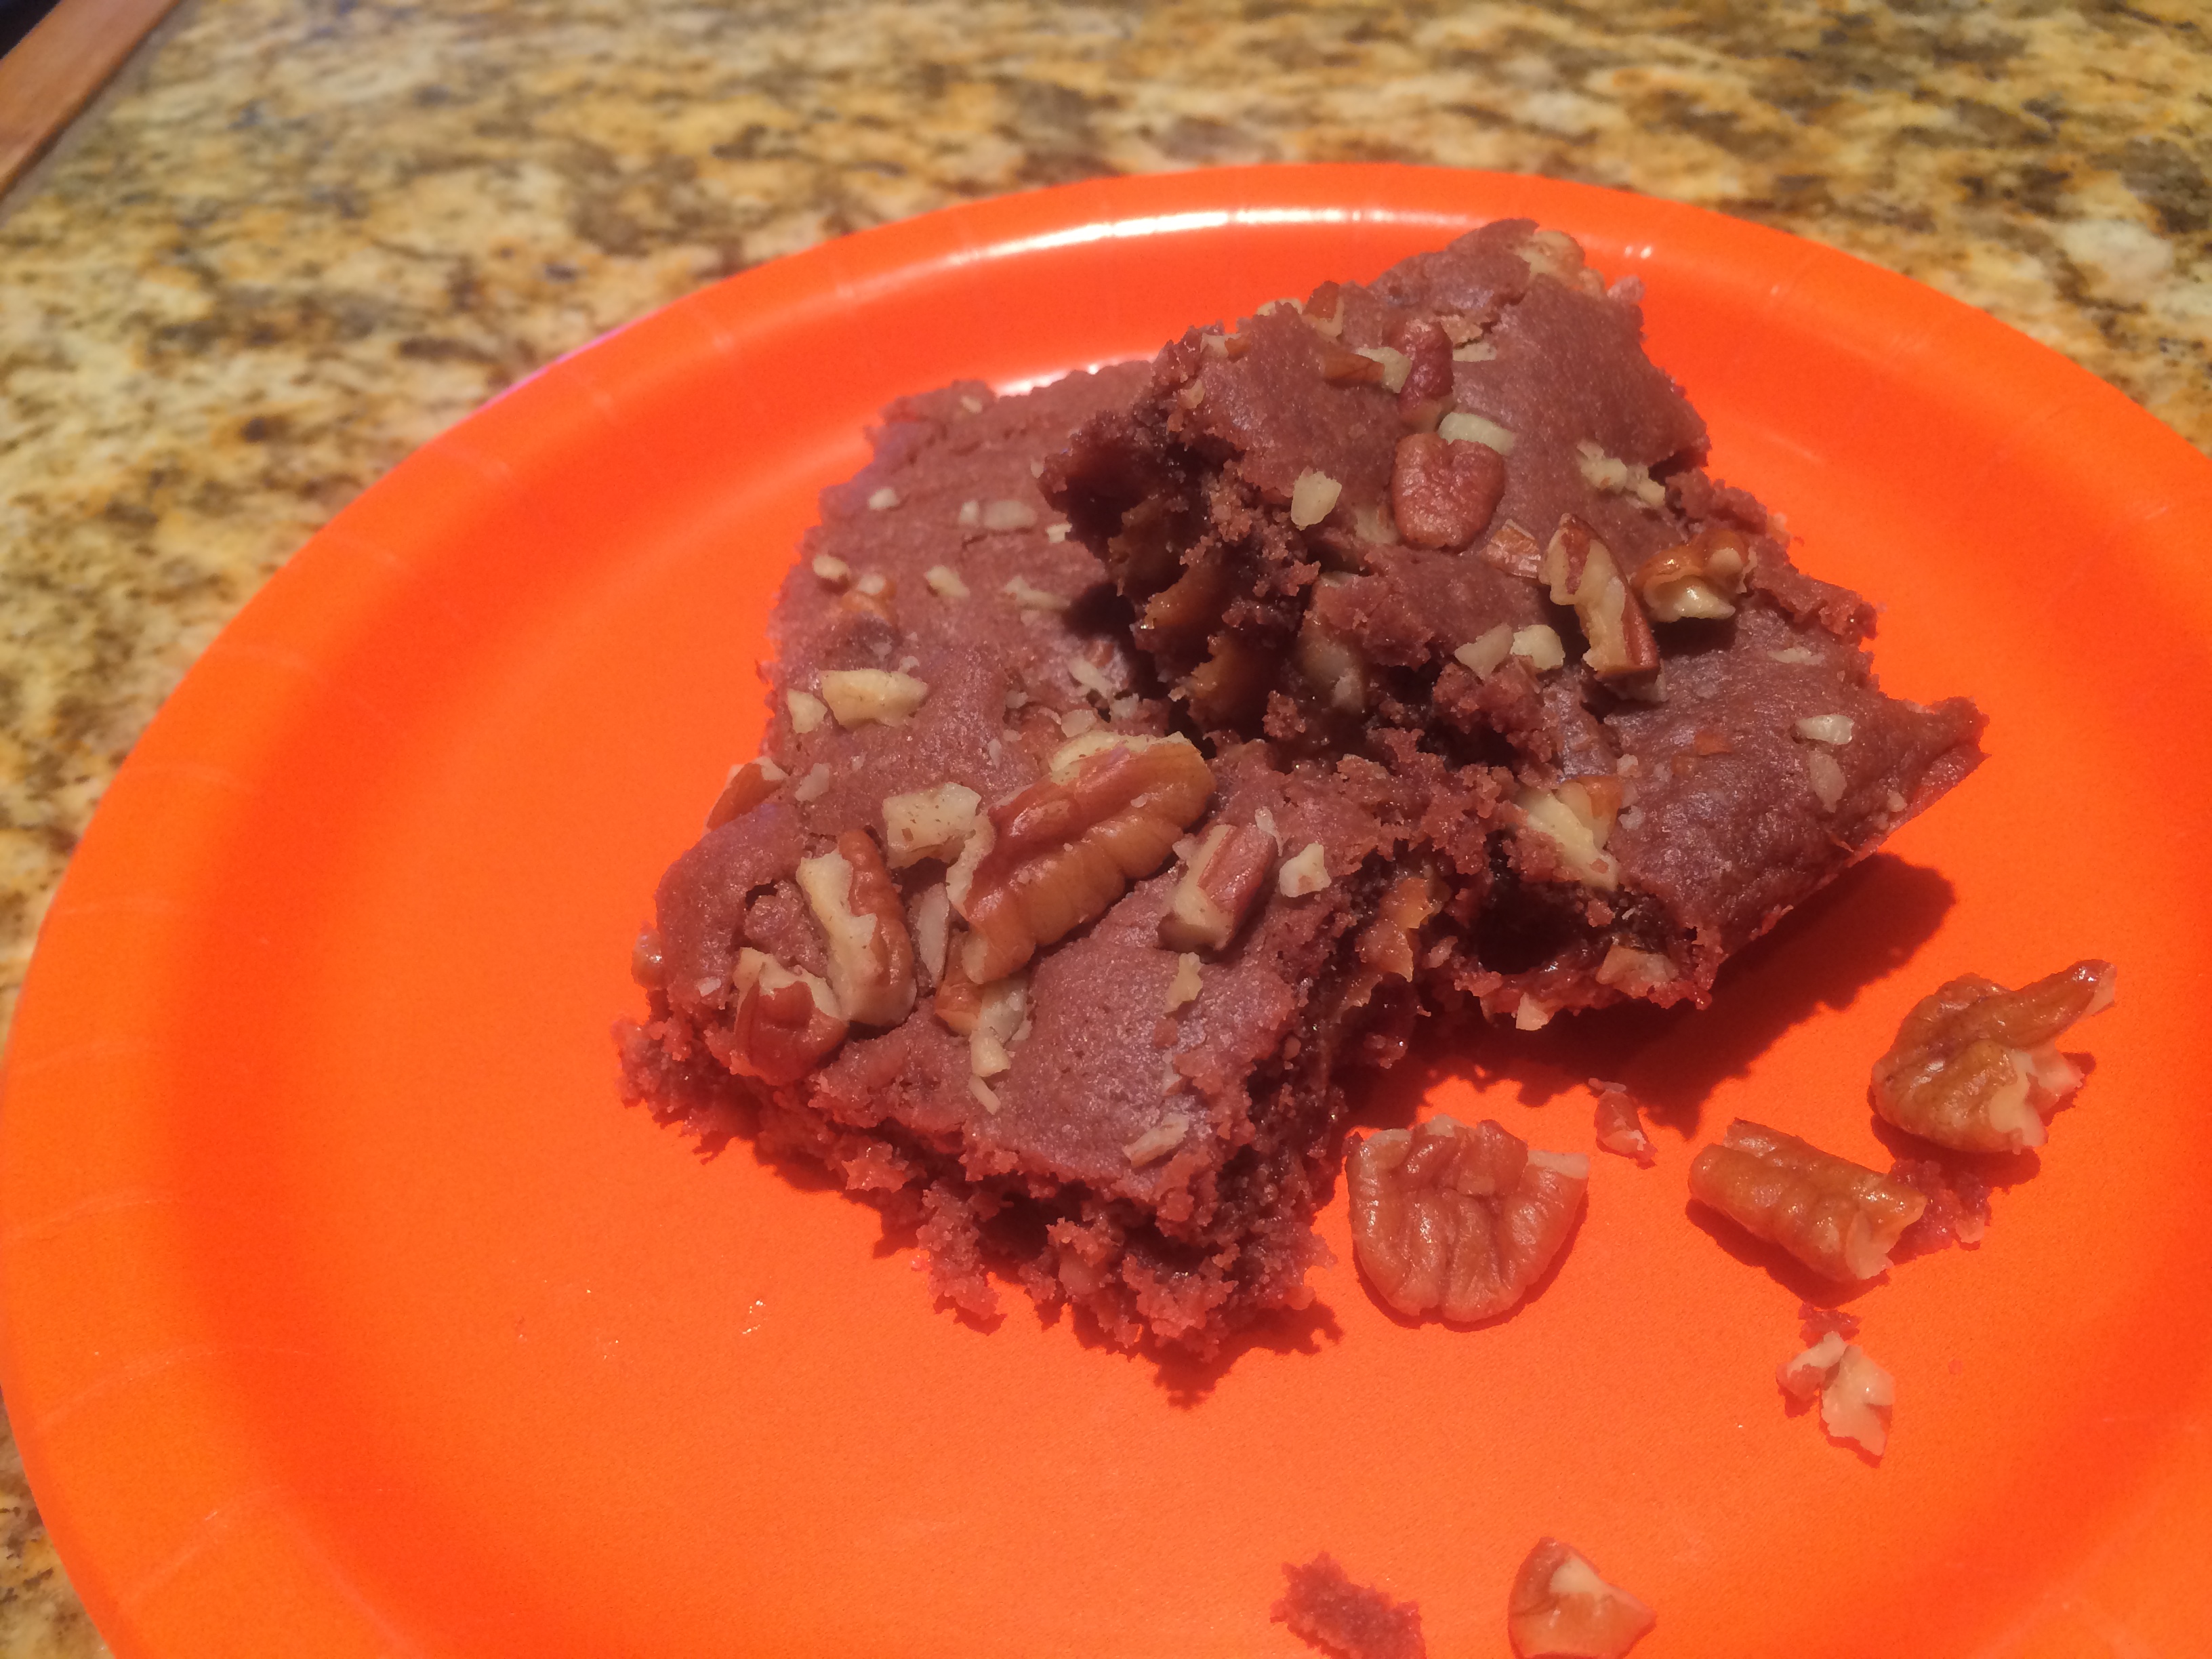
1 box German chocolate cake mix (I use SuperMoist)
3/4 cup unsalted butter or margarine, melted
1/3 cup evaporated milk
1 cup chopped pecans
Preheat oven to 350 degrees. Spray sides of a 9x13 inch pan with vegetable spray.
Mix all above ingredients. Put half of the mixture in the refrigerator to firm up. Press the other half of the mixture into a 9x13 pan. Let stand on the counter for about 10 minutes. Bake for 6-8 minutes. (I bake mine for 7 minutes.)
Top with the following in the order listed:
1. Melt 12-15 oz caramels (or one bag of Kraft brand) with another 1/3 cup evaporated milk. I melt the caramels with the evaporated milk in the microwave. Usually, I cook it on high for 2 minutes, stir it, and then cook it for about 30 seconds to one minute more. Then, I stir it to make it smooth before I pour it onto the bottom layer.
2. Optional: Sprinkle 6 oz. (1 cup) semi-sweet chocolate chips on top of the caramel mixture. ( I usually omit them because I think the chocolate chips make them too rich.)
3. Remaining cake mixture: to accomplish this, roll out the remaining cake mixture between two layers of wax paper until it becomes 9"x13" rectangle. Peel off the top layer of wax paper and flip it over onto the caramel and chocolate chip layer. Quickly peel off the rest of the wax paper.
Bake for 20 more minutes. Cool one hour before cutting. I cut a pan into 24 brownies (48 if you choose to use the chocolate chips). They are quite rich and taste best in small bites.
~Alternate method for the nuts: Tom likes larger pieces of pecans, so I coarsely chop them and sprinkle half on bottom layer after pressing into the pan. Then I sprinkle the rest of them on the top layer right before the second baking (for 20 minutes).
~This recipe arrived in a delicious gift box from my sister Bev and if you ever want a decadent, indulgent dessert, this will be sure to satisfy your cravings.
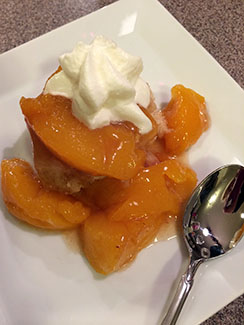
1 tablespoon cornstarch
1/4 teaspoon ground cinnamon
4 cups sliced peaches (about 6 medium) **If you use canned peaches, make sure you drain them.
1 teaspoon freshly squeezed lemon juice
3 tablespoons shortening
1 cup flour
4 tablespoons sugar
1 1/2 teaspoon baking powder
1/2 teaspoon salt
1/2 cup milk
Heat oven to 400 degrees. Whisk 1/2 cup sugar, cornstarch and cinnamon in a 2-quart saucepan. Gently stir in peaches and lemon juice. Cook, stirring often, until mixture thickens and boils. Boil and stir for one minute. Pour into ungreased 2-quart casserole; keep peach mixture hot in oven.
Cut shortening into flour, 4 tablespoons sugar, baking powder and salt until mixture resembles fine crumbs. Stir in milk until just moistened. Do not overmix. Drop dough by 6 spoonfuls onto hot peach mixture.
Bake until topping is golden brown, 25 to 30 minutes. Serve warm. Embellish with a dollop of whipped cream or a scoop of ice cream, if desired.
~This cobbler is heavenly! You can try blueberry, cherry, plum or other fruit as well. (You may want to increase the sugar in cherry and plum cobbler to 1 1/4 cups and 3/4 cup respectively.)
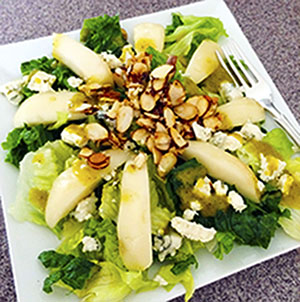
One head *Romaine lettuce, chopped
1 1/2 tablespoons Champagne vinegar or white wine vinegar
3/4 teaspoon yellow mustard
**one egg yolk
3/4 teaspoon kosher salt
1/2 teaspoon freshly ground black pepper
6 tablespoons good olive oil
2 ripe pears, halved, cored and sliced
1/4 pound good Roquefort (or your favorite blue cheese)
1/2 cup sliced, glazed almonds
Place chopped Romaine lettuce on each salad plate.
In a medium bowl, whisk together the vinegar, mustard, egg yolk, salt and pepper. Slowly whisk in the olive oil to make an emulsion. Carefully toss the pears with some of the vinaigrette and place on top of the Romaine lettuce. Drizzle the remaining vinaigrette over the lettuce to moisten it. Crumble the Roquefort over the salad.
*Note: You can use any type of lettuce or combination of greens.
For the glazed almonds:
Add three tablespoons sugar to a small skillet. Stir in 1/2 cup sliced almonds. Heat, stirring constantly on medium, until sugar melts and turns a caramel color. This happens relatively quickly! Pour immediately onto wax paper which has been laid on a heat-proof surface. Cool. Break up into bite-sized pieces.
**RAW EGG WARNING
Use caution in consuming raw and lightly cooked eggs due to the slight risk of Salmonella or other food-borne illness. To reduce this risk, we recommend you use only fresh, properly refrigerated, clean, grade A or AA eggs, with intact shells. In addition, avoid contact between the yolks or whites and the shell. Or, use pasteurized eggs.
~This sounds simple and it is, but it's surprisingly scrumptious! (This is inspired by a recipe from the Barefoot Contessa, but as usual, I twisted it to fit my taste buds.)
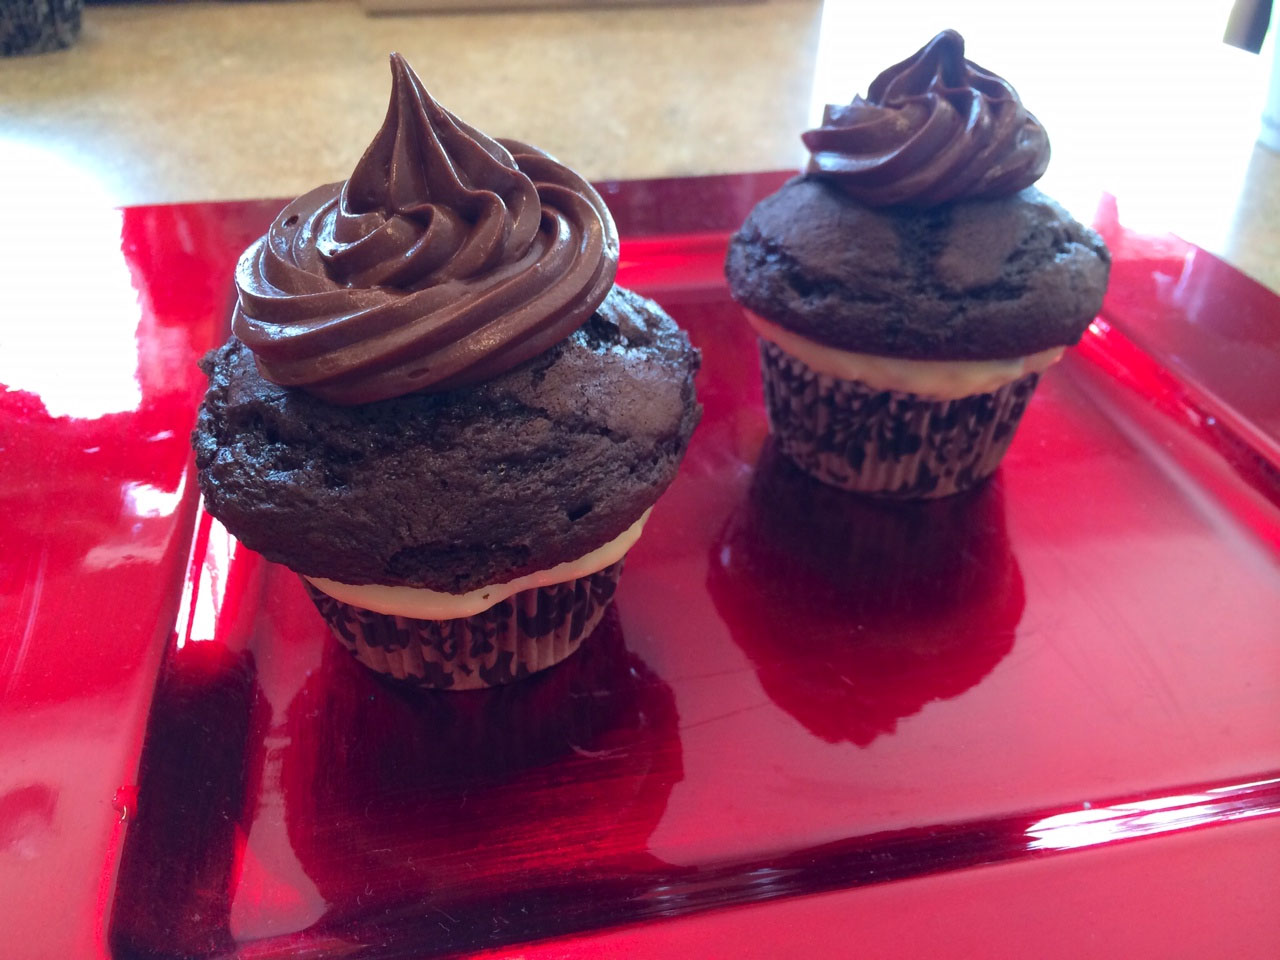
1 chocolate fudge cake mix, (for high altitude, add 1/4 c. flour
1/4 cup hot fudge sauce
1 cup chocolate milk
1 package chocolate instant pudding mix
1/2 cup vegetable oil
4 large eggs
1 teaspoon pure vanilla extract
Preheat oven to 350 degrees. Mix all of the above and beat hard with an electric mixer for 5 minutes.
Meanwhile, put cupcake papers into two 12-cup cupcake pans.
With an ice cream scoop add batter to the cupcake paper filled pans, filling them about two-thirds full.
Bake for 20-22 minutes. Cool completely.
For the cream:
6 large egg yolks
3/4 cup sugar
1/4 cup plus 2 1/2 tablespoons corn starch
1/4 teaspoon kosher salt
3 cups whole milk
2 teaspoons pure vanilla extract
Fill a large bowl about half way with ice and water. This called an ice water bath. In a slightly smaller, but still large, bowl whisk the egg yolks. Set this bowl aside. Stir the sugar, cornstarch and salt together into a medium saucepan. Slowly stir in the milk. Stirring constantly with a silicone spatula or wooden spoon, cook on medium heat until the mixture boils and thickens, about 5-10 minutes. Remove from heat.
Add the milk mixture to the egg yolks a little at a time, whisking after each addition. Once the milk mixture is whisked into the egg yolks, pour it all back into the saucepan. Over medium heat, cook until mixture thickens and boils, stirring constantly. Remove from heat and stir in the vanilla.
Pour the mixture into a medium sized bowl. Place the bowl into the ice water bath, making sure that the water does not breach the edge of the bowl. Stir the mixture every once in a while until it is cool. Once it is cool, cover it with plastic wrap, directly onto the surface of the custard. This prevents a skin from forming on the surface of the custard.
At this point the custard can be refrigerated until you need to assemble the cupcakes (even overnight).
Note: If you want to substitute instant vanilla pudding or instant custard for the filling, it would save a lot of time, but perhaps not be as delectable. :)
Using a serrated knife, slice the tops off of the cooled cupcakes. Reserve. Add a large dollop of the custard on top of each cupcake. Press the reserved cupcake tops slightly on top of the custard. You should see an approximate 1/4 inch layer of custard.
Traditionally, Boston Cream Pie is topped with a chocolate ganache glaze. I prefer frosting, so I swirled a decadent chocolate frosting on top to complete our unbelievable indulgence.
Here's the recipe: Chocolaty Chocolate Frosting
8 ounces (1 stick) unsalted butter
6 ounces semisweet chocolate, chopped
1/4 cup unsweetened cocoa powder, sifted
2 teaspoons pure vanilla extract
2/3 cup sour cream
3 cups powdered sugar
Pinch of kosher salt (about 1/8 teaspoon)
Melt the butter in a large saucepan over medium heat. Stir in the chocolate. Remove from heat when melted. (Be sure not to "cook" the chocolate; it will burn.) Stir in the sour cream and vanilla until smooth. Stir in the sifted cocoa. Sift in the powdered sugar. With an electric mixer beat in the powdered sugar until frosting is smooth.
Let the frosting cool for 20 minutes.
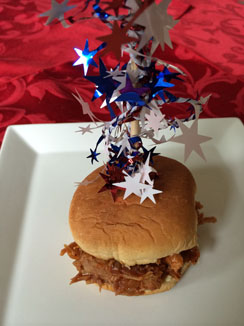
2 tablespoons spice rub, (recipe below, or your favorite)
2 tablespoons vegetable oil (I use canola)
1 onion, peeled and coarsely chopped
5 carrots, peeled and cut lengthwise
3 tablespoons Pinot Noir wine
1/2 cup water
1 beef bouillon cube
Bottled barbeque sauce, your favorite (I use Famous Dave's Sweet and Zesty)
Slider buns (small hamburger buns)
Vegetable spray
Crockpot
Spice Rub:
1 tablespoon paprika
1 tablespoon brown sugar
1 teaspoon garlic powder
1 teaspoon onion powder
1 teaspoon dried oregano
1/2 teaspoon salt
1/4 teaspoon black pepper
1/8 teaspoon cayenne pepper
Mix together and store, covered, in a cool, dry spot.
Spray the inside of the crockpot, including the lid, with vegetable spray. Heat the oil in a large skillet on medium high heat. Rub the roast on all sides with the spice rub. Sear the roast on all of the sides.
Put the carrots in the bottom of the crockpot. Add the onions. Place the seared roast on top of the vegetables. Add the bouillon cube, wine and water. Put the lid on and cook for 4 hours on high.
Pour the barbeque sauce all over the roast and cook for an additional 20-30 minutes.
Remove the vegetables to a serving plate or bowl. With two forks pull the meat apart into bite-sized pieces. (You may need to slice some of the pieces if they are too long.) Serve on slider buns with more barbeque sauce if desired.
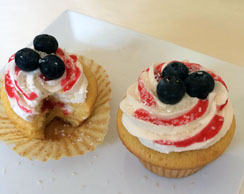
1 yellow or white cake mix, (plus 1/4 cup flour high altitude)
1/2 cup evaporated milk (or regular milk)
3/4 cup water
1 3.4 ounce package instant vanilla pudding
1/2 cup vegetable oil ( I use canola)
4 large eggs
1 teaspoon pure vanilla extract
Preheat oven to 350 degrees. Add all of the above ingredients into a large bowl and beat hard for 5 minutes.
In the meantime, line two12-cup cupcake pans with your favorite paper baking cup liners.
Using an ice cream scoop, add batter about two-thirds up the paper liner. Bake for about 20-22 minutes. Cool in the pan for about 5 minutes. Remove from the pan and cool completely.
Note: I have the best luck baking one pan at a time. If your oven allows, you can bake both pans of cupcakes at the same time. Many people rotate the pans half-way through.
Buttercream Frosting:
1/2 cup unsalted butter, softened
1/2 cup shortening
1/2 teaspoon salt
1 teaspoon pure vanilla extract
4 cups confectioner's sugar
1 1/2 tablespoons milk
1 teaspoon freshly squeezed lemon juice
1/4 teaspoon butter flavor
Cream butter and shortening together. Add salt and vanilla. Gradually add 1 cup sugar, I cup at a time, beating well on medium speed. Make sure to scrape the sides and bottom of the bowl. Add the milk, lemon juice and butter flavor. Beat until light and fluffy. Add more milk if needed, a few drops at a time.
Note: You will probably need to double this frosting recipe, depending upon how liberal you are with this delicious buttercream!
Filling:
1/2 cup seedless raspberry jam (or your favorite red jam) 1/2 cup of the frosting
1/2 pint of blueberries crystal clear, red or blue decorative sugar
To assemble:
Using a cool new gadget my daughter, Natalie, gave me,
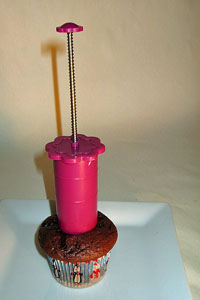 I popped a hole about an inch deep in the top of each cupcake. I reserved the piece I cut out. (If you don't have one of these gadgets, carefully cut a one-inch hole in the top of each cupcake. Be sure to save the portion that you cut out.
Next, fit a pastry bag with a large star tip. (If you don't have a pastry bag, you can use a large zippered plastic freezer bag.) Fold the top down and fill with frosting. Squeeze the frosting down to the bottom, trying to eliminate air bubbles.
Pipe a small amount of frosting into the hole. Using a knife, spread the frosting so that it coats all the sides of the hole.
Fill another pastry bag, this time fitted with a small writing tip, with the raspberry jam. Pipe a tablespoon or so into the hole in the cupcake.
Replace the reserved piece of cake that you cut out back on top of the filling. Press it down so that it is flush with the top of the cupcake.
Starting at the edge of the cupcake, frost the top of the cupcake using a swirling motion, ending in the center.
Carefully pipe jam in the grooves. Top with blueberries. Sprinkle with crystal clear, red or blue decorative sugar.
~You and your Independence Day friends will indulge with a burst of flavor with this fun and sparkling cupcake!
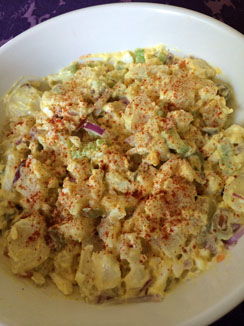 Deviled Egg Potato Salad
6-8 medium potatoes (I use red.)
1/2cup finely diced red or other sweet onion
1/4 cup sliced green olives
1/4 cup finely diced celery
4 hard cooked eggs
Paprika
Sauce:
3/4 cup Miracle Whip
1/4 cup sour cream
1 1/2 tablespoons yellow mustard
2 tablespoons freshly squeezed lemon juice
2 tablespoons sugar
1/2-1 teaspoon salt
1/8 teaspoon black pepper
1/8 teaspoon cayenne pepper
There are two schools of thought when cooking potatoes for potato salad.
The fastest way is to peel the potatoes, and dice them before adding them to a cold pot of salted (about 1-2 tablespoons) water that just covers them. Boil them for about 15-20 minutes or until they are fork tender, and not too mushy. Drain and pour into a large bowl.
The second way is to put the whole potatoes, skin and all into a cold pot of salted water that just covers them. Boil them for a longer period of time (about 20-30 minutes) until they are fork tender. Drain, and leave them in the pot for about 5 minutes to let the steam penetrate the potatoes. Then let them cool slightly so that you can handle them. Peel and slice or dice. Immediately add to a large bowl along with the onions, olives and celery. Dice 3 of the eggs and add to the bowl. Some people think that the potatoes have more texture using this method.
Mix all of the sauce ingredients in another bowl until smooth. With clean hands, take the remaining egg and squeeze and squish it over the bowl containing the sauce until it is pulverized. Mix the egg into the sauce.
Pour the sauce over the potatoes, eggs and vegetables. Sprinkle with paprika.
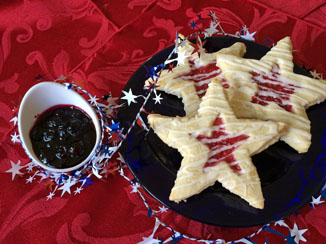
Stars and Stripes All American Shortbread With Blueberry Dipping Sauce
For the cookies:
2 1/2 cups all-purpose flour plus more for rolling out cookies
1/4 teaspoon baking soda
1/2 teaspoon salt
12 tablespoons (1 1/2 sticks) unsalted butter, softened
3/4 cup granulated sugar
2 tablespoons whipping cream
1 large egg, plus one egg white
1 teaspoon pure almond extract
1/2 cup raspberry preserves (or Freshy Fresh Raspberry Freezer Jam found here on the Food Page!
http://lovetohelpyou.com/FoodPage.html#raspberryjam )
For the glaze:
1 cup confectioner's sugar
3 tablespoons whipping cream
1/4 teaspoon pure vanilla extract
Dash salt For the Blueberry Dipping Sauce:
6 ounces fresh blueberries
1 tablespoon sugar
1 teaspoon cornstarch
1 tablespoon freshly squeezed lemon juice
1/4 cup water
Tools:
Stand or rotary mixer
Rubber spatula
Rolling pin
Baking sheets
One star cookie cutter 2-3 inches long
One small star cookie cutter, one inch long
Parchment paper or Silpats
Preheat oven to 350 degrees. Line two baking sheets with Silpats (silicone mats) or with parchment paper.
In a stand mixer, or with a rotary mixer, cream the butter and sugar together on medium high speed until pale and fluffy, about 3 minutes. Add the 2 tablespoons of whipping cream, the whole egg and almond extract and beat thoroughly.
Sift the flour, 1/4 teaspoon of salt, and baking soda together over a large silicone mat, or piece of wax or parchment paper. Carefully add the flour mixture to the butter and sugar mixture in three additions on low speed. Incorporate until the dough is just combined, being careful not to overbeat. With a rubber spatula, scrape down the sides and give the dough a final stir by hand.
Sprinkle flour onto a counter. Roll out half the dough to a quarter inch thick. Using a star cookie cutter about 2-3 inches long, cut out as many cookies as you can, re-rolling the scraps. Place on cookie sheets, one inch apart.
Lightly beat the egg white. Paint the top of each cookie with the egg white.
Roll out the remaining dough. Cut the same number of cookies using the large cookie cutter. Then, using the small star cookie cutter, cut a small star out of the center of each cookie. Place the large cookie on top of the ones on the baking sheet, minus the small star. Add a teaspoon of raspberry preserves in the center of each cookie. With a toothpick or the tip of a sharp knife tease the raspberry filling into all the points of the star. Smooth the edges. Paint the top of the cookies with the egg white.
Bake for 14 or 15 minutes, or until edges are golden. Cool on sheets for five minutes, and then transfer them to a wire rack to cool completely, about one hour.
For the Dipping Sauce:
In a small saucepan, mix the sugar, cornstarch water and lemon juice together until smooth. Fold in the blueberries, carefully. Cook, stirring constantly over medium heat until thickened. Pour about two tablespoons of the sauce into individual cups and cool.
Does this recipe seem familiar? You can modify your recipes to fit any event, celebration or an any day treat!
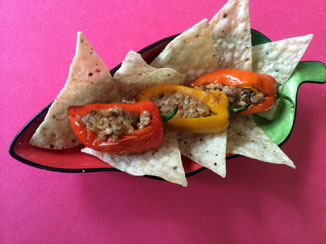
3 tablespoons extra-virgin olive oil
3/4-1 pound assorted mini baby bell peppers (about 20)
1 onion, diced finely
4 slices pickled jalapeno peppers, chopped finely
3 cloves garlic, minced
1 teaspoon cumin
1/2 teaspoon chipotle chile powder
salt
3/4 pound pork cubed steak or ground pork
1 cup shredded pepper-jack cheese
In a large skillet heat the olive oil over medium heat. Add the mini baby bell peppers. Make sure there is only a single layer. Saute until the skins blister and start to brown, turning periodically. This should take about 8-10 minutes. (Turn the heat down slightly if the oil start to spit and crackle.) Remove to a large platter.
Into the same skillet add the onions, chopped jalapeno slices, garlic, cumin and chipotle chile powder. Sprinkle with 1/2 teaspoon salt. Stir to coat the vegetables and spices. Cook for about 6-8 minutes or until the onions are translucent. Add the pork and stir to break up into small pieces. Cook until no longer pink, again about 6 minutes. Add more salt if desired. Add the cheese and stir into the mixture. Turn the heat off.
Cut a slit in each pepper from the stem to the tip with a small, sharp knife. Stuff 2-3 teaspoons of the pork and vegetable mixture using your clean fingers or with a small spoon.
At this point they are ready to be served, or if you are assembling these for a later party, cover and refrigerate.
You can serve these warm or cold, However, if you like them hot, transfer them to a baking sheet and bake the for about 10 minutes in a 425 degree oven.
~This is my version of a recipe I found in the Food Network magazine. That's the beauty of experimentation. You can mix and match whatever you have in your pantry or refrigerator to suit your unique tastes. Don't be afraid to try something new!
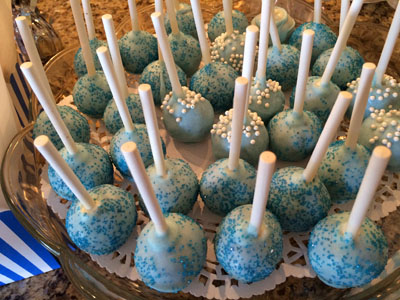 1 cake mix, your favorite flavor (I use Betty Crocker Supermoist)
1/2 cup canola oil
3 eggs
1 1/4 cups water (or other liquid if you want to be creative)
1 teaspoon pure vanilla extract
For high altitude add:
1/4 cup flour
1/4 cup more water
One tub of frosting (I use Betty Crocker Creamy Deluxe.)
1-12 ounce package chocolate chips and/or
1-6 ounce bar of good white chocolate (e.g. Lindt)
4 tablespoons heavy cream
Colored sprinkles, if desired
Lollipop sticks (about 25-40 depending upon the diameter of your cake pops)
Preheat oven to 350 degrees.
Make the cake according to directions on the box, adding the vanilla. Pour batter into a 9x13 pan. Bake for 30-35 minutes. Remove from oven and cool on a rack.
When totally cool, crumble the cake into a large bowl. (A food processor works well for this step. Just put the cake in the food processor and pulse several times until the cake becomes fine crumbs. Then pour the crumbs into a large bowl.) Add about 1/2-3/4 tub of frosting. Mix into the cake with an electric mixer. Cover with plastic wrap and cool for a couple of hours.
When cool, scoop out cake mixture and roll into about 1 1/2-inch balls. Place on a tray that has been lined with wax paper.
Using the microwave, melt about 3 tablespoons of chocolate chips (or white chocolate) in a microwave proof bowl in 20 second increments.
Swirl one end of a lollipop stick in the melted chocolate. Press it into a cake pop ball about halfway. Repeat with the remaining balls. Return the tray to the refrigerator and cool for 15 minutes. (You can speed up the process by putting them in the freezer.
Melt the rest of the chocolate in a larger microwave bowl. Heat the heavy cream for about 20 seconds in the microwave. Stir the cream into the melted chocolate. (Add more cream if desired to make the chocolate creamier.
Pour sprinkles into a bowl.
Take the pops out of the refrigerator or freezer. Scoop some chocolate with a large spoon. Holding the pop by the stick, swirl the chocolate onto the cake pop, covering it completely. Dip into sprinkles if desired. Cool again in the refrigerator.
If you want to be fancier, melt a contrasting color of chocolate and drizzle the contrasting color over the cake pops.
~These are delicious, but I think they are best assembled with friends.
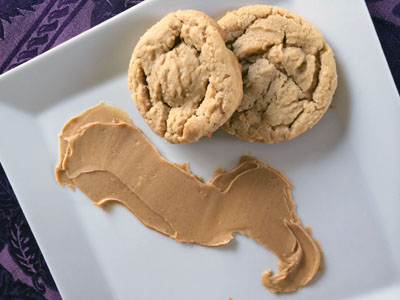
1 cup shortening
1 cup brown sugar
1 cup white sugar
1 cup peanut butter
2 large eggs
2 cups flour (add 2 tablespoons if at high altitude)
1 1/2 teaspoons baking soda
1/2 teaspoon salt
2 teaspoons pure vanilla extract
1 cup chopped honey roasted peanuts
Preheat oven to 350 degrees.
Cream the shortening and sugars together. Add eggs and peanut butter and mix thoroughly. Add dry ingredients and mix until almost incorporated. Add vanilla and peanuts. Mix until the dough has just come together. Do not overmix.
Note: This recipe does not require the cookies to be mashed with a fork before baking.
Bake on ungreased cookie sheet for about 12 minutes.
Top with your favorite chocolate or butterscotch chip just before baking for extra richness!
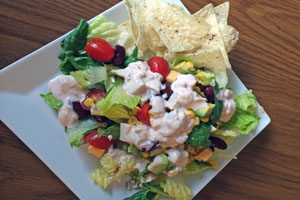
1-2 heads of romaine lettuce (or your favorite), chopped
1 can of kidney beans, chilled and drained
1 cup of grape tomatoes
1 large avocado, diced
1/2 cup corn, cooked and chilled
1/2 c sliced ripe olives, if desired
1/2 cup shredded cheddar or pepper-jack cheese
1 pound ground beef, browned and drained, if desired
1 bag restaurant style white corn tortilla chips, or your favorite
Dressing:
1/2 cup sour cream or plain yogurt
2 tablespoons picante sauce
1 4 ounce can diced chiles
Toss lettuce, beans, tomatoes, avocado, corn, olives, cheese and meat in a large bowl.
In a small bowl stir the sour cream or yogurt, picante sauce and green chilies together to combine. Pour over the top and toss.
Add chips around the edge of the bowl.
~Love this version of a summertime favorite! Add or subtract any of your favorite ingredients!
 that complements the flavor of cake, and mix it into the crumbs.
<br><br>
Roll into balls about one inch in diameter.
<br><br>
Chop 6 ounces of white chocolate and put it into a large microwaveable bowl. Microwave at 30 second intervals, stirring after each interval until melted. If desired, add one or two drops of food coloring and stir to combine. If you want two colors, separate
<br><br>
Dip the end of a lollipop stick into the melted chocolate and push it into a cake ball, making sure that the cake is securely around the stick. Repeat with all the cake balls.
<br><br>
<img width=300px align=right src=)
Then dip each cake ball into the melted chocolate, twirling to coat the entire surface. Let the excess chocolate drip off before setting aside to dry. Place the dipped cake pops on a cookie sheet lined with wax or parchment paper.
If you would like to decorate the cake pops with sprinkles as is pictured above, dip them in the sprinkles immediately after dipping them in chocolate.
To decorate with swirls of chocolate, fill a pastry bag (or disposable plastic zipper bag) that has been fitted with a small tip with the different color (or same color) of melted chocolate. Swirl the chocolate on the cake pops in a decorative manner.
Debi and Brooke did such a great job with these! They were beautiful and delicious! Have fun wowing your guests!
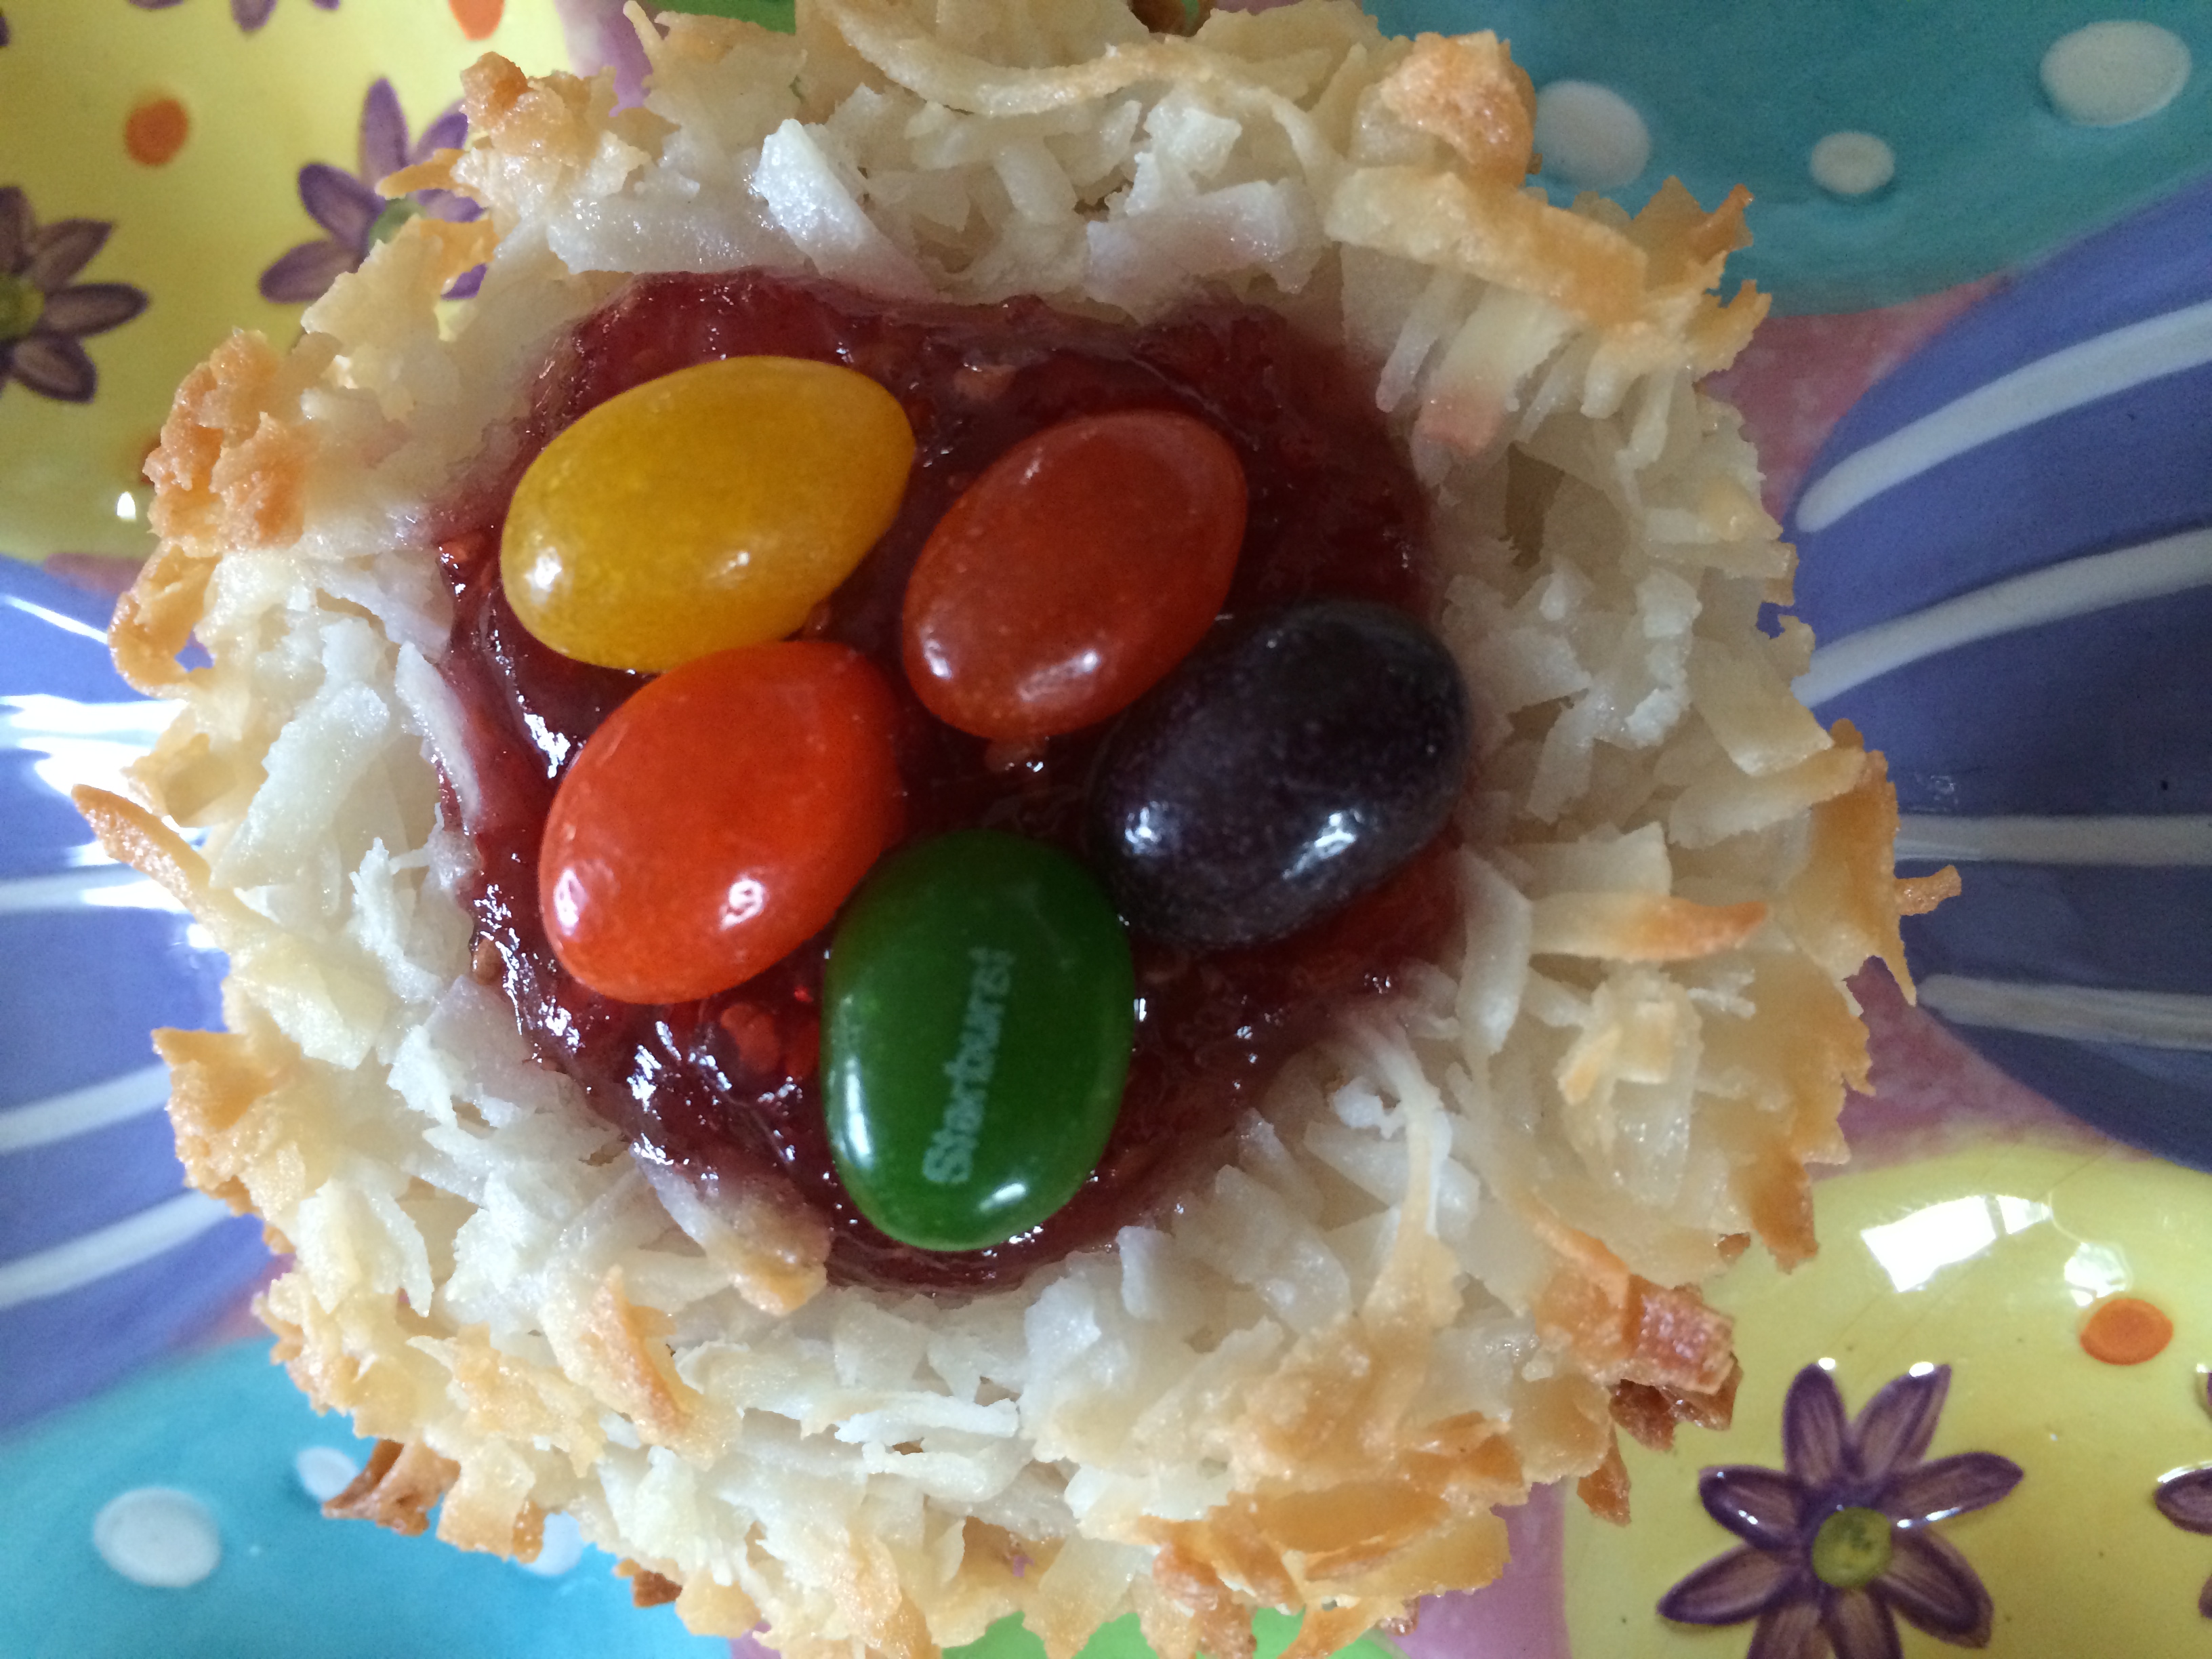
My family delights in the cute things I make each holiday. A twist on a traditional thumbprint cookie, this macaroon is chewy, creamy and crunchy all at the same time. Plus, they are super easy to make.
3 large egg whites
1/2 cup white granulated sugar
1/8 teaspoon salt
1/2 teaspoon pure vanilla extract
1 14 ounce package sweetened shredded coconut
Make sure that the oven is preheated to 325 degrees.
Line a cookie sheet with parchment paper or a Silpat.
In a large bowl beat the egg whites, sugar and salt until frothy.
Fold the coconut in to the egg white mixture.
Drop scoops of coconut batter about 1-2 inches apart onto the lined cookie sheet. Spred them out so that they are about 3/4 inch thick. Bake for 10 minutes.
After 10 minutes, make an indentation in the center of the cookie, using a melon baller. Fill with 1/4 teaspoon raspberry jam (or your favorite). Bake for 10-15 more minutes, depending upon how large a cookie you have decided to make.
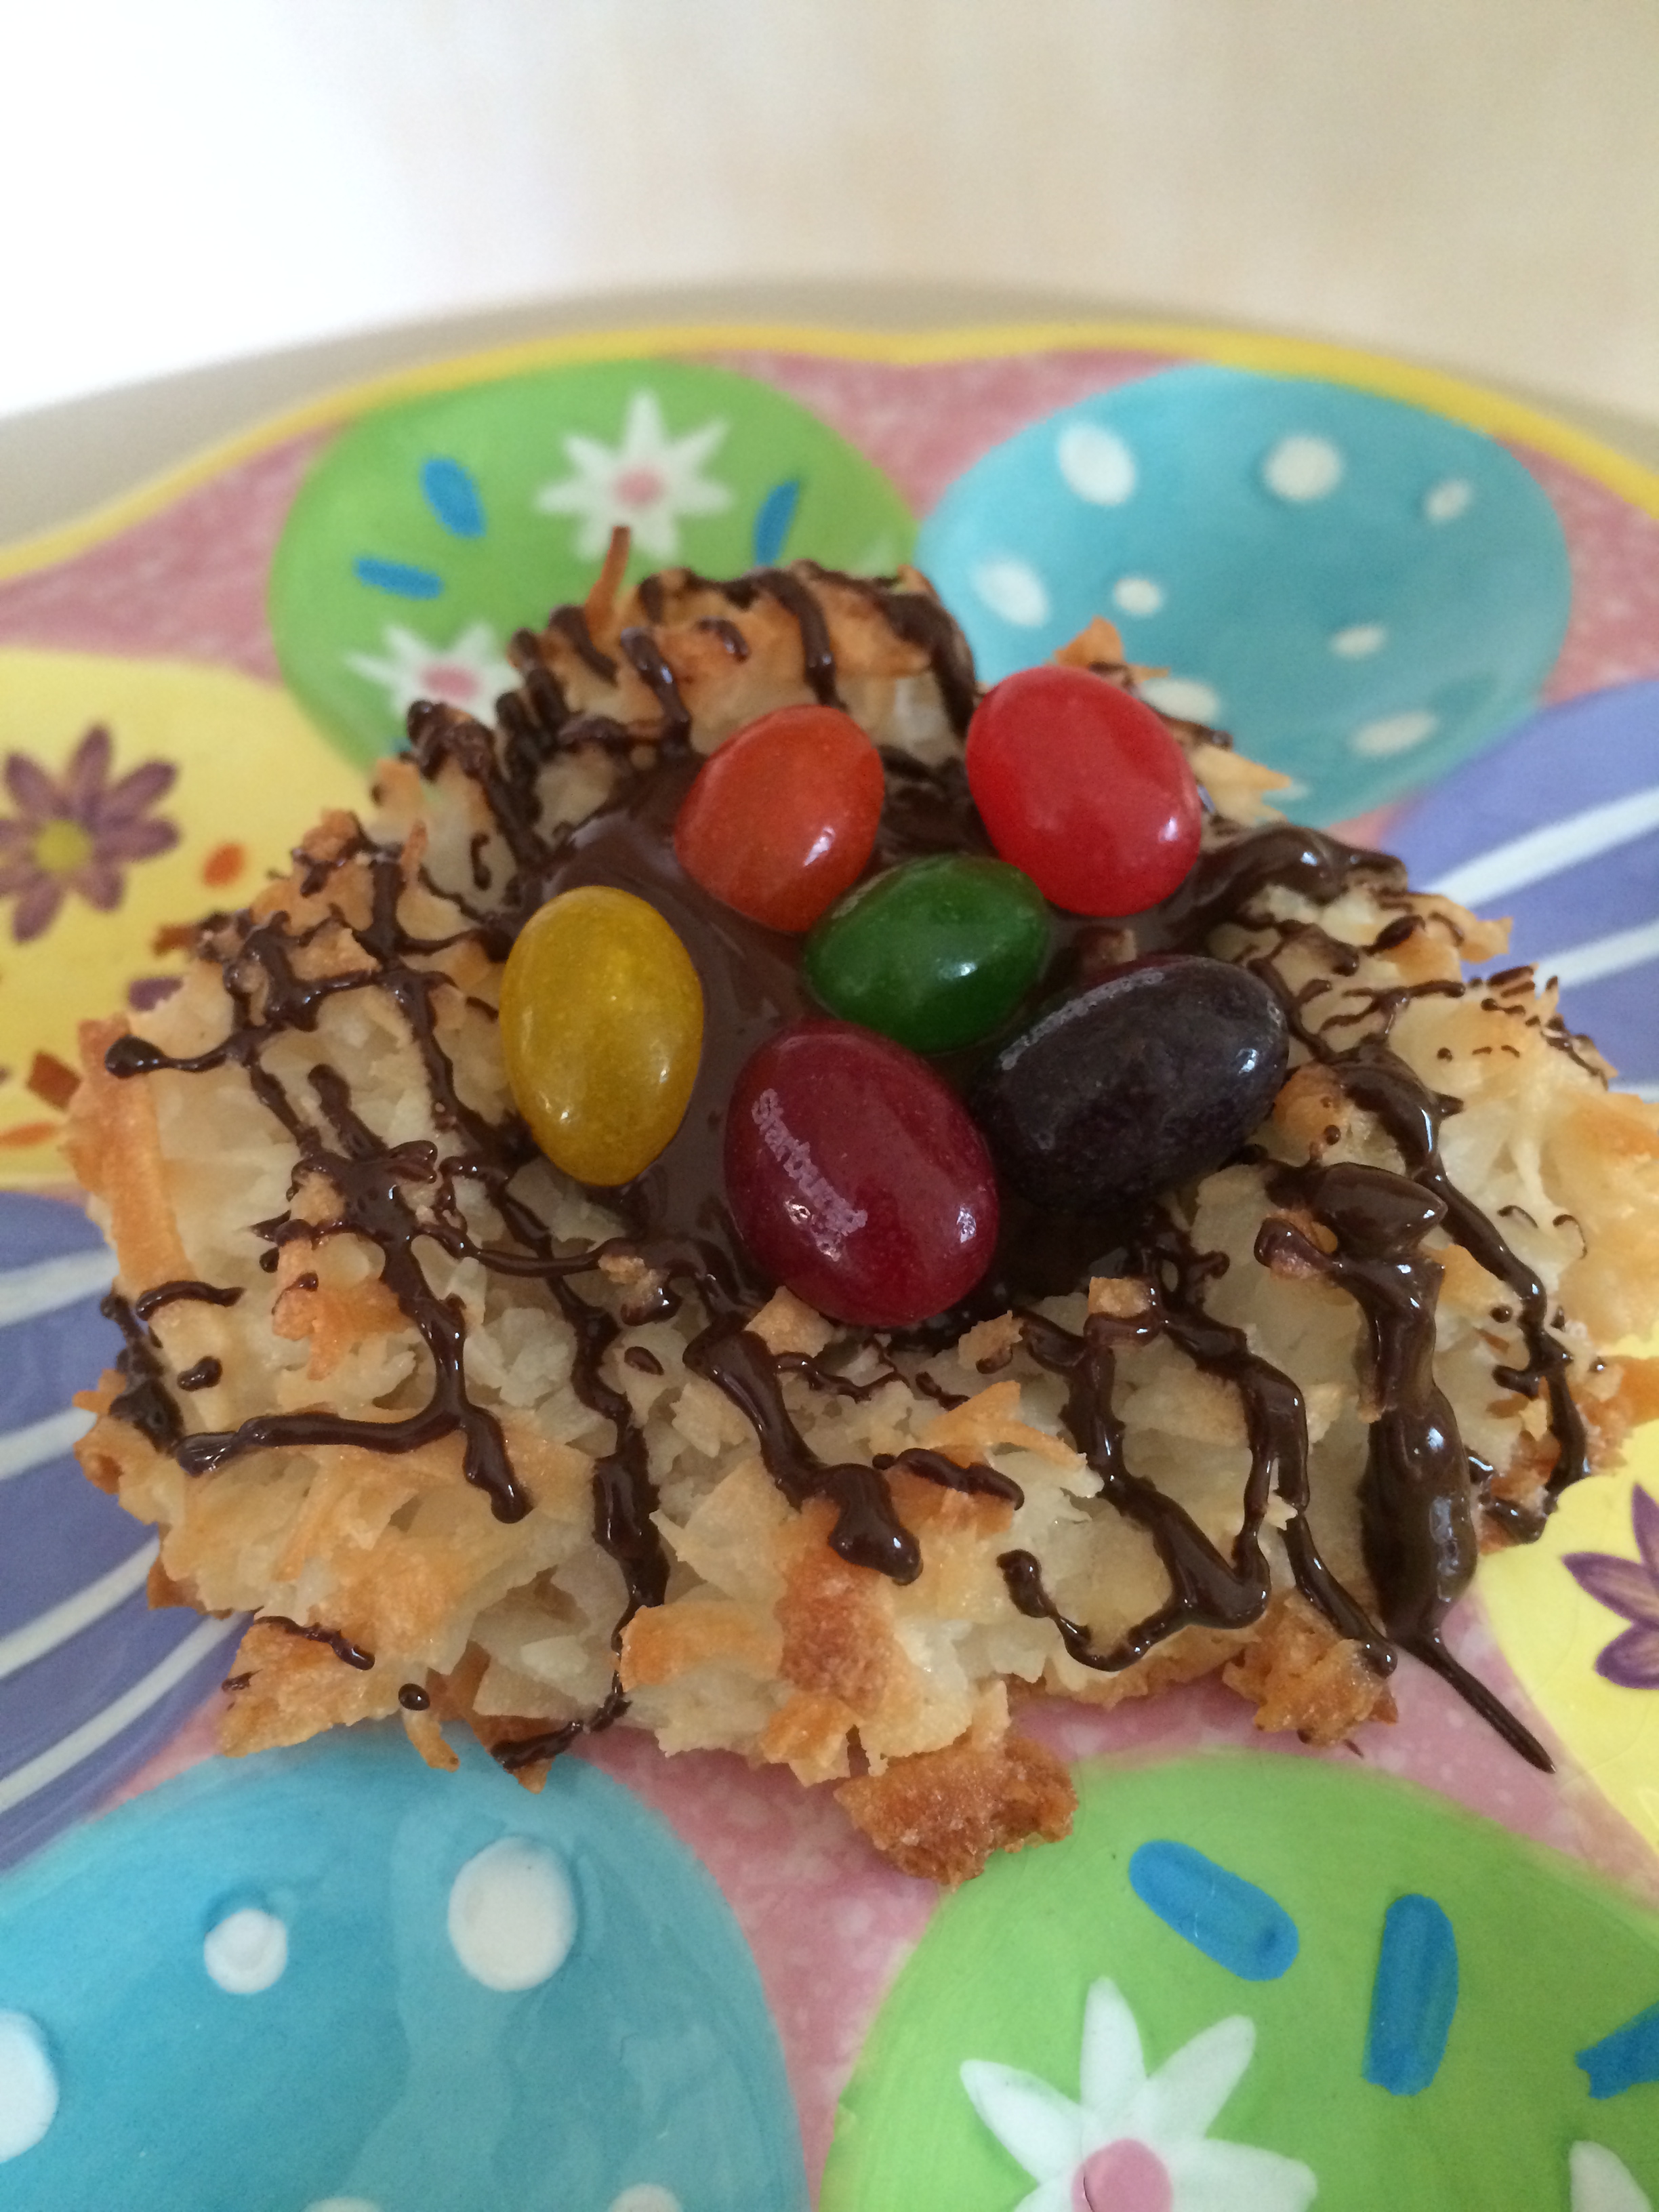
If you decide to make this alternative, follow all the directions except adding the jam.
Melt 6 ounces of dark, milk or white chocolate. Fill the indentation and drizzle chocolate over the surface.
Add your favorite jelly beans or egg-shaped candies to either version you have decided to make to simulate a nest.
~Inspired by the Food Network, these are so cute, easy and delicious!
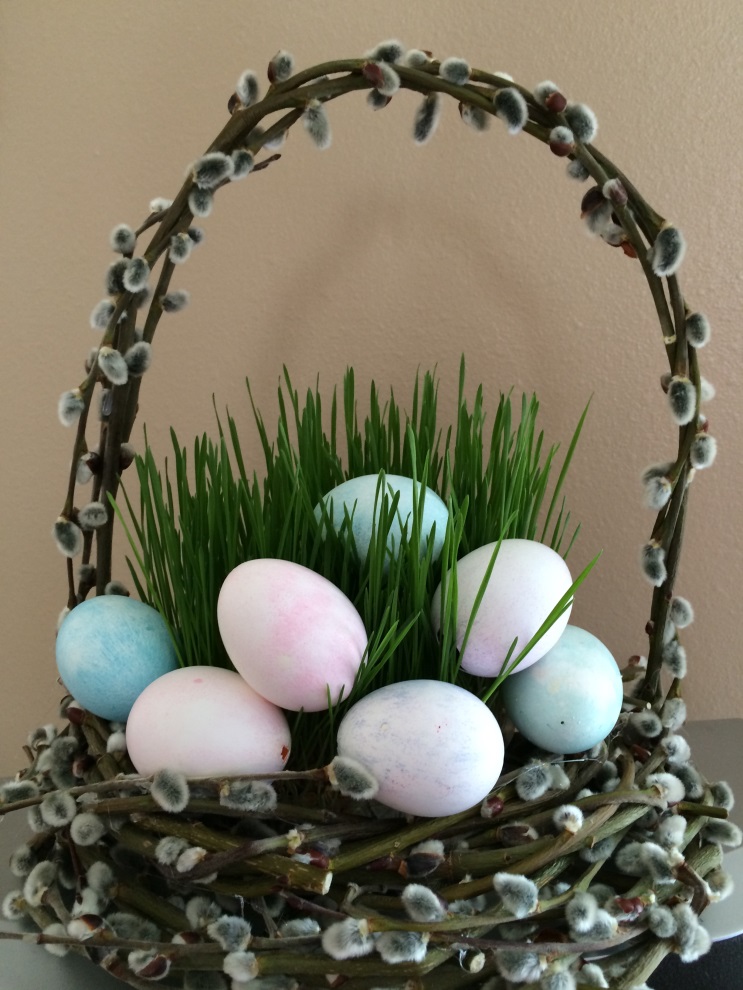
We have all heard that we should eat more green leafy vegetables. But, grass? Isn't that reserved for four legged creatures?
Apparently not.
After researching several Web sites, it seems clear that consuming wheat grass juice has many benefits. Here are a few:
1. Neutralizes toxins in the body
2. It is an effective healer.
3. Helps prevent tooth decay
4. Helps get rid of eczema and other skin irritations.
5. Improves digestion
6. Has over 100 elements needed by humans
7. Contains a wide variety of vitamins and minerals including essential vitamins and trace minerals.
For further reading visit these sites:
http://thechalkboardmag.com/50-reasons-to-drink-wheatgrass-everyday
http://www.mayoclinic.org/healthy-living/nutrition-and-healthy-eating/expert-answers/wheatgrass/faq-20058018
And I thought it just made cute Easter basket filler.
Here's how you grow it:
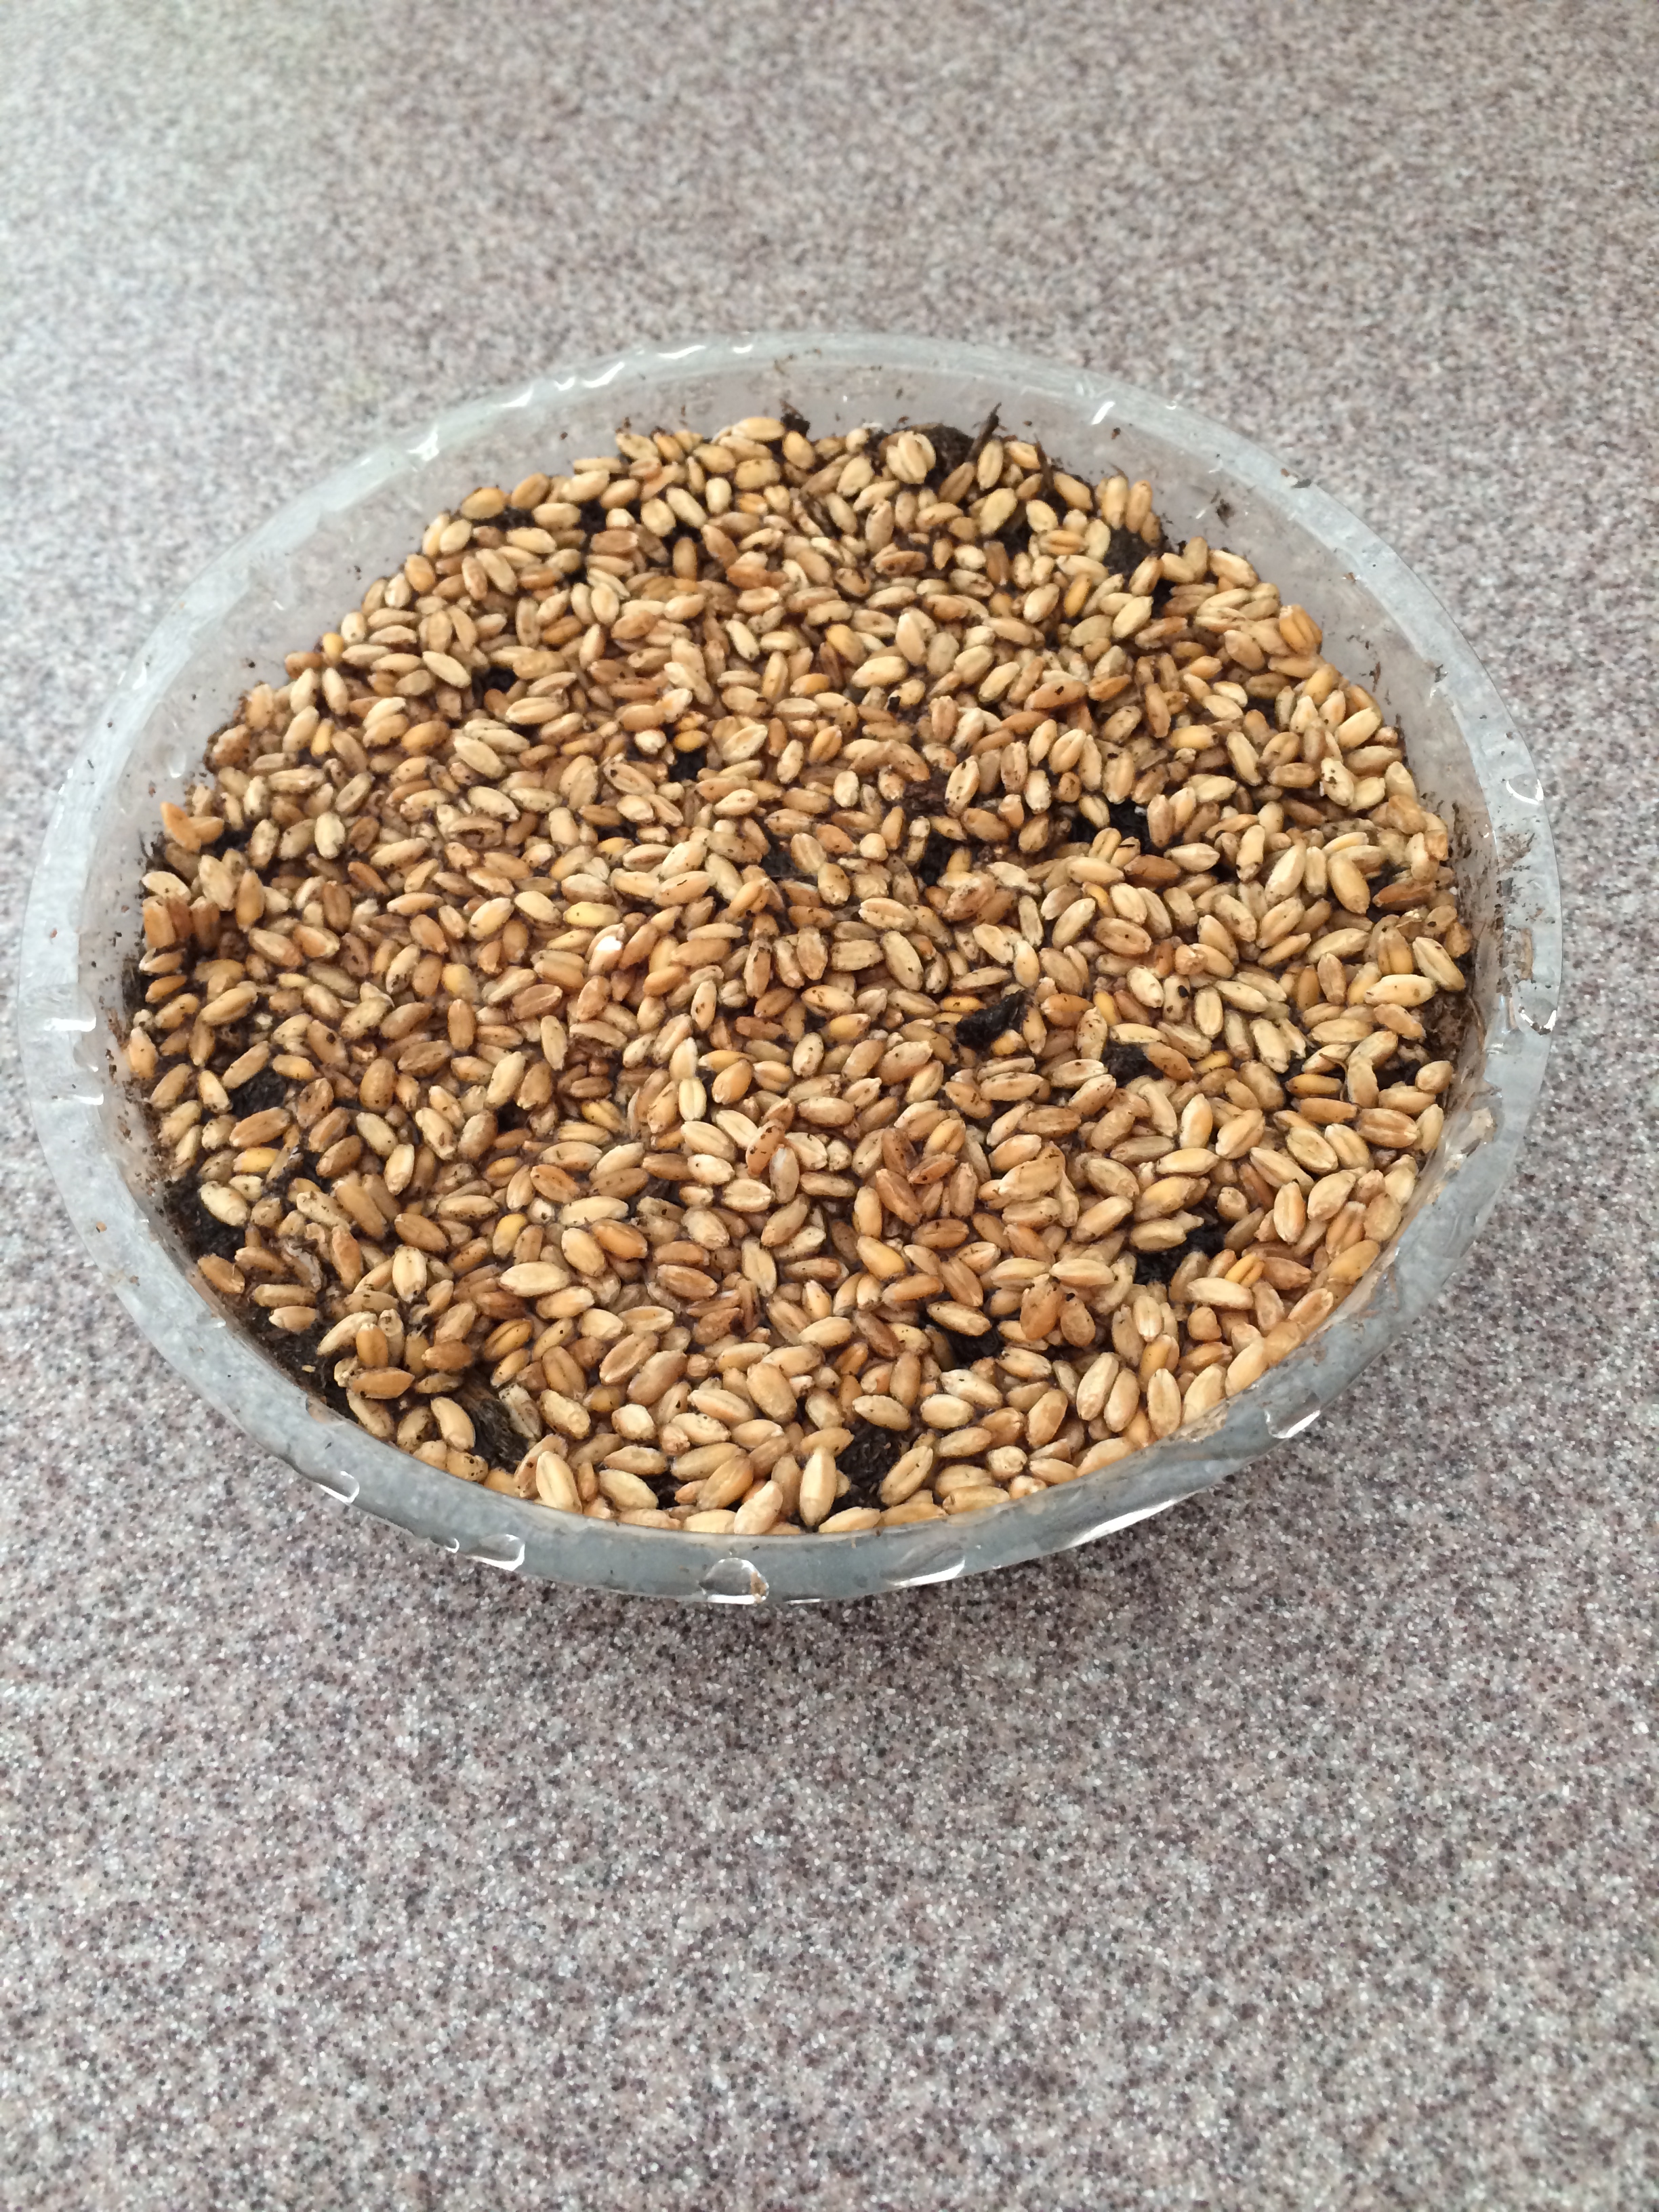
Fill a plastic liner for a basket half way up with potting soil. Layer the wheat grass seed in a single layer on top of the soil. You do not need to cover it with more soil. Water it liberally, making sure that the seeds are moistened and kept moist. Sometimes I take another liner and turn it over on top of the one that is planted, creating a greenhouse effect. In a couple of days your wheat grass will have sprouted. It will be tall enough for an Easter basket within a week. If it looks like it is getting to tall for the basket, just trim it and juice it for a nutritional shot of vitamins and minerals.
How to juice wheat grass:
Clip wheat grass into one inch strips, enough to fill a 1/2 cup container. Place in a blender along with 2-3 cups water and a squeeze of lemon. Blend on high speed until grass is pulverized.
Line a sieve with cheesecloth or a coffee filter. Place over a bowl and pour the wheatgrass mixture over the cheesecloth. Let it drain through. Discard the solids.
Drink immediately or chill for about an hour.
I wasn't sure whether to put this delectable delight in the "Food" index or the "Dessert" index. Technically it's a breakfast main dish, but it tastes like you're indulging in something sinful.
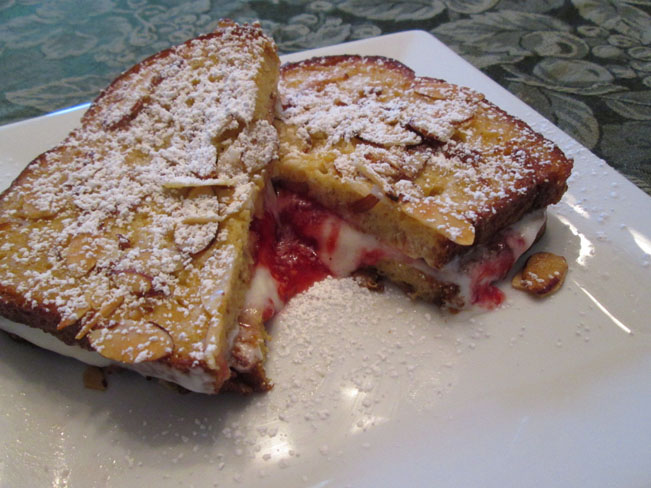
2 tablespoons butter
1 tablespoon canola oil
4 slices of bread (your choice)
2 eggs
2 tablespoons milk
1/2 teaspoon pure almond extract
Dash salt
2-4 tablespoons sliced almonds
1-2 tablespoons powdered sugar, for dusting
Cream Cheese Filling:
4 ounces cream cheese, softened
3/4 cup powdered sugar
1/2 teaspoon fresh lemon juice
Raspberry Sauce:
1 cup raspberries (either fresh or frozen)
2-3 tablespoons sugar
1/2 teaspoon corn starch
Begin filling by combining the cream cheese, powdered sugar and lemon juice in a small bowl. Set aside.
In microwavable bowl, combine the sugar and cornstarch together. Carefully fold in the raspberries. (If you are using frozen berries, thaw them first.) Microwave the mixture for about 1 minute. Stir. The mixture should be slightly thickened. Set aside.
In a flat dish whisk the eggs, milk, almond extract and a dash salt until frothy. Set aside. Heat a flat skillet (large enough to griddle four slices of bread if possible) over medium high heat. Add one tablespoon butter and canola oil and let melt, coating the surface. Sprinkle almonds in the area where you will be placing two slices of bread.
Dip both sides of four slices of bread into the egg mixture. Place two of the slices in the skillet over the almonds and two next to them. Brown bread on both sides, adding the extra tablespoon of butter on the skillet if needed.
Spread half of the cream cheese filling on top of one of the slices of grilled bread that does not have the almond topping. Spread with half of the raspberry mixture. Top with one of the almond topped slices of grilled bread. Sprinkle with powdered sugar. Repeat with the remaining two slices of grilled bread.
Tip: To make the process easier, you can use Freshy Fresh Raspberry Jam http://lovetohelpyou.com/FoodPage.html#raspberryjam that you have already made as a substitute for the raspberry filling, or even your favorite store-bought or homemade jam.
~This Stuffed French Toast is pure decadence. Try it using a variety of flavors!
I guess that our co-workers were starving, either that or they loved this easy and delicious dip! It disappeared from the work room before the next class period!
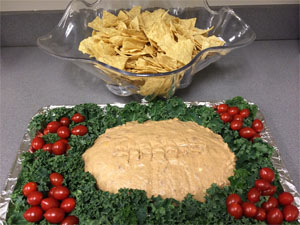
1 regular sized can Rosarita Spicy Jalapeno refried beans
4 ounces cream cheese, softened
2 ounces sour cream
4 ounces cheddar cheese, grated
Combine all ingredients in medium saucepan and cook over low heat, stirring often.
Serve with Restaurant Style white corn chips or whatever chips you prefer.
You can also use this recipe for burrito filling:
Serve in heated flour tortillas with your choice of other fillings (chopped tomatoes, sliced black olives, shredded lettuce, chopped avocado, sliced jalapenos, salsa, cooked ground beef, etc.)
**Note: This recipe is easily doubled or tripled.
~I have become somewhat famous among our friends because of this bean dip. This recipe is really inspired from one I borrowed from our friend, Sylvia Ahermae. After tasting this filling, you may have trouble enjoying burritos in your local Mexican restaurant.
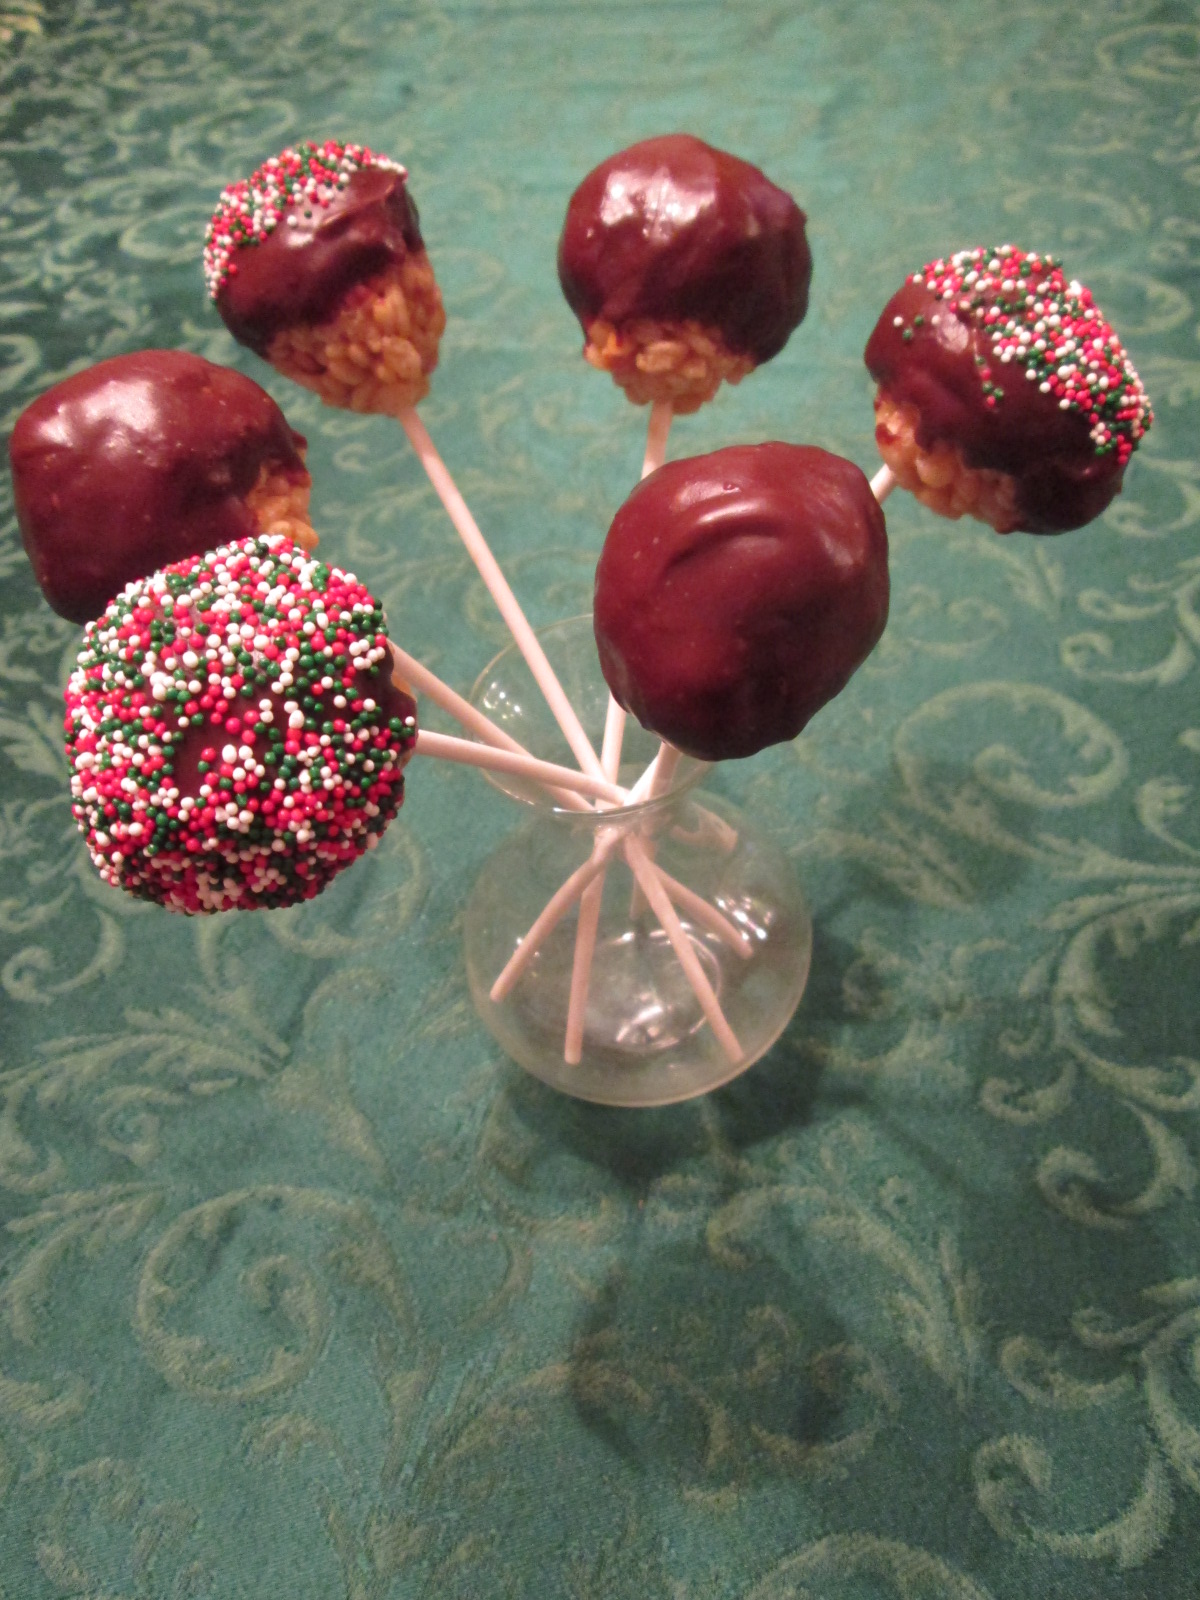
6 cups crispy rice cereal
1 cup sugar
1 cup light corn syrup
1 cup peanut butter
1 teaspoon vanilla
6 ounces chocolate chips (1 cup)
6 ounces butterscotch chips (1 cup)
red and green (or your favorite) sprinkles
lollipop sticks
1-2 tablespoons butter or vegetable spray
Measure out crispy rice cereal into a large bowl.
In a medium saucepan dissolve sugar in syrup--remove from heat. Immediately stir in peanut butter and vanilla until smooth.
Pour over crispy rice cereal and mix well.
With buttered (or sprayed) hands form balls onto lollipop sticks, making sure the crispy rice mixture is pressed onto the sticks firmly.
Combine both kinds of chips and melt in microwave (at one minute increments for aproximately 2 and a half minutes). Stir to combine. Dip lollipops into melted chocolate and then in your favorite sprinkles. Place in a small vase or glass to allow the chocolate/butterscotch to set.
~This is an extremely easy recipe. I usually make these as bars, but I thought they would be fun as lollipops for our Christmas celebration. Note: The guys on Teddy's sports teams went wild for these. If you bring these to the baseball games, you'll be a hit!
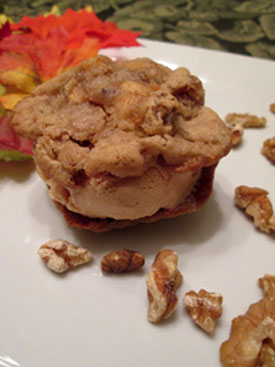 1 3/4 cups brown sugar
2/3 cup shortening
1 egg
1 teaspoon cinnamon
1/4 teaspoon cloves
1/2 teaspoon nutmeg
1/2 cup milk
1 teaspoon vanilla
2 cups flour
1 cup finely chopped apples
(One large apple)
1 tablespoon baking powder
1 cup chopped nuts (I use walnuts, but pecans would also work.)
1 teaspoon salt
1 cup golden raisins
Cream together brown sugar and shortening. Add egg and beat thoroughly. Add milk and incorporate, making sure to scrape the sides of the bowl. Stir in vanilla.
Sift together the flour, baking powder, salt, cinnamon, cloves and nutmeg. Sir into wet mixture until almost absorbed. Fold in apples, nuts and raisins. Chill in the refrigerator for 30 minutes.
Bake in 350 degree oven for 15 minutes.
~This recipe is a legacy from my mom. My contribution is that I use golden raisins instead of the regular raisins. I think the golden raisins give these cookies a smoother, softer essence. Other pluses for this recipe, (besides the fact that they are scrumptious), are that most of the ingredients are already in your cupboard and the recipe takes only one large apple. (I use Jonathon, but you can use your favorite like: Granny Smith, Macintosh, Red Rome, Winesap, Spye or similar.) However, you have to be careful; these cookies are quickly addicting.
~For extra decadence, sandwich a scoop of pumpkin ice cream between two cookies. Savor the scents and flavor of autumn.
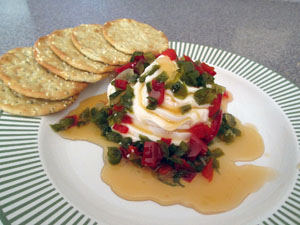 10 large jalapenos
2 green bell peppers
1 mild long red pepper
2 red bell peppers
1 medium onion
2 1/4 cups sugar
1 box low sugar Sure-Jell (pink box)
1 cup apple cider vinegar
1 teaspoon kosher salt
Mason jars- pint, 12 ounce, 8 ounce or 4 ounce
Lids and rings
Canning tongs and large canning pot
*Caution: When working with jalapenos or other hot peppers, wear protective eyewear and gloves.
Place mason jars, enough to equal about 6 or 7 cups into a large canning pot. Fill it with water to cover them plus one inch. Bring to a boil. Turn the heat off and keep the jars in the boiling water until the relish is ready to be canned.
Fill a saucepan with water and boil the rings to sterilize them. Keep them hot.
Slice all the peppers open and discard all of the seeds and ribs. Dice finely. Finely dice the onion as well. You should end up with six cups of diced peppers and onions. Pour into large pot. Using a heat resistant spoon stir in kosher salt and cider vinegar.
Mix 1/4 cup sugar with the Sure-Jell in a small bowl. Stir into peppers and onions. Over high heat, bring the mixture to a full rolling boil (one that can't be stirred down) stirring constantly. Boil for one minute. Immediately add the rest of the sugar (2 cups) and bring to a full boil, stirring constantly. (Be careful, it will boil up violently.) Boil for one minute. Remove from heat.
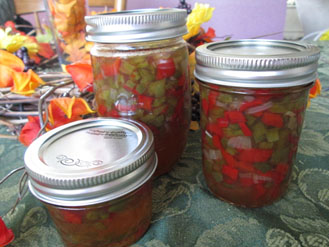 Using canning tongs, remove a jar from the boiling water emptying the water either back into the pot, if there is room, or into the sink. Place into a heat resistant bowl and put a canning funnel into the top. Ladle in relish, leaving a half inch space at the top of the jar. Remove the funnel and wipe the threads and the top of the jar with a clean, wet cloth. Dip a lid into boiling water for a few seconds. Place the lid on top of the jar and screw a ring tightly to seal. Repeat using all of the relish.
Place the jars back into the large canning pot with the boiling water and turn the heat on high. Boil for 10 minutes at sea-level and 20 minutes at high altitude. Carefully remove and place on a heat resistant surface. Listen for the tell-tale "pop", indicating that the jars have sealed. Let stand for 24 hours. Store for up to a year.
~I know what you're thinking..."why would I go to the trouble to make relish?" Because it's delicious and colorful (think about the nutrients)! And, capsaicin, a component found in hot peppers, helps relieve pain.
Try this delicious dip that is pictured above: heat one cup of this colorful relish in the microwave for about one minute. Stir and pour over a block of room temperature cream cheese. (If you decide to pipe your cream cheese onto a plate, microwave it for about 20 seconds first.) Enjoy with your favorite cracker. But be careful. This relish is addicting!
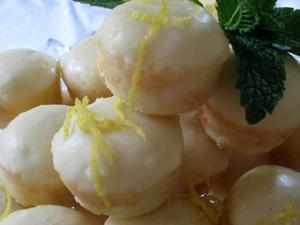 Preheat oven to 350 degrees.
Sift together into a large bowl of a standing mixer (or use hand rotary mixer)
1 1/2 cups cake flour
2/3 cup sugar
1 3/4 teaspoons baking powder
1/2 teaspoon salt
Add:
1 small package instant vanilla or lemon pudding
1/2 cup shortening
1/3 cup milk
1/4 cup freshly squeezed lemon juice
zest of 1 1/2 large lemons
1/2 teaspoon vanilla
Baker's Joy non-stick spray
Beat on low speed for 30 seconds and then on a cake setting for 2 minutes, pausing twice to scrape down sides of mixer.
Add: 2 eggs
Beat one minute longer. Spray a mini muffin tin with vegetable spray. (I have found that Baker's Joy works the best.) Fill the cups half full with batter. Bake for 14-15 minutes or until slightly golden.
Meanwhile, make the glaze:
4 cups confectioner's sugar
1/3 cup plus 3 tablespoons freshly squeezed lemon juice
zest of 1 1/2 lemons
3 tablespoons vegetable oil (I use canola)
Line a cookie sheet with waxed paper and place a wire rack on top.
After baking, immediately plunge the tiny cakes into the glaze, while they're still warm, coating the whole cupcake. Place on top of the wire rack to catch any drips. Let glaze dry thoroughly and coat again if desired. Makes 36-38 delectable bites.
Variation: To add even more lemon flavor, pipe lemon curd into the top of each one of these bites. The recipe follows:
Lemon Curd
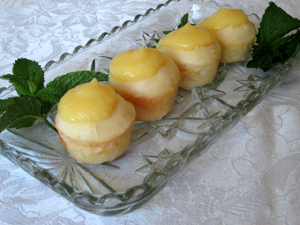
2 large egg yolks
1 large whole egg
3/8 cup sugar
1/4 cup freshly squeezed lemon juice
2 tablespoons unsalted butter
Pinch of salt
Grated zest of one lemon
In a small saucepan, whisk the egg, egg yolks, sugar, salt, zest and lemon juice until smooth. Place over low heat and stir constantly with a silicone spatula or wooden spoon while cooking for about 8-10 minutes. The mixture should bubble and thicken enough to coat the back of the spatula or spoon. Add butter and stir until it is melted.
Remove from heat and continue stirring for a few minutes to cool the mixture slightly. Strain through a sieve, if desired, to make sure the curd is completely smooth. Cover with plastic wrap or parchment paper, making sure that it rests directly on the surface of the mixture, so that a skin does not form on top of the lemon curd. Refrigerate before using. Lemon curd lasts for up to 4 days in the refrigerator.
~Oh my gosh are these ever surprising! Often, lemon recipes miss the boat and do not use enough of the bright flavor and are left somewhat bland. I modified a couple recipes and enhanced the lemon flavor so that these really "pop" in your mouth! Just in time for Independence Day.
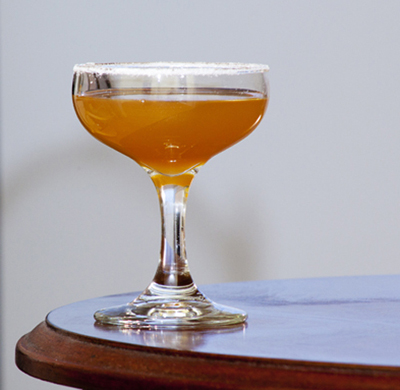 Side Car
1 1/2 ounces Cognac
1 ounce Cointreau
1/2 ounce freshly squeezed lemon juice
Draw the lemon around the rim of each chilled glass and dip into sugar (colored sugar if you want to be festive!) Add all of the liquid ingredients into a cocktail shaker that has been filled with ice. Shake for 15 seconds and strain into the rimmed glass. Garnish with a twist of lemon. Yield: one drink
 Mint Julep
2 ounces bourbon
1/2 ounce simple syrup (Boil equal parts sugar and water until sugar is dissolved. Then cool. Make enough to use for both the juleps and the Luscious Lemonade recipe that follows for those teetotalers at the party.)
20 mint leaves
Crushed ice
Mint sprigs for garnish
Place the mint leaves and the simple syrup into the bottom of a julep glass. (Whatever glass you decide on will be fine as long as it's not too delicate.) Muddle the leaves lightly, infusing the minty oils into the syrup. (If you don't have a muddler, use a long spoon.)
Next, add the bourbon and fill the glass half full with crushed ice. Swizzle the whole mixture. Once it is mixed, fill the glass with more crushed ice. Garnish with a mint sprig. Place the straw right next to the mint sprig so that you can inhale all of the minty freshness as you sip the sweet deliciousness.
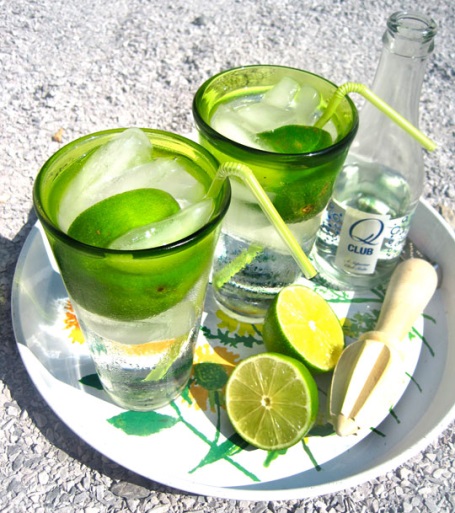 Gin Rickey (reportedly F. Scott Fitzgerald's favorite drink)
1/2 of a lime
1 1/2-2 ounces gin
Club soda
Fill a tall glass with ice. Squeeze the half lime into the glass and drop the rind in as well. Add the gin. Fill to the top with club soda. Stir and enjoy!
For the sweet designated drivers in your group:
 Luscious Lemonade
1 1/2 cups water
1 1/2 cups sugar
1 cup freshly squeezed lemon juice (about 4-5 lemons)
Pour the water and sugar in a small saucepan and simmer until all the sugar is dissolved. Meanwhile squeeze lemons and pour juice into a half-gallon pitcher. Add sugar syrup, aka simple syrup. Fill pitcher with cold water. Add slices of lemon if desired.
~Some people may ask, why don't you just pour the sugar in and skip the cooking step? My sister in law, Donna, had the answer: the cooking step imparts a smooth, caramelly flavor, which is the perfect complement to the bright lemon essence. A luscious beverage to aid your parched summer throat.
Here is a fun Web site to access more vintage cocktails recipes: www.diy-cocktails.com/tag/1920s-cocktails
*cocktail photos courtesy of www.diy-cocktails.com
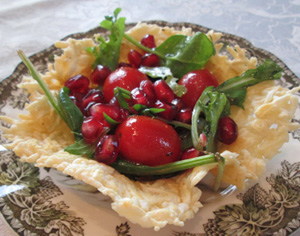 For the Parmesan Cups:
1/4 cup grated Parmesan for each cup
Cupcake pan
Stovetop method
On a flat nonstick heated over medium high heat griddle or skillet, spread parmesan in to a 4-5 inch diameter circle. Cook until the parmesan has golden brown edges, about one to two minutes. Flip over and cook for about one to two more minutes. With a spatula, transfer the parmesan round onto the underside of the cupcake pans, molding them into bowls. Let them cool until firm for about five minutes.
Oven method
Preheat the oven to 375 degrees. On a Silpat or cookie sheet lined with parchment paper, spread the parmesan in a 4 or 5 inch diameter circle. Bake for 8-10 minutes. Transfer and mold the parmesan in the same way as the stovetop method.
For the vinaigrette: 1/2 teaspoon salt 2 tablespoons sugar dash of pepper 2 tablespoons vinegar 1/4 cup oil 3 dashes of Tabasco sauce 1 tablespoon chopped parsley
Combine and let sit in refrigerator for an hour or more. Drizzle over spinach or your favorite salad green. Add other vegetables or fruit if desired. (Pictured, baby spinach, baby arugula, grape tomatoes and pomegranate seeds)
Place the parmesan cups on a salad plate and add the dressed salad greens.
~ What a fun presentation for an otherwise ordinary salad! Your friends will be impressed at your skills. They don't need to know how easy it was.
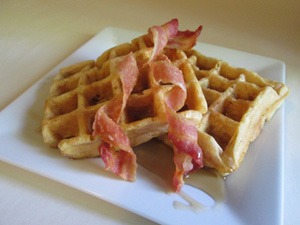 2 1/2 cups flour
4 brown sugar, packed
2 teaspoons baking powder
1/2 teaspoon salt
1 teaspoon vanilla
3 egg whites
One egg yolk
1 sweet potato, baked and peeled
2 cups milk
1/2 cup vegetable oil
4 strips center cut bacon, cooked and finely chopped
Preheat the oven to 200.
In a large bowl sift together flour, brown sugar, baking powder and salt.
In another bowl beat the egg yolk and sweet potato. Whisk in the milk and vegetable oil.
In a small bowl beat the egg whites to soft peaks. Add the vanilla and beat in.
Make a well in the dry ingredients and pour the egg mixture into it. Combine until just moistened. Fold in the egg whites and bacon.
Cook your waffles according to the directions for your waffle maker. (For my KRUPS brand, I cook my waffles 3 minutes and 15 seconds.) Using a large kitchen ladle facilitates this and usually yields the exact amount of batter, at least for my waffle baker. After cooking waffles put them directly on the oven rack while you make more. This makes them crispy and allows the cook to eat with the family after all of the batter is cooked. (***After making these waffles in Montana, and putting them in an electric oven, they came out pretty limp--just the opposite of what happens in my Colorado gas oven. We weren't sure whether it was the lower altitude, the waffle maker or the electric oven that didn't keep them crispy. So, beware.)
To make these even more healthy, substitute 1 cup whole wheat flour and 1/2 cup oatmeal for 1 1/2 cups of the white flour.
You can add pecans, walnuts, chocolate chips, raspberries or whatever you desire to augment these delicious waffles. I always drizzle Log Cabin maple syrup on mine.
~My daughter, Natalie, has been very creative with different flavors while making these waffles. She suggested this sweet potato/bacon combination for a trendy and delicious spin on an old standby.
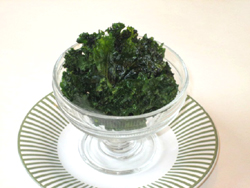
Luckily, I happened upon one of my favorite shows on the Create channel: Fast Food My Way with Jacques Pepin. He offered an easy way to fix one of the celebrated green superfoods: kale chips. It's so easy. Here it is:
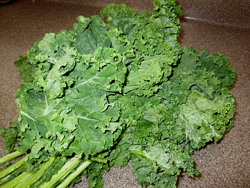 One bunch of kale
Olive oil
Kosher salt, optional
Other seasonings, optional
Preheat the oven to 300 degrees. (Not 450, as is used for sturdier vegetables. A higher temperature will turn your kale black.)
Wash kale and pat dry. Cut the leafy part off of the stems, even discarding the center ribs. Toss with about one tablespoon (too much makes them too greasy) olive oil. Spread out in one layer on a baking sheet. Sprinkle very lightly with kosher salt.
Optional: sprinkle with other seasonings. Just use sparingly.
Bake for 20-25 minutes or until crispy.
~This is a delicious and cool way to give your family loads of nutrition!
Here is kale's (a relative of broccoli) nutritional low down:
One cup of kale has just 36 calories and 5 grams of fiber. It has:
15% of the daily requirement of calcium and vitamin B6
40% of magnesium
180% of vitamin A (antioxidant)
200% of vitamin C (antioxidant)
1020% of vitamin K (antioxidant) **Read about the dangers of too much vitamin K for some people at WebMD.
Rich in lutein which promotes eye health
Adding kale to your diet also binds bile acids, helps to lower cholesterol and lowers the risk of heart disease, especially when cooked like the recipe above.
Source: http://www.webmd.com/food-recipes/features/the-truth-about-kale
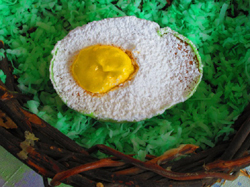 For the "eggs"
1 yellow or white cake mix, plus 1/4 c. flour
1/2 cup unsweetened pineapple juice
3/4 cup water
1 package vanilla instant pudding mix
1/2 cup vegetable oil
4 large eggs
1 teaspoon almond flavoring
Lemon curd "yolk":
2-3 lemons
Zest of two lemons
1/2 cup freshly squeezed lemon juice
2 whole large eggs
4 large egg yolks
3/4 cup sugar
Dash salt
2 tablespoons butter, diced
Glaze:
2/3 cup butter
4 cups powdered sugar
1 1/2 teaspoons vanilla or almond flavoring
4 to 8 tablespoons hot pineapple juice or water
Food coloring
Extra powdered sugar for dusting "eggs", about 1 cup
Special egg cake pan by Wilton
Preheat oven to 350 degrees. Spray the pan that looks like eggs sliced in half lengthwise with cooking spray or Baker's Joy. Combine all of the cake ingredients into a large bowl of an electric mixer and beat on medium high speed for 5 minutes.
With an ice cream scoop, pour batter into the individual egg shapes, about two-thirds full. Bake for 20-22 minutes. Remove and cool on a wire rack flat side down.
While the cakes are baking, make the lemon curd. In a small saucepan combine the sugar, eggs and egg yolks, salt and lemon juice. Cook on medium heat until thick and bubbly. Stir in butter a tablespoon at a time. Whisk in lemon zest. Pour into a bowl. Cover with plastic wrap, making sure that the wrap sits right on the surface of the lemon mixture. This way it doesn't form a skin on the surface. Refrigerate until cool.
For the Glaze: Heat butter in saucepan until melted. Stir in powdered sugar and vanilla or almond flavoring. Stir in water or juice, one tablespoon at a time, until glaze is of desired consistency.
Divide glaze into a few small bowls. Add one or two drops of food coloring and stir until you reach the desired color.
To decorate the "eggs":
Line a baking sheet with waxed paper or parchment paper. Put the wire rack with the cakes on it. Make sure to turn the cakes over so that the flat side is down, if they aren't already. Coat the rounded side of each cake with the glaze. Let dry.
When the glaze is dry, turn the cakes over. With a melon baller, scoop out a place where the lemon curd "yolk" will go. (For placement, scoop out a round hole closer to the wider end of the "egg" cake.)
Using a sifter or sieve, sprinkle powdered sugar over the flat part of the cake. Remove the cooled lemon curd and stir it until it is smooth. Fill the cavity that you just hollowed out with the lemon curd.
~These cute and delicious "eggs" always get a startled delighted reaction!
Estes Park, CO
 Hands down this is our favorite restaurant in Estes Park. Every offering has been delicious. The prices are reasonable and the ambience exudes mountain charm. This restaurant is located on "the other side" of Estes, the back way to Rocky Mountain National Park. The restaurant sits right next to a pond with many gorgeous mallard ducks as residents.
The chef is very concerned with making sure that his creations explode with flavor. Every time we visit we leave amazed and vow to return soon.
This time we both decided to order sandwiches and share them. Tom ordered the sliced prime rib sandwich with roasted red peppers and melted provolone cheese on a toasted sourdough roll, similar to a Philly cheesesteak ($8.49). The prime rib was expertly prepared and melted in our hungry mouths. The bread was perfectly tangy and the cheese and condiments enhanced the whole experience. The sandwich came with his choice of a variety of sides. Tom chose the garlic mashed potatoes. Again, he was thinking of my penchant for taters, since we were sharing and I have to say we both thoroughly slid into their velvety goodness.
 Enough about his. I ordered the chicken salad on a croissant. You may be thinkin', how boring, but you have to remember where we were. This was the place where EVERYTHING that I have tried was delicious. And this was no exception. The chicken was perfectly cooked. The dressing was also perfect, not gloppy like some mayo based chicken salads. The chef also added some delightful surprises to complement the chicken; I think there were grapes along with celery in the sandwich. All heaped on a gorgeous, buttery croissant. As you can see, the sandwich came with a pineapple, melon and grape fruit cup, delightful.
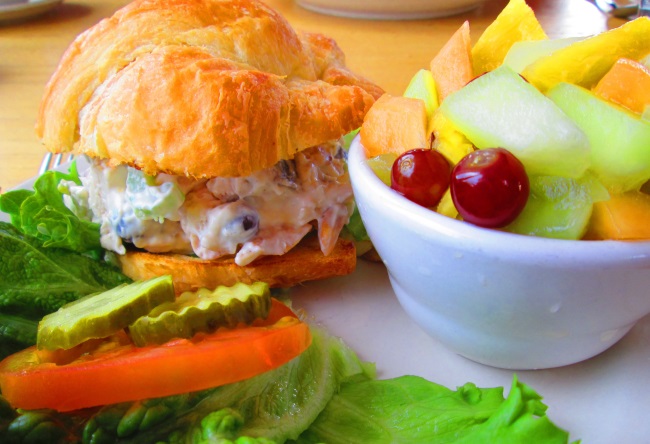 And you think that was all? Nope. We also got to savor their version of potato cheddar soup. (It was included!) And you know what? They got that right, too. Personally I think it's difficult to nail a potato soup. It can be too runny or too thick, with far too much cheese in it. This was exactly how it should be: flavorful, smooth, with the cheddar complementing the potatoes, not overpowering them. Just delicious. All for $8.49.
OK, now all that was left was to go stroll around Estes Park, trying to relieve our full stomachs. Tom did not have to twist my arm too much to do that.
 For the cookies:
2 1/2 cups all-purpose flour plus more for rolling out cookies
1/4 teaspoon baking soda
1/4 teaspoon salt
12 tablespoons (1 1/2 sticks) unsalted butter, softened
3/4 cup granulated sugar
2 tablespoons whipping cream
1 large egg, plus one egg white
1 teaspoon pure almond extract
1/2 cup raspberry preserves
1 can cherry pie filling
Sprinkling of confectioners' sugar for rolling out the cookies
For the glaze:
1 cup confectioner's sugar
3 tablespoons whipping cream
Dash salt
Tools:
Stand or rotary mixer
Rubber spatula
Rolling pin
Baking sheets
One heart cookie cutter 2-3 inches long
One small heart cookie cutter, one inch long
Parchment paper or Silpats
Preheat oven to 350 degrees. Line two baking sheets with Silpats (silicone mats) or with parchment paper.
In a stand mixer, or with a rotary mixer, cream the butter and sugar together on medium high speed until pale and fluffy, about 3 minutes. Add the 2 tablespoons of whipping cream, the whole egg and almond extract and beat thoroughly.
Sift the flour, 1/4 teaspoon of salt, and baking soda together over a large silicone mat, or piece of wax or parchment paper. Carefully add the flour mixture to the butter and sugar mixture in three additions on low speed. Incorporate until the dough is just combined, being careful not to overbeat. With a rubber spatula, scrape down the sides and give the dough a final stir by hand.
Sprinkle both flour and confectioners' sugar onto a counter. Roll out half the dough to a quarter inch thick. Using a heart cookie cutter about 2-3 inches long, cut out as many cookies as you can, re-rolling the scraps. Place on cookie sheets, one inch apart.
Lightly beat the egg white. Paint a quarter inch of egg white all around the top of each cookie. Add a teaspoon of raspberry preserves in the center of each cookie. Top with one or two cherries, being careful not to add too much of the cherry gel filling.
Roll out the remaining dough. Cut the same number of cookies using the large cookie cutter. Then, using the small heart cookie cutter, cut a small heart out of the center of each cookie. Place the large cookie on top of the ones on the baking sheet, minus the small heart. This reveals the cherry-raspberry filling. Pinch around the edges to seal the filling in. Smooth the edges. Paint the top of the cookies with the egg white. Place the small heart cookies on the baking sheets in between the large cookies. Paint the tops of these as well.
Bake for 14 or 15 minutes, or until edges are golden. Cool on sheets for five minutes, and then transfer them to a wire rack to cool completely, about one hour.
For the glaze, beat confectioners' sugar, 3 tablespoons whipping cream, dash salt and vanilla together until smooth. With a fork, drizzle the glaze on the edges in a lacy pattern. Let them stand for 30 minutes before serving.
~Inspired by America's Test Kitchen, these beautiful cookies blanket your taste buds with uncommon velvety sweetness. The sweet-tart combo of the cherries and raspberries top off this best sugar cookie I have ever had, inviting bite after bite.
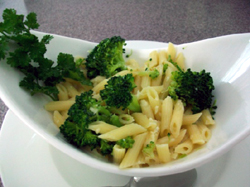 1/2 pound penne noodles, cooked al dente
1/4 pound (one stick) unsalted butter
1 egg yolk
1/2 cup heavy cream
3/4 cup grated Parmesan cheese
salt and pepper to taste
Cream butter until fluffy. Add egg yolk and cream to butter. Beat well. While beating, add cheese one tablespoon at a time. Put drained noodles in heated serving bowl. Fold in cheese mixture and season with salt and pepper. Serve immediately. (If you like more sauce, just reduce the amount of noodles you cook or make a double batch of the cheese mixture.)
Delicious with your favorite steamed vegetable folded in to the mixture. (Pictured with steamed broccoli.)
If you need to keep this warm until other dishes are ready, suspend over simmering water.
~You'll feel like a pro with this elegant, yet simple recipe.
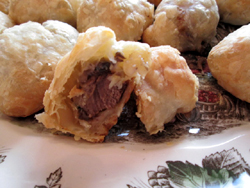 1-2 pounds beef tenderloin
1-2 tablespoons canola oil
1 large sheet DuFour puff pastry, (found at Whole Foods), or your favorite
Filling:
1-2 shallots, chopped finely (to equal 3 tablespoons)
4 tablespoons unsalted butter
2 tablespoons flour
8 ounces white mushrooms, finely chopped
1 cup cream
1/2 teaspoon salt
1/2 teaspoon fresh lemon juice
1 1/2 teaspoon minced chives
1 tablespoon minced fresh parsley
Dash of cayenne pepper
Defrost the puff pastry in the refrigerator overnight.
In a hot 10-inch skillet, drizzle in the canola oil and sear one-inch cubes of beef tenderloin on two sides. Remove to a bowl and put into the refrigerator while you make the filling.
For the filling:
Melt butter in the same skillet. Add shallots and cook over moderate heat for 4 minutes, stirring constantly. Add mushrooms and cook for about 10 minutes. Remove from heat and sprinkle flour over mixture, stirring to blend. Return to heat. Cook, stirring constantly, for one minute. Pour in heavy cream; stir and heat to boiling. When thickened, simmer and cook for one minute. Remove from heat and add parsley, chives, lemon juice, salt and cayenne pepper. Cool for 5 minutes.
Preheat the oven to 400 degrees.
On a lightly floured counter roll out the puff pastry, so that it is smooth. With a pizza cutter, cut the pastry into 2x2 inch squares. Place one tablespoon of the filling in the middle of each square. Top with a beef tenderloin cube. Bring up all the sides and pinch to seal. Place on baking sheets lined with parchment paper or a Silpat, seam side down. Bake for 25 minutes or until golden brown.
~We had these for Christmas dinner this year in lieu of the standard turkey or ham fare. They turned out to be just the exact amount of delicious over-the-top indulgence. We may have found our new standard Christmas dinner fare! They would also steal the show as an elegant appetizer!
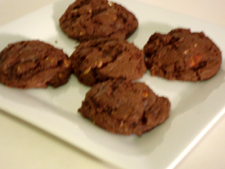 1/2 cup unsalted butter, softened
1/2 cup shortening
1 1/2 cups sugar
2 eggs
2 teaspoons vanilla
2 1/4 cups flour (add 2 tablespoons more if at high altitude)
3/4 cups cocoa
1 teaspoon baking soda
1/2 teaspoon salt
1 cup white chocolate chunks
1 cup chopped roasted, salted almonds
In the bowl of a standing mixer cream butter, shortening and sugar together. Let it beat while you are sifting the dry mixture together.
Sift the flour, cocoa, baking soda and salt together.
Chop the almonds and white chocolate into chunks.
Stop the mixer and scrape the sides down. Add the eggs and vanilla and beat thoroughly.
Add the dry mixture and mix on a low speed until almost combined. Add the white chocolate chunks and almonds and mix until just combined. Do not overbeat.
Drop onto an ungreased cookie sheet. (I use a one-inch cookie scoop.) Bake at 350 degrees for 8-9 minutes. Do not overbake; they will be soft when you take them out of the oven. Let them cool on the cookie sheet for about 5 minutes, and then move them to a wire rack.
~I am always looking for amazing cookies. This is inspired by a recipe that used white chocolate chips, which, of course, you can use, but I like the white chocolate (wrapped in plastic wrap in varying sizes-bulk form) from Whole Foods. The other recipe also used macadamia nuts, which I never have on hand. We love Blue Diamond Roasted and Salted Almonds, so I substituted them with spectacular results! These decadent brownie-like addictions will become your new favorite cookie.
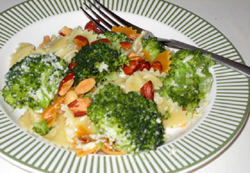 Salt for boiling water
2 heads (about four cups) broccoli florets
1/2 pound bow tie pasta (I like to use the mini bow ties)
2 tablespoons unsalted butter
2 tablespoons olive oil
1 teaspoon minced garlic
Zest of one lemon
Juice of one lemon
Juice of one lime
1/2 teaspoon black pepper
1/4- 1/2 cup chopped roasted, salted almonds
1/4- 1/2 cup grated parmesan cheese
Steam the broccoli above salted, boiling water for about 10 minutes, until the broccoli is tender but still bright green. Cook the pasta according to the directions. (It should take about the same length of time as the broccoli.)
When the broccoli and the pasta have about 2 minutes more to cook, melt the butter and oil in a large skillet over medium-low heat. Cook the garlic and lemon zest for 30 seconds. Turn off the heat and add the lemon juice, lime juice and black pepper. Stir.
Add the cooked broccoli, drained pasta and almonds to the skillet. Stir to combine. Add parmesan cheese and fold in. Sprinkle with almonds. Serve immediately.
~This is our go-to dinner seems like every week. Fast and easy, it is inspired by Ina Garten's recipe with an extra twist of lime and the satisfying crunch of almonds. We just love this dish!
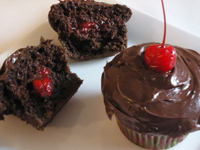 One fudge cake mix, plus 1/4 cup flour (I use Betty Crocker SuperMoist)
4 eggs
1/2 cup vegetable oil (I use canola.)
1 cup chocolate milk
1/4 cup Smucker's or similar hot fudge, warmed
1 small package instant chocolate fudge pudding
1/2 teaspoon pure vanilla extract
1/2 teaspoon pure almond extract
1 can cherry pie filling
1-2 tubs of ready-made frosting (I use Betty Crocker Creamy Deluxe)
Maraschino cherries for garnish, optional
Preheat oven to 350 degrees.
Mix all of the above but the cherries and frosting and beat hard with an electric mixer for 5 minutes.
Meanwhile, place festive paper cupcake papers into 2 one dozen cupcake tins.
With a large ice cream scoop, scoop batter into cups about two-thirds full.
Bake for 20-22 minutes. Cool on a rack for ten minutes. Remove from cupcake tins and cool thoroughly.
Cut a small round section, about the size of a quarter, and about one inch deep in the top of each cupcake, reserving the small piece of cake. (There are cool gadgets to accomplish this easily.) Cut about 1/4 inch off of the bottom of the small piece of cake.
Spoon one or two cherries from the pie filling into the hole. Top with reserved cake and press down so that the top of the reserved piece is flush with the rest of the cupcake.
Frost the tops as creatively as you wish. Garnish with a maraschino cherry if desired. (Be sure to blot it dry before you place it on top of your cupcake.)
Makes 2 dozen.
~ If you want to create a buzz at work, or at a party, bring these cupcakes and watch the smiles form. Decadent and delectable, these moist cakes with the hidden delight in the center will brighten even the most bah-humbug spirit.
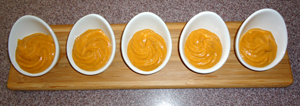
4 cups powdered sugar, sifted
2 packages (8 oz. each) cream cheese, softened
1 can (30 oz) pumpkin pie filling
2 tsp. cinnamon
1 tsp. ginger
In a large mixing bowl, combine sugar and cream cheese, beating until well blended. Beat in remaining ingredients. Store in an airtight container in the refrigerator. Serve with purchased or homemade ginger cookies. Yield: about 7 cups of dip.
Tip: Serve in a hollowed out pumpkin for a festive container.
~ One gorgeous Colorado autumn day my girlfriend, Sandy, called me and said, "Do you remember that pumpkin dip we had in MOPS? Do you still have it?" Surprisingly, (or maybe not, given my pack-rat reputation), I dug it out from the back of my file cabinet. What a pleasant reminder of our fun times in MOPS. Try the Ginger Crinkles in this book to dip in this dip!
1 cup butter or margarine
1 teaspoon baking soda
2 cups packed brown sugar
1/2 teaspoon salt
12 cups popped corn, about 7/8 cup kernels (do not air pop)
1/4 cup light corn syrup
1/4 cup water
melted, tinted orange white chocolate, optional
melted semi-sweet chocolate, optional
Pumpkin Pie Spice Mix:
1 teaspoon cinnamon
1/2 teaspoon allspice
1/2 teaspoon nutmeg
1/4 teaspoon ginger
1/8 teaspoon ground cloves
Melt butter (or margarine) in 2 quart saucepan. Stir in the brown sugar, salt, corn syrup and water. Heat to boiling over medium high heat. Boil for 4 minutes. Carefully stir the pumpkin spice into the caramel mixture. Boil one more minute. If it threatens to boil over, turn the heat down slightly. Remove from heat and add baking soda; stir well with a heat proof spoon or spatula. (It will boil up violently at first, but calm down as you stir.) Pour over popped corn and stir until well coated. Place on two cookie sheets and bake at 250 degrees for 40 minutes, stirring occasionally. Bake both batches at the same time using lower and middle racks in oven. Take caramel corn off cookie sheets immediately after removing from oven.
~My daughter, Natalie, suggested that I come up with a Pumpkin Pie Spice caramel corn, since that flavor is so popular lately. The spicy flavor pops and immediately evokes the warmth of an autumn day. Try it drizzled with orange-flavored white chocolate and semi-sweet chocolate for over-the-top decadence.
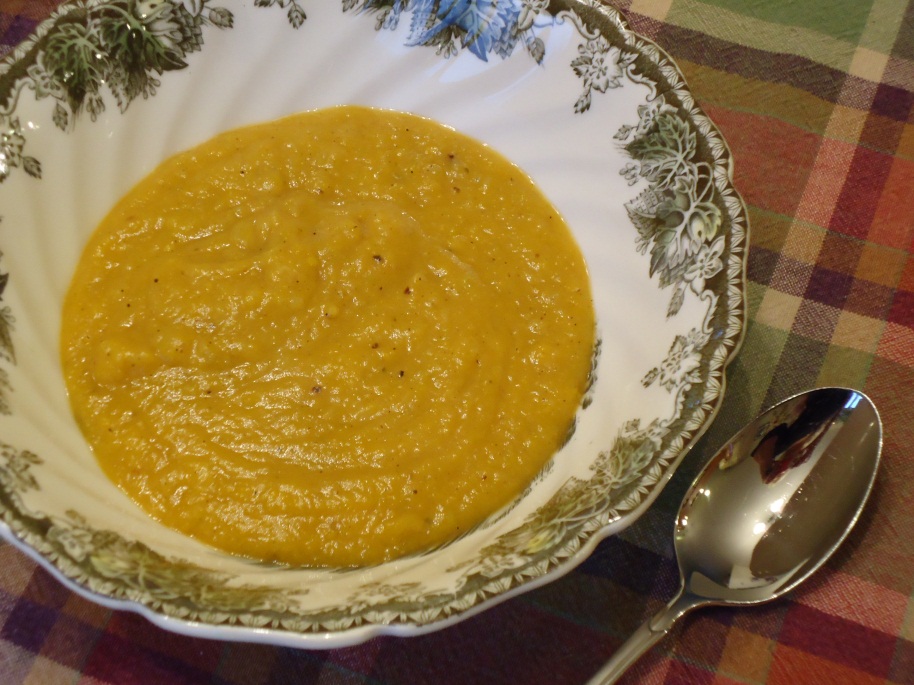 1 medium butternut squash
1 sweet onion, peeled
1 McIntosh apple, peeled and cored
1 tablespoon extra virgin olive oil
1/2-1 teaspoon kosher salt
1/2 teaspoon freshly grated black pepper
1 cup water 3 chicken bouillon cubes
Preheat the oven to 425 degrees.
Peel the butternut squash with a vegetable peeler. Cut about one half inch off of the top and bottom and discard. Slice the narrow end into about one inch slices. Cut those slices into cubes. Split the remaining squash in half and scrape out all of the seeds. Cut the remaining squash into one inch cubes. Cut the onion and the apple into one inch cubes as well. Toss with olive oil, kosher salt and pepper and spread them out onto a cookie sheet in a single layer. Roast for 25-30 minutes or until very tender.
Meanwhile, heat the water with the bouillon cubes. Stir until the bouillon cubes are dissolved. When the vegetables are done, place them into a food processor with about a half cup of the chicken broth. Coarsely puree. Pour into a large saucepot and add the rest of the broth to make a thick soup. Heat on low until ready to serve, stirring occasionally.
~Ok, so I am trying to change my eating habits somewhat. My daughter, Natalie, and my husband, Tom, extol the virtues of squash constantly, so I thought I'd try making the very trendy squash soup. Surprisingly, this delicious, velvety bisque seemed decadent on my tongue, even though there is no cheese, butter or cream in it. Who knew squash could taste so good?
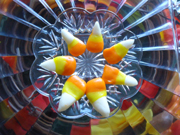 Every holiday (and regular days!) I try to think of a way to delight my family. (Halloween is almost here!) Many times it's ferreting out the newest candy, since sweet teeth run rampant around here. So, when Alton Brown, from Food Network, came out with his version of candy corn, and since my daughter and my honey love it, I decided to try it. Surely, homemade candy corn would taste better than that stuff in the bag, right?
1 1/4 cups powdered sugar
6 1/2 tablespoons nonfat dry milk
1/4 teaspoon kosher salt
1/2 cup granulated sugar
1/3 cup light corn syrup
2 1/2 tablespoons water
2 tablespoon unsalted butter, at room temperature
1 teaspoon pure vanilla-if you can find a clear pure vanilla use that
Concentrated gel food coloring, yellow and orange
Line a cookie sheet with parchment paper or a silicone baking mat.
Pulse the powdered sugar, dry milk and the salt in a food processor about 4-5 times.
In a 2-quart saucepan stir the water, syrup and granulated sugar together. Cook at medium heat for 4 minutes. Attach a candy thermometer to the side and add the butter. Bring the mixture up to 230 degrees. This will take 1-2 minutes. Take it off the heat and detach the thermometer. Stir in the vanilla and the dry mixture vigorously with a heat proof spoon until it is smooth and there are no lumps. Pour the mixture onto the cookie sheet that you lined with parchment paper (or the silicone mat). Cool for about 15-20 minutes until it is cool enough for you to handle. Cut the dough into three equal parts. Stick a toothpick into the orange food coloring and add it to one of the parts. Knead the dough, distributing the coloring. Repeat until you have achieved the desired color of orange. Repeat with the yellow food coloring. Leave the last part white. When forming the candy corn, I found it easier to work with small amounts. Take about 1/4 or 1/5 of the each color of dough and roll it into a strand about 1/2 inch in diameter. Place them next to each other in this order orange, yellow and white. Press them together slightly and form into a wedge, so that the white section is pointed and the orange part stay wide. Cut them into individual candy corn shapes. Lay them out on the parchment to dry for at least an hour. Keep them stored in an air tight container with parchment paper between each layer.
Alton Brown says that these taste even better after a few days.
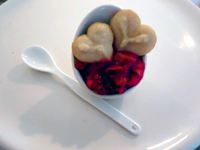 3 cups rhubarb, one inch dice
1/2 cup raspberries (if using frozen raspberries, measure after thaw)
1 cup sugar
1/4 cup flour
1/2 teaspoon pure almond extract
1 tablespoon butter, cut into eight pieces
Preheat oven to 400 degrees. Spray two 6 or 7 ounce ramekins with cooking spray. In a small bowl, mix sugar and flour together. Add half the rhubarb in the bottom of the ramekins. Top with two tablespoons of the thawed raspberries in each ramekin. Sprinkle with half the sugar and flour mixture. Repeat this procedure. (If there is too much sugar and flour mixture left to put into the ramekin, don't worry. Just fill it to the top.) Divide the almond extract between the two and sprinkle over the raspberry-rhubarb mixture. Dot each ramekin with half the butter. Cover with aluminum foil with a slit cut into the top.
Transfer ramekins to a parchment-lined sheet pan. Bake until rhubarb is tender and begins to boil, about 40-50 minutes, carefully stirring half way through the cooking.
Serve warm or cold with Very Vanilla Spritz Cookies.
Very Vanilla Spritz
1 cup unsalted butter, softened
1 cup sugar
1 large egg
2 1/2 teaspoons pure vanilla extract
1/2 teaspoon salt
2 1/2 cups all-purpose flour, sifted before measuring
Decorative sugar for sprinkling, frosting or melted chocolate, optional
Preheat oven to 375 degrees.
Beat the butter and sugar in a bowl of an electric mixer on high speed until light and fluffy. Beat in the egg, vanilla and salt.
Fold in the flour, incorporating it, but being careful not to overbeat.
Pack the dough into a cookie press. Fit with desired die design plate. Press the dough out onto an ungreased baking sheet one inch apart. Sprinkle with decorative sugar if desired.
Bake until golden brown, about 7 1/2 minutes.
When cool, spread with melted chocolate on the backs of the cookies or frost, if desired.
~I really yearned for pie one day, but I didn't want all the calories. So, I created this raspberry-rhubarb pie filling and baked it in individual ramekins without the crust. Then, I had the idea that I could use it as a dip with these updated Spritz cookies. These melt-in-your-mouth cookies pair beautifully with this velvety tart dessert. Dunk to your heart's content!
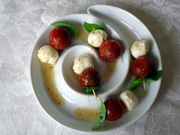 Equal number of:
Ciliegine (cherry sized) fresh mozzarella cheese balls
Cherry tomatoes
Basil leaves
Lite Caesar vinaigrette
Toothpicks
Featuring super sweet Black Cherry tomatoes
Thread one mozzarella ball, one cherry tomato and one basil leaf on each toothpick. Arrange the finished appetizers on a flat (or fancy!) dish. Drizzle Caesar dressing over the appetizers. May be served cool or at room temperature.
~The cherry tomato bounty is coming! This crowd pleaser is so easy, yet looks fancy. Traditionally these are drizzled with balsamic vinegar or vinaigrette. I decided to switch it up and try Caesar. Experiment with your favorite!
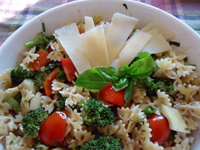 1 package 12 oz. mini farfalle (bowtie) or rotini pasta (or a combination of your favorite!)
1 red bell pepper peeled, seeded and diced
3 tomatoes, diced
5 green onions, sliced, tops included
1 1/2 cups cut broccoli, cooked and cooled
1/2 cucumber, peeled, seeded and diced
4 oz sliced ripe black olives
3/4 cup Parmesan cheese
Dressing:
2 tablespoons basil (I mix dried and freshly julienned)
2 teaspoons marjoram
1 teaspoon garlic powder
1/2 cup olive oil (I use extra virgin)
5 tablespoons balsamic vinegar (I use the type from Modena)
Juice of one lemon
2 tablespoons sugar
2 teaspoons black pepper
1 1/2 teaspoons salt
Cook pasta according to directions, making sure to add salt to the boiling water. Meanwhile, prepare the vegetables and add to a large bowl. Pour the dressing ingredients in a salad cruet and shake thoroughly. (If you don't have a cruet, whisk the ingredients in a small bowl.)
Rinse cooked pasta with cold water, drain and pour it on top of the vegetables. Pour the dressing over the pasta and vegetables and toss gently.
~Tom asked me to develop a pasta salad for our 2011 Whiskeytown Lake extravaganza when we were there for sweet Erin's wedding. You can add your favorite vegetables, meat or cheese to this as well. I was thinking fresh mozzarella, cauliflower, carrots and pepperoni would be delicious in this as well. Mix or match to your heart's content.
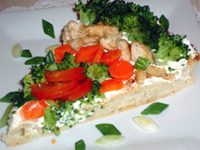 Colorful Chicken and Vegetable Pizza
Pizza crust, either premade (ex. Boboli) or homemade
Filling:
8 ounces Neufchatel cream cheese (light), softened
1/3 cup sour cream (light)
1 teaspoon grated onion
1 tablespoon fresh parsley, finely chopped
1 tablespoon fresh basil, finely chopped or julienned
1 teaspoon freshly squeezed lemon juice
1/2 teaspoon sugar
Toppings:
2 chicken breasts, previously cooked, cooled and cut into cubes
2 cups broccoli chopped, blanched and cooled
1 cup carrots sliced into rounds, blanched and cooled
1/2- 1 cup cauliflower, blanched and cooled
1 cup cherry tomatoes, sliced (can sustitute regular sized tomatoes, sliced or diced)
1/4 cup sliced black olives
2 scallions, thinly sliced
Mix filling ingredients together until smooth. Spread evenly over pizza crust.
Arrange the chicken and vegetables except the scallions around the pizza in concentric circles, ending with a mound of olives in the middle. Sprinkle with sliced scallions.
Chill until ready to serve. Cut into pizza slices.
Note: The vegetables in this dish are just suggestions. You may substitute any vegetable combination you like. Also, if you like raw vegetables, blanching isn't necessary, as long as the vegetables are washed thoroughly. That will save you a couple steps.
In addition, if you want to make this a vegetarian dish, you can certainly omit the chicken. It's delicious either way!
If you want to delight your mom, bring her a slice of this delicious pizza. It'll give her a couple servings of vegetables and won't kill her diet!
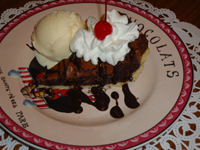 2 eggs, lightly beaten
1 cup sugar
6 oz. chopped semi-sweet chocolate, melted
1/2 cup sifted self rising flour
1/2 cup (1 stick) butter, melted
1 teaspoon vanilla
1 cup chopped almonds, roasted and salted
1-2 tablespoons self-rising flour
1 (9 inch) deep dish unbaked pie shell
Preheat oven to 350 degrees.
Combine eggs, sugar and melted chocolate in a large bowl. Add flour and mix well. Toss almonds in the small amount of flour. (This prevents the pecans from sinking to the bottom of the pie.) Stir in almonds, melted butter and vanilla. Bake for 30-40 minutes.
Serve with your favorite ice cream, a drizzle of hot fudge, possibly whipped cream and top it off with a cherry!
~ When I tried this recipe, I was worried that it didn't call for salt. Salt always enhances sweet recipes. However, I'd never used self-rising flour before. So, I looked on the label and relaxed because, sure enough, it has leavening as well as salt in it. I should have known it would be delicious because this recipe is inspired from one of Paula Deen's recipes. It's quick and easy. (Her recipe calls for semi-sweet chocolate chips, but use whatever you have on hand.) Also, it's easily doubled, making it convenient to put one in the freezer for a future sweet surprise!
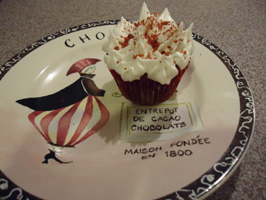 Delve into this delicious indulgence. Perfect for Valentine's Day!
One German chocolate cake mix (18.25 ounce)
1 box instant vanilla pudding
1/2 cup canola oil
4 eggs
1 1/3 cup water
1 teaspoon vanilla
2 teaspoons unflavored concentrated gel red food coloring
For the Frosting:
1/2 cup shortening
1 tablespoon milk
3/4 teaspoon salt
2-3 tablespoons water
4 cups powdered sugar
2 tablespoons corn syrup
1 teaspoon pure vanilla extract
Preheat oven to 350 degrees. In a bowl of an electric mixer, combine all of the cake ingredients together. Mix on low speed for 30 seconds and then on medium speed for 4 minutes, scraping the bowl at least twice. Put cupcake papers into cupcake pans. Using an ice cream scoop, fill cupcake papers two-thirds full. Bake for 20-22 minutes. Cool completely and frost. If desired, crumble one of the cupcakes and sprinkle the crumbs over the creamy white frosting for an elegant presentation.
For the Frosting In a large bowl beat the shortening and salt with an electric mixer until fluffy. Add powdered sugar and vanilla. Beat on a low speed and add milk. Add water one tablespoon at a time until frosting almost reaches desired consistency. Add corn syrup and beat well. Add more water if needed.
Makes 27 cupcakes.
~ I have looked everywhere for a red velvet cake that didn't taste like red food coloring. This one blends the ease of a cake mix with depth of flavor of pudding. It blooms with a gorgeous ruby hue with the bonus of no bitter aftertaste.
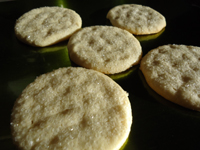 I finally found a gorgeous, melt-in-your-mouth sugar cookie. I named them fairy cookies, because just when I thought I had captured them, they disappear!
1 cup powdered sugar
1 cup white sugar
1 cup butter, softened
1 cup vegetable oil (I use canola)
2 eggs
1 teaspoon vanilla
1/4 teaspoon almond extract
4 cups plus 4 heaping tablespoons flour
1 teaspoon salt
1 teaspoon baking soda
1 teaspoon cream of tartar
1/4-1/2 cup decorative or sanding sugar
Preheat oven to 350 degrees.
Cream together powdered and white sugars, butter and oil, making sure to scrape down the sides of the bowl at least once. Cream until light and fluffy. Beat in eggs, vanilla and almond extract. Add dry ingredients and mix well.
Cover with plastic wrap and chill in the refrigerator for 2-3 hours.
Cover large plate with decorative sugar. Roll dough into 1-inch balls and drop onto decorative sugar. Make sure the sugar is only on one side of the ball. Place balls on a cookie sheet sugar side up. With a meat tenderizer, bottom of a glass or with a fork, press the cookies down slightly.
Bake for approximately eight minutes. Don't let them get visibly brown. This recipe makes approximately seven dozen cookies.
~My sweet friend, Bonnie, shared this recipe with me. My adorable daughter Natalie has declared that these heavenly cookies are now her favorite!
I must admit that I'm not much of a muffin eater. After all, I'd rather use my allotment of dessert calories on luxurious chocolate. I know what you're thinking: there are chocolate muffins. However, I much prefer other chocolate applications: fudge cake, my homemade chocolate chips cookies, New York Spree, brownies, chocolate ice cream, on and on. That's why you gotta know that this next recipe must be fabulous.
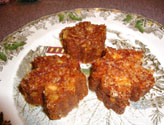 Dry Ingredients
1 1/2 cups flour
3/4 cup sugar
3/4 cup walnuts, coarsely chopped
1 1/2 teaspoons baking soda
1/2 teaspoon salt
Sanding sugar, if desired
Wet Ingredients
1/2 cup canola oil
1 large egg
2 or 3 large very ripe bananas slightly mashed (This should yield 1 1/2 cups.)
1 T fresh lemon zest
3 tablespoons buttermilk
You can make your own buttermilk. Just add 1 1/2 teaspoons of lemon juice to 2 1/2 tablespoons of milk. Let sit while you assemble the rest of the batter.
Preheat oven to 375 degrees.
Spray muffin pan with cooking spray, or grease with butter. Stir or whisk dry ingredients in a large bowl. In another bowl whisk the wet ingredients together thoroughly.
Make a well in the center of the dry ingredients and pour the wet ingredients into it. Stir to just barely combined. Do not beat because this will result in a tough muffin. Sprinkle coarse sanding sugar in the bottom of the muffin cups, if desired.
Spoon the batter into the muffin pans, two-third full. Bake until golden brown, 20-25 minutes. Transfer to wire rack and let cool for 10 minutes. Turn them over to unmold the muffins.
~If you noticed in the photo, I used a gorgeous maple leaf shaped muffin pan that my sweet friend Sandy gave me to make this recipe. This recipe works well with standard muffin pans and small decorative ones like the one I used.
Every year at Christmastime my sweet friend Sandy remembers that I revel in her recipe of these sinfully creamy treats. Pay attention to the recipe since candy making is very scientific. Once you taste these, you'll be glad you made the effort.
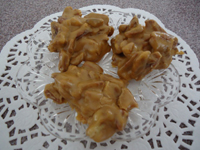 2 cups sugar
1 teaspoon baking soda
1/4 teaspoon salt
1 cup buttermilk
2 tablespoons butter
2 cups pecan halves or chopped roasted and salted almonds
1 teaspoon vanilla
Candy thermometer
Combine sugar, soda, salt and buttermilk in a large saucepan or pot. Clip a candy thermometer on to the side of the pan. Quickly bring to a boil, stirring constantly until mixture reaches 210 degrees for high altitude and 220 degrees for sea level. The mixture should have a creamy tinge. Stir in butter. Cook, stirring frequently, until mixture reaches the soft ball stage which is 224 degrees for high altitude and 230 degrees for sea level. Remove from heat and stir in vanilla. With an electric mixer, beat for a few minutes until mixture has almost lost its gloss. Fold in pecans (or your favorite nut). Stir by hand until the mixture has totally lost its gloss. Drop by teaspoons or tablespoons, onto wax paper.
**Note-If mixture becomes too thick before all of the mixture is dropped, stir in a few drops of warm water.
~I have often told Sandy that she could actually market these pralines. They are unbelievably delicious. Try switching it up and add different types of nuts. Almonds work well.
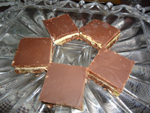 ~When we were newly married and visiting my in-laws for Christmas, I marveled at my mother-in-law's most delectable treats. This one stood out and it is a tradition for our family to indulge in this treat every Christmas.
Bottom layer
8 ounces (1 stick) butter or margarine
1/4 cup white granulated sugar
5 tablespoons cocoa
1 slightly beaten egg or equivalent egg substitute
1 teaspoon vanilla extract
2 cups vanilla wafer or graham cracker crumbs
1 cup finely shredded coconut
1/2 cup chopped walnuts
Middle layer
1/4 cup butter, softened
2 cups confectioner's (powdered) sugar
4 tablespoons instant vanilla pudding powder
Small amount of milk or cream
Top layer
1 12-ounce package semi-sweet chocolate chips
1. Combine first three ingredients in a double boiler or medium saucepan. Cook on low heat and stir until smooth.
2. Stir in one beaten egg and vanilla. Remove from heat.
3. Add crumbs, coconut and walnuts. Mix thoroughly.
4. Spread and press into the bottom of an ungreased 9x13 pan. Put this into the refrigerator while you are making the next layer.
5. Using an electric mixer, beat together 1/4 cup softened butter, powdered sugar and pudding powder, using milk or cream to make sure mixture is smooth.
6. Spread over crumb mix.
7. Melt chocolate chips in the microwave or in a double boiler. It usually takes about three minutes in the microwave in 30 second intervals, stirring after each.
8. Pour chocolate over cream layer, and spread evenly.
9. Cut into 2x2 inch squares. Keeps well in plastic container in refrigerator or freezer.
~ You'll feel like you're on a New York spree after tasting these decadent chocolate squares. Even though they're rich, they're very addicting. My mother-in-law, Jean, passed this recipe to me. She used to make this every Christmas, and my husband, Tom, ate them instead of candy. I used to grab them right out of her freezer (no defrosting needed!). "Spree," as my son, Ted, lovingly calls it, is a cookie exchange favorite in our neighborhood. It is our family's absolute favorite Christmas treat.
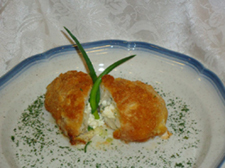 4 boneless, skinless chicken breasts
4 tablespoons cream cheese
4 tablespoons butter or margarine
salt
4 tablespoons minced fresh parsley
4 tablespoons green onions, chopped
One sleeve of Club crackers, crushed into crumbs
2 eggs, slightly beaten
oil for frying
Preheat oven to 350 degrees. Pound the chicken breasts flat. Put one tablespoon of cream cheese, butter and green onions on each breast. Sprinkle with salt and parsley. Roll up. Dip in egg and then roll in cracker crumbs. Repeat. Fry on all sides until golden brown, about 2 minutes on each side. Bake in 350 degrees oven for 30 minutes.
~I was introduced to Chicken Kiev by my genius sister, Evy, when she was in her early 20s. Immediately I loved it.
However, true to my rebellious nature, I added cream cheese to the recipe, and I use cracker crumbs instead of the traditional bread crumbs, so this is not exactly Chicken Kiev in the truest sense. However, this version has a surprisingly creamy center, and I think you'll find that it is even more delicious.
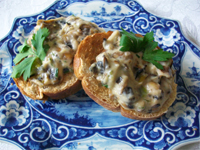 4 tablespoons butter
3 tablespoons finely chopped green onions
1/2 pound mushrooms, finely chopped
2 tablespoons flour
1 cup heavy cream
1/2 teaspoon salt
1/2 teaspoon fresh lemon juice
1 1/2 teaspoon minced chives
1 tablespoon minced fresh parsley
1/8 teaspoon cayenne pepper
1 bag bagel chips
Melt butter in a 10 inch skillet. Add green onions and cook over moderate heat for 4 minutes, stirring constantly. Add mushrooms and cook for 10 minutes. Remove from heat and sprinkle flour over mixture, stirring to blend. Return to heat. Cook, stirring constantly, for one minute. Pour in heavy cream; stir and heat to boiling. When thickened, simmer and cook for one minute. Remove from heat and add parsley, chives, lemon juice, salt and cayenne pepper. Cool. May be refrigerated or frozen until ready to use.
If you are using bagel chips, just warm up the topping (in a skillet or microwave) if you have made it ahead of time and spread on the bagel chips. Do not worry if these become cold; they are delicious cold, warm or hot.
~ This appetizer convinces even the pickiest mushroom hater of its velvety deliciousness. It looks fancy, but is actually pretty simple.
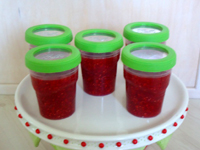 5 6-ounce packages fresh raspberries
5 1/2 cups sugar
One 1.75 ounce package pectin
Pint, half pint or 4 ounce freezer or canning jars with lids (about 7-8 cups)
Make sure your jars are thoroughly washed and rinsed. Measure the sugar into a large mixing bowl. Put berries in a food processor, one package at a time and pulse about 5-7 times, depending upon how chunky you like your jam. Do not puree. The resulting mash should have pieces of fruit. (Or, if you don't have a food processor, use a potato masher to crush the fruit.) Pour the mashed fruit into a large measuring cup. You will need 3 cups of processed fruit. Repeat until you have processed the necessary amount of fruit.
Pour the fruit into the bowl containing the sugar. Mix well. Let it stand for 10 minutes.
When the fruit has been sitting for about 7 minutes, measure 3/4 cup water into a small saucepan and stir the pectin into it. (It may start out a bit lumpy.) Put it on the stove and turn it on high heat. Stir it constantly until it boils. Keep stirring while it boils for one minute.
Immediately stir the pectin mixture into the fruit mixture until the sugar is dissolved, about three minutes.
Ladle fruit mixture into jars, leaving 1/2 inch for plastic containers and 1 inch for glass jars at the top for expansion. Let the containers stand for 24 hours.
The jam can be refrigerated for up to 3 weeks or stored in the freezer for up to a year. Thaw in refrigerator.
~This jam tastes so fresh! If you make one batch at a time, you won't need much freezer space, because it disappears quickly!
Note: Some people say that glass jars shouldn't be used, since they might break in the freezer. However, since I keep so many glass canning jars on hand, I decided to try using them, making sure I had plenty of space for expansion-one inch-at the top. That worked beautifully!
Trying to think of a cute, budget-friendly family Valentine meal? Here's one that will delight your family. You'll look like a rock-star, with minimal effort.
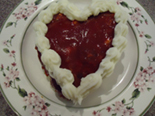 For the meat
1 pound lean ground beef
1/4 cup chopped onion
1/4 cup grated Parmesan cheese
1/4 cup Club cracker crumbs
1/2 teaspoon of each: salt, dried basil, dried oregano, dried parsley, garlic powder, onion powder, paprika
1/4 teaspoon black pepper
1/4 teaspoon red pepper flakes
1 teaspoon whole mustard
Ketchup
Vegetable spray
For the Mashed Potatoes
4 large red potatoes, diced
1 tablespoon salt
3 tablespoons unsalted butter
2-4 tablespoons whipping cream
Piping bag (I use a plastic zipper bag.)
Large star piping tip with coupling
Preheat oven to 350 degrees. Cover a cookie sheet with heavy duty aluminum foil. Spray with vegetable spray. Mix all ingredients together. Put the meat onto the cookie sheet and form into a heart about an inch and a half or two inches thick. Spread the top and sides with desired about ketchup. Bake for one hour.
Meanwhile, put potatoes into a medium saucepot. Cover with water and add 1 tablespoon salt. Bring to a boil. Turn heat down to medium and cook for about 15-20 minutes until very tender. Remove from heat and drain thoroughly. Place back on the burner. (Do not turn the burner back on.) Add butter and beat with an electric beater for about one minute. Add 2 tablespoons whipping cream and beat for another 15 seconds. Beat in more whipping cream as needed to achieve a smooth, creamy consistency.
When you take the meat out of the oven, let it rest for 5 minutes. While the meat is resting, spoon the mashed potatoes into a piping bag that has been fitted with a star decorator tip. Transfer the Meatlove onto a dinner plate. Pipe the mashed potatoes around the top edge of the Meatlove. Pipe extra potatoes on the plate around the Meatlove. Serve with steamed broccoli.
Comfort food revisited! Are you looking to incorporate some of the recommended super foods into your diet? This recipe is delicious comfort food infused with the anti-oxidant super food pomegranate, along with a touch of anti-inflammatory properties of red pepper flakes.
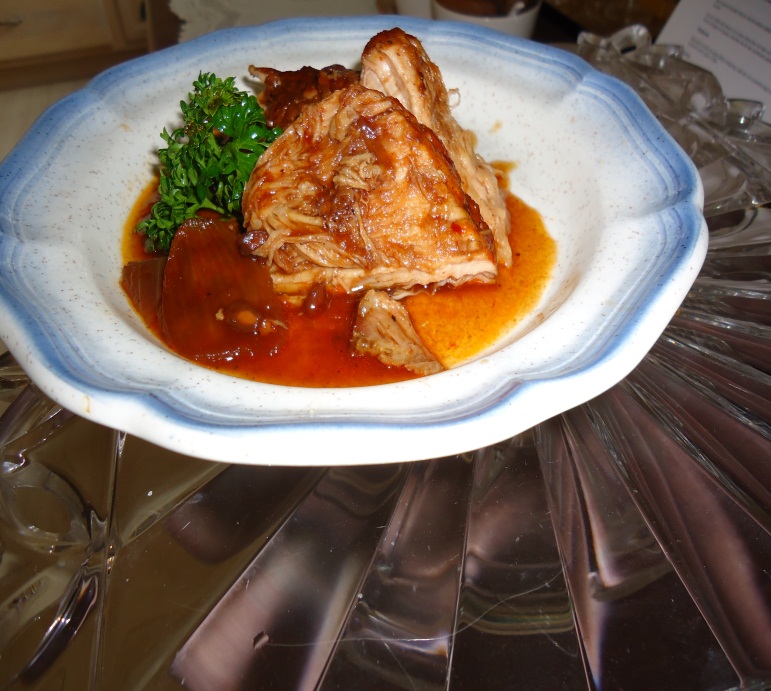
One 1 1/2 pound top loin pork roast
1 tablespoon canola oil
Dash salt
Dash pepper
Dash garlic powder
Dash onion powder
Cooking spray
One pomegranate, seeded
One onion, peeled and cut into eighths
1/8 teaspoon red pepper flakes
1/4 cup barbeque sauce (your favorite)
Sprinkle salt, pepper, garlic powder and onion powder on all sides of the pork loin. Drizzle oil into a hot skillet. Sear pork loin on all sides. Spray the inside of a crockpot with cooking spray and turn on low. Place the pork loin into the crock pot. Seed the pomegranate under water to avoid staining your clothes. Put the the seeds into a saucepan with 1/3 cup of water. (Make sure you remove the white membranes.) Crush the seeds with a fork. Cook on high heat for 5 minutes until the juice is reduced. Pour the juice and seeds into a strainer over the pork loin. Then, drizzle 1/4 cup barbeque sauce over the pork loin. Sprinkle with red pepper flakes. Cook on low for 6 hours.
Slice and serve with pomegranate/barbeque sauce. If desired, shred the meat and return to the sauce. Serve slider style on mini whole wheat buns for delicious shredded pork sandwiches. All the flavor and none of the guilt!
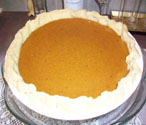 3/4 cup sugar
1/2 teaspoon salt
1 teaspoon ground cinnamon
1/2 teaspoon ground cloves
1/2 teaspoon nutmeg
1/2 teaspoon allspice
1 can pumpkin
2 large eggs
1 can (12 ounces) evaporated milk
1 unbaked 9-inch pie crust (recipe to follow)
Mix sugar, salt, cinnamon, ginger, cloves, nutmeg and allspice in large bowl. Stir in pumpkin and mix until incorporated. Add eggs and mix in well. Gradually stir in evaporated milk. Pour into pie shell. Bake in preheated 425 deg oven for 15 minutes. Reduce temperature to 350 deg. Bake 40-50 minutes until set. Cool on wire rack for 2 hours. Serve with dollops of sweetened whipped cream if desired.
Pie Crust:
1 cup plus 2 tablespoons flour
1 tablespoon sugar
1/2 teaspoon salt
4 tablespoons (2 ounces) cold cream cheese, cut into 1/2 inch chunks
4 tablespoons cold butter
2 tablespoons cold shortening (ex. Crisco)
3 tablespoons ice-cold water
In a food processor, pulse flour sugar and salt two times. Add cream cheese, butter and shortening and pulse until mixture resembles small peas. Add ice-cold water and pulse until dough becomes a ball. Pour out onto plastic wrap and form into flat disk. Wrap tightly and refrigerate for one hour. Roll out and place in 9-inch pie plate. Crimp or flute edge.
~Some recipes for pumpkin pie just call for cinnamon and possibly ginger, but I like the full gamut of harvest spices. The enticing aroma puts me into a Thanksgiving mood.
It's that spooky time again. Time to create mouth-watering treats for your tricksters. But, beware of this treat; it can send you into the addictive realm of deliciousness...
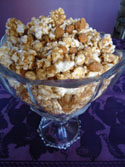 6 quarts popped corn (do not air pop) Use 3/4 cup kernals and pop on top of the stove in a large kettle with about 1/4 cup canola oil.
1 cup butter
2 cups packed brown sugar
1/4 cup water
1/4 cup light corn syrup
1/2 teaspoon salt
1 teaspoon baking soda
1 teaspoon vanilla
1/2 - 1 cup honey roasted peanuts, or your favorite nut
Place popped corn into a large paper bag or two large heat-resistant bowls. Pour peanuts on top of popcorn. (If using two bowls, pour half of the peanuts on top of the popcorn in each of the bowls.)
Melt butter in 2 quart saucepan. Add brown sugar, salt, corn syrup and water. Heat to boiling. Boil for 5 minutes. Be sure to watch it carefully so the syrup doesn't boil over. Remove from heat and add baking soda and vanilla; stir well with a heat resistant spatula or wooden spoon. (Don't be alarmed when it bubbles up violently; just keep stirring it until it calms down.) Pour over popped corn and peanuts and stir until well coated. Pour the coated popcorn on two cookie sheets and bake at 250 degrees for 40 minutes, stirring occasionally. Bake both batches at the same time using lower and middle racks in oven. Take caramel corn off cookie sheets immediately after removing from oven.
`I give this caramel corn out to the "lucky" kids we know on Halloween. When my friend Debi used to spend Halloween with me while our guys were hunting, she would revel in this buttery sweetness. She complained that she hadn't had any recently. I'll have to surprise her with some soon.
If you decide to give it out at Halloween, make sure you give it only to kids you know. Since it's not factory wrapped, most parents would throw it away-that would be a waste of such a special treat.
It's the season for the intoxicating scent of homemade cookies, working its magic like a magnet luring you into the kitchen. But be warned; if you make these cookies, they can be addicting.
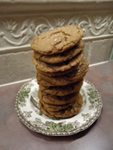 2 cups flour
3/4 cup shortening
1/4 teaspoon salt
1 cup light brown sugar
3 teaspoons baking soda
1 egg, slightly beaten
1 teaspoon cinnamon
1/4 cup light molasses
2 teaspoons ginger
1/4 cup granulated sugar
Sift flour, salt, soda, cinnamon, and ginger together. Set aside. Cream shortening. Gradually add brown sugar and cream thoroughly. Add beaten egg and molasses. Blend well. Add sifted dry ingredients. Stir until just moistened. Shape into balls about one inch in diameter. Dip tops into granulated sugar. Place sugar side up on a greased baking sheet. Bake in a preheated 350 deg oven for 10-11 minutes. Remove from baking sheet to cooling rack.
~Oh my gosh, these are the best ginger cookies I have ever tasted, and I've tried quite a few! I rediscovered this recipe from my mom's recipe file. She saved the recipe I had copied onto a card from the cookies I made in 7th grade Home-Ec class. And to think that we thought Jr. High was some place we never wanted to revisit. We were wrong...
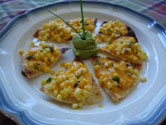 Wait, isn't it supposed to be football? For some of us, it is football. We wait all spring and summer, moping about no football, and then all of a sudden there is more football on TV than you can throw a foam brick at. We're in heaven.
For others, it's all about the snacks and drinks. Since we're still technically in the midst of corn season, the following recipe should excite all of your senses. You can make one recipe and stick somewhat to your diet, but, I'm warning you; you'll want more. You may also want to indulge in the best margarita I've ever tried to wash down the spicy chips. Have fun!
Grilled Corn and Cheddar Nachos
2 ears of corn, husks peeled back and silk removed
1 jalapeno pepper
1 scallion, thinly sliced
1/2 teaspoon cumin
1 tablespoon fresh lime juice
Dash of salt and pepper
4 ounces cheddar cheese, grated (1 3/4 cups)
24 tortilla chips (I use white corn chips)
Preheat grill to medium high heat. (I just plug in my table top electric grill).
Preheat broiler.
Reposition husks back over corn and place on grill. Place jalapeno pepper on grill as well. Grill turning occasionally about ten minutes. Let cool slightly.
Cut kernels off cobs and transfer to a medium sized bowl. Split jalapeno in half and seed, making sure to remove the membranes. (Don't touch your eyes!) Finely dice. Add to corn.
Add scallion, cumin, lime juice and cheese to corn mixture. Toss until well combined.
Arrange chips on a baking sheet. Top each chip with about one tablespoon of corn mixture. Broil until cheese is bubbly, about 30 seconds. Serve immediately.
~This recipe is just right for my husband as we sit down to watch the game. Surprisingly tasty and satisfying - at least for the first half. You may need to make more to finish the game.
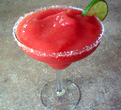 6 oz really good frozen limeade concentrate
3-4 ounces tequila (your favorite)
1-2 oz Triple Sec
2 cups frozen strawberries
2-4 tablespoons superfine sugar, optional
One lime
2 tablespoons sugar
Ice
Pour all ingredients (except ice and lime) in a blender and fill to the top with ice. Blend on high.
Meanwhile, spread sugar on a small plate. Rim margarita glasses with a cut lime and dip into sugar.
Pour frozen mixture into glasses and garnish with a slice of lime or strawberry if desired.
~My friend Cindy gave me this recipe. Those Texans sure know their tequila drinks! This is absolutely the best margarita I've ever tasted!
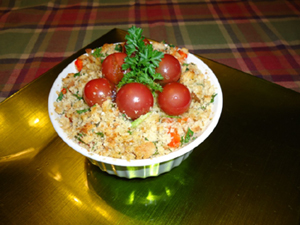 You can't wait. Once that first cherry tomato blushes almost ripe, you grab it and pop it into your mouth, celebrating your harvest. However, by September the early glow of first fruits has passed and you wonder: What am I going to do with all these cherry tomatoes? Luckily, I found and modified a recipe that should appeal to almost any palate. Try it and tweak it to your tastes.
Cherry Tomato-Red Bell Pepper Crisp
1 1/2 cup cherry tomatoes
1 red bell pepper, cored, peeled and cut into 1 inch pieces
2 slices bread
1-2x2x2 inch piece or 1/4 cup shredded Parmesan cheese
3 sprigs parsley
one green onion, cut into thirds
one clove garlic, peeled (optional)
1/2 teaspoon salt
1/4 teaspoon pepper
drizzle of olive oil (1-2 tablespoons)
Preheat oven to 400 deg.
Spray a 9 inch casserole dish or glass pie pan with vegetable spray. Layer the bottom with one cup tomatoes and the bell pepper pieces, reserving a few cherry tomatoes for the top.
Put the bread, Parmesan cheese, parsley, green onion, salt, pepper (and garlic, if desired) in a food processor. Pulse until the bread and the Parmesan cheese are crumbled. Pour over the cherry tomatoes and bell pepper pieces. Arrange reserved cherry tomatoes on top. Drizzle with olive oil. Bake for 25 minutes.
Experiment with other vegetables such as carrots, onions, mushrooms or green beans.
~The crunch of the peppers and the sweetness of the tomatoes blanketed by the crispy topping just explodes into a flavor festivity. Who knew that a traditional dessert could be translated into a lovely vegetable side dish?
 Unblemished grape leaves, free of pesticides and washed
Water
Pickling Salt
Citric or Ascorbic Acid
Quart or pint Mason jars
Rings and new lids
Canning Tongs
Kitchen tongs
Canning pot
Large, medium and small saucepan
Large bowl
2 cups of ice cubes
Count the number of grape leaves you wish to preserve. I used quart jars because my grape leaves were large and I didn't want to press them down into a small pint jar. I put 24 grape leaves in one jar.
Put as many clean jars as you will need into canning pot and cover with water. Turn on high heat and bring to a boil. Fill another large pot half way with water and bring that to a boil. Fill a small saucepan half way with and bring to a boil.
Prepare the brine by boiling 1/4 cup pickling salt with every 4 cups of water you use in a medium saucepan. Add 2 1/2 to 3 teaspoons citric or ascorbic acid powder for every 4 cups of the brine.
Put the lids in the small saucepan of boiling water and turn down to low.
When the water in the large canning pot is boiling, turn the heat down to medium.
Add cold water and ice cubes to the large bowl.
With kitchen tongs submerge the grape leaves into the boiling water in the large saucepan for 30-45 seconds. Fish them out and immediately plunge into the bowl with the ice water.
Stack six grape leaves on top of each other and roll up tightly. Repeat with all of the grape leaves.
With canning tongs lift a hot jar out of the canning pot, making sure to spill out a little of the boiling water into the pot to prevent burns. Empty out in the sink or another heat-proof container.
Pack as many rolled up stacks of grape leaves as can fit into a jar (4-6). Fill with boiling brine solution, leaving 1/4 inch head space. Wipe off rim of jar. Place hot lid on top and screw on ring tightly. Process in boiling water for 30 minutes.
Lift jars out with canning tongs and place on a heat-proof counter or pad for 24 hours. Make sure the lids "pop" indicating that the jar is sealed.
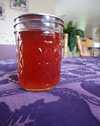 4 cups grapes, stems removed
Jelly bag, cheesecloth or coffee filter
1/4 cup water
7 cups sugar
1 package pectin (like Sure-Jell)
1/2 teaspoon butter
8 ounce, 12 ounce, or pint canning jars
New lids and rings (Used rings can be used if they are clean.)
Canning pot
Canning tongs
Made with Niagara Grapes
Wash grapes thoroughly. Put grapes and water in a large pot. Heat to a boil and simmer for 15 minutes. DO NOT CRUSH, because crushing will result in a cloudy jelly. Line a large colander with cheesecloth or filter or use a jelly stand. Put the colander over a large pot. Pour grapes and resulting juice into colander. Let stand overnight.
br> Resist the temptation to crush! Place jars in canning pot and fill with water to cover them about 1-2 inches. Bring to a boil. Fill a small saucepan with water and bring to a boil. Measure 5 cups of grape juice into a large pot. Stir in pectin. Add 1/2 teaspoon butter to reduce the amount of foam. (This really works!) Bring mixture to a boil. Immediately stir in sugar all at once. Bring to a full rolling boil, (one that won't be stirred down), stirring constantly with a wooden or silicone long handled spoon or spatula. Boil and stir for one minute. Turn off heat.
Skim off any residual foam. (There won't be nearly as much foam if you add the butter.) Dip the lids into boiling water that is in the small saucepan before placing on mason jars. Lift jars, one at a time, out of the canning pot, spilling a little into the pot before discarding the rest in the sink or another heat proof container. Ladle fruit juice immediately into jars, leaving 1/4 inch headspace.
Wipe off rims before screwing the hot lids on. Using the canning tongs, return the jars back into the canning pot and boil for 5 minutes. Add 2 minutes for each 1000 feet above sea level. Since I live at about 5,000 feet, I process them for 15 minutes. Lift the jars out onto a heat-proof counter or heat pad and listen for the tell-tale "pop" indicating that the lids are sealed. After lids "pop", leave them in place for 24 hours. (You can check to see if they are sealed by pressing lightly on the top. If it doesn't give, it is sealed.)
Makes about 8 cups.
~ My neighbor, Mrs. Maxey was the one who advised me not to crush the grapes. As a result, my jelly looks like a jewel.
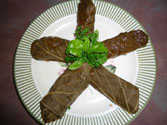 12 grape leaves, washed and blanched, or preserved
1/2 cup rice, cooked
1/2 pound ground beef
1/2 onion, diced
1/4 red bell pepper, cut into small dice
4 oz. fresh mushrooms, chopped
2 tablespoons fresh basil, julienned
1/2 teaspoon red pepper flakes
Splash of wine (your favorite)
4 beef bouillon cubes
Salt and pepper
Saute ground beef onion, bell pepper and mushrooms in a large skillet for about 5 minutes or until beef is cooked and vegetables are tender. Drain. Stir in two bouillon cubes, rice and a splash of wine. Cook uncovered, stirring occasionally until the bouillon cubes are dissolved and the wine is incorporated, about five more minutes. The mixture should not be runny.
In another skillet pour two cups of water and the remaining two bouillon cubes. Bring to a boil. Once it boils, turn the heat down to a simmer.
Lay out grape leaves on a plate. Viewing the leaf as a hand, spoon 1-2 tablespoons of the rice mixture sideways onto the spot where the thumb would be (if the leaf were a hand J). Then roll up, burrito style, tucking in the edges so that the ends are enclosed. Repeat, using all the rice mixture.
Lay the grape leaf rolls side-by-side in the simmering beef broth. Simmer, covered, for 45 minutes-one hour, or until the broth has evaporated.
Serves 4-6 per person.
~Several recipes for dolmades include mint leaves in the recipe, but since I prefer basil, I decided to try it. Then I switched it up and added my favorite mushrooms and the bite of red pepper flakes. Non-traditional, to be sure, but I've always been somewhat of a rebel. Tzatziki, the famous Mediterranean cucumber/yogurt sauce as well as a tomato sauce is often featured as a topping for dolmades. However, this delicious recipe doesn't need any augmentation.
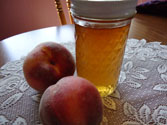 Peels from about 18-22 pounds of peaches
3 cups of sugar, measured into a medium sized bowl are large measuring cup
1 teaspoon vanilla, or 1 tablespoon fresh lemon juice, optional
1 box of pectin
Clean Mason jars
lids and rings (lids can only be used once)
Large canning pot
Canning tongs
Save the peels from peaches while processing peaches for canning. Refrigerate until you have the peels and pits from a box (about 18- 22 lbs.) of peaches. Place in a heavy saucepan. Cover with 3 1/4 cups of water. (If you have peels from 10-18 pounds, add 4 cups of water.) Bring to a boil.Turn down the heat and simmer for 30 minutes. Turn off the heat, cover, and let stand overnight.
Put canning pot full of mason jars and water to cover them by at least one inch on stove. Cover the pot and bring it to a boil.
Meanwhile, strain juice through a cheese cloth (obtained at any store that has a fabric department or canning supplies) lined in a colander or sieve.
I have also used coffee filters. (When using coffee filters, you may need to replace them every so often with a new one, if the straining becomes to slow. Gather up the coffee filter containing the peels and remaining liquid from the colander, still holding it over the colander. Replace with a new filter. Carefully pour the remaining peels and liquid into the new filter. Discard the used filter. Repeat as necessary.)
Either straining process ensures a gorgeous, clear jelly.
Measure three cups of juice into a large saucepan. Add one package of powdered pectin. Bring to a vigorous boil (one that cannot be stirred down). Immediately stir in the 3 cups of sugar. Bring back up to a full rolling boil and boil exactly one minute, while you stir it constantly. Remove from heat.
(At this point you may stir in vanilla if desired. Vanilla will give it a smooth, mellow flavor. Or, you can stir in lemon juice. This will brighten up the flavor, giving it a little zing. However, you do not need to add any flavoring.)
Skim off any foam that may have accumulated.
With canning tongs carefully lift a jar out of the pot, spilling a little of the water out, to avoid burning yourself while you pour the rest of the water out into a sink. Using a ladle, quickly fill hot mason jars with the peach jelly within 1/8th inch of top of jars. With a clean, damp cloth, wipe the rims and threads of the jars. Put a hot lid on each jar. Screw the ring on tightly. Place jars back into the canning pot of boiling water and make sure the water covers them by 1-2 inches. Bring the water back to a boil and boil for 10 minutes. Add 2 minutes for each 1000 feet above 1000 feet. (Remember, Denver is a mile high-5280 feet.)
Using the tongs, lift the jars out of the pot, setting them on a rack or a towel to cool completely. Leave them there for 24 hours. Within a few minutes you will hear a "pop", indicating that the jar is properly sealed. The lid will have depressed slightly in the middle. Make sure that all of the jars are sealed. (To check them, just press the tops and see if they give.) If they don't seal after 24 hours, you need to refrigerate them immediately, or take the lids off, wipe the rims, use new lids and reprocess.
Yield: About five 8-ounce jars of gorgeous jelly
~My sweet girlfriend Cheryl gave me this recipe after she thought that it was a shame to "waste" all of the flavor from the peach peels. She researched and found this recipe that many of our friends have enjoyed. Recycling at its most deliciousness!
Every year my little dog and I look forward to the opening of the farmer's markets. The farmer's market is just an added bonus to his weekly downtown stroll. The sensory delights explode as we navigate around the big dogs and the tempting booths. Patiently he endures the tiny hands that want to pet him, and shows off his skills when he waves good-bye to all of his admirers.
I love to support local farmers, and I shop for the most enticing produce each week. This week I was on the hunt for my annual box of Pallisade Peaches. I have found that I prefer peaches grown locally because they ripen beautifully, even if I buy them when they are rock hard. I just leave them in the cardboard box, put them into a brown paper bag, or into a deep bowl on the counter and voila, within a few days I have sweet, mouth-watering Colorado gold.
Usually, there are several booths selling peaches. How are we to know which peach to choose? When I began my quest, I harkened back into my childhood when I helped my mom can peaches. I remembered that I needed a peach that was free-stone (so I would'nt have to wrestle with it) and that she used either Elberta or Hale Haven. Not seeing any of those varieties, I spoke to the vendor and asked him whether he would have either one of those in the next few weeks. Or, if the ones he was selling that day were similar. He said that the Suncrest peaches he was offering had superior flavor, but perhaps did not "slip" as easily as other varieties.
What does that mean? When canning peaches, you need to slip the skin off of the peach. In order to do that, you will need to submerge the whole peach into boiling water for thirty seconds and then immediately plunge it into ice cold water. The skin should slip right off.
As he lifted the lid off of the box of peaches, I knew I was hooked. The scarlet orbs warmed the inside of the box, mesmerizing me. The challenge presented concerning slipping the skin off of these gorgeous peaches would just have to be conquered.
Flushed with pleasure, I proudly hefted my 22 lb. box of amazing Colorado peaches and my sweet puppy and I floated back to the car, dreaming of the glistening jars of peaches I would preserve in a week. (Well, my puppy was probably dreaming of that cute Cock-a-poo he met.) Next week here is the recipe I will use to can my beautiful peaches:
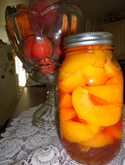 Large canning pot
Large saucepan
2 small sauce pans
Quart or pint canning jars
2 piece lids and rings
Canning tongs
Wet dish cloth
Plastic knife
Wire rack (or dry dish cloth)
Free-stone peaches
Ascorbic acid produce protector (like Fruit Fresh)
Sugar
Count how many peaches you plan to can. You'll need 5-6 peaches for each quart you can. Make sure your jars are clean. Place them into a large canning pot and cover them with water. Set the covered pot on a stove burner and bring the water to a boil.
Meanwhile measure out equal parts of water and sugar into a large saucepan.
(I usually start with 3 cups of water and 3 cups of sugar.) Add one teaspoon ascorbic acid for each cup of liquid. Bring to a boil.
Fill a small saucepan three-quarters of the way full with water and bring it to a boil. Fill a kitchen sink or a large pot with enough ice water to cover a peach. Sprinkle in ascorbic acid according to the directions on the bottle.
Put the lids into another small saucepan. Cover with water and bring to a boil. When it boils, cover the pan and turn the burner off.
When the water in the small saucepan without the lids comes to a boil, submerge a peach or two in the water for thirty seconds. With a slotted spoon, dip them out and plunge them immediately into the ice-cold water. You should be able to slip the skins right off of the peaches. (If you want to, reserve the skins for another delicious recipe: Peach Peel Jelly.) Put the peaches back into the ice-cold water until you have at least six peaches and the water in the canning pot is boiling.
When the water in the canning pot is boiling, turn the burner off. With canning tongs carefully lift a jar out of the pot, spilling a little of the water out, to avoid burning yourself while you pour the rest of the water out into a sink. Replace the lid. Set the jar into a ceramic bowl. Slice or halve the peaches into the jar, packing tightly. Cover completely with the sugar water. Slide a plastic knife down the side of the jar to extract any air bubbles. Add sugar water to within 1/4 inch from the top, if needed, (to create head space). Wipe the rim and threads of the jar clean, removing any sugar syrup.
Carefully take a lid out of the hot water and place it on top of the jar. Screw the ring on tightly. Repeat for all the peaches. Using the canning tongs, place the jars back into the canning pot, making sure that the water covers them. Bring the water back to a boil and boil for 10 minutes. Add 2 minutes for each 1000 feet above 1000 feet. (Remember, Denver is a mile high-5280.)
When the time is up, carefully extract your jars and put them on a rack or a dry towel on your counter. Leave them there for 24 hours. Within a few minutes you will hear a "pop", indicating that the jar is properly sealed. The lid will have depressed slightly in the middle. Make sure that all of the jars are sealed. (To check them, just press the tops and see if they give.) If you have one that did not seal after 24 hours, you can just put it into the refrigerator and enjoy that jar of peaches right away. If none of them have sealed, you will need to unscrew the rings, throw all of the lids away, and use new lids to process them again. Make sure that the tops of the jars are wiped clean.
~I usually store my canned peaches in boxes in the basement. In the dead of winter I'll suddenly remember my luscious summer, just waiting to chase away my winter blues.
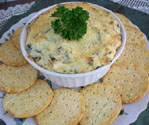 Bringing something to the workplace to brighten co-workers' eyes can be easy. I have gained quite a favorable reputation for my "attitude adjustment" recipes. Here are a couple samples:
Amazing Artichoke Dip
1 cup thawed and drained chopped spinach
1-8 oz. package cream cheese, softened
1- 13.75 oz. can artichoke hearts
1/4 cup sour cream
1/4 cup homemade mayonnaise (recipe follows), (or store bought mayonnaise)
1/3 cup Parmesan cheese (or more for topping)
1/2 teaspoon red pepper flakes
1/4 teaspoon salt
1/4 teaspoon garlic powder
Preheat oven to 350 degrees.
Drain artichokes and cut quartered hearts in half. Squeeze the liquid out of the drained spinach. In a large bowl thoroughly mix cream cheese, sour cream, mayonnaise, Parmesan cheese, red pepper, salt and garlic powder. Gently fold in spinach and artichoke hearts. Place in a casserole dish that has been sprayed with non stick cooking spray. Sprinkle with more Parmesan cheese if desired. Bake for 35 minutes. Serve with baguette slices, crackers or assorted vegetables.
Homemade Mayonnaise
1 large egg **
1 tablespoon fresh lemon juice
1/4 teaspoon dry mustard
1/4 teaspoon salt
1/2 teaspoon sugar
dash cayenne pepper
dash onion powder
dash garlic powder
3/4 cup vegetable oil
Blend all ingredients except oil on low speed. Slowly add oil through the top center of the blender lid, and blend until the mixture is thick, about 30 seconds. This mayonnaise will keep in a covered container in the refrigerator for two weeks.
**If you are concerned about a raw egg in the mayonnaise, poach the egg for two o three minutes before blending.
~After searching and tasting, I finally developed the perfect artichoke dip!
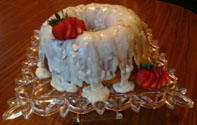 1 yellow or white cake mix, plus 1/4 c. flour
1/2 cup unsweetened pineapple juice
3/4 cup water
1 package vanilla instant pudding mix
1/2 cup vegetable oil
4 large eggs
1 teaspoon almond flavoring
1/4 cup poppy seeds
Preheat oven to 375 degrees for aluminum Bundt pans and 325 degrees for cast iron Bundt pans. Mix all of the above but the poppy seeds and beat hard with an electric mixer for 5 minutes. Add poppy seeds and beat for one minute. Grease and flour Bundt pan. (I use Baker's Joy spray.) Pour batter into the Bundt pan and bake for 40 minutes. Let stand ten minutes before removing. When cool, drizzle creamy glaze over top.
~My friend Jacki shares the best recipes! I added the glaze for even more richness-big surprise!
Everyone loves this cake!
Velvety Glaze
1/3 cup butter
2 cups powdered sugar
1 1/2 teaspoon almond flavoring
2-4 tablespoons hot pineapple juice
optional: 1/4 cup sliced almonds
Heat butter in a medium sized saucepan until melted. Stir in powdered sugar and flavoring. Stir in pineapple juice, one tablespoon at a time, until glaze is of desired consistency. Stir in almonds. Drizzle over Bundt cake.
2 cups flour
1 cup shortening (e.g., Crisco)
1 cup brown sugar, packed
2 eggs
2/3 cup white granulated sugar
1 teaspoon vanilla extract
1 teaspoon salt
1 teaspoon baking soda
2 tablespoons hot water
6 ounces chocolate chips
Preheat oven to 350 deg.
Mix first four dry ingredients thoroughly.
Mix shortening, eggs, and vanilla extract into dry mixture.
Combine baking soda and hot water and mix into dough until completely incorporated.
Stir in chocolate chips.
Drop by teaspoons or tablespoons depending upon your cookie size preference onto cookie sheet.
Bake at 350 deg for 10-13 minutes, depending upon the size of cookie and the tendency of your oven.
~This recipe has been in my family for as long as I can remember. It was one of the first recipes I memorized when I was a little girl. My mom encouraged my sisters and me to bake from scratch at an early age. My kids crave the dough. (Yikes, raw egg alert!)
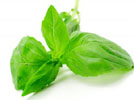 One of the most favorite herbs lately is basil. I love its lemony, peppery fragrance, but I have had trouble growing it in the past. When I tried to grow it in an herb garden pot on my kitchen counter, the parsley would thrive, but the basil would soon shrivel, turn black and die. Next I tried in my friend's gorgeous garden. Her soil was rich and black, but, again, the basil seemed to struggle. Then I reasoned that perhaps our climate with its cool evenings made the basil shiver. So, the next year, I tried planting a four inch plant, right in that same beautiful soil, but this time I surrounded it with a Wall of Water. A Wall of Water is a cylinder of plastic that has reservoirs that you fill with water. Once they are full of water, the cylinder stands up on its own, protecting the plant. It acts as a greenhouse, keeping the plant warm, and allowing sunlight in, creating a Mediterranean lifestyle the basil is used to. Success! I had basil to adorn several dishes all season. And I dried some to use in the winter.
Drying basil
I have tried several methods, but this one seems to be the easiest and holds the color the best. Lay the leaves of basil in a single layer on a microwaveable dinner plate. Microwave on high for one minute. Remove from microwave and let cool. Crumble into a spice jar.