Remembering Sacrifice
Fun with Seed Catalogs
Grow Your Own Leafy Greens
Window Box Wish Come True
Sowing Summer Splendor
Fall for Planting Tulips
Garden Notes 2015
Creeping Jenny
Making (Snow in) Summer Last Longer
Lilac Love
How to Grow Sweet Potato Vines
Seed Starting
Beautiful Baby Boy Shower
Is That a Pussy Willow Basket?!
Plant in Spring For Summer Stargazing
New Raised Garden Beds
Valentine Heart Wreaths
Hurry Up Harvest
Clematis Love
Gettin' Back in the Swing
Ready, Set, Paint
Mid-Season Garden Satisfaction
Peonies
New Baby Bunny Blankie
Best Lawn on the Block
Pillow Talk
Farmer's Market Delight
How to Can Peaches
How to Grow Raspberries
10 Things that Bring Joy
Wreaths of Smiles
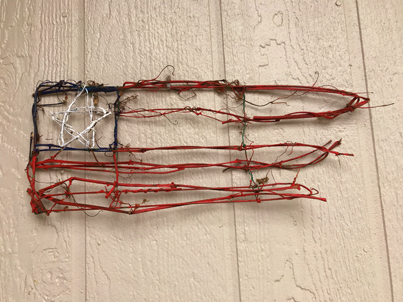
Materials:
2 wire hangers
18 inch 24 gauge florist wire, about 10-12 pieces
stretchy floral tape
flexible grape vines
red, white and blue paint (I used acrylic.)
hot glue gun and glue stick
wire cutters
pliers
Cut the top hanging part of the hanger off using the wire cutters. Bend the hanger, so that you have a ninety degree angle for the top left side of your flag. Keep the bent part for the first set of stripes. Squeeze it further with the pliers so that each stripe is about an inch apart. It will not reach the side, but that's ok-you will continue the stripe with grape vines.
Cut another hanger apart. This time cut a long piece the form the next two stripes. Attach but hooking it onto the side and securing it with floral tape.
Repeat this last procedure.
Secure the stripes vertically with the florist wire, wrapping it around each stripe and twisting it around the top and bottom . One of the vertical structures should create the square for the star.
Once you have a stable structure, start winding grapevines around the wire, connecting the spaces between the wire frame.
Create a star out of the florist wire. Wind it with grape vines. Hot glue some vines to it, if necessary. Secure it in the left corner square with florist wire.
Set the flag out on a flat surface in the sun, if possible. The vines will dry out and turn brown in a couple days.
Lightly paint the grape vines and wire with the three colors. Let dry and hang.
~Making this gave me an opportunity to stop and reflect on everything all the brave people have done for me. I hope I can return the favor, honoring them by treating everyone in the same manner I would like to be treated.
These pages burst with mouth-watering tidbits as well as gorgeous flowers that can be grown. They are just waiting to be chosen.
Think about what you like to eat. The seed menu is in alphabetical order for easy selection. Each variety is displayed with a photo and details outlining number of days until harvest, size and features.
Then, think about the size of your garden. Choose just what will fit in your garden and your lifestyle.
Some seeds need to be started inside (e.g., tomatoes, peppers) and some can be sown directly into the soil (e.g., carrots, pumpkins). One of the questions to ask yourself is: do I have the patience to start seeds inside?
In any case, it's fun to see all of the gorgeous fruits, vegetables and flowers showcased in these catalogs. Spring will be here sooner than you think!
With one package of seed, you will grow enough spinach to eat fresh, and probably have enough freeze for later, depending how much of a spinach head you are :) . Plus, your neighbors will benefit from your gifts of fresh spinach.
There's something very cool about stepping outside and picking your own food. Equally delightful is to invite the little girls down the street to come and pick some spinach. I asked them if they liked spinach and they said they loved spinach "with Ranch". Hey, whatever gets them to eat their leafy greens.
Note: There has been an alarm associated with eating spinach leading to the formation of kidney stones. I did some research and apparently, if spinach is eaten with acids such as lemon (or any citrus) the danger evaporates. So squeeze lemon, or a citrus vinaigrette on your spinach and benefit from all the fabulous nutrients it contains.
But not real ones.
I didn't want the expense or the mess of installing new windows, plus the security issues. So, I saw these frames with mirrors at our local craft store that had just the right look. They look like windows, but I don't have to worry about cleaning spider webs or other debris on the back side.
Then we were on the prowl for window boxes. We are of the mind that if we are going to go to all of the trouble to install something on our house, we want it to be sturdy and practical. We found these beautiful heavy-duty self-watering boxes, that are sure to give us pleasure, year after year. They are a bit pricey, but we will probably never have to replace them.
To install the "windows", we measured the wall and found the studs, so that they would have sturdy backing. We also measured up from the ground to see how the window with the boxes under them would look the best. Also, we allowed about 1 1/2 inches below the frames to mount the boxes. That way we could remove the boxes easily to clean them.
Next we drilled holes in the frames so that the screws would not split the wood. We held up the frames to the spot we wanted to mount them and drilled holes into the siding and studs. Then, we screwed them to the wall.
To install the brackets for the window boxes, we had to add backing on the other side of the wall between the studs. (Just a short piece of 2x4 screwed in between the studs.) We lined up the brackets, holding the boxes up to make sure we aligned them correctly and marked the spots. We drilled starter holes first, and screwed the brackets to the wall. The boxes slid onto the brackets easily. I now had my wish!
This year we decided to "plant" the boxes with silk flowers and plants. Next year we'll think about taking advantage of the self-watering feature of these beautiful boxes.

What do you think of this display?
If you would love beauties like these in your garden, here's what to do:
In the early spring, find a spot in your garden that will accommodate bulbs that like to multiply. (These are in a sunny spot, but I have luck with lilies growing in partial shade as well.)
Make sure the soil is loose and rich with compost and other organic material. (I usually add compost to my garden every year to replenish nutrients.)
Find the color you prefer in your local garden shop.
Make sure you follow planting directions on the package. Usually you will need to plant lilies 4 inches deep. Cover with soil and press firmly. Water thoroughly.
After the initial watering, water sparingly until the buds form. Then, water like you would all your flowers.
Now, enjoy the magnificence!

Do you want this kind of a display next spring?
How about a garden with these beauties?
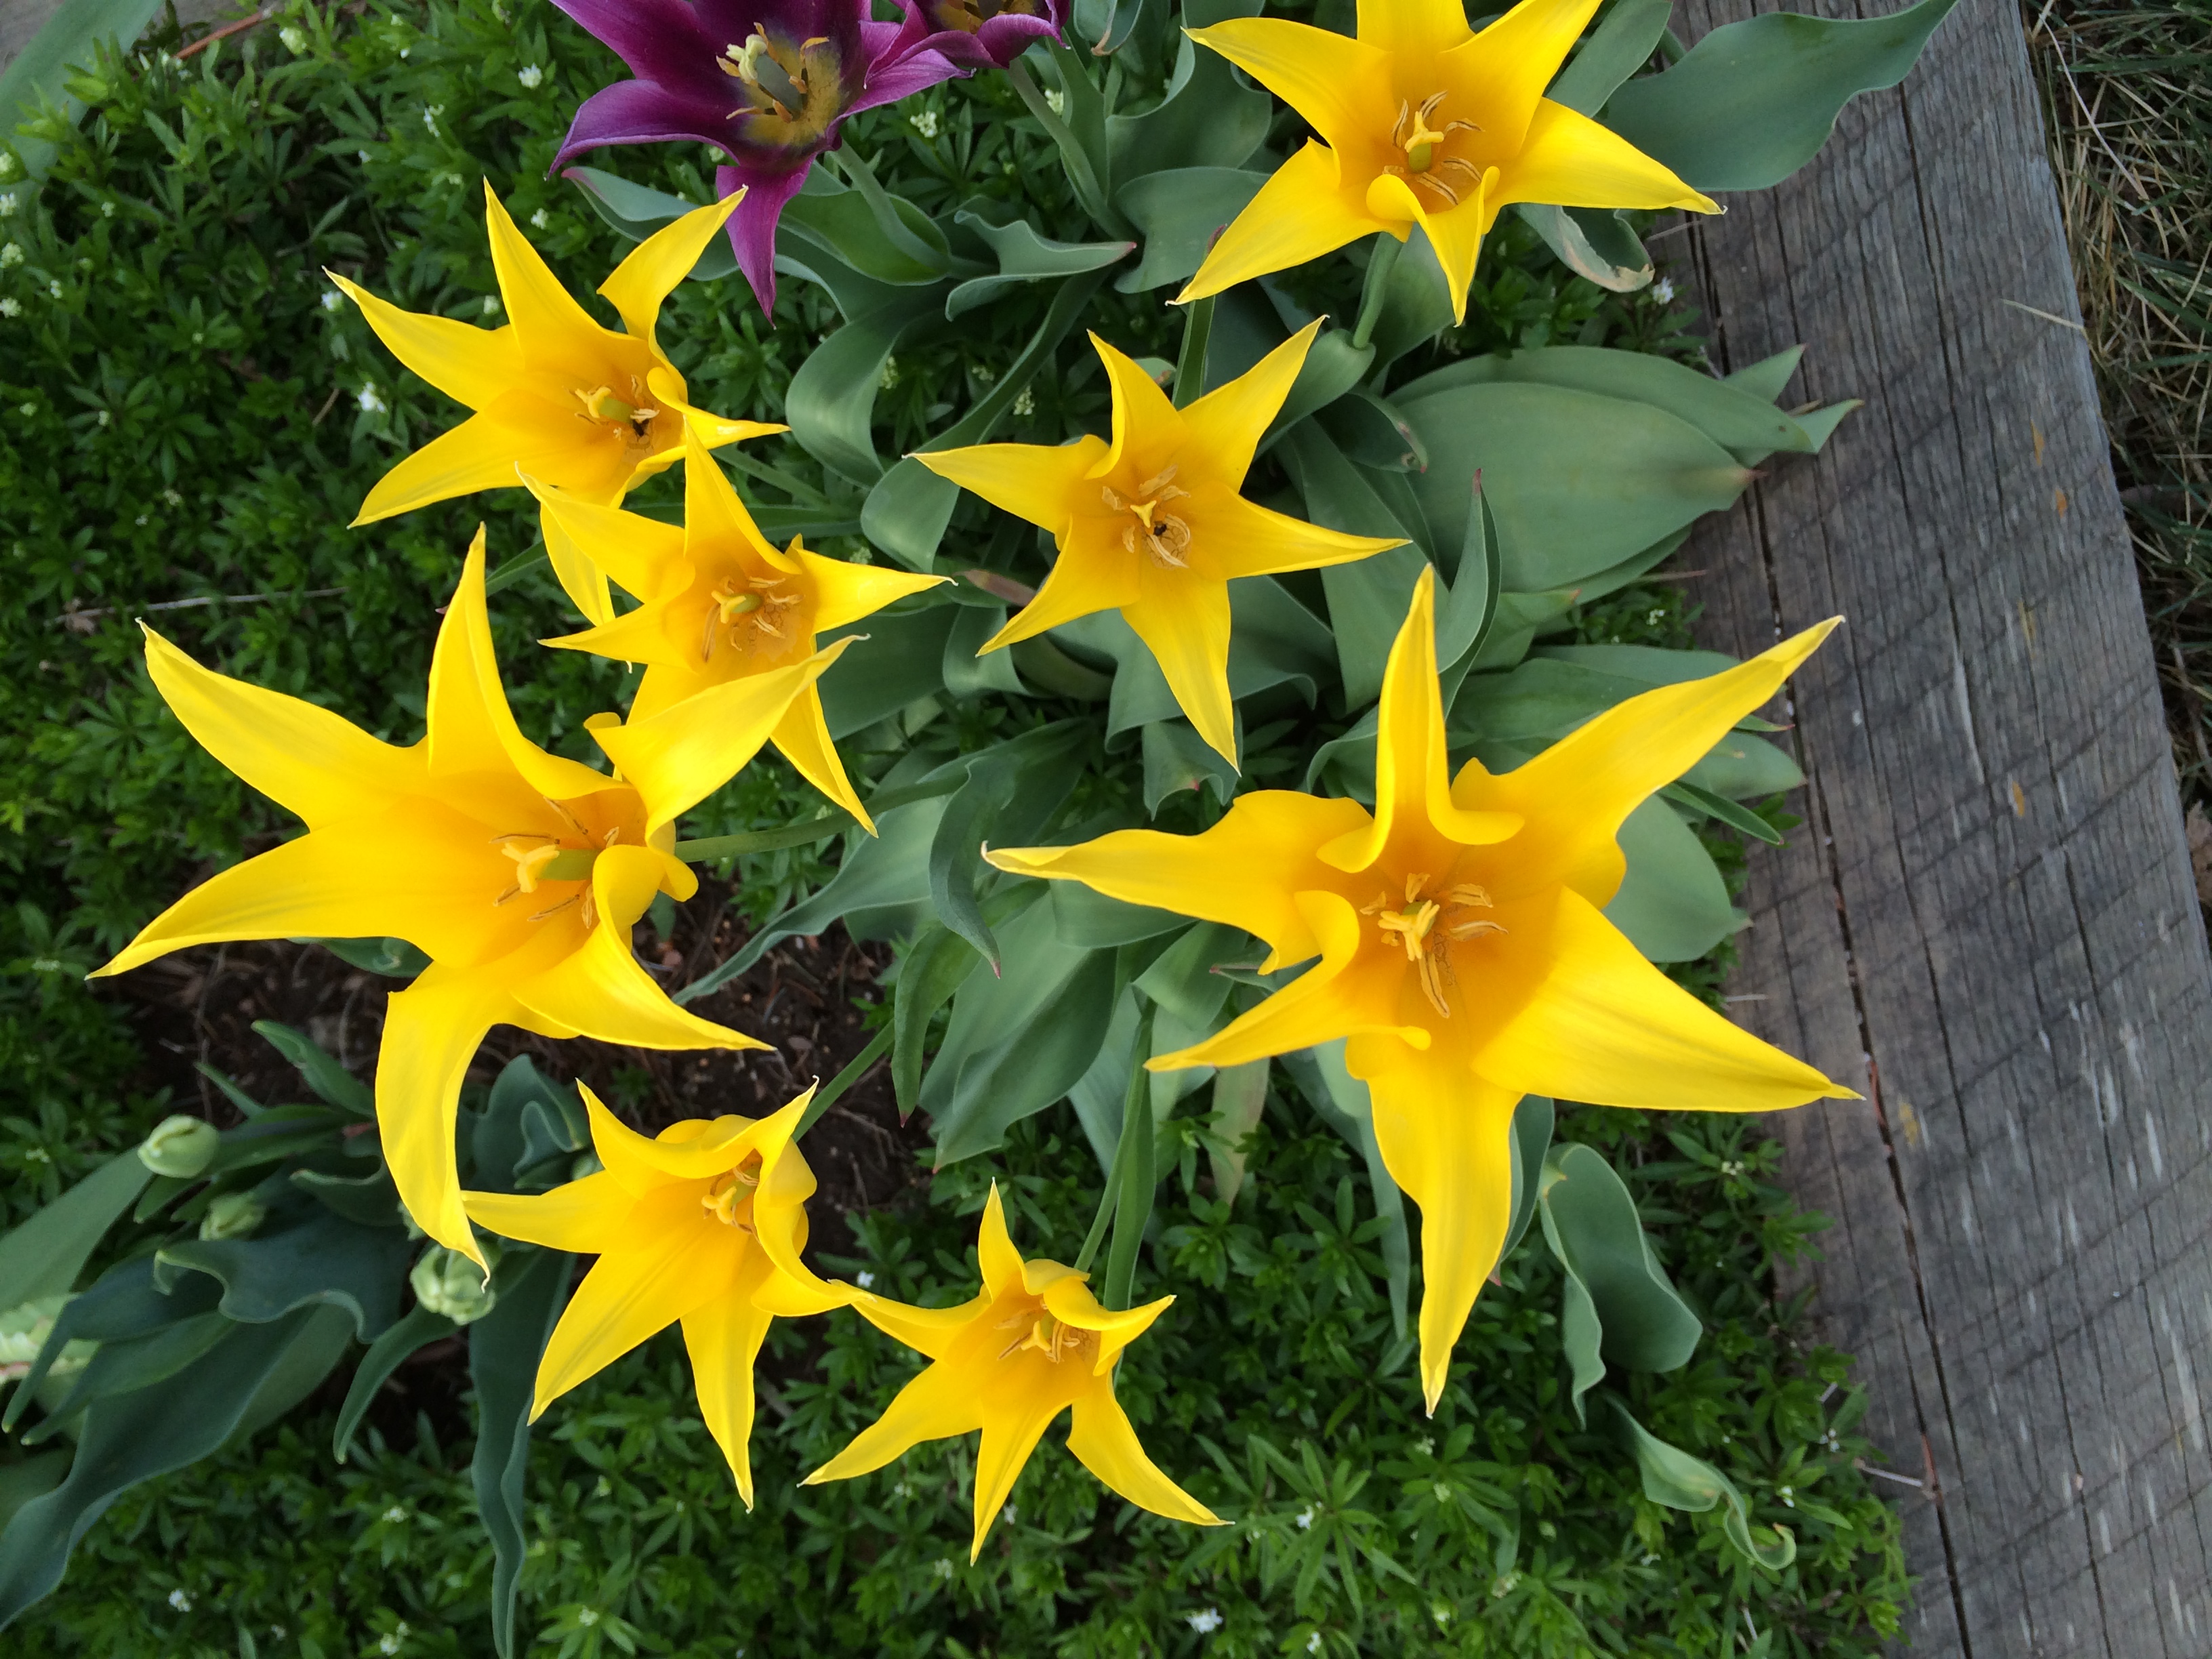
Since tulips and other fall bulbs like daffodils, hyacinths, snowdrops and crocus need to experience a cold winter, you will need to plant them in September or October.
Plant your tulips this fall in order for them to get acclimated in your soil and spring to life in March or April of next year.
Dig about a 7 inch deep hole for each bulb. Plant the bulb pointy side up, filling the hole with nutrient-rich soil. Water thoroughly.
Water a few times over the winter, or if you get snow a few times over the winter, that should be sufficient.
Note: Tulips multiply year after year, which is a bonus. However, if you want lush display the first year, you will need to plant as many as you want, because most tulip bulbs only produce one flower.
I'm eager to plant some bulbs this year I purchased in Holland.
Holland, Michigan, that is.
They promise to be the best ones I've ever seen. I'm excited for next spring. In the meantime I can anticipate spring with photos of ones I already have. Like these gorgeous peachy pink parrot tulips.

Ok, I told you that I would let you know what I discovered about my foray into catalog seeds. First of all, we love Burpee seeds and plants and the resulting produce overall.
Here are the winners for this year:
Cherry Punch Tomatoes
A sturdy plant with bountiful harvest as with most cherry tomato plants. These, however, are sweeter and larger than the Sweet 100s I have planted in previous years. Pick them just before they become bright red for optimum sweetness and texture.
Super Tasty Tomatoes
These were so good in both texture and taste that next year I will plant only these for my slicers. Delicious.
Danvers Carrots
These outproduced the Scarlet Nantes that we have planted in the past. Sweet and long, they are a better choice.
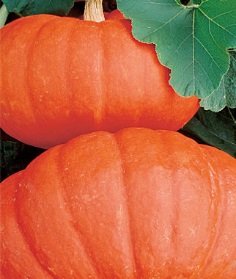
Rouge Vif d'Etampes Heirloom Pumpkins
These are just delightful. We only harvested 4 or 5 from one hill, but that may be due to the placement of this garden bed.
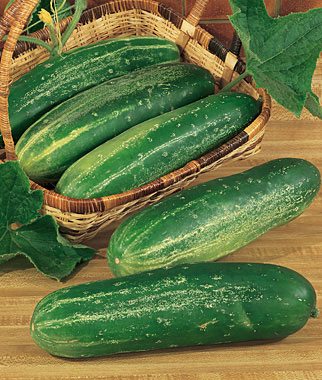
Straight 8 Cucumbers
These started a bit slowly, but once they "took", they were prolific, sweet and large. Tip: harvest them every day or every other day to prevent gargantuan cucumbers which tend to split and become bitter.
In between, Perhaps Deserving of a Second Season
Jack-O-Lantern Pumpkins
These were smaller than I thought they'd be, but they are beautiful and smooth for easy carving. Again, we harvested only about 5 pumpkins from the hill we planted.
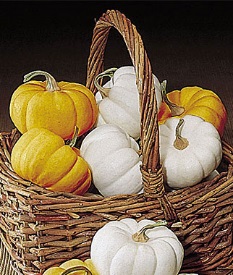
Jack-Be-Little Mini Harvest Blend Pumpkins
This is the plant that really broke my heart. It advertises a variety of cute mini pumpkins, but alas, we only harvested white ones. Even though I separated the seeds into like sizes, and tried to plant one of each, it apparently didn't work. However, the 10 white ones we got are really cute in my displays around my house.
Celebrity Tomatoes
The texture and the taste were just ok, but we had a bountiful harvest from this variety.
Super Sauce Tomatoes
These are huge and prolific, but they don't have much flavor and the texture is a bit mealy.
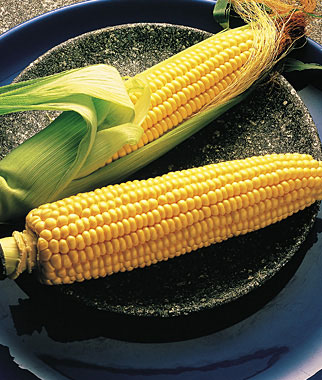
Illini Extra Sweet Corn
Gorgeous plants, but the corn isn't as sweet as the Peaches and Cream corn we got at the Farmer's Market.
Cabernet Red Sweet Pepper
We only got about 4 peppers from this plant. But they are firm and tasty.
Losers; Disappointing; We Will Be Trying Different Varieties Next Year
Mighty Sweet Tomatoes
Didn't even germinate, so we weren't able to see whether this grape tomato would be good or not.
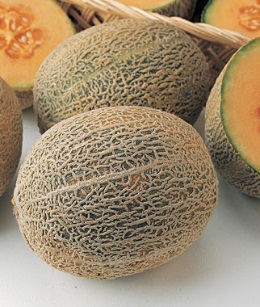
Honey Bun Melons
These plants made it to the garden, but quickly died. Sad.
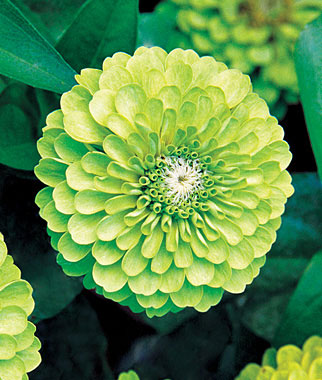
Green Zinnias
These did flower, but they weren't as full and bright as I had hoped.
So, on to next year when we will try something new. We keep thinking that we need more garden space; maybe we'll take on a new raised bed project. But right now we are savoring our bountiful, especially Super Tasty harvest.
Love this neon green ground cover! It is easily transplanted to cover even the most arid, sandy soil. In addition, it volunteers from year-to-year. So far it has "creeped" into many of our gardens, but it not been a problem. It is easy to pull out if you don't want it in a certain area. I have even used it in flower arrangements.
If you want a beautiful, lush, not prickly ground cover, this is perfect! And you only have to buy it once. Or, maybe get a little from a sweet neighbor.
Every summer, this lush perennial drapes its sagey dappled leaves over our patio flower bed. And the bonus is that its delicate, Queen Anne's Lace-like flowers are the crowning glory of this easy-to-grow ground cover.
I decided to try my hand at preserving these frilly fractal flowers. Now, there are several ways to preserve and/or press flowers. I even learned the "proper" way in my Plant Propagation class in the lab while I was at Colorado State University. You can spend a lot of time and money to buy or build yourself a flower press, one that has the proper vents to allow air to flow around it.
However, sometimes I just want to complete a project with no fuss.
So, I got a magazine, a couple sheets of computer printer paper and a large 5-inch thick dictionary. I found a spot where the flowers could dry in peace.
Then, I cut a couple flowers (ones that were not too old) and opened the magazine to the middle. I placed one of the papers on the right side of the magazine. I laid the flowers on the paper and carefully placed the other sheet of paper on top of them. Again, carefully, close the magazine and place a large book (or books) on top of it.
Let them dry for about a month. Check them and carefully test them to see whether they are dry. If they are pliable at all, they are not dry and will mold if you put them into a frame. You'll need to let them dry for a longer period of time.
Once they are dry, you can mount them on paper. I couldn't find paper I liked, so I created a patterned sheet of paper on the computer that read "Queen Anne's Lace" in a pretty font in a repeated pattern.
Position the flowers on the paper. Dot with glue in just a few spots on the backs of the flowers and lightly press them to the paper. Allow to dry thoroughly.
Find a frame that you love, preferably one with glass, in order to protect the flowers further. Frame your gorgeous flowers!
Now, don't you feel smart that you have saved summer?
This time of year the perfume of lilacs wafts over all of us who are lucky enough to live in Lilac Land. Varying degrees of purple, lavender and lilac! blooms gently sway in the soft breezes of spring right around Mother's Day each year. And, we can't forget the white varieties that burst with vigorous growth. We have found that our white lilacs are the most fragrant as well as the bushiest and easiest to grow.
Once the blooms are spent on the bushes, they will turn a rusty color. If you want to insure a glorious bouquet of blooms next year, the best way is to clip off the spent blooms.
I think I inherited my love for lilacs from my mom, and in turn have passed it on to my kids. Even though they only bloom for a few weeks in the spring, appreciating these fabulous flowers feels like true luxury.
How to Grow Sweet Potato Vines
In the past few years I have loved the look of sweet potato vines cascading over the rim and down the front of my garden raised beds and urns. I love the neon green, but there are also purple varieties.
This year I have decided to try to grow some "slips" (tiny plants that grow into vines) from actual sweet potatoes from the grocery store. They say it's easy. Here is the procedure:
1. Choose a sweet potato that has eyes on it.
2. Choose a jar that that has a mouth wide enough for the sweet potato to fit in with about a half-inch clearance around the sweet potato. (Or, at least one that portions of the sweet potato can fit in.)
3. If you decide to use the whole potato, stick 3 or 4 toothpicks in an east, west, north south position, horizontally in the center of the potato. Fill the jar almost to the top with water.
4. Put the potato in the jar with the toothpicks resting on the rim of the jar, and the bottom part of the potato submerged.
5. Put in on a counter or window sill that gets a lot of sunlight.
6. Pretty soon, 1-2 weeks you will see roots emerging and then green shoots appearing from the "eyes" of the potatoes, often from under the water.
7. Once they are about 4 inches long, carefully cut them from the potato and plant them either in your garden in loamy soil, or in a small pot with potting soil in it.

8. Just keep the small pots watered with plenty of sunlight. Then, when there is no more chance of frost, plant them outside in your garden or in pots.
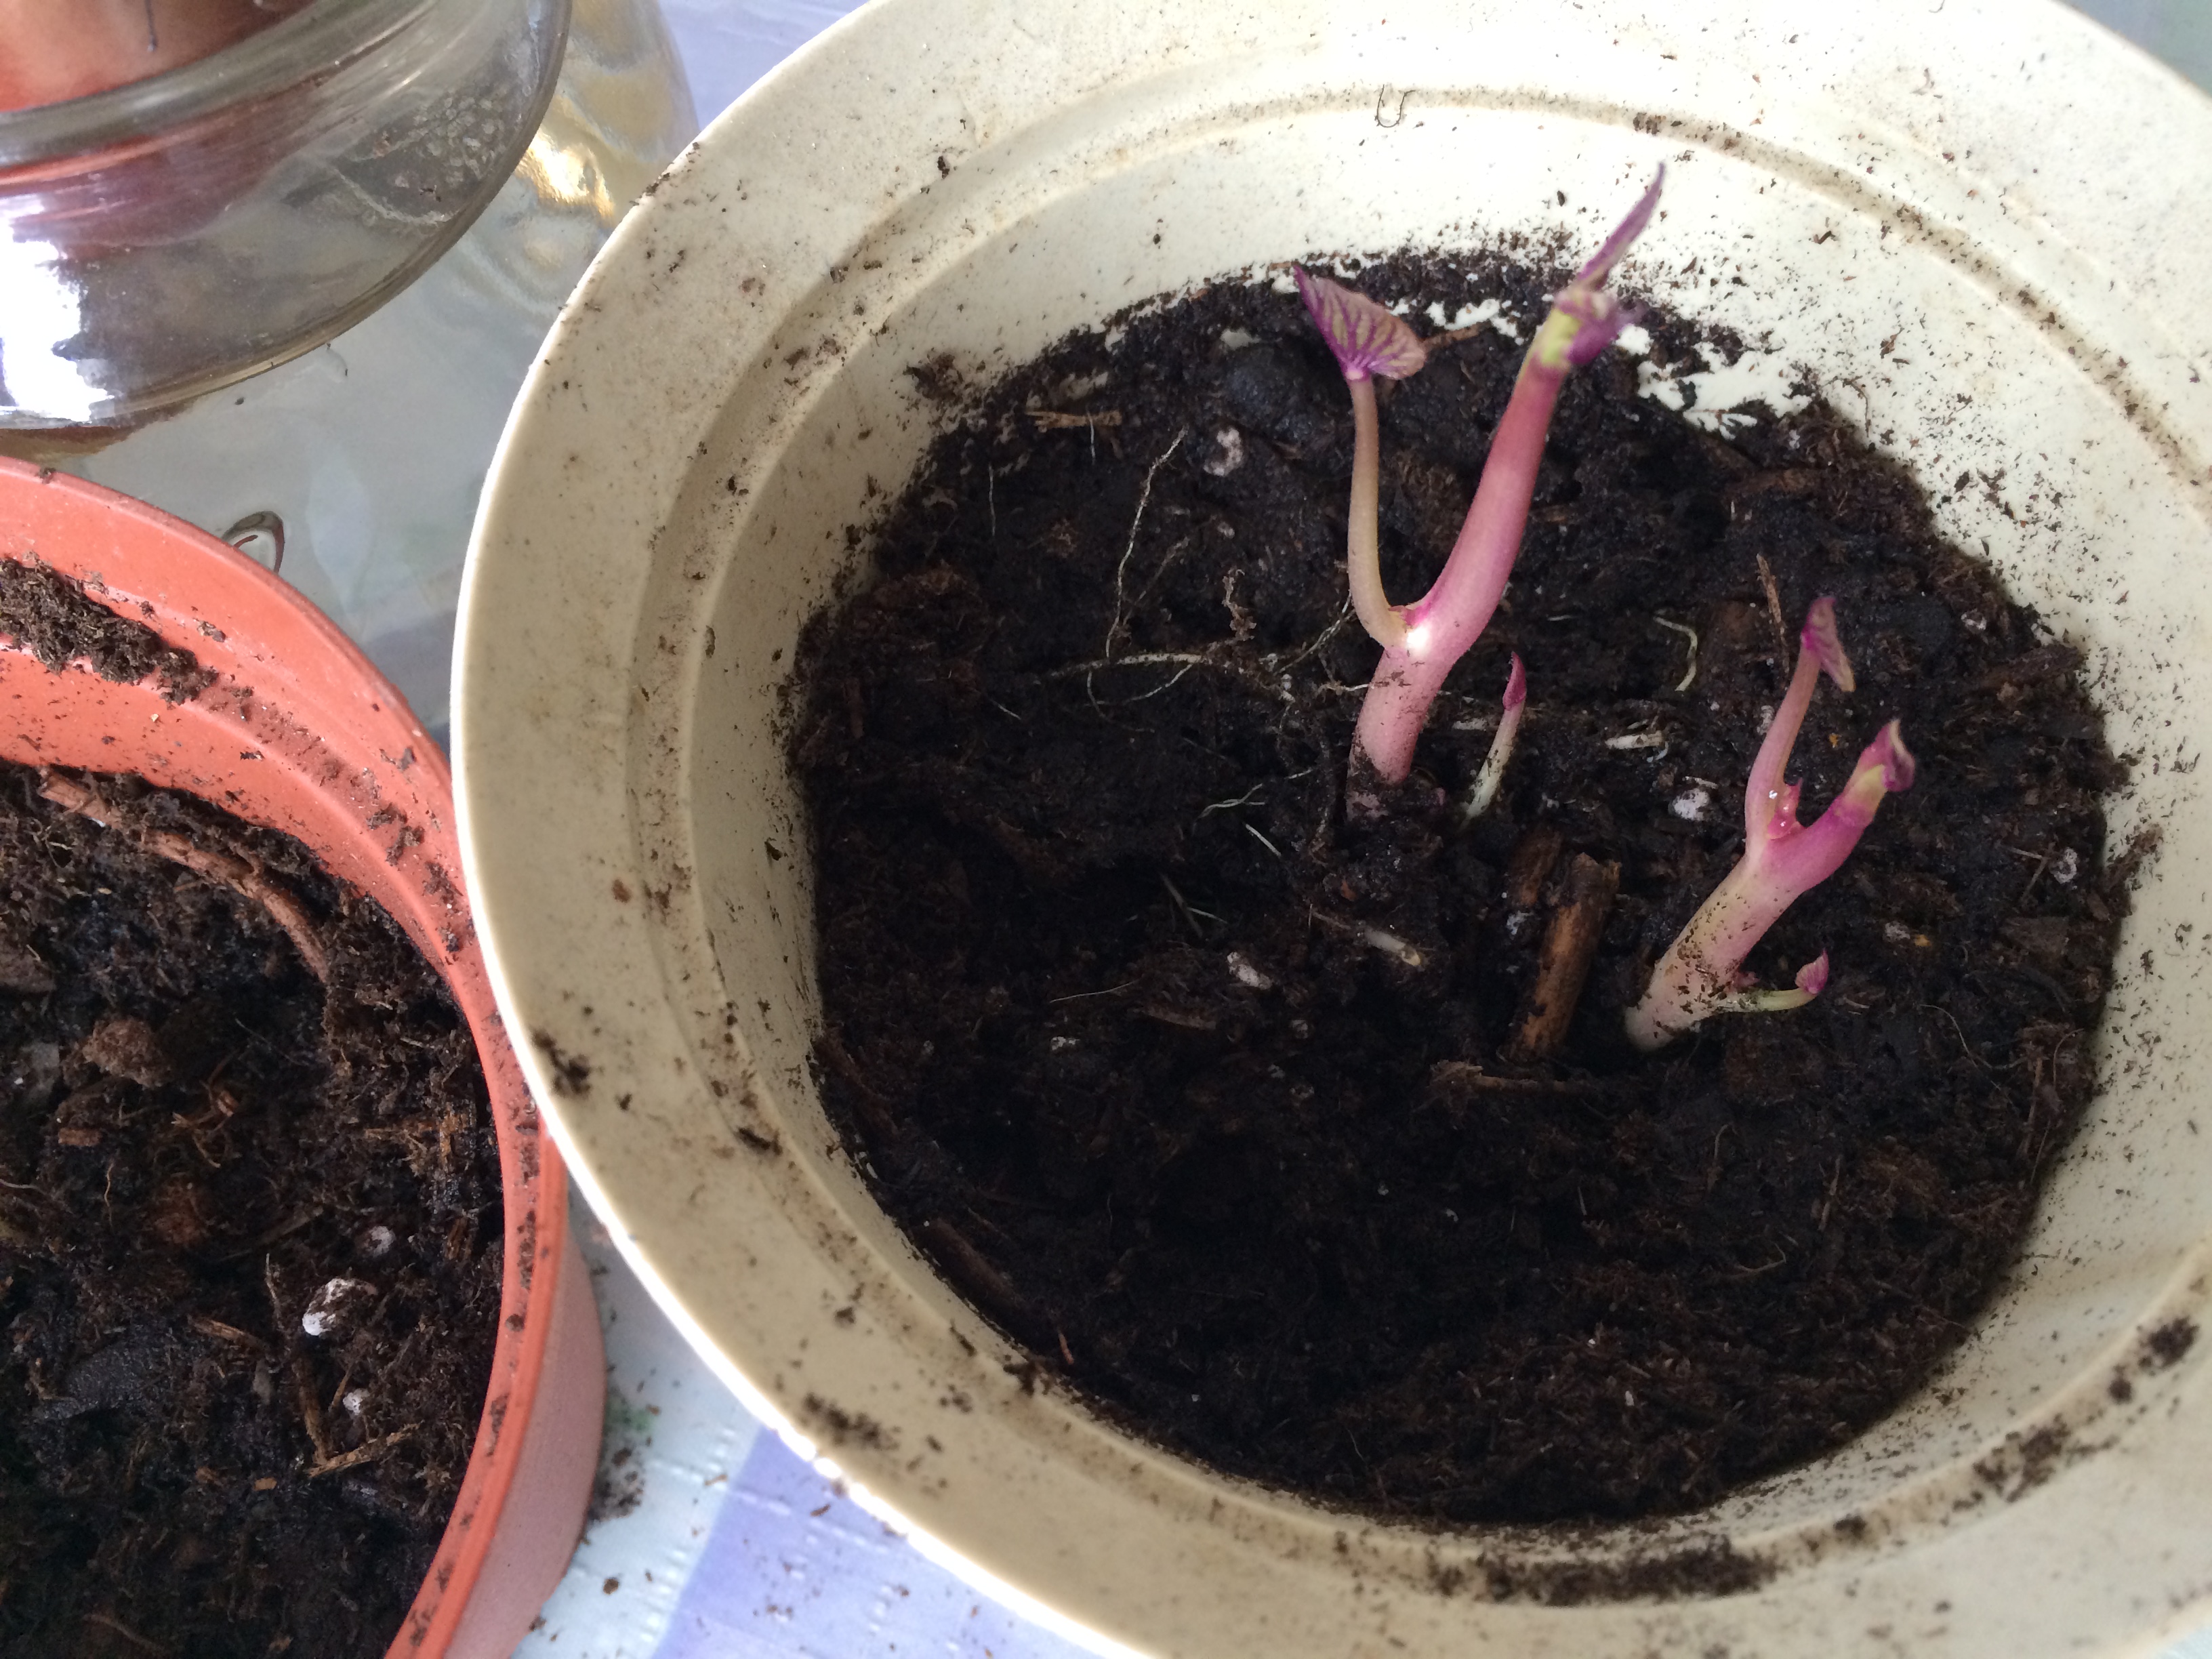
9. You can also cut the sweet potatoes into 2-4 pieces. Just adjust the toothpicks, so that an inch or so of the potato is submerged in the water.
The cool part is that you may not know which variety you will be growing. If you really want to control the variety, ask a representative in your garden center which variety is which. In less than a month, you should have lots of pretty vines to plant. All for about a dollar.
Seed Starting
It's that time again when we think, "What do we want to plant THIS year?" Some people keep year-to-year garden journals of what particular variety worked and what didn't. Our garden is fairly small, so I know which varieties that gave us complete satisfaction and which to avoid.
This year I'm going to plant several tomato plants. Last year we had plenty of cherry tomatoes, but could have used more slicers. And, the highly touted sauce variety we tried, San Marzano, was not very successful. And even though we bought most of our seeds from our neighborhood garden center, many varieties that we tried were not as successful as we would have hoped. We're not sure whether it was the seeds or the planter. We decided to be kind to ourselves and blame the seeds.
My husband swears by the Burpee Seed Co., so we're going to try the old stand-by again.
Seemingly ubiquitous wherever I shop, I easily bought some familiar Burpee varieties straight off the rack. However, I ordered a Burpee catalog online for us to peruse, to see whether there were varieties that were not included on the discount store racks. Turns out, Burpee Seed Co. has so many types of seeds that it's difficult to choose.
Here are the special seeds from the catalog that we decided upon:
Tomatoes
Slicers
Supertasty

Celebrity
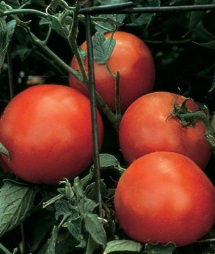
Cherry
Mighty Sweet
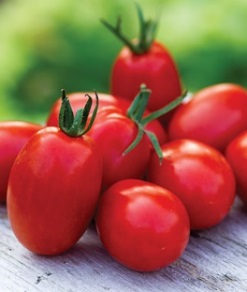
Cherry Punch
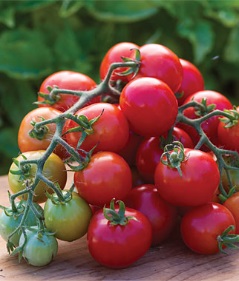
Super Sauce
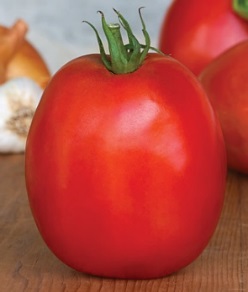
Honey Bun Melons
Cabernet Red Sweet Pepper

Illini Extra Sweet Corn
Pumpkins
Jack-Be-Little Variety Mini Harvest Blend
Rouge Vif d'Etampes Heirloom (scarlet)
Jack-o-Lantern

Straight 8 Cucumber
We are also planting Walla Walla Sweet Onion plants, green onions, dill, basil, marjoram, jalapeno peppers, sweet peas, and two varieties of zinnias.
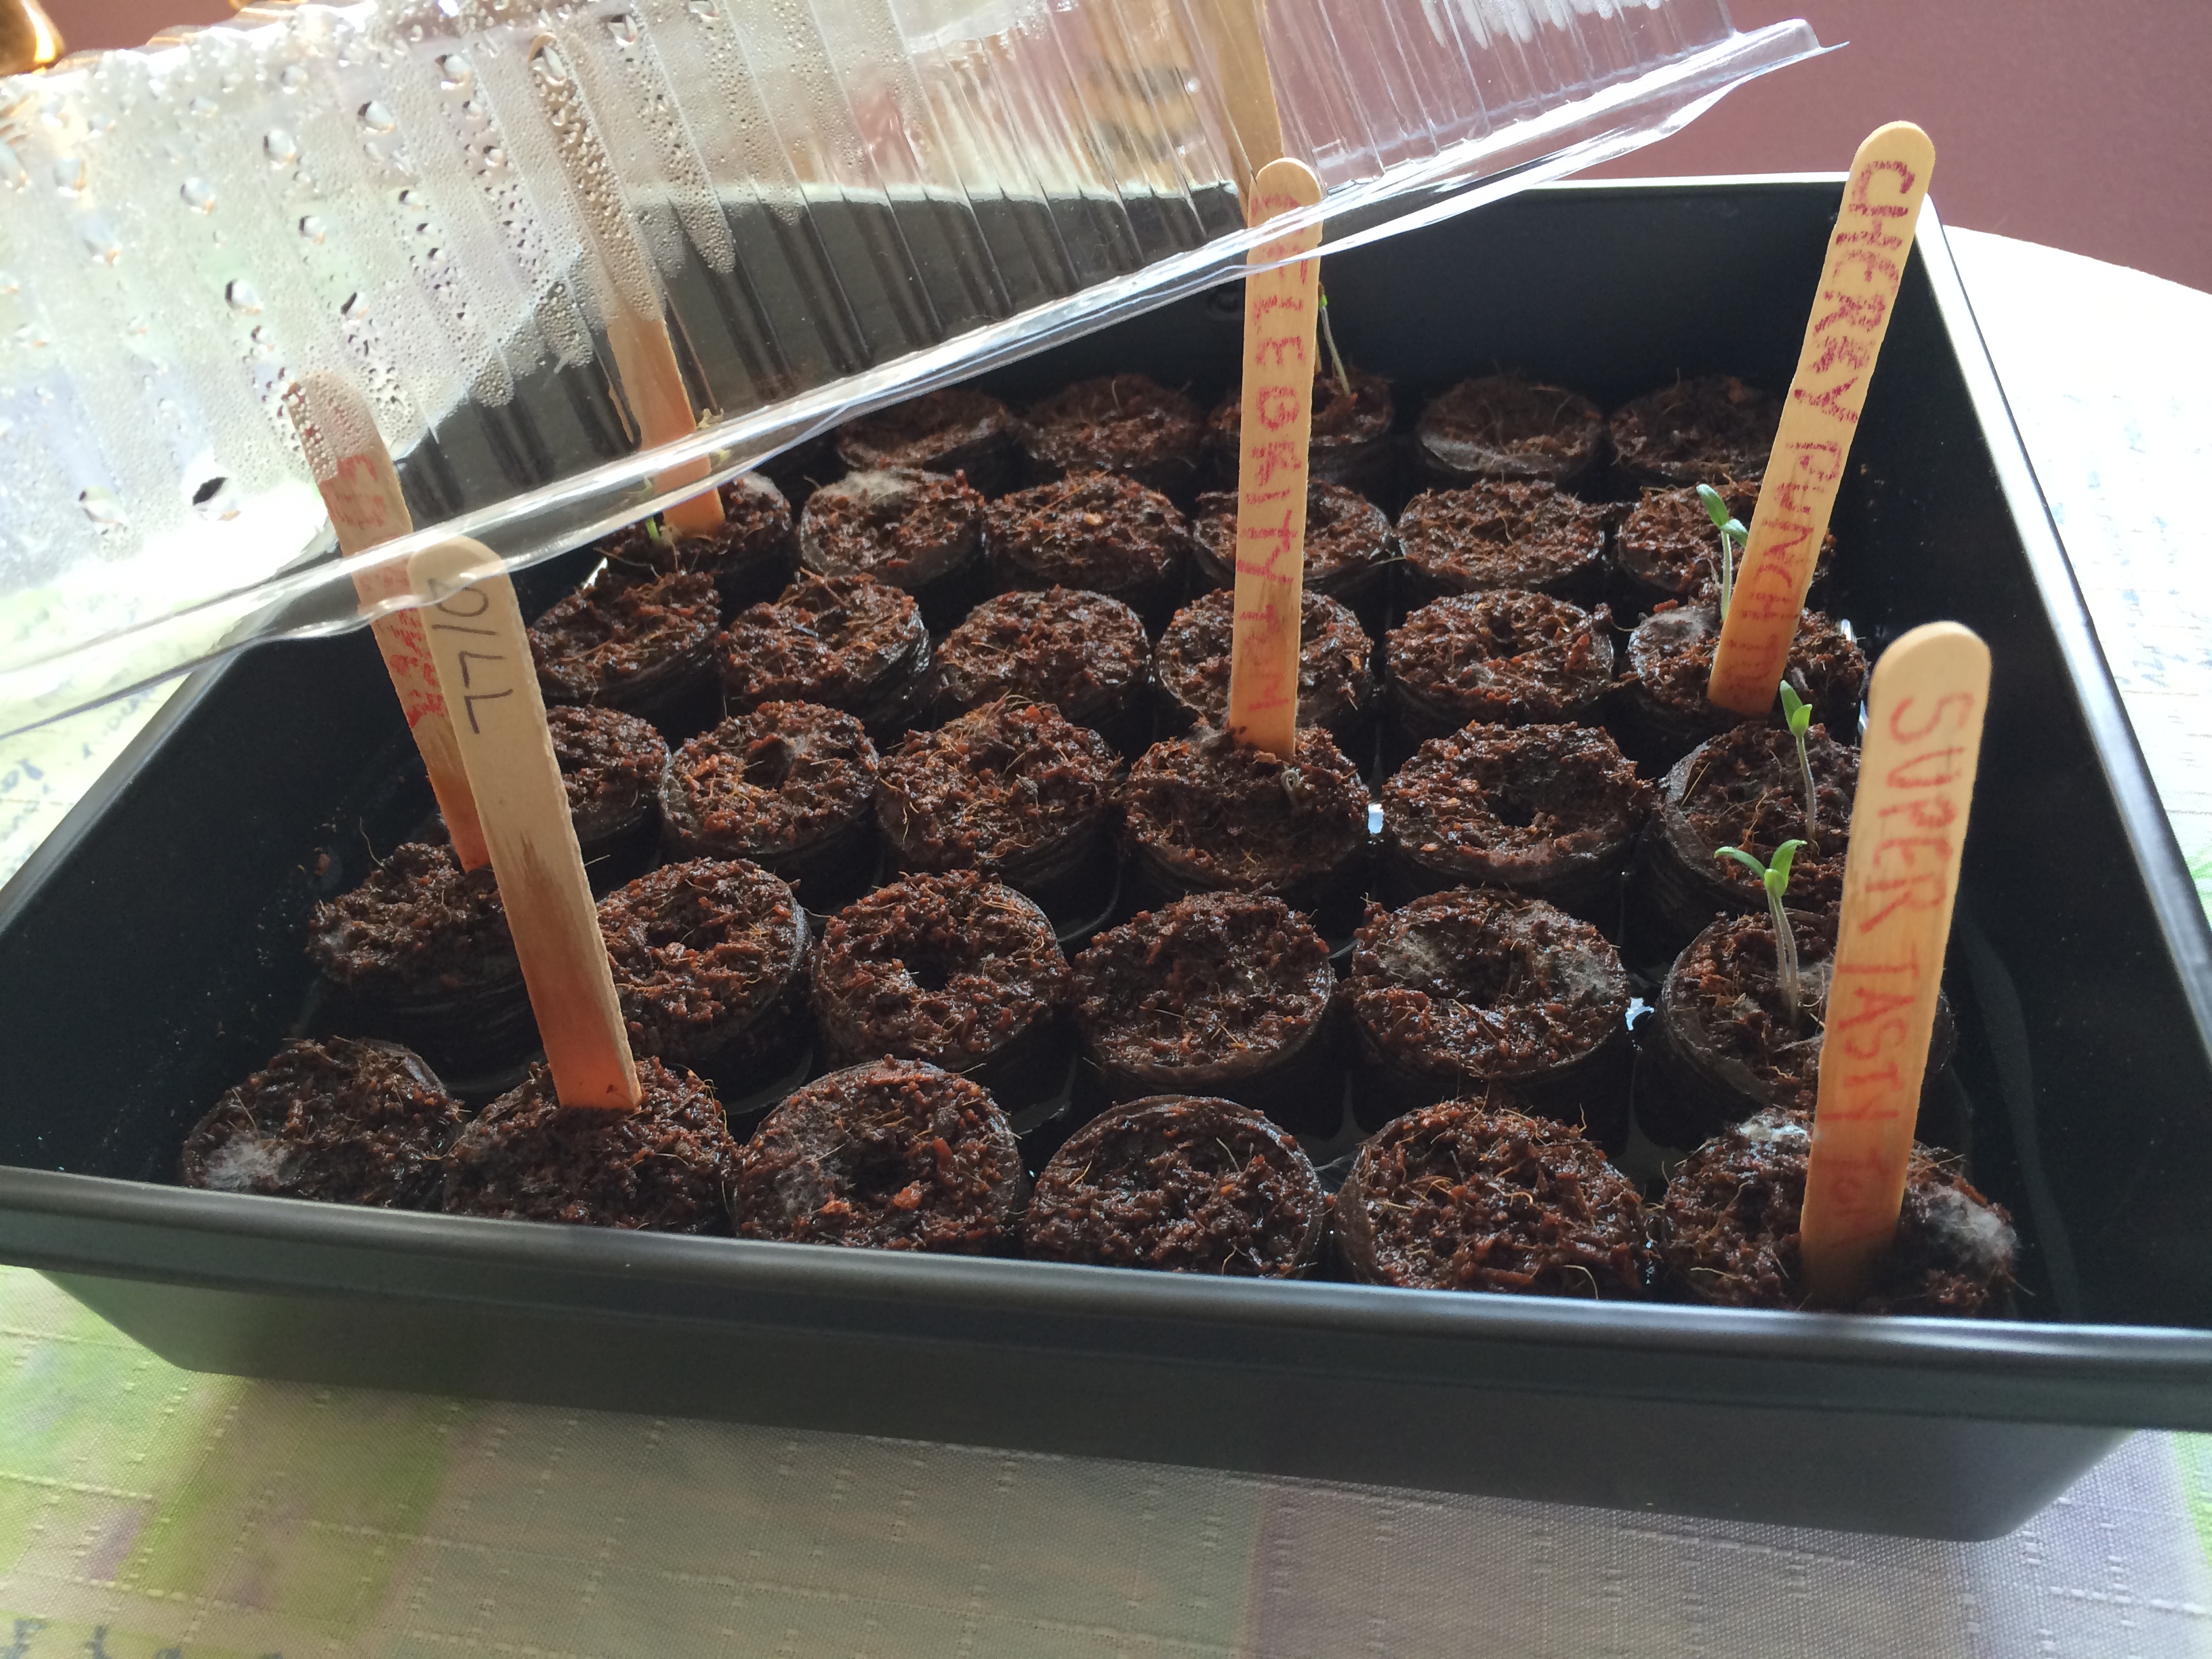 We are trying a new method for starting seeds. Usually I'm worried that these little "cells" are too small, that the plants will quickly outgrow them before the threat of frost is gone. But in this case, I feel like I can just lift them out when they look root-bound, add potting soil to the tray, and "plant" them in more soil. That way they can remain under the grow light while I wait for early or mid-May.
While I wait for (the rest of!) the seeds to sprout, I decided to add steer manure to our raised beds to "beef up" the nutrients in the soil. After spreading the soil over the surface, I just turned it over with a shovel. Since our soil is pretty loose, it didn't take long. (The loose soil was due to the bale of sphagnum moss we turned into the soil last year.)
Now, it's the waiting game. I'll keep you posted about which varieties work well. It's really hard to wait...
Here is the Burpee Seed Web site: http://www.burpee.com/
-flower and vegetable photos courtesy of www.burpee.com.
Beautiful Baby Boy Shower

Jeni's "Ready To Pop" Party
Jeni's sister, Brooke, and I decided to throw Jeni and her much-anticipated baby boy, Logan, a fun, fabulous fete, just a couple weeks before her due date. (In this busy world, that was the only weekend that would work for the 20 or so guests.) Jeni's mom, the very creative Debi, selected the very true theme.
Super Fun and Delicious Snacks
Cake Pops
Instead of a cake, Debi made these adorable cake pops, keeping true to the theme.

Find the recipe here
Caramel "Pop"corn

Another cute snack is caramel "pop"corn in their little popcorn boxes. Guests were able to grab their own personal box and munch happily. We found the boxes at www.shindigz.com
Then, since the caramel corn is made with butter, I lined each box with parchment paper to avoid oily stains.
Find the recipe for this addictive caramel corn here
Watermelon Baby Carriage
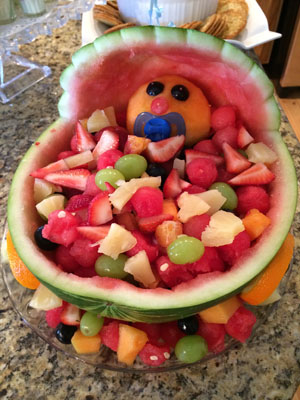
Fill it with your favorite variety of fruit!

Incorporate other healthy choices by assembling crudites over a "shot" of salad dressing in shot glasses.
Amazing Artichoke Dip

And one more not so healthy, but delicious appetizer we offered was our favorite Amazing Artichoke Dip. Find the recipe here
Decorations and Favors
Super Cute Diaper Cake

Really cute cake made out of diapers! Debi made this easily with one pack of 50 diapers. She stuck in cute footie lollipops she found at www.shindigz.com
Favors

I made these sweet boo boo bunnies as favors for our guests to take home! And of course we encouraged the guests to enjoy the sweet footie lollipops.
Gift Idea
For Baby Logan I reached into a sweet memory of my own son's first word. I decided to make a duck blankie for Logan to cuddle.
Duck Blankie

Is That a Pussy Willow Basket?!
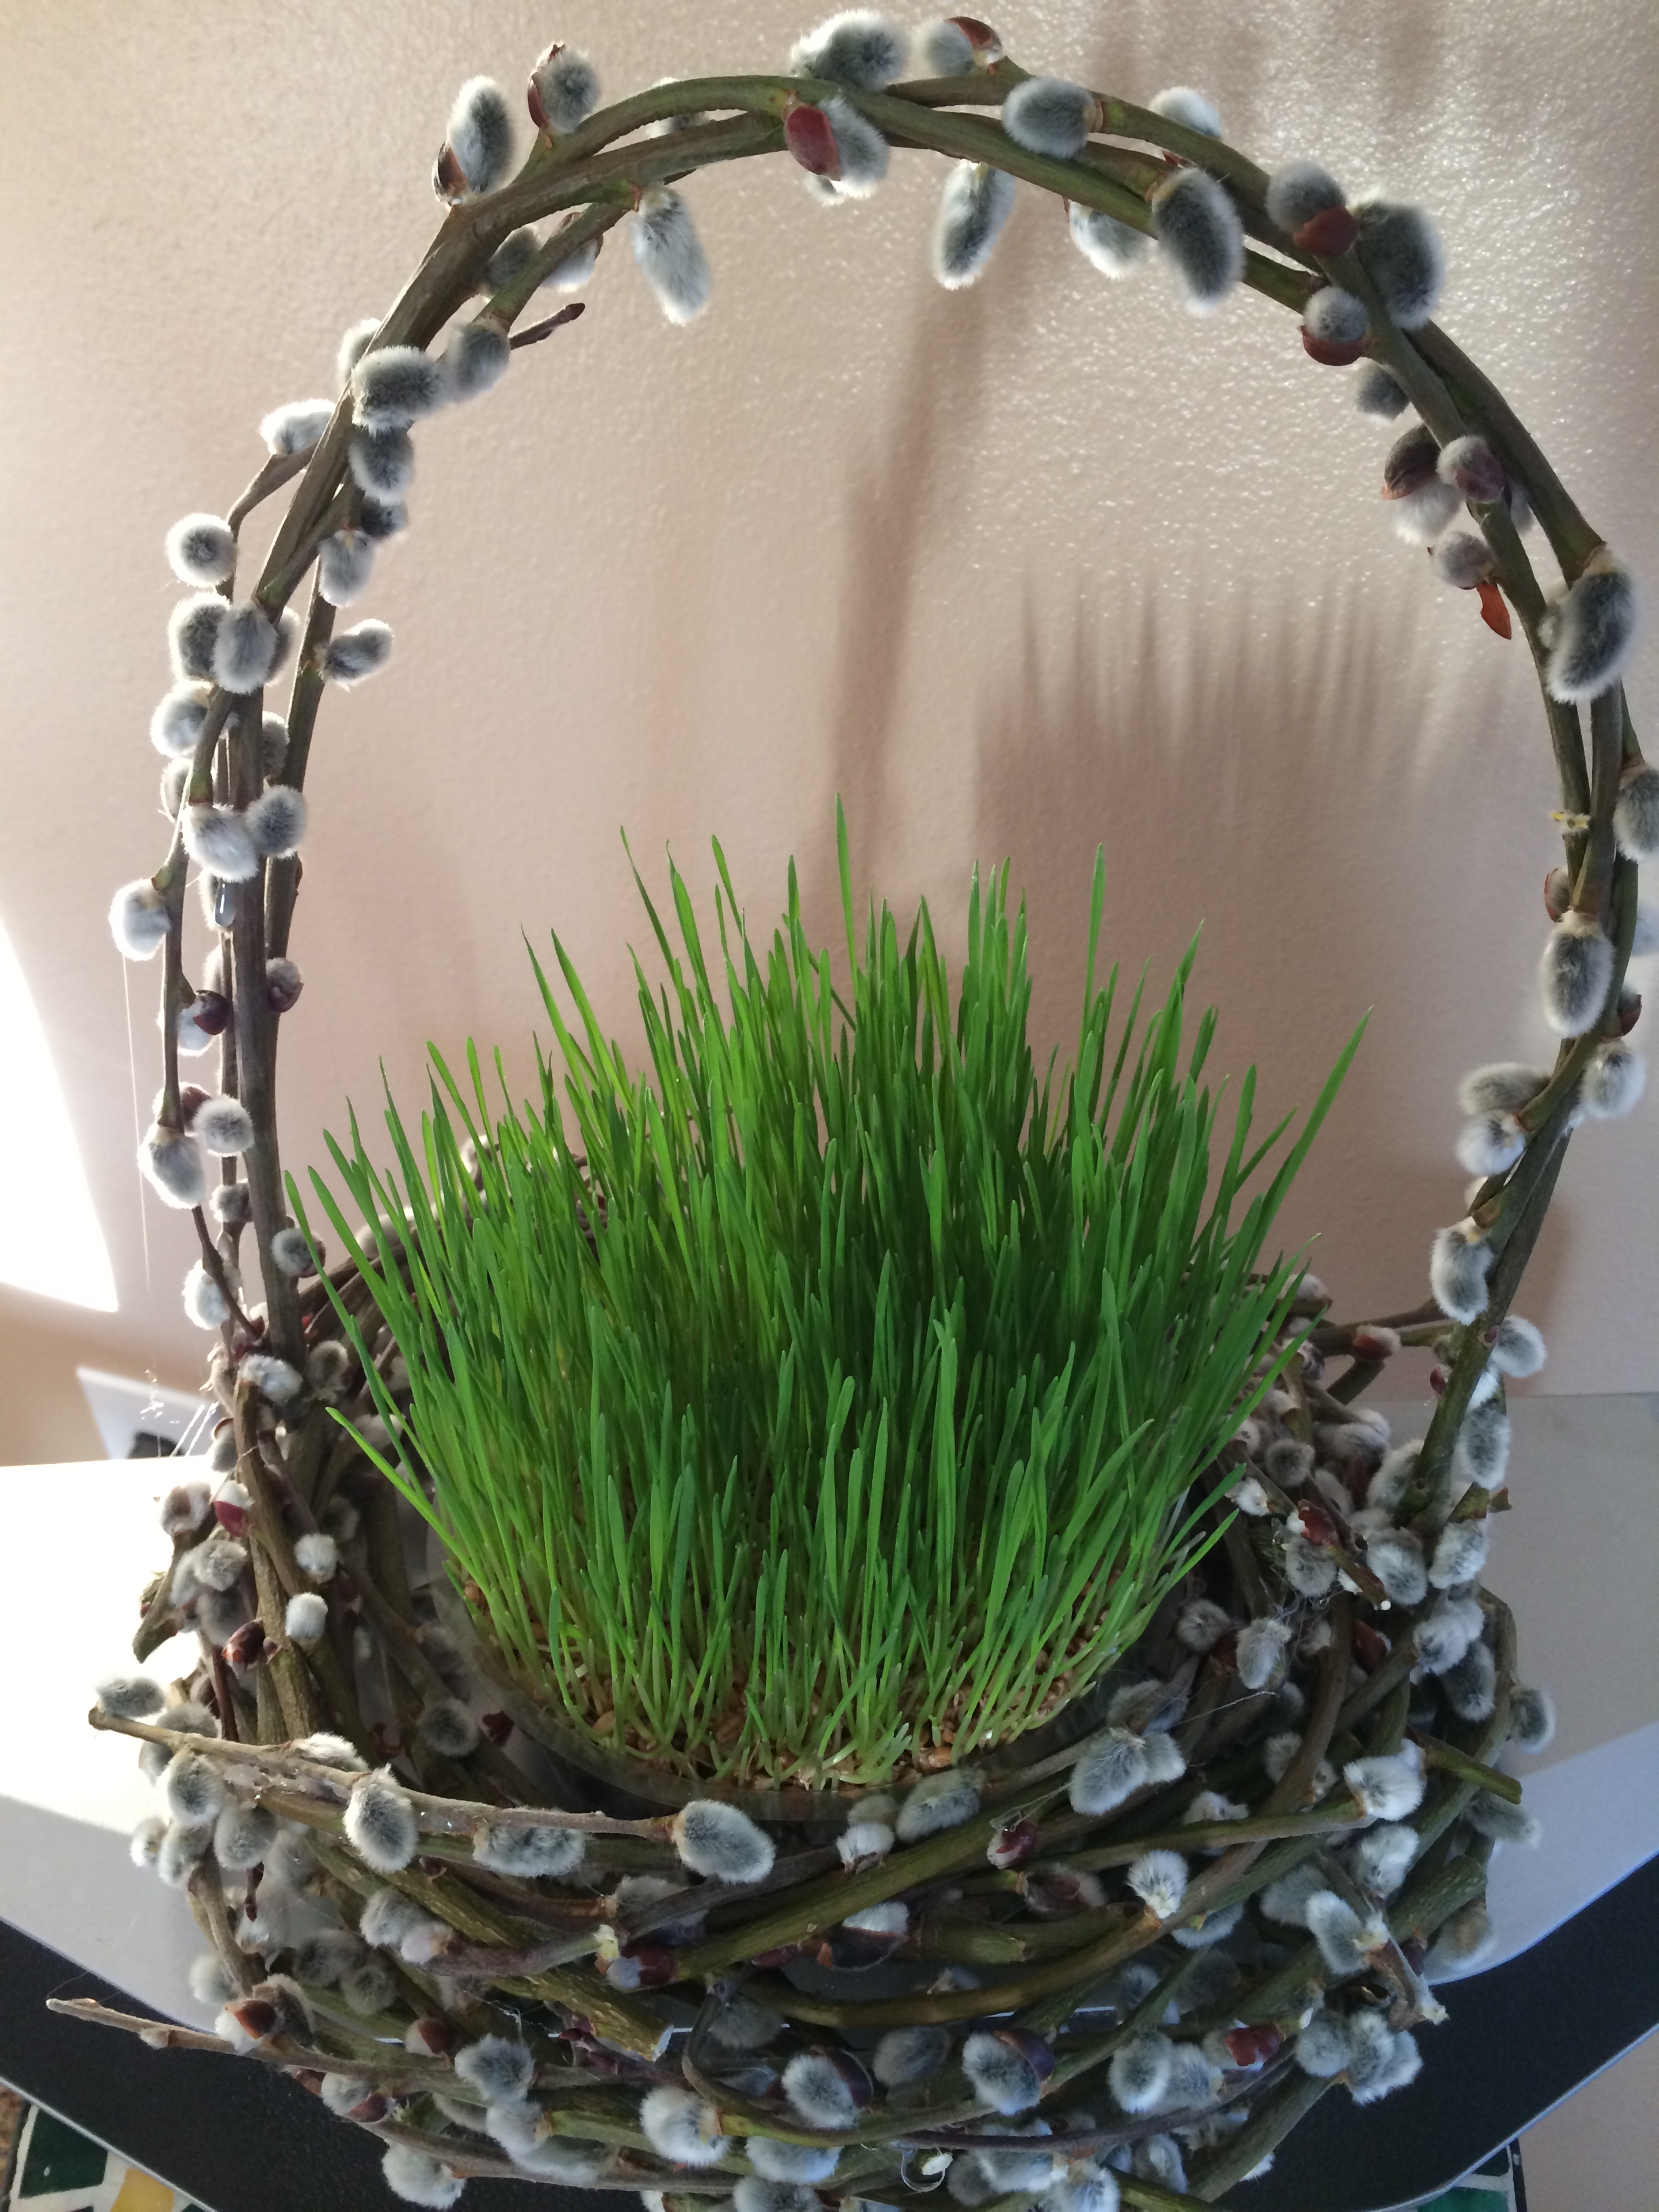
It sure is! I used the same techniques found here http://lovetohelpyou.com/HomeGardenPage.html#wreath to make this springy Easter basket.
This time I made two wreaths and set them on top of each other in order to make the basket deeper. Then, I took a long pussy willow branch and wound it around both, tucking the ends in among the other branches that make up the wreath. I repeated the process to make sure the basket was very secure.
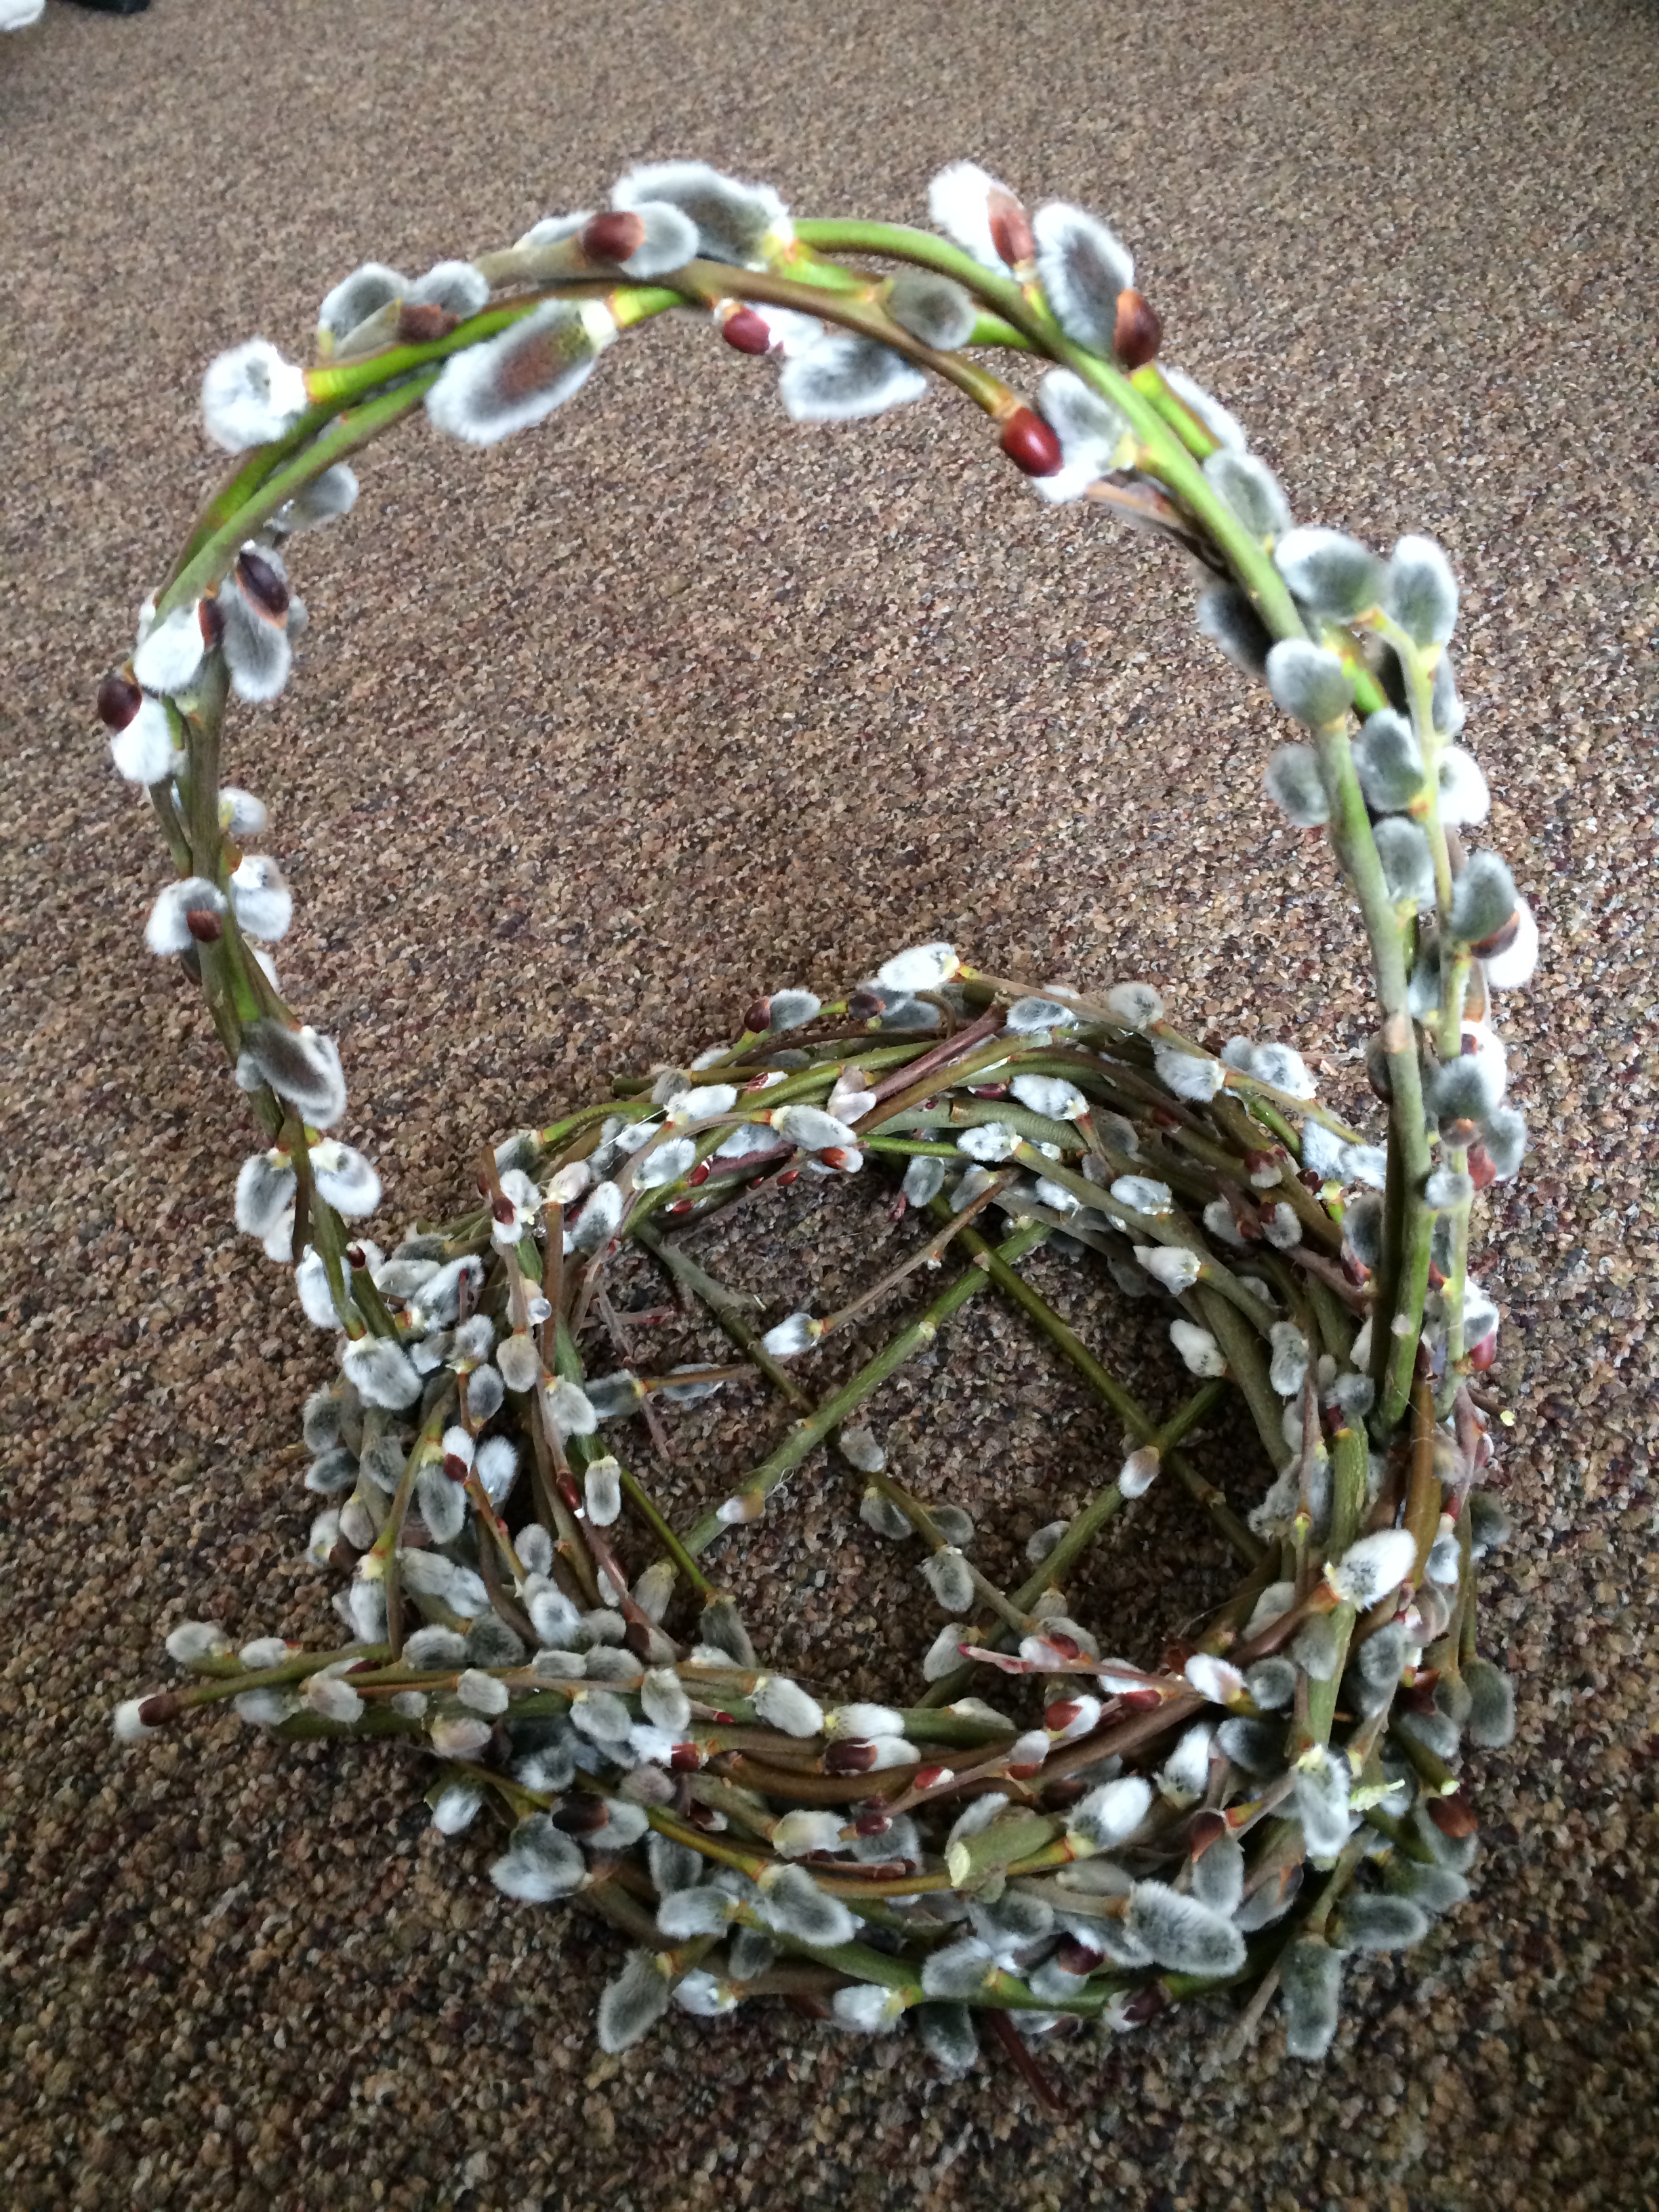
For the bottom, I cut 6 branches that were the same diameter as the basket. Then, I stuck 3 of them between the bottom 2 branches of the basket. With 3 more, I wove them over and under the first 3, making a basket weave pattern. This holds the plastic liner that I planted my wheatgrass seeds in.
For the handle, I cut 3 branches about 18 inches long. I stuck the first one down among the finished basket branches, all the way to the bottom. Carefully, I bent the branch over and stuck the other end down to the bottom of the opposite side.
With the subsequent branches, I stuck the first end in right next to the first handle branch. Then, I wound the second branch around the first branch before sticking it among the branches of the finished backet. I repeated this process with the last branch, making a substantial handle.
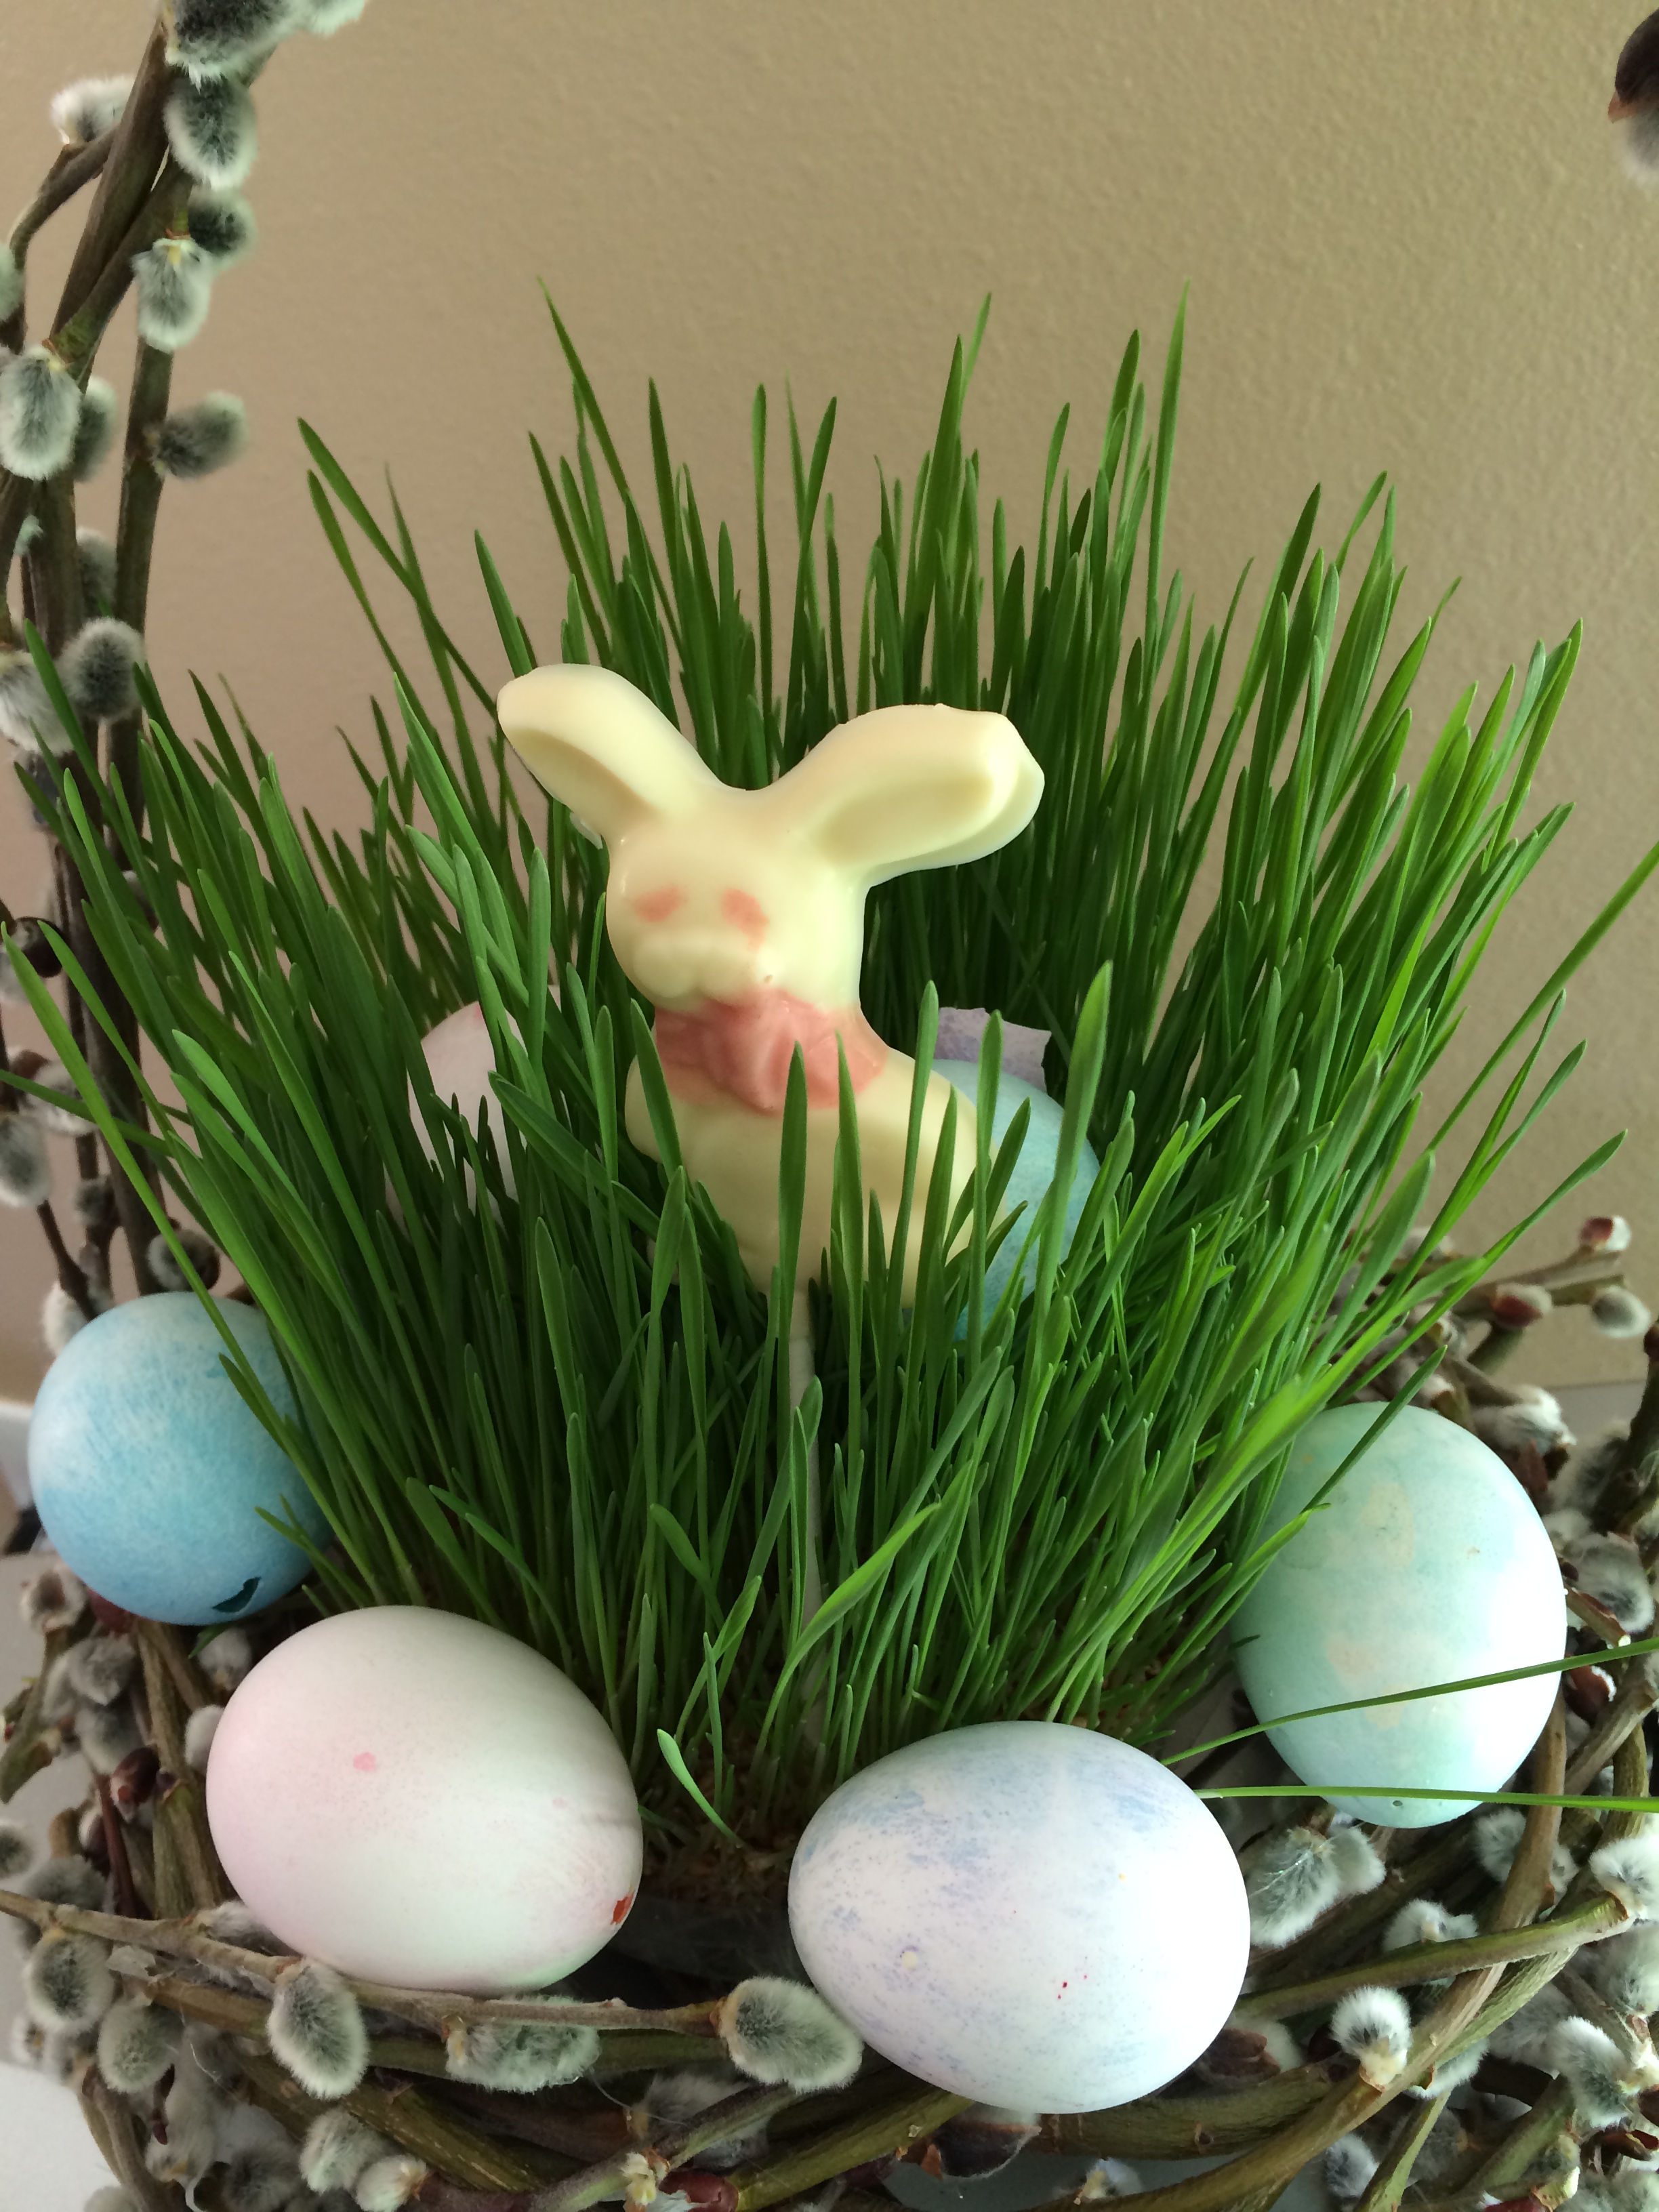 I created this basket from the generosity of my neighbor, Shirley, who gave me the pussy willow branches that they pruned from their bush. Use this basket to delight all the Easter bunnies you come across!
Plant in the Spring for Stargazing in the Summer

Don't you just love these lilies? These are called "Stargazers" and have the most intoxicating scent. If you would like to grow these beauties, now is the time to look for lily bulbs in your local garden center to plant for gorgeous blooms in the summer.

Unlike tulips, crocus, hyacinth or daffodils that need cold overwintering to bloom in the spring, lilies and other summer blooming bulb-type flowers should be planted in the spring as soon as you can dig in the thawed ground.
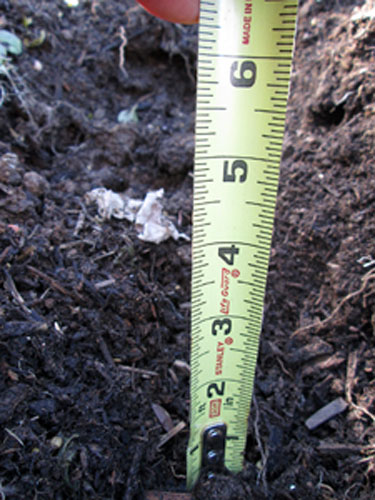
When you plant, refer to the guide to make sure you are planting the bulb at the correct depth. The pointed part of the bulb should point up. The root part should nestle in some nutrient-rich soil. After you plant your bulbs, water the area thoroughly. Mark the spot where you plant your bulbs, so that you'll be sure to watch for their emergence.
New Raised Garden Beds
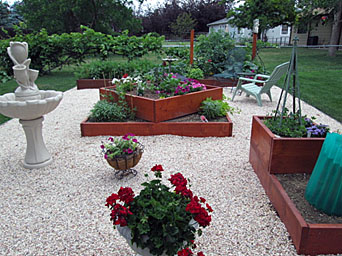
When we decided to revamp our backyard, we knew it would be in stages. This year we decided to tackle some new and different raised beds: one for flowers and one for herbs.
Not completely enamored with the treated wood we used last year (it curled!), we decided to use fir and stain it with protective redwood stain. (We wanted real redwood, but it wasn't available.)
Since we were positioning the finished boxes on poly tarps, we felt that the boxes may not disintegrate as easily as they might if they were placed right on top of soil. We decided to make this box the same size as the two we made last year, but with a pronounced difference: we wanted another box on top turned sideways to form a diamond shape.
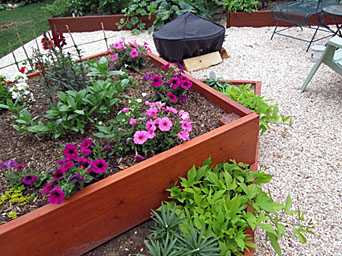
In order to avoid the pitfalls we experienced, I recommend positioning the boards on top of the existing box, measure them and THEN cut them. In addition, fasten them as you go. For these boxes, we reinforced the corners by screwing a slightly shorter (about one inch shorter) 4x4 inch post on the inside of each corner, three screws down each side. Hopefully, this will counteract any future wood curling.
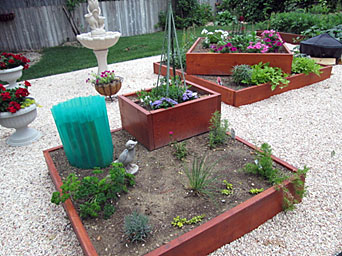
And what happened to our first attempt? We didn't waste the box that didn't fit. Why cry about a miscue? Just plant an herb garden! Then, use the left-over boards and create more interest on top of the herb garden. A garden pyramid is just the ticket for the Sweet Peas to twine up.
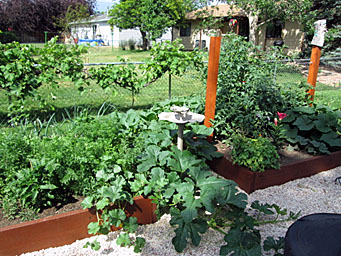
We still planted last year's beds with vegetables. Paying attention to sound advice, we rotated our crops, so that the soil would feed them properly. My sweet husband also built a tomato "cage" with posts, coated wire and eyelets, to tie our stout tomato plants to. Early in the season he also applied timed-release Scott's Osmocote fertilizer. Learn more about this fantastic plant food here: http://www.osmocotegarden.com/
It's been fun playing in our garden. Our spinach is trying to make sure that we get all of our superfood benefit by sprouting leaves daily. Carrots and cucumbers have found their way to our table, too, so far. We can hardly wait for tomatoes, green onions, onions, peppers, cantaloupe, pumpkins, and butternut squash. Our harvest will truly make it all worth it.
Valentine Heart Wreaths
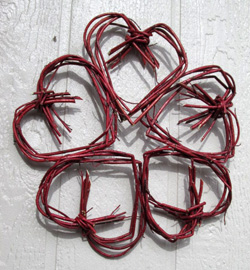
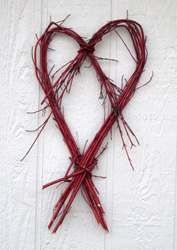 Everyone longs for a bit of spring in the dead of winter. Try making these whimsical heart wreaths, fashioned out of dormant red twig dogwood, to give your own heart a smile.
Cut 10 twigs about 4 feet long; two of these should be very thin. Take four twigs and entwine them, much like braiding. Do the same thing with four more. Put the two bundles together and take one thin twig and wind it around the bundles in and out, securing the twig so that it won't unravel. Bend the tops down to form a heart. Wind the other twig around the place where the bundles intersect, securing them together. With twist ties or binder clips, secure the top twigs to the sides. Leave them there until the twigs dry out, about 3 or 4 days. In addition, put them on a flat surface and then put a large book on the top part of the wreath until it dries. After the wreath dries, remove the clips or twist ties. For more security wind a piece of thin wire around the top and then fashion a hook to hang the wreath from.
Rose Pillow

Make it for $9, as seen in shops for $50
Get the Pillow Pattern for just $2!
Hurry Up Harvest
 Remember when your English teacher told you to pay attention? Turns out even though he annoyed you, he was right; it's a valuable skill when applied to everyday life. Yesterday I happened to perk up when I heard that in a couple days the high would be 36 degrees. What? The 83 degrees recorded on my car's outside thermometer right then made that temperature in the near future unbelievable. Unless you live in Colorado.
Here in Colorado it's common to experience all four seasons in one day. The old adage, "if you don't like the weather, wait an hour" can be true in Colorado. In the fall it's pretty cool in the morning (in the 30s or 40s), but often the temp soars to the eighties by the afternoon. Sometimes a cold front roars in and it actually snows. By the next day our sweet, intense sunshine melts the crazy white stuff, allowing us to go about our business easily. And, we may not have that quirky snow again for another two months, extending our savory, multi-hued autumn. I actually really like the unpredictability, having grown up in the November-March unrelenting, unsympathetic, gray skies of the MIdwest. However, it means that people have to be flexible and pay attention, especially if they have gardens.
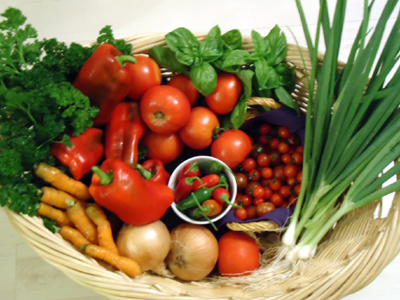
Because even though the early snow melts, the temperature has still plummeted below freezing. Enough to stiffen unsuspecting produce and flowers. So, today I ran out and picked all of the tomatoes, cherry tomatoes, red bell peppers, jalapeno peppers, scallions, parsley and basil before they got nipped by Jack.
In addition, we will drape the plants with sheets and blankets to protect them from the one night freeze, but at least I picked what was ripe.
I know you were wondering whether we were successful at our first attempt at raised bed gardening, so I assembled this one day harvest for your viewing pleasure.
Well, we can't. So, as a result, our neighbors really love our garden as well.
Isn't sharing what makes life worthwhile?
Clematis Love
 I can't express to you how much pleasure I experience gazing out at the gorgeous Jackmanii and Niobe clematis vines that twine up our arbor.
In the spring, several varieties of clematis vines are available from your local garden center. They look anemic--most of the time just a spindly vine in a one-gallon container. But don't worry; not only do they come back every year, they just get fuller and more robust.
Autumn is the time to cut the vines. Ruthlessly.
 I cut them almost down to the ground, leaving about two-three inches of the vines sticking out of the ground. It seems like such a harsh thing to do, but don't worry. They always come back just as robust in the spring, flowering in June and July.
We tend to leave the vines on the arbor over the winter. This offers shelter from the nip for the sweet finches and chickadees who visit the bird feeder. In March we haul the dried vines away as part of our spring cleanup.

Note: Throughout the season we feed the fledgling and then vigorous vines with Miracle Gro fertilizer, using the all-purpose first and then the Bloom Booster when the flowers start to emerge.
So, if you are looking to plant a clematis, and think that the spindly vine you see at the garden shop isn't worth it, just look at how it will flourish. You won't regret it.
Gettin' Back in the Swing
 As the kids go back to school, why don't we all treat this time of year as "back to school" time? OK, it doesn't have to mean taking a class. But why don't we all gear up to take on that project that we have been setting aside in favor of lazy (or not so lazy) summertime pursuits. Here are some ideas to get you going:
-Christmas is coming (have you seen the displays in the stores already?) Plan on making a special homemade gift and buy the items needed to get started. Maybe a fluffy throw pillow for your sister?
-Finally start that story (or memoirs) you have been meaning to write. School supplies are cheap right now-paper, pens, flash drives-anything you might need to get started. And, this lovely time of year is deliciously inspiring.
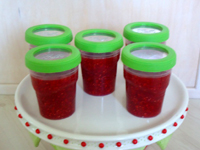
-Make a batch of jam, either regular or freezer jam (that tastes fresher!). These can be gifts as well (unless you eat all of the jam first!). Click Here for Freshy Fresh Raspberry Jam!
-Organize your summer photos into albums. Make a photo book for Grandma. Or, fashion a custom calendar showcasing your family in each month for Grandpa.
 -Move the furniture around for a fresh look.
-Buy local and utilize Farmer's Market bounty and make Grilled Corn Nachos for the big game.
-Plan a day trip to go and revel in the fall colors, complete with a picnic and the promise of ice cream cones on the way home. It will give you (and your family) something to look forward to.
-Clip some flowers and foliage from your yard. Experiment with blooms that may not be traditional. Arrange them in a cute vase for a sweet smile for your soul.
Whatever you do, treat it like a school project. Plan it, organize your materials and set a due date. That way you will stay on track and feel a sense of accomplishment when you "turn in" that "A" project.
Pictured: petunias, geraniums, penstimon, thyme and creeping jenny
Ready, Set, Paint
 It was bugging me. For some reason, I had not taken the time to paint my guest bathroom this summer. The paint was patiently waiting; I had already chosen the color and bought it months ago. So finally, I saw a window of time that would allow my impatient self the time to do a good job. I was ready.
The first task was to remove the wall mirror. I Googled how to do it correctly and efficiently. Since the mirror was fastened to the wall with metal clips, all I had to do was (get my husband ) to take a scrap piece of wood, hold it just under the clip and gently tap the piece of wood gently upward with a mallet or hammer. I held it while we tilted the mirror forward and carefully lifted it out of the bottom clips.
Then I took a Phillips screwdriver to remove the screws from the clips. (We decided that the mirror was too old and needed to be replaced. So, once the clips were removed we could spackle the wall before we painted.) Uh-oh. There were screw anchors in the drywall. These appeared to be simple ones, not the butterfly ones that open up on the other side of the drywall. So once again, I Googled the best method of removing the anchors. Here it is:
Screw the original screw back into the anchor a couple turns. With a mallet, tap the screw gently a couple times. That will loosen its grip on the drywall. With pliers or Channel Locks, grip the screw and pull the anchor straight out. Only a small hole remains to be patched. Thanks, Google!
We also thought it would be beneficial to take the door off of its hinges, so that it would be out of the way and so that I would not have to cover it.
Ok. Now I started to remove all of the cover plates, vent covers and towel bars. Then the taping started. I had already caulked the gaps between the baseboards and the wall. That makes it so much easier to make a clean paint line. In addition it is really worth it to use good blue painter's tape like Scotch or green tape like Frog. It will make cleanup a breeze.
 Since this is a small three-quarter bathroom, I bought two 0.7 mil plastic drop cloths for a little over a dollar each at Wal-Mart. I cut one cloth about two-thirds the length and stuck it to the tape at the top of the shower. I draped the rest over the shower door.
The second cloth I cut into three pieces: one to cover the floor, one to cover the lavatory and one to cover the toilet. I taped the last one around the toilet so that it would be easy to paint around it. I stuck the other two to the tape on the baseboards and the sides and top of the lavatory. I was now ready to paint. Phew!
Once I assembled my tools, I was ready to paint:
plastic gloves
screwdriver to open the paint can
trim brush
paint pad (This is fantastic!)
roller
paint tray with removable plastic liner
wooden stir stick
rag to clean up drips
Semi-gloss paint for easy cleanup
 My genius daughter, Natalie, turned me on to the magnificent paint pad with the small wheels on the edge to facilitate movement. Simply load the paint on to the pad and effortlessly slide it along edges. It covers incredibly well. Once the edges are done, roll the rest. Use the small trim brush for places too small for either the pad or the roller to reach. Also, go ahead and paint the ceiling. Much easier and why not?
In about a third of the time it took me to prepare to paint I was finished! I did not wait too long to carefully remove the tape and the drop cloths. That way I could wipe any drips rather than trying to chip off dried color that I did not want. Turns out I only had just a couple drips. Score! Satisfaction is a job well done.

Mid-Season Garden Satisfaction
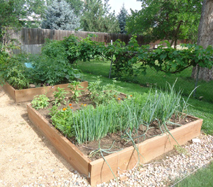 I promised that we would keep you updated concerning our raised bed garden project. The photo shows how lush every plant has grown. So far we have harvested enough spinach for our own use and two of our neighbors. All from one row!
The onions are almost ready for me to push the stalks over. That way the onion bulbs continue to grow underground, because of course that is what we want. I will wait until they almost start to flower, and then bend the stalks over, right at ground level. Do not be afraid to crush them a little. As the stalks start to shrivel, the energy for growth transfers to the bulb. It will take about another month for the onions to grow to the correct size. Deliciously sweet Walla-Wallas!
 Verdant tomato plants are gorgeous, promising a bounty of fruit. This year we planted one Black Cherry tomato plant that we purchased and both Ace and Sweet 100 from seeds that we started inside. All of these are our favorite varieties. So far the plants are sturdy and full of blooms. My experienced gardener sister, Evy, counseled me to prune some interior branches so that more energy goes to producing fruit. Also, this Black Cherry tomato plant has grown larger than the cage that was supposed to contain it. In order to keep the branches from swinging low and lying on the ground, I took an old pair of pantyhose and wrapped it around the whole plant. I secured it to the tomato cage. The nylon is flexible, so it won't harm the plant. There are many little green tomatoes on the branches, hoping to turn a rich burgundy. It has been really difficult to wait!
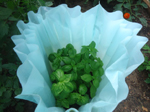 The basil has thrived inside the Wall of Water plastic sleeve. I will leave it in the Wall of Water, protecting it from wind, hail and cool nighttime temperatures. It has produced enough for gifts as well.
It has been a blast experimenting; look for our harvest in about a month!
Peonies
I always wish that my peonies would keep blooming all summer with their luscious, silky soft, giant orbs of joy.
 Its name comes from a Paean (Paeon), a student of Asclepius, who was the Greek god of medicine and healing. After Asclepius grew jealous and full of revenge because Paean possessed an herb more powerful than he had, Zeus took pity on Paean and turned him into a beautiful flower forever known as a peony. The idea that Paean is immortal comes from the fact that after the blooms fade, the foliage stays bright and green until the frost.
Once someone told me that the peony flower buds would not bloom unless ants were allowed to climb up the stalks and eat the sticky substance off of the buds. I have found that to be incorrect. My peonies bloom just fine without the help of ants. However, ants do love them. So, if you don't want a colony of ants crawling around on your table after you've brought a bouquet of peonies inside, try the following method: immerse the blooms under cold water for a couple minutes and the ants will come scurrying out from deep inside the petals. This method works for earwigs in dahlias as well.

Drying Peonies
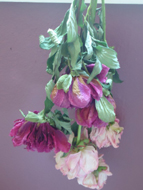 I can't bear to lose all of my peonies, so each year I cut some at the peak of their bloom, bundle them and hang them upside to dry. The pink ones mellow into a Victorian dusty rose color and the fuscia ones into a deep plum. They last a long time in a dried flower arrangement, but try not to bump them. The petals will shatter off of the stems if treated roughly. You can try spraying hairspray on the back of the blooms to help to seal the petals on the stem.
Enjoy a myriad of peony hues year- round from the moment they pop with their sweet fragrance in your garden through to the gorgeous preserved beauty.

New Baby Bunny Blankie
It's a tradition for me to create homemade gifts for the new babies in our extended family. In the past I have fashioned various sizes of Raggedy Anns and Andys. I've cross-stitched quilts. I even tried my hand at homemade Cabbage Patch dolls and Care Bears.
Lately, though, I've been creating blankies for babies to cuddle with. The latest one is for Tom's niece Erin's new baby. Olivia is due to arrive soon, so this is the bunny blankie I have made:
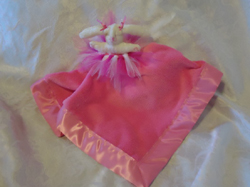 I didn't find a pattern for this idea, so I had to look at stuffed animals and try to create a pattern for the bunny. It worked out really well. After I found some baby soft white fleece fabric, I fashioned a bunny head and arms. Then, I embroidered a cute face and hearts on its paws. The bunny needed some more pink, so I sewed bows on her ears.
 Also, I made sure to bind the edges of the raspberry sherbet "cuddle soft" fleece with satiny blanket binding because I'm pretty sure that's what all babies like to stroke for comfort. Just for fun I made the bunny a removable tutu because who doesn't like tutus?!
Here's hoping Miss Olivia will find peace and security in her brand new, cuddly life.
Best Lawn on the Block

"Have you seen that perfectly green yard down the street?"
"Yeah, some old man lives there who doesn't do anything but take care of his lawn."
What? Old man? They must have meant my cute husband. That must mean I'm old as well. (I don't feel old.) And, really, Tom and I don't spend much time on the lawn, even though the velvety "Coors Field-like" appearance looks like we do. Here's what we do:
1) In March or April he fertilizes with Scott's Turf Builder with Plus 2 Weed Control. It's available at many garden stores but here's the Web site: Scott's Turf Builder with Plus 2 Weed Control. He's tried many types of fertilizer, but this works the best. He waits for a couple days that are forecasted to be warm. He applies the fertilizer one day, and lets it do its magic (killing dandelions). After 24 hours he waters it in. (It's a bonus if it happens to rain - free water!)
2) Once it's warm enough to fire up the sprinkler system, he sets it to water three times a week for 15 minutes per zone.
3) Tom edges the lawn once a year.
4) We tag-team mowing it every few days.
That's it. A perfect, velvety, verdant lawn to sink our tootsies into.
OK, it's not perfect yet, but it's early spring. You'll see from the photo the difference between our fertilized lawn and the next door neighbor's that isn't. And we've only watered it once this year, to water in the fertilizer.
Ultimately, we've figured out to how to have a perfect lawn and a life.
Pillow Talk
Trying to keep the outlook on life fresh can be challenging the older we get. There are no kids to shuttle to various activities, no parent/teacher conferences to go to. Life can swiftly move from quiet to humdrum. It is time to change it up.
 I was looking around my house wondering what to change to perk up our general outlook. One easy way to change the look of a living space is to buy or make new pillows for your sofa or easy chairs. You don't have to spend your entire budget on pillows, even though some designer stores charge $100 or more on one pillow. You can find beautiful, inexpensive pillows at discount designer stores or even big box superstores when you're doing your weekly grocery shopping. My rule of thumb is not to spend more than $12.50 per pillow, including the fabric, filling, thread and any fancy fringe.
If you're handy, a pillow is usually just a square, so sewing one is really easy. In the photo pictured to the right, I made these pillows almost exactly like one I had seen in a designer furniture store with a price tag of $65, complete with the luxurious fabric and fancy braid for $12.50 each. It only took 20 minutes. I felt really smart.
Once you do that, it's easy to pick up little accents to place around the room to align with the season or holiday that's approaching.
Farmer's Market Delight
Every year my little dog and I look forward to the opening of the farmer's markets. The farmer's market is just an added bonus to his weekly downtown stroll. The sensory delights explode as we navigate around the big dogs and the tempting booths. Patiently he endures the tiny hands that want to pet him, and shows off his skills when he waves good-bye to all of his admirers.
I love to support local farmers, and I shop for the most enticing produce each week. This week I was on the hunt for my annual box of Pallisade Peaches. I have found that I prefer peaches grown locally because they ripen beautifully, even if I buy them when they are rock hard. I just leave them in the cardboard box, put them into a brown paper bag, or into a deep bowl on the counter and voila, within a few days I have sweet, mouth-watering Colorado gold.
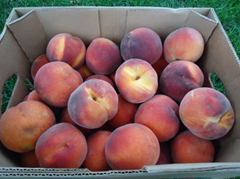 Usually, there are several booths selling peaches. How are we to know which peach to choose? When I began my quest, I harkened back into my childhood when I helped my mom can peaches. I remembered that I needed a peach that was free-stone (so I would'nt have to wrestle with it) and that she used either Elberta or Hale Haven. Not seeing any of those varieties, I spoke to the vendor and asked him whether he would have either one of those in the next few weeks. Or, if the ones he was selling that day were similar. He said that the Suncrest peaches he was offering had superior flavor, but perhaps did not "slip" as easily as other varieties.
What does that mean? When canning peaches, you need to slip the skin off of the peach. In order to do that, you will need to submerge the whole peach into boiling water for thirty seconds and then immediately plunge it into ice cold water. The skin should slip right off.
As he lifted the lid off of the box of peaches, I knew I was hooked. The scarlet orbs warmed the inside of the box, mesmerizing me. The challenge presented concerning slipping the skin off of these gorgeous peaches would just have to be conquered.
Flushed with pleasure, I proudly hefted my 22 lb. box of amazing Colorado peaches and my sweet puppy and I floated back to the car, dreaming of the glistening jars of peaches I would preserve in a week. (Well, my puppy was probably dreaming of that cute Cock-a-poo he met.) Next week, once they are properly ripe, here is the recipe I will use to can my beautiful peaches:
How To Can Peaches
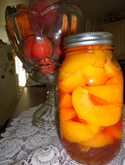 Large canning pot
Large saucepan
2 small sauce pans
Quart or pint canning jars
2 piece lids and rings
Canning tongs
Wet dish cloth
Plastic knife
Wire rack (or dry dish cloth)
Free-stone peaches
Freshly squeezed lemon juice (about 2-3 lemons)
Sugar (amount depending upon how many peaches you plan to can)
Count how many peaches you plan to can. You'll need 3-6 peaches for each quart you can. Make sure your jars are clean. Place them into a large canning pot and cover them with water. Set the covered pot on a stove burner and bring the water to a boil.
Meanwhile measure out equal parts of water and sugar into a large saucepan.
(I usually start with 3 cups of water and 3 cups of sugar.) Add the juice of on1/2 lemon (about one tablespoon) to this much liquid. Bring to a boil.
Fill a small saucepan three-quarters of the way full with water and bring it to a boil. Fill a kitchen sink or a large pot with enough ice water to cover a peach. Add the juice from 1/2 lemon to this ice water.
Put the lids into another small saucepan. Cover with water and bring to a boil. When it boils, cover the pan and turn the burner off.
When the water in the small saucepan without the lids comes to a boil, submerge a peach or two in the water for thirty seconds. With a slotted spoon, dip them out and plunge them immediately into the ice-cold water. You should be able to slip the skins right off of the peaches. (If you want to, reserve the skins for another delicious recipe: Peach Peel Jelly.) Put the peaches back into the ice-cold water until you have at least six peaches and the water in the canning pot is boiling.
When the water in the canning pot is boiling, turn the burner off. With canning tongs carefully lift a jar out of the pot, spilling a little of the water out, to avoid burning yourself while you pour the rest of the water out into a sink. Replace the lid. Set the jar into a ceramic bowl. Slice or halve the peaches into the jar, packing tightly. Cover completely with the sugar water. Slide a plastic knife down the side of the jar to extract any air bubbles. Add sugar water to within 1/4 inch from the top, if needed, (to create head space). Wipe the rim and threads of the jar clean, removing any sugar syrup.
Carefully take a lid out of the hot water and place it on top of the jar. Screw the ring on tightly. Repeat for all the peaches. Using the canning tongs, place the jars back into the canning pot, making sure that the water covers them. Bring the water back to a boil and boil for 10 minutes. Add 2 minutes for each 1000 feet above 1000 feet. (Remember, Denver is a mile high-5280.)
When the time is up, carefully extract your jars and put them on a rack or a dry towel on your counter. Leave them there for 24 hours. Within a few minutes you will hear a "pop", indicating that the jar is properly sealed. The lid will have depressed slightly in the middle. Make sure that all of the jars are sealed. (To check them, just press the tops and see if they give.) If you have one that did not seal after 24 hours, you can just put it into the refrigerator and enjoy that jar of peaches right away. If none of them have sealed, you will need to unscrew the rings, throw all of the lids away, and use new lids to process them again. Make sure that the tops of the jars are wiped clean.
~I usually store my canned peaches in boxes in the basement. In the dead of winter I'll suddenly remember my luscious summer, just waiting to chase away my winter blues.
**Note: In the years since I first wrote this article, I have also successfully canned Cresthaven and Hale peaches. In addition, I have canned Colorado peaches from the grocery store: varieties unknown. Just ask your grocer if they are free-stone. That's primarily what you want. They will usually open one for you if they don't know. Generally, by the middle to end of August the peaches are free stone in Colorado. **Tip: Try to buy peaches as close to your home state as possible. They will ripen the best.
How to Grow Raspberries
Don't you just cringe when you see the $5 price tag on a six-ounce clamshell container of raspberries in the market? Don't you wish that you could just go out your backdoor and pick them right off the canes? It was a fantasy of mine to have my own raspberry patch ever since I was allowed to pick raspberries from canes in our neighbor's yard. So, when we bought our first house, we decided to plant some raspberry plants.
First, look for two-three year plants, so that you can have raspberries quickly. The first year plants will not produce raspberries. Plant them in full sun and give them plenty of water. Often I will give them some fertilizer at the beginning of the season in order to boost the growth. They should thrive. My plants have two crops of berries. I'm usually very excited to find the first berries, but it's the second crop that produces the largest and the best tasting berries. Of course varieties may differ. Make sure you buy the ones that are best suited for your climate. Your local nursery is a great resource.
After the last crop prune the canes down about twelve inches. Some people wait until February or March to prune off any winter kill. I've done both with equal success.
Raspberries seed themselves, so you will have a huge patch in no time. Don't be afraid to dig up excess plants and why not share them? People will love you for it!
10 Things that Bring Joy
What gives you joy? That emotion seems to be the most sought after, yet often the most elusive. People often scoff at the notion of finding joy in the simple things, but when they stop and consider them, those are the experiences that give us our daily smiles. Here are some examples:
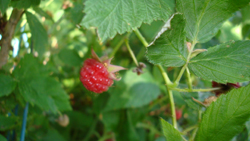
Picking a juicy ripe raspberry right off the cane in my backyard (and popping it right into my mouth, savoring its tangy sweetness)
Finding the perfect pair of jeans, even marked "slim-fit" and at a size lower than the last time, all for 50% off and an additional 20% off-Score!
Wondering what to do when all of a sudden a girlfriend calls and asks if you want to go out for coffee-Yes!
Remembering that you have a lovely basil plant in your backyard for that delicious bruschetta you plan to make
Picking a warm, nothing like it, vine-ripened tomato from your garden for that bruschetta you plan to make
Delighting your daughter with the deals you find
Going on a verdant hike with your husband and kids and watching them brave the frigid water while "shooting the rapids"
The perfect bite of a homemade chocolate chip cookie still warm from the oven
Watching his face light up when I surprise my sweetheart with an unexpected bag of deliciously soft licorice
Cheering as your son steals home
What is important to remember is that if you want to have joy or you want to bring joy to others, don't ruin the experience with overanalyzing or putting too much of your own needs ahead of other's. If you agree to go get a treat after someone has suggested it, make sure that s/he has the full experience. If you don't like the menu, get over it, find something that you do like and share the experience. Don't cut it short because of your own desires. Don't complain about the cost. Let go of your own ego. In short, don't take the joy out of it.
Wreaths of Smiles
 Every season I like to switch it up and change the floral decor in and around my house. Halloween looms like a ghouly ghost starting in August, so I haul out my "Fall" plastic storage tub to discover the treasures I tucked away after Thanksgiving last year. I"m always surprised by the cute decorations and leftover bits of leaves and flowers patiently waiting for me to rework. Usually I add to the collection, by venturing out to my usual haunts to check out the newest merchandise. Always keeping the budget in mind I like to spend the least amount of money for the most amount of dazzle.
For a few years I have grown the mini pumpkins that I so adore. I scatter a few of those on my mantle, outside next to larger pumpkins and gourds and my snack bar to make everyone who sees them smile.
If I have a good season, I cut errant grapevines and wind them into submission creating beautiful wreaths. Depending upon my mood, I augment them with a various array of fall leaves, cat tails, pine cones, nuts, berries and flowers.
My daughter wanted a fall wreath to hang on the front door of her new house. Here is a photo of it after I gave it to her:
~Once you have the technique mastered, you can use almost any twig or vine to make a lovely wreath.
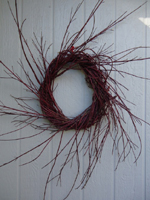
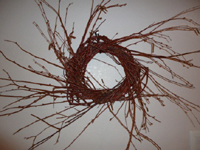 *If you cut birch branches, make sure you use a dab of Elmer's glue on the end of each cut. That way the borers won't burrow into the wood and kill your tree.
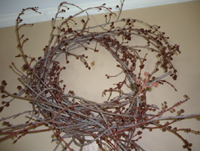
Made with silver maple

Made with aspen